Category: Uncategorized

Looking Outwards – Arduino Shields

CELLULAR SHIELD
During our first visit to Ali’s lab, I was pretty explicit about my interest in GPS capabilities in physical computing. For me, the idea of context awareness, particular in place and time, is key to the development of our identities, as well as for the appropriation of our works. So to my delight I found this cellular shield which extended those capabilities, by giving the Arduino the same capabilities as a regular cellphone, easily adding SMS, GPRS/GSM, and TCP/IP to any project. So not only is one able to generate locational data, but also send it everywhere and anywhere.


TOUCHSHIELD SLIDE
D.I.Y. Touch Screen capabilities. Enough said. —Proceeds to daydreaming about building about building own Nintendo DS so as to finally be able to play Pokemon


AUDIO WAVE SHIELD
Many of my favorite projects incorporate audio, so to have a dedicated audio component for Arduino is exciting. At the same time this allows the Arduino to multitask, playing audio/music as it performs whatever other functions it was made to do.

Written by Comments Off on Looking Outwards – Arduino Shields Posted in Uncategorized

Maddy Looking Outwards – Arduino Shields

Wave Shield Kit & Etc.

The Adafruit Wave Shield simplifies the thought process behind hardware projects with audio by give you a nice shield with all the necessary components. Useful for making lots of noise! I don’t know much about sound or music, but I always find myself enjoying sonic art/projects that incorporate sound. I think it adds an extra dimension to any project and I’d love to use this in a piece.

Gameduino Shield

This has plugs for a VGA monitor and stereo speakers, and you can use it for creating “old-school” video games. Using an rPi or an Udoo would probably be easier, but it’s amazing that you can even get interactive graphics using an Arduino.

Touch Shield

It’s a fully assembled touch shield, you can use it to draw LOTS OF THINGS and it even takes pressure! Wow! I’d love to see this used as some sort of interface, like a way to design a robot’s walk path before executing.

Ralph-LookingOutwards

http://www.adafruit.com/products/11411141_MED

This is the easy to use data logging shield.  According to the description, all the parts are already assembled, so it only needs to soldered to the Arduino to function properly. For any long-term project that requires extensive data-collection, this is the shield I would use for the sake of convenience and assurance. The less I need to fiddle with the parts myself, the less likely I’ll screw everything up.

http://www.adafruit.com/products/384gameduinoball_MEDgameduino_MED

This is the thing that everyone seems interested in, and for good reason. The alternative is the video game shield kit, which feels underwhelming due to its black and white output. The variety of color available to this shield makes projects feel more dazzling yet portable. I would love to see just how powerful this shield is.

http://www.adafruit.com/products/175   wavepack_MED

This shield can be used to add an entirely new dimension to an art piece and make the experience all the richer. In terms of what we perceive in an interactive project, sound is much more subtle when compared to visual feedback. But with it, the project can feel more fulfilling and polished. For example, touching an onscreen bubble and watching it pop only is a significantly different experience from hearing the pop also.

Sensors!

Color Light Sensor – Sparkfun
https://www.sparkfun.com/products/10656

I had a strong bias to the cheaper sensors on each site, and this is one of my favorites. I can imagine this being used as the “eyes” of a robot to identify certain objects by color. I think it would be cool to make a robot that can analyze the colors of a simple painting, drawing, or graphic and try to duplicate that coloring by having several arms that reach into pigments, mix its own shades and then draw the shapes. I also think this project could be used in a cool way to identify the color schemes of a room, someone’s outfit, or etcetera because sometimes I walk into a room that has some awesome interior decorations and I want to know the exact colors they combined so well.

Piezo Vibration Sensor – Large with Mass – Sparkfun
https://www.sparkfun.com/products/9197

The most obvious application I can think of for this would be attaching it to musical instruments to sense sound vibrations. The vibration data can then be converted into some other sensory output. Depending on how sensitive this device is, it can also be used to detect a presence through footsteps or knocking on a door. I imagine it can be applied to anything with sound, actually.

Tilt Sensor – Sparkfun
https://www.sparkfun.com/products/10313

A tilt sensor is screaming for use in an interactive piece. It could be used with a controller, lever, or a ship wheel… Anywho, the tilt sensor kind of reminds me of a project like Dave’s bubble creature. It could measure the amount of someone’s OCD in a room of tilted objects…

Looking Outwards: Arduino

Discovery 1: Printer Orchestra

“Printer Orchestra”  was created by Chris Cairns and the team at “is this good?” for the printer manufacturer Brother.

I liked the Printer Orchestra off-the-bat for its charm. In the about section on Vimeo, the team explains that they were inspired by “Tristram Cary, James Houston, BD594 and other radical tinkerers” and comment that “Making cold stuff warm is fun.” I love the last part of that—I think the orchestra is a huge success in taking mundane, cold pieces of technology and making them warm and expressive. (I also think it’s a good idea to carry forward in this course/in electronic media art in general.)

Discovery 2: BMW Museum Kinetic Sculpture

This kinetic sculpture in the BMW museum was created by the firm ART+COM, a German firm which “design[s] and develop[s] innovative media installations, environments, and architecture.” According to ART+COM, the sculpture visualizes “the process of form-finding in different variations.”

This project’s documentation does not explicitly state that it uses Arduino, but it did come up in a youtube search for “arduino mediaarttube” and it looks like an Arduino project. Anyway, I enjoyed this project first for its aesthetic and second for its concept. The suspended spheres look like they are floating, and seeing them move gracefully and gradually into sync is mesmerizing to watch. I think the project successfully expresses the exploration involved in form-finding.

Given that this project is not highly interactive, I think it’s remarkably engaging. I also appreciate that in this piece, it seems clear that the technology was supporting a larger vision—to create these floating, synchronized spheres—rather than just being an experimental “gizmo”.

Discovery 3: un-melt

“un-melt” is a video created by Tony Round, an architect and filmmaker. The video was created for Gizmodo’s monthly video challenge. The particular challenge he was responding to was to “play with video reversal—backwards playback”.

Round used Arduino in this project to drive a homemade timelapse dolly rig. I liked this project because the video seemed beautiful and magical, showing me a process (un-melting) that I would not normally perceive. I also really enjoyed the cinematography of the piece; it had really beautiful shots. Round’s use of the Arduino to steer his dolly enabled him to take those shots, and I think that this use of Arduino was interesting because it was not all about the Arduino itself; it was about what the Arduino could support.


Trypophobia

trypophobia
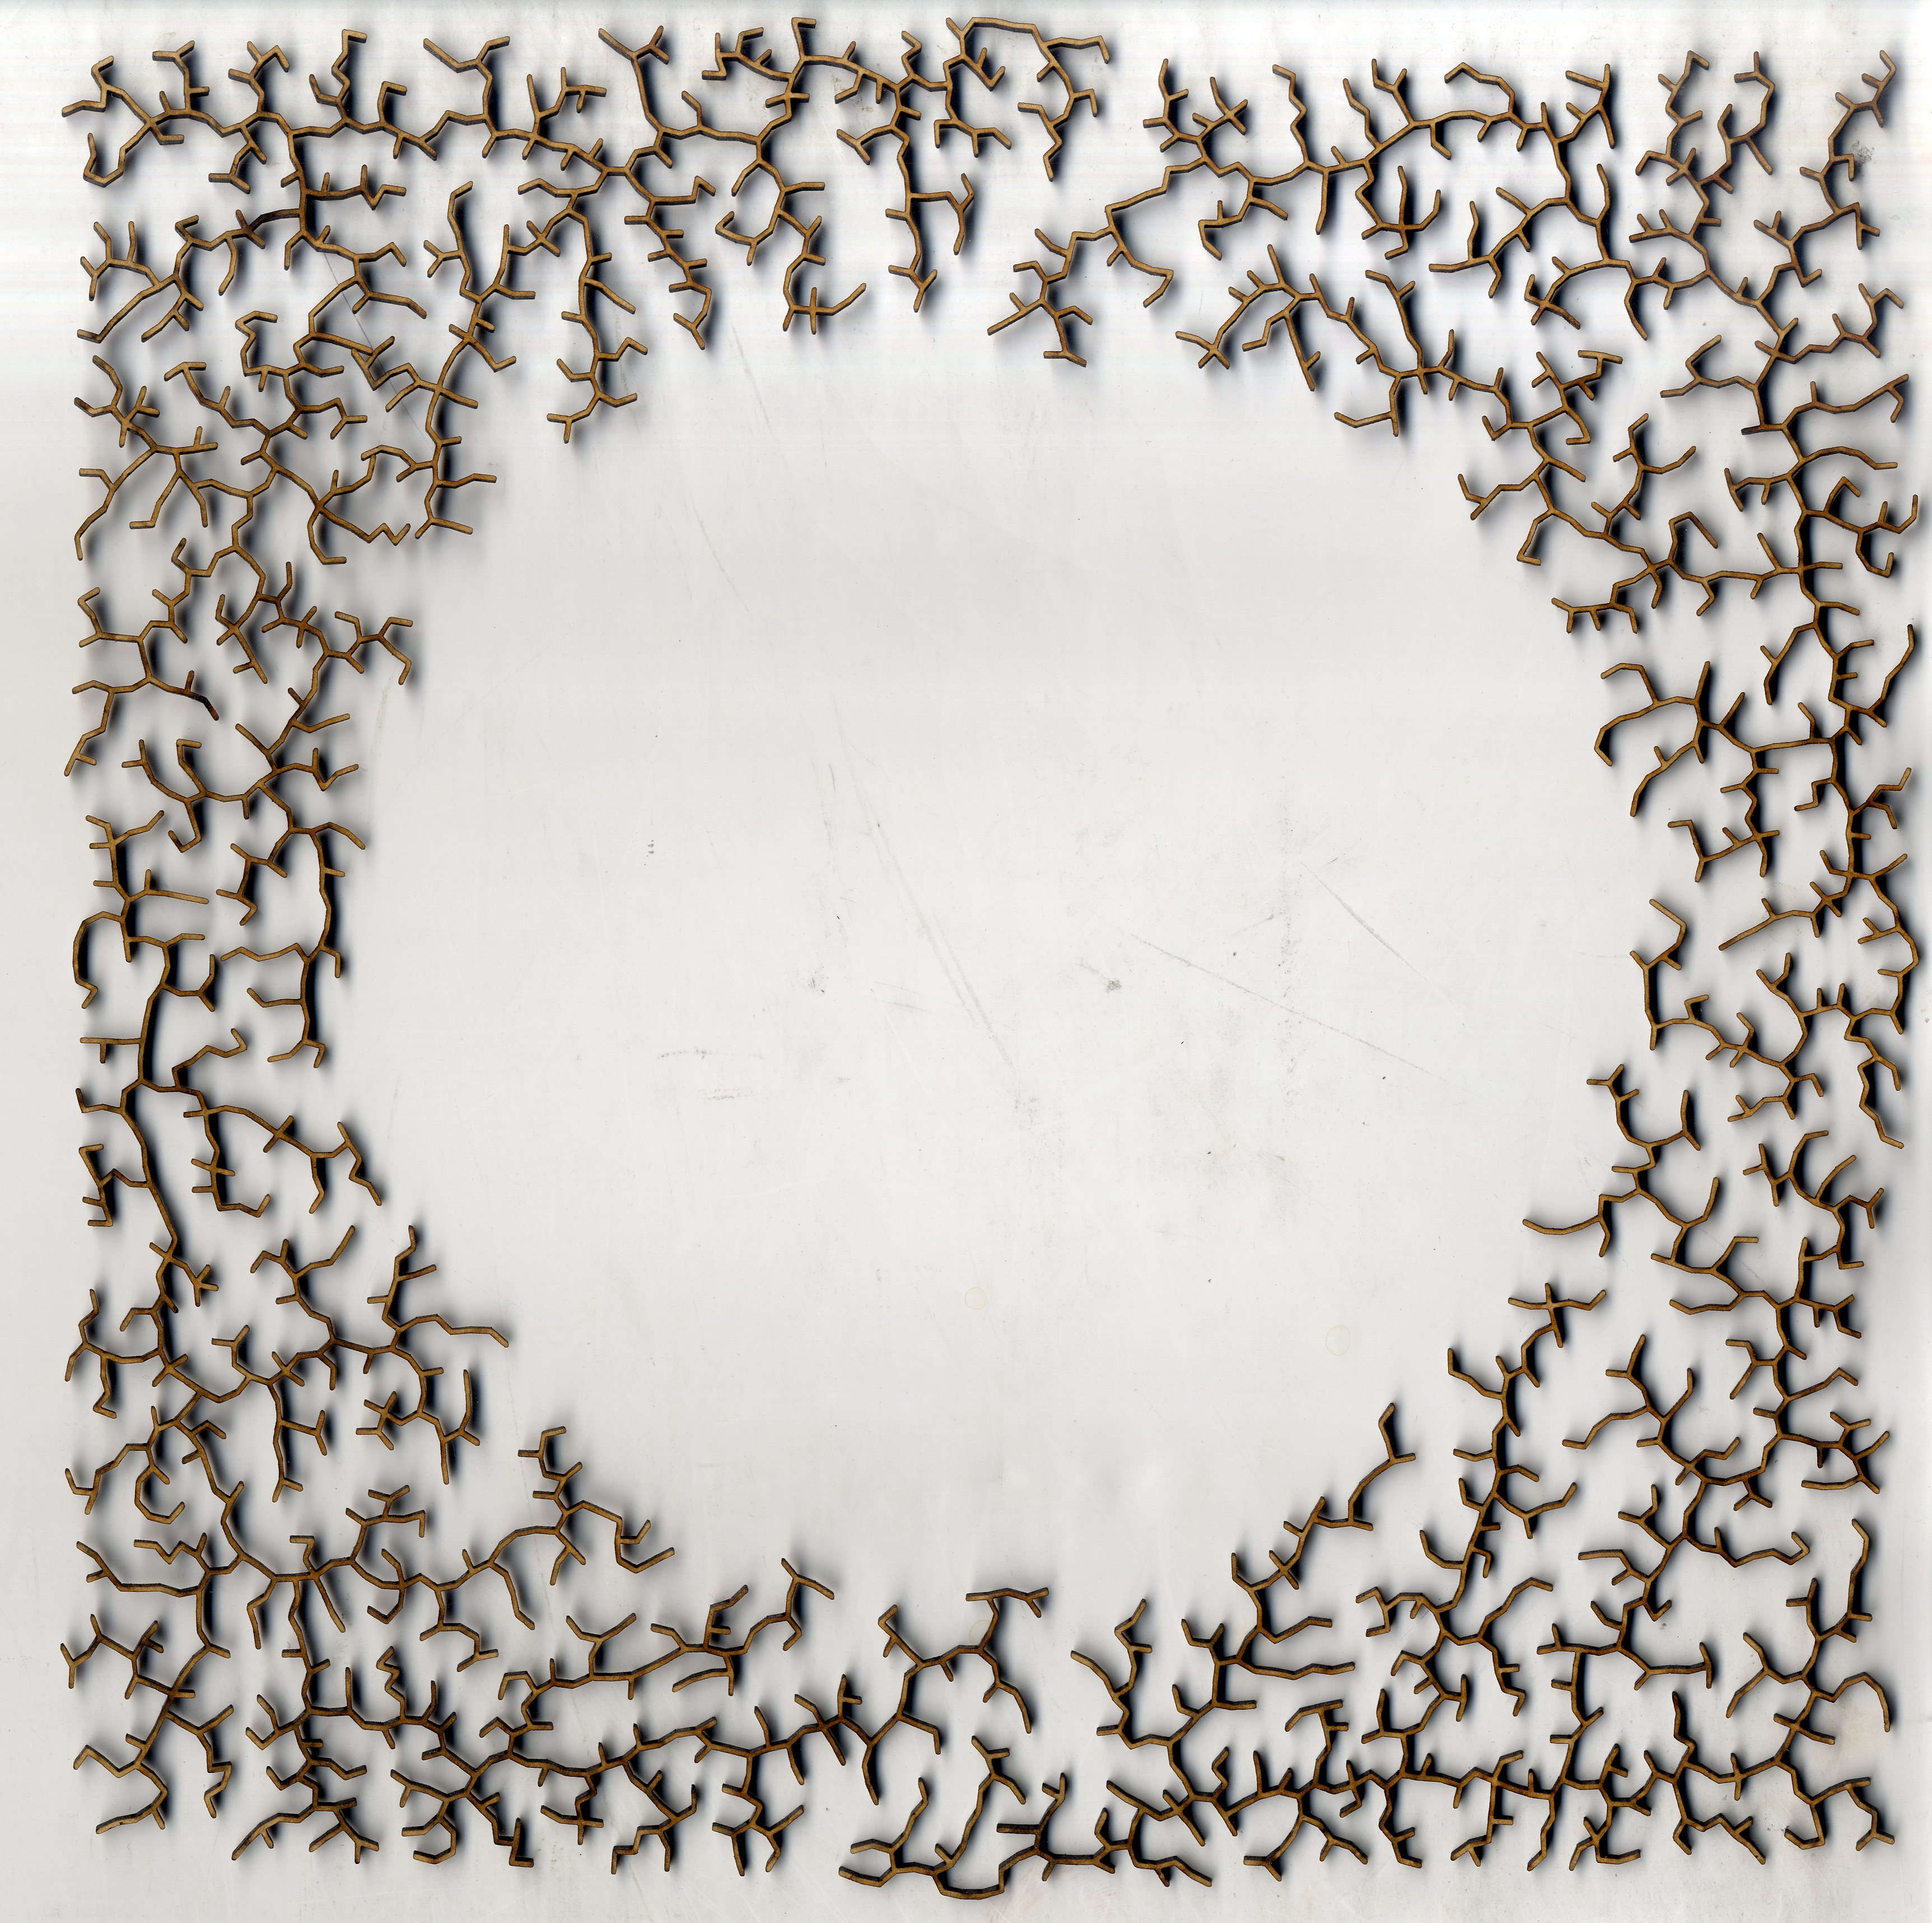
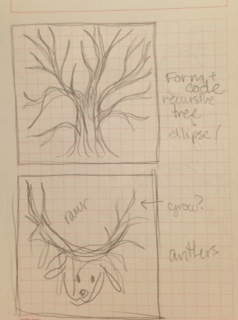
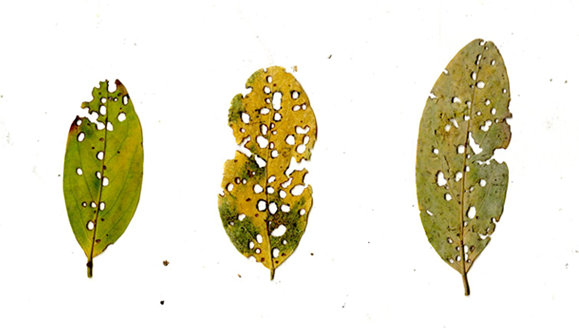
I have to walk through the radio station to get to campus every day, and there’s a small wooded area with lots of leaves on the ground (as there tends to be in the fall). I noticed that some of these leaves have weird holes in them–probably from small, hungry, bugs, but unsettling nonetheless. These creepy leaves reminded me of this phenomena coined trypophobia, where people find themselves intensely afraid of small, patterned holes such as those in lotus flowers or honeycomb. Small, patterned holes are also a regular natural occurrence, besides lotus flower and honeycomb they can be found in wood, plants, coral, sponges, and more. Clearly the art of generating small, patterned holes was worth investigation.

./wp-content/uploads/sites/2/2013/10/screen02.pdf

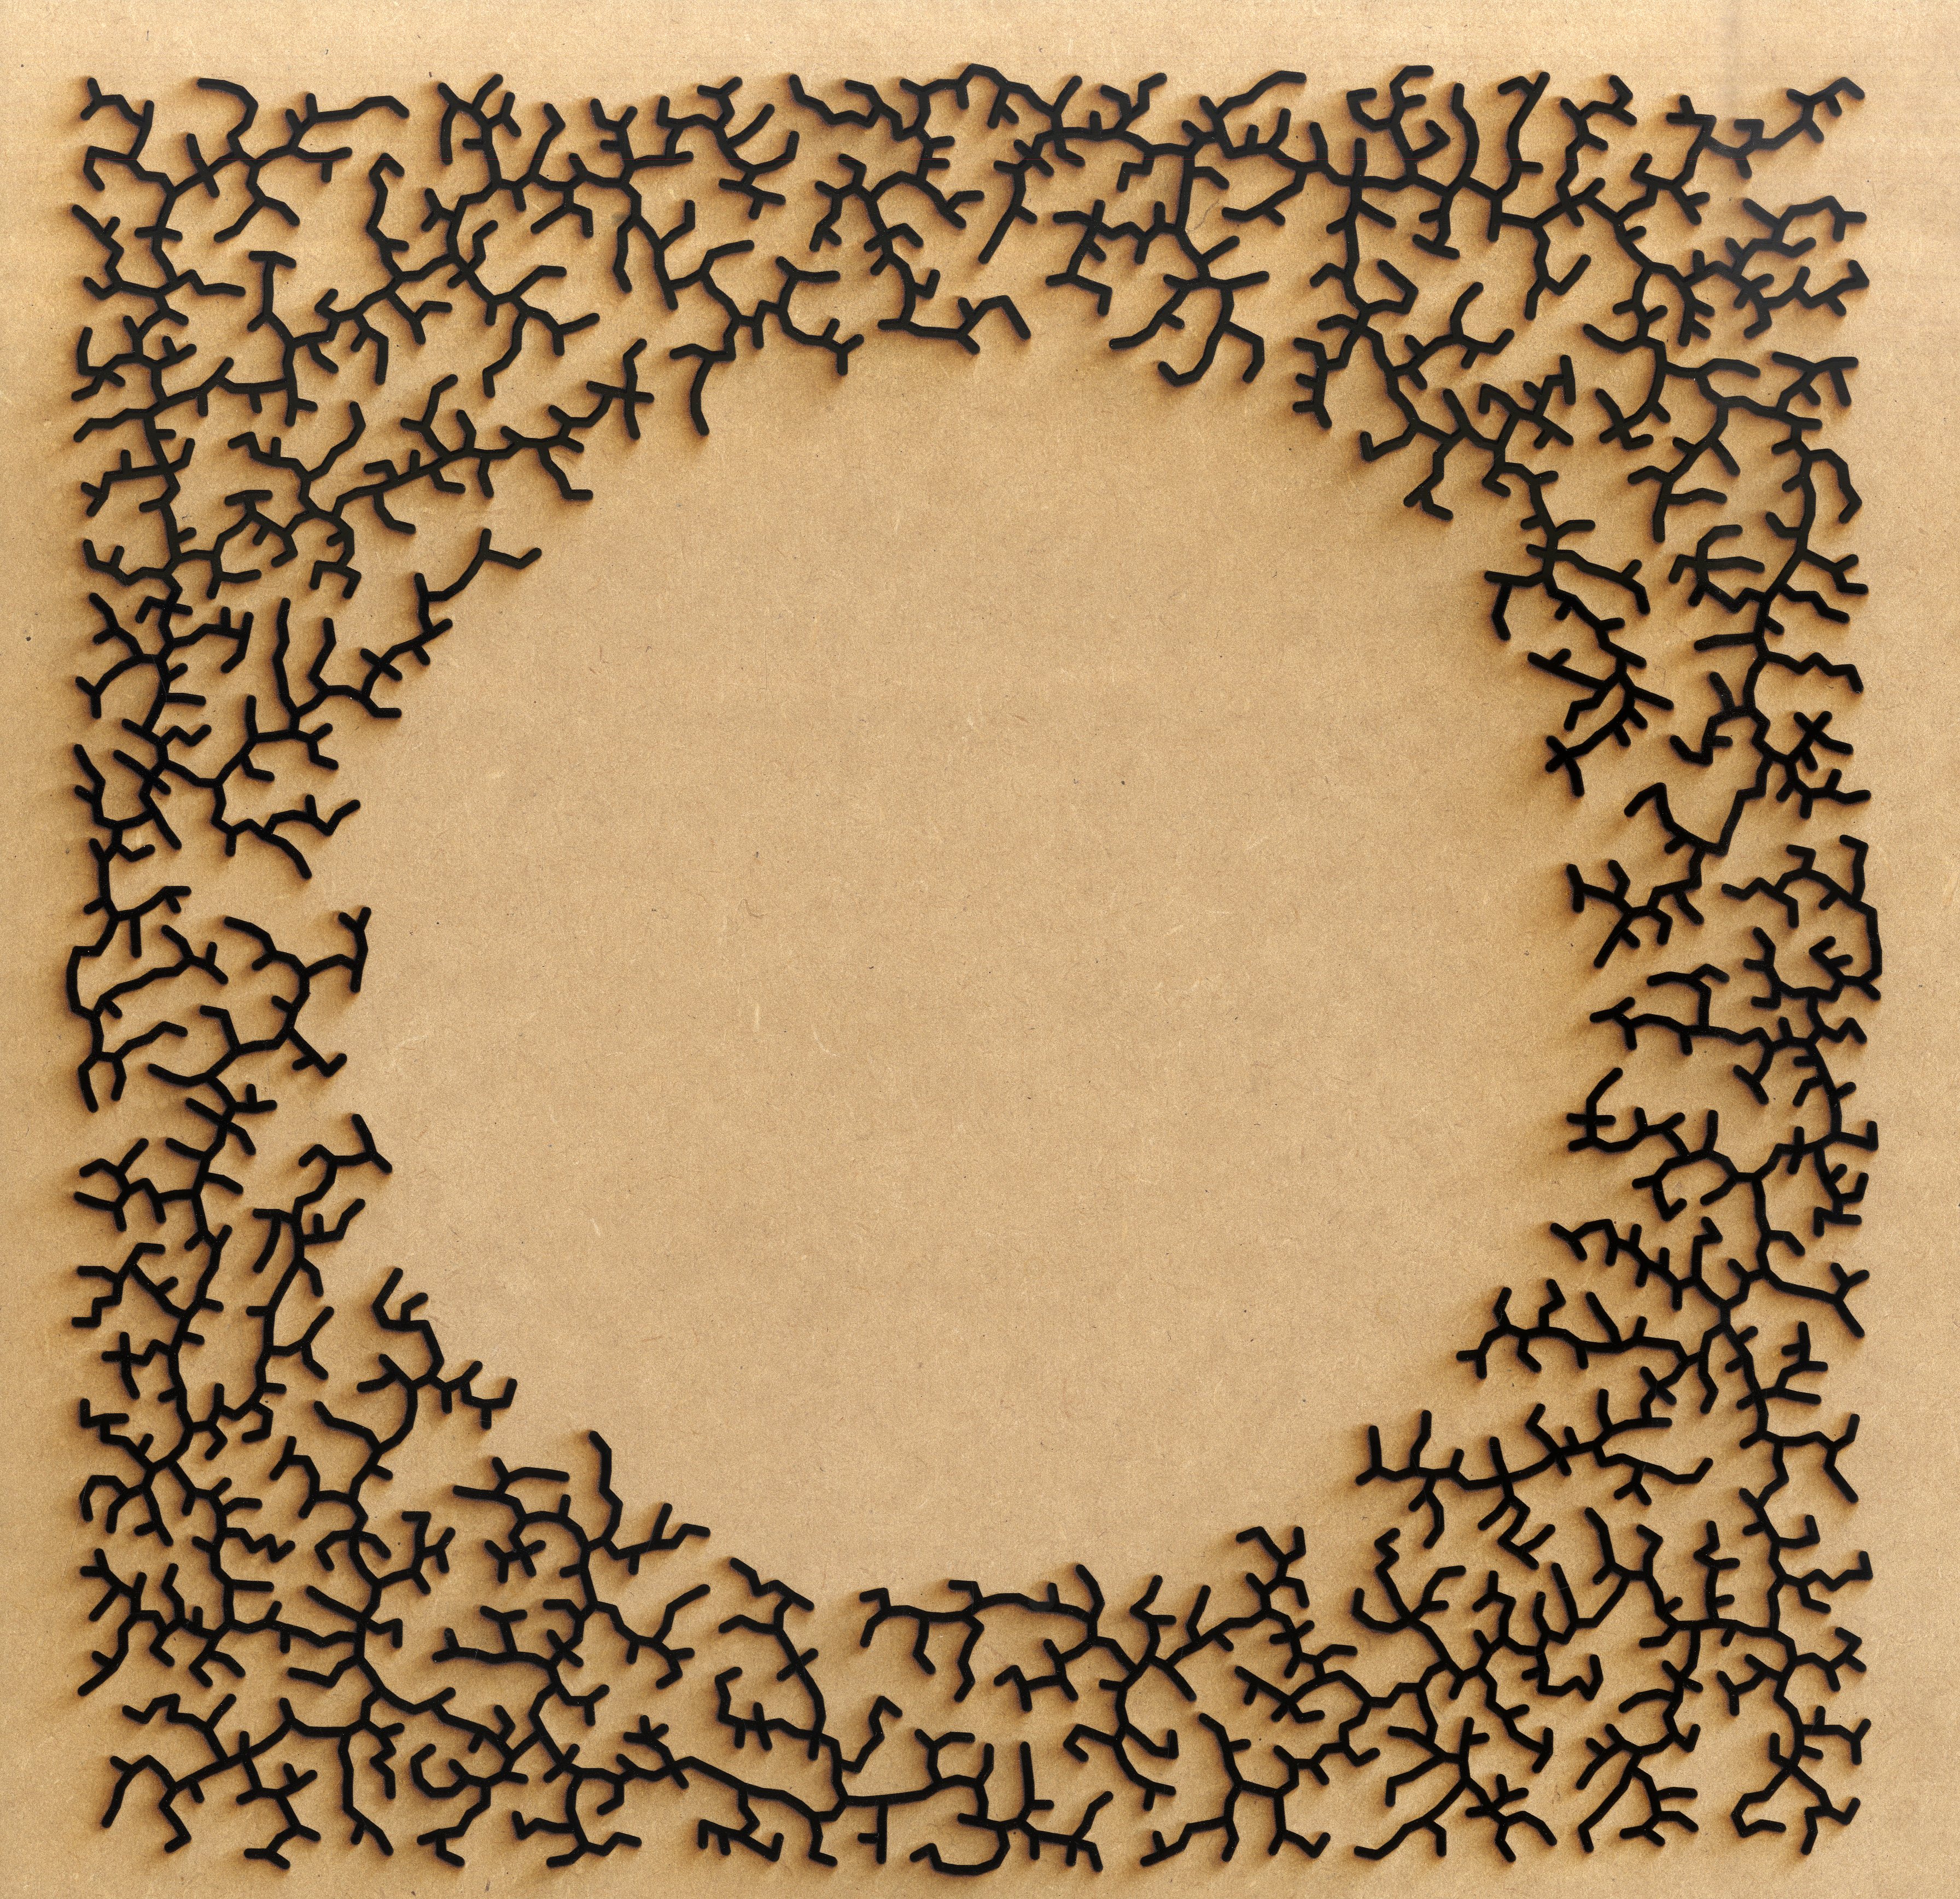
I ended up with two variants. The first of which has a lot more variation in size and shape, and completely fills the wooded area. I basically shot particles at a board and if they were too close to an edge or another particle they’d fall off. Not very simulation heavy!

import processing.pdf.*;

int inch = 60;
int margin = inch/2;

ArrayList blobs;

void setup() {
  size(inch*12, inch*12, PDF, "screen05.pdf");
  background(255);
  noFill();
  smooth();

  float rad, x, y, maxr, minr;
  float desiredseperation = 0;
  boolean addBlob = true;
  int points, attempts, maxblob;

  blobs = new ArrayList();

  minr = inch/8;
  maxr = 1.5*inch;
  maxblob = 300;
  attempts = 0;

  while ((blobs.size() != maxblob) && (attempts < 6000)) {     rad = random(minr, maxr - map(blobs.size(), 0, maxblob, 0, maxr-minr+1));     points = int(random(5, 25 - map(blobs.size(), 0, maxblob, 0, 20)));     //x = random(margin+rad, width-(margin+rad));     //y = random(margin+rad, height-(margin+rad));    x = (width/2) + random(0,inch*4)*cos(TWO_PI*random(0,2));    y = (height/2) + random(0,inch*4)*sin(TWO_PI*random(0,2));     addBlob = true;     if (blobs.size() > 0) {
      for (Blob other : blobs) {
        desiredseperation = rad + other.r + (inch/8);
        if (dist(x, y, other.cx, other.cy) < desiredseperation) {
          addBlob = false;
          attempts += 1;
        }
      }
      if (addBlob) {
        blobs.add(new Blob(rad, points, x, y));
        attempts = 0;
      }
    }

    if (blobs.size() == 0) {
       blobs.add(new Blob(rad, points, x, y));
    }
  }

  for (Blob b : blobs) {
    b.display();
  }
  println(blobs.size());
}

void draw() {
  // Exit the program 
  println("Finished.");
  exit();
}

class Blob {
  float r;
  float cx, cy;
  int points;
  float px, py, pr, angle, offset;

  Blob (float inr, int inpoints, float inx, float iny) {
    r = inr; // random(inch/8, inch*2)
    points = inpoints; // random(3, 12)
    cx = inx;
    cy = iny;
  }

  void display() {
    beginShape();
    offset = random(0,1);
    for (int i = 0; i < points; i++) {
      angle = TWO_PI*(i+offset)/points;
      pr = random(.6, 1) * r;
      px = cx + pr*cos(angle);
      py = cy + pr*sin(angle);
      curveVertex(px, py);
      if ((i == 0) || (i == points-1)) {
        curveVertex(px, py);
      }
    }
    endShape(CLOSE);
  }
}

./wp-content/uploads/sites/2/2013/10/frame-0214.pdf

The second one used Golan’s particle class to create a fleet of small holes that then drifted away from each other within a larger circle.

import processing.pdf.*;
boolean record;

int inch = 60;

ArrayList particles;

void setup() {
  size(inch*12, inch*12);
  background(255);
  noFill();
  smooth();

  particles = new ArrayList();

  for (int i = 0; i < 150; i++) {     float rad = random(inch/8, inch/4);     particles.add(new Particle(width/2 + random(-inch, inch), height/2 + random(-inch, inch), rad));   } } void draw() {   if (record) {     // Note that #### will be replaced with the frame number. Fancy!     beginRecord(PDF, "frame-####.pdf");    }      background(255);   float gravityForceX = 0;   float gravityForceY = 0.0;   float mutualRepulsionAmount = inch/16;     for (Particle p : particles) {      for (Particle other : particles) {       float desiredseperation = p.r + other.r + (inch/8);              float dx = p.px - other.px;       float dy = p.py - other.py;       float dh = sqrt(dx*dx + dy*dy);       if (dh > 1.0) {

        float componentInX = dx/dh;
        float componentInY = dy/dh;
        float proportionToDistanceSquared = 1.0/(dh*dh);

        float repulsionForcex = mutualRepulsionAmount * componentInX * proportionToDistanceSquared;
        float repulsionForcey = mutualRepulsionAmount * componentInY * proportionToDistanceSquared;

        p.addForce( repulsionForcex,  repulsionForcey); // add in forces
        other.addForce(-repulsionForcex, -repulsionForcey); // add in forces
      }

      /*if (dist(p.px, p.py, other.px, other.py) < desiredseperation) {

      }*/
    }
  }

  // update the particles
  for (int i=0; i<particles.size(); i++) {
    particles.get(i).bPeriodicBoundaries = false;
    particles.get(i).update(); // update all locations
  }

  for (int i=0; i<particles.size(); i++) {     particles.get(i).addForce(gravityForceX, gravityForceY);   }   for (Particle p : particles) {     p.render();   }      if (record) {     endRecord(); 	record = false;   } } // Use a keypress so thousands of files aren't created void mousePressed() {   record = true; } class Particle {   float r;   float px;   float py;   float vx;   float vy;   float damping;   float mass;   boolean bLimitVelocities = true;   boolean bPeriodicBoundaries = false;   float margin = 2;      float offset, qx, qy, qr, angle;   // stuff   float cx = width / 2;   float cy = height / 2;   float boundr = 300;   // Constructor for the Particle   Particle (float x, float y, float inr) {     r = inr;     px = x;     py = y;     vx = vy = 0;     damping = 0.95;     mass = 1.0;   }   // Add a force in. One step of Euler integration.   void addForce (float fx, float fy) {     float ax = fx / mass;     float ay = fy / mass;     vx += ax;     vy += ay;   }   // Update the position. Another step of Euler integration.   void update() {     vx *= damping;     vy *= damping;     limitVelocities();     handleBoundaries();     px += vx;     py += vy;   }   void limitVelocities() {     if (bLimitVelocities) {       float speed = sqrt(vx*vx + vy*vy);       float maxSpeed = 6.0;       if (speed > maxSpeed) {
        vx *= maxSpeed/speed;
        vy *= maxSpeed/speed;
      }
    }
  }

  void handleBoundaries() {
    if (bPeriodicBoundaries) {
      if (px > width ) px -= width;
      if (px < 0     ) px += width;       if (py > height) py -= height;
      if (py < 0     ) py += height;     }     else {       //super tenuous circular boundaries       if (dist(cx, cy, px+vx, py+vy) > boundr - r) {
        vx *= -1;
        vy *= -1;
      }
    }
  }

  void render() {

    float noiseVal = noise((mouseX)*80, 
                            mouseY*80);

    stroke(0);
    beginShape();
    offset = random(0,1);
    for (int i = 0; i < 10; i++) {
      angle = TWO_PI*(i+offset)/10;
      qr = random(0.75, 1) * r;
      qx = px + qr*cos(angle);
      qy = py + qr*sin(angle);
      curveVertex(qx, qy);
      if ((i == 0) || (i == 10-1)) {
        curveVertex(qx, qy);
      }
    }
    endShape(CLOSE);
  }
}

Laser-cut screen (in Progress)

I wanted to incorporate two factors into my screen: first, text. I know this may look slightly bizarre after having been laser cut — Ds and Os will be simply cut from the screen — but I do not feel this is disadvantageous. There are some beautiful examples in the codelab for design students on the level below EMS which to me feel typographic rather than incomplete. The second was some kind of setup such that there was more text towards the top. This is because the most light would shine through the screen at the top in this setup, which would be much more visually balanced. I also wanted some of the words, like “rain” to show vertically rather than horizontally.
[pictures would be helpful — pending]

To implement this I decided to try to use the mutual repulsion spring system we were shown as this would be an opportunity to use a particle system without having to pack but I could still use (reverse) gravity to draw the text upwards towards the top of the screen. I’m still having trouble getting it to work, though, as text() does not work in quite the same way as ellipse(), particularly when one is trying to retreive words from an array…

(If anyone could shed some light on this, it would be great…)

In the mean time, here is my code:

ArrayList myWords;

void setup() {
myWords = new ArrayList();
//*
//* for (int i = 0; i < 10; i++) { //* float rx = random(width); //* float ry = random(height); //* //myWords.add(); //* myWords += randomWord; //* } // } void draw(){ background(255); float gravityForcex = -0.005; float gravityForcey = 0; float mutualRepulsionAmount = 1.0; for (int i = 0; i< 20; i++) { words nextWord = myWords.get(i); float wx = nextWord.wx; float wy = nextWord.wy; if (mousePressed) { nextWord.addForce (gravityForcex, gravityForcey); } //this part I essentially copied... I just couldn't think of a better way to do it... but I worked through the whole thing. for (int j=0; j 1.0) {

float componentInX = dx/dh;
float componentInY = dy/dh;
float proportionToDistanceSquared = 1.0/(dh*dh);

float repulsionForcex = mutualRepulsionAmount * componentInX * proportionToDistanceSquared;
float repulsionForcey = mutualRepulsionAmount * componentInY * proportionToDistanceSquared;

nextWord.addForce( repulsionForcex, repulsionForcey);
nextWord.addForce(-repulsionForcex, -repulsionForcey);
}
}
}

for (int i=0; i<50; i++) {
myWords.get(i).update(); //update
}

for (int i=0; i<50; i++) {
myWords.get(i).render(); // reeendering!!
}
}

// this is my other tab...
class words {
float wx;
float wy;
float vx;
float vy;
float mass;

words(float x, float y) {
wx = x;
wy = y;
vx = 0;
vy = 0;
mass = 1.0;
}

void addForce(float fx, float fy) {
float ax = fx/mass;
float ay = fy/mass;
vx+=ax;
vy += ay;
}

void update() {
wx +=vx;
wy += vy;
if (wx

Chloe – LookingOutwards03

LEVI’S STATION TO STATION PROJECT

Personally I’m always a fan of collaborations, particularly when it involves a large corporation attempting to get in sync with the current culture and connect with its consumers. Here, Levi’s agency, AKQA hired  Fake Love to redesign antique objects as web-enabled tools and traveled on Levi’s Station to Station project across the country in the Summer of 2013.

  • Still Camera (1939 Graflex) >> Instagram
  • Video Camera (1953 Bolex B8) >> Instagram Video
  • Typewriter (1901 Underwood No. 5) >> Twitter
  • Guitar(1953 Gibson E-125) >> SoundCloud

The objects relied on a combination of many new technologies, including the Rasperry Pi camera module, custom printed circuit boards, embedded AVR systems, Wi-Fi, Bluetooth, RFID, and OLED screens as well as a variety of buttons, switches, knobs and other input/output peripherals.

I loved the idea of revitalizing the old to update it for the now. On the hardware end, bringing what would be simply virtual services into a tangible state, especially on its classical origins that bring a new-found appreciation for what might be seen as old junk. At the same time, the fact that these devices connect its input to the social web adds a whole new dimension of community, further expanding the poetic effect that it has on me.

CHIAROSCURO by SOUGWEN CHUNG

CHIAROSCURO — Installation by Sougwen Chung from sougwen on Vimeo.

In an attempt to bring the art of drawing to a modern, interdisciplinary context, Chung’s Chiaroscuro makes use of large installed drawings with projection mapping, sensors and lights to immerse viewers in a world of contrasts. The project makes use of Arduino Teensy 3.0 to monitor a light sensor, used to adjust the brightness to the ambient light intensity, and a frequency analyzer (from Bliptronics) is used to analyze the sound spectrum to enhance the interplay of music, the forms of the drawings, and the lights of the projection mappings.

While the subdued role of Arduino being nothing more than a light emitter turned out to be rather disappointing, I find myself strongly attached to the project simply by its mesmerizing, dream-like aesthetics. For me, it is a reminder that while the advent of technology in art is amazing, it is ultimately the human element that really makes a piece.

SUPER ANGRY BIRDS by ANDREW SPITZ & HIDEAKI MATSUI

Super Angry Birds – a Tangible Controller from Andrew Spitz on Vimeo.

This project brings back the tactile sensation of a slingshot into the modern classic of Angry Birds by using a force feedback USB controller–essentially a hacked motorized fader found in audio mixing consoles to simulate the force one would feel when using a slingshot. For controlling the hardware, Spitz and Matsui used an Arduino-based microcontroller called Music & Motors developed by the CIID, programmed with Max/MSP.

I really appreciate the way the artifacts were so designed to stay true to its original inspirations, making the device a far more effective bridge over the gap between the real and the virtual. On the programming end, I was pleased to see that the controller was quite precise yet still stable despite the small scale of the controller (which I’d imagine would be quite difficult for those with shaky hands). A way that this project could be extended is if the tab on the slingshot could somehow change its graphics according to which bird one was using in the game. At the same time though, part of me wonders if there could be any other applications for these types of controls beyond this particular game, or the realm of gaming at all.

Lasercut 2.0 – Cracks

./wp-content/uploads/sites/2/2013/10/cracks3.pdf

The results:

img001

img002

I changed my idea for the lasercut after the lecture today. Because of the limitations on shapes you can make with the lasercut, I decided to go back to using simple lines. I remembered back to the Recursive Trees code in the book Form + Code by Casey Reas and decided to search around the internet for similar code. Most trees had the problem of intersecting lines that would be impractical to lasercut. I was also thinking about the instructional art we had to engineer in an earlier assignment, because it was able to stop drawing lines once it detected another line.

Then I was looking at particle systems on OpenProcessing and found this one code called “Roots” that uses nodes like particles, and creates new nodes based on their distance from other nodes. His inspiration was Rapidly-exploring Random Trees (RRT). The link to that person’s code is here: http://www.openprocessing.org/sketch/38518

So I thought that would be very applicable to a lasercut, where everything has to be intact. I studied and grossly simplified the code to the point where I could understand it and modeled the growth of the nodes to match the Lissajous curves we learned in class. (Although, the circle still looked the best out of the various PDFs I saved…)

Here are my sketches:

photo (2)

photo (3)

Unfortunately, my code doesn’t work in Javascript so I can’t show it on OpenProcessing, but it is below:

// Credit goes to Alexander Mordvintsev for his code "Roots"
// which was inspired by RRT (Rapidly-exploring Random Trees)
// See here: http://www.openprocessing.org/sketch/38518

import processing.pdf.*;

ArrayList nodes;
int     branching    = 100;
float   branchLength = 5.0;
 
void setup()
{
  size(500,500);
  background(255);
  strokeWeight(1);
  smooth();
  nodes = new ArrayList();
  beginRecord(PDF, "cracks1.pdf");
}

void draw() {
  // Adds the parent node
  if (nodes.size() == 0)
    nodes.add(new Node(width-20,height/2));
  // Accelerates the amount of growth per frame
  for (int i=0; i<10; i++)
    grow();
}

void keyPressed() {
  endRecord();
  exit();
}

Node findNearest(Node p) {
  float minDist = 1e10;
  int minIndex  = -1;
  for (int i=0; i sq(branching));
  x += px;
  y += py;
  
  // Boundaries for the frame of the lasercut
  if(x>20 && x20 && y= branchLength) {
      Node newNode = new Node(base, sample);
      nodes.add(newNode);
      newNode.display();
    }
  }
}

class Node
{
  PVector pos;
  Node parent;
 
  Node(float x, float y) {
    pos = new PVector(x,y);
  }
  
  Node(Node base, Node sample) {
    PVector step = PVector.sub(sample.pos,base.pos);
    step.limit(5.0);
    pos = PVector.add(base.pos,step);
    parent = base;
  }
 
  float dist(Node other) {
    return PVector.dist(pos,other.pos);
  }
  
  // Draws a line between nearest node and new node
  void display() {
    if (parent!=null) {
      line(parent.pos.x, parent.pos.y, pos.x, pos.y);
    }
  }
}

Laser Tadpole Things – WIP

./wp-content/uploads/sites/2/2013/09/frame-1217.pdf

My original idea for this was to have tadpole-looking creatures playing follow-the-leader with the mouse cursor. I’d hoped an image of them flocking together would be cool, but as you can see from the PDF, it may not translate well into a lasercut. (I tried filling the forms in black so the hole shapes would be more apparent). Alas, I did not figure out how to get the tails to move, how to keep them completely separate from each other, or keep them away from the edges. I could have them die if they get too close to the edge, but that would look unnatural. Also, even though I have been trying to study Daniel Shiffman’s code very closely, I’m not totally understanding the built-in functions and methods he uses, so pretty much all of the code is from his tutorials and simulation.

And that is why I’m pretty much stumped right now. But playing with the particles is actually really fun. I made it so you can click on the screen so the tadpoles will appear. I added the attractor and repeller classes, but I didn’t use them in the PDF. I saved the PDF by hitting a keyboard button. Here is the thing below:

* Note that the tadpoles are dying very unnaturally because of the shift from Java to JS