Category: Uncategorized

Sensor Display


In the Cave from Elizabeth Agyemang on Vimeo.
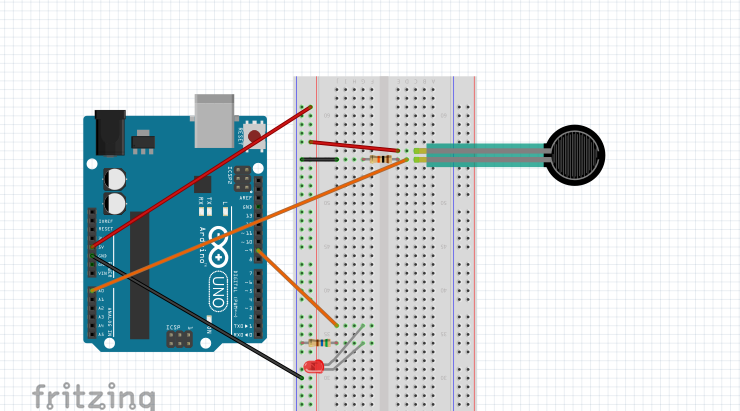
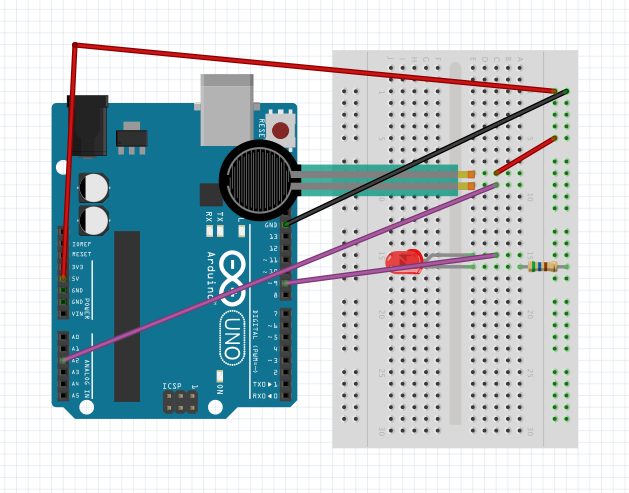
A week ago I was handed a box filled with all sorts of strange gadgets and gizmos, little parts that could be connected to an Aurdino and used to create something, anything. That’s the task I was given to do. After scrumaging through the remaining items, I found myself drawn to two objects. The first was a simple white stick like object connected to a circlular base, a sparkfun potentiometer I learned. The device immediately felt reminiscent to a flash light, the way it twisted and turned in the same smooth and intuitive fashion. It was based on this encounter, that I created my program.

Concept 
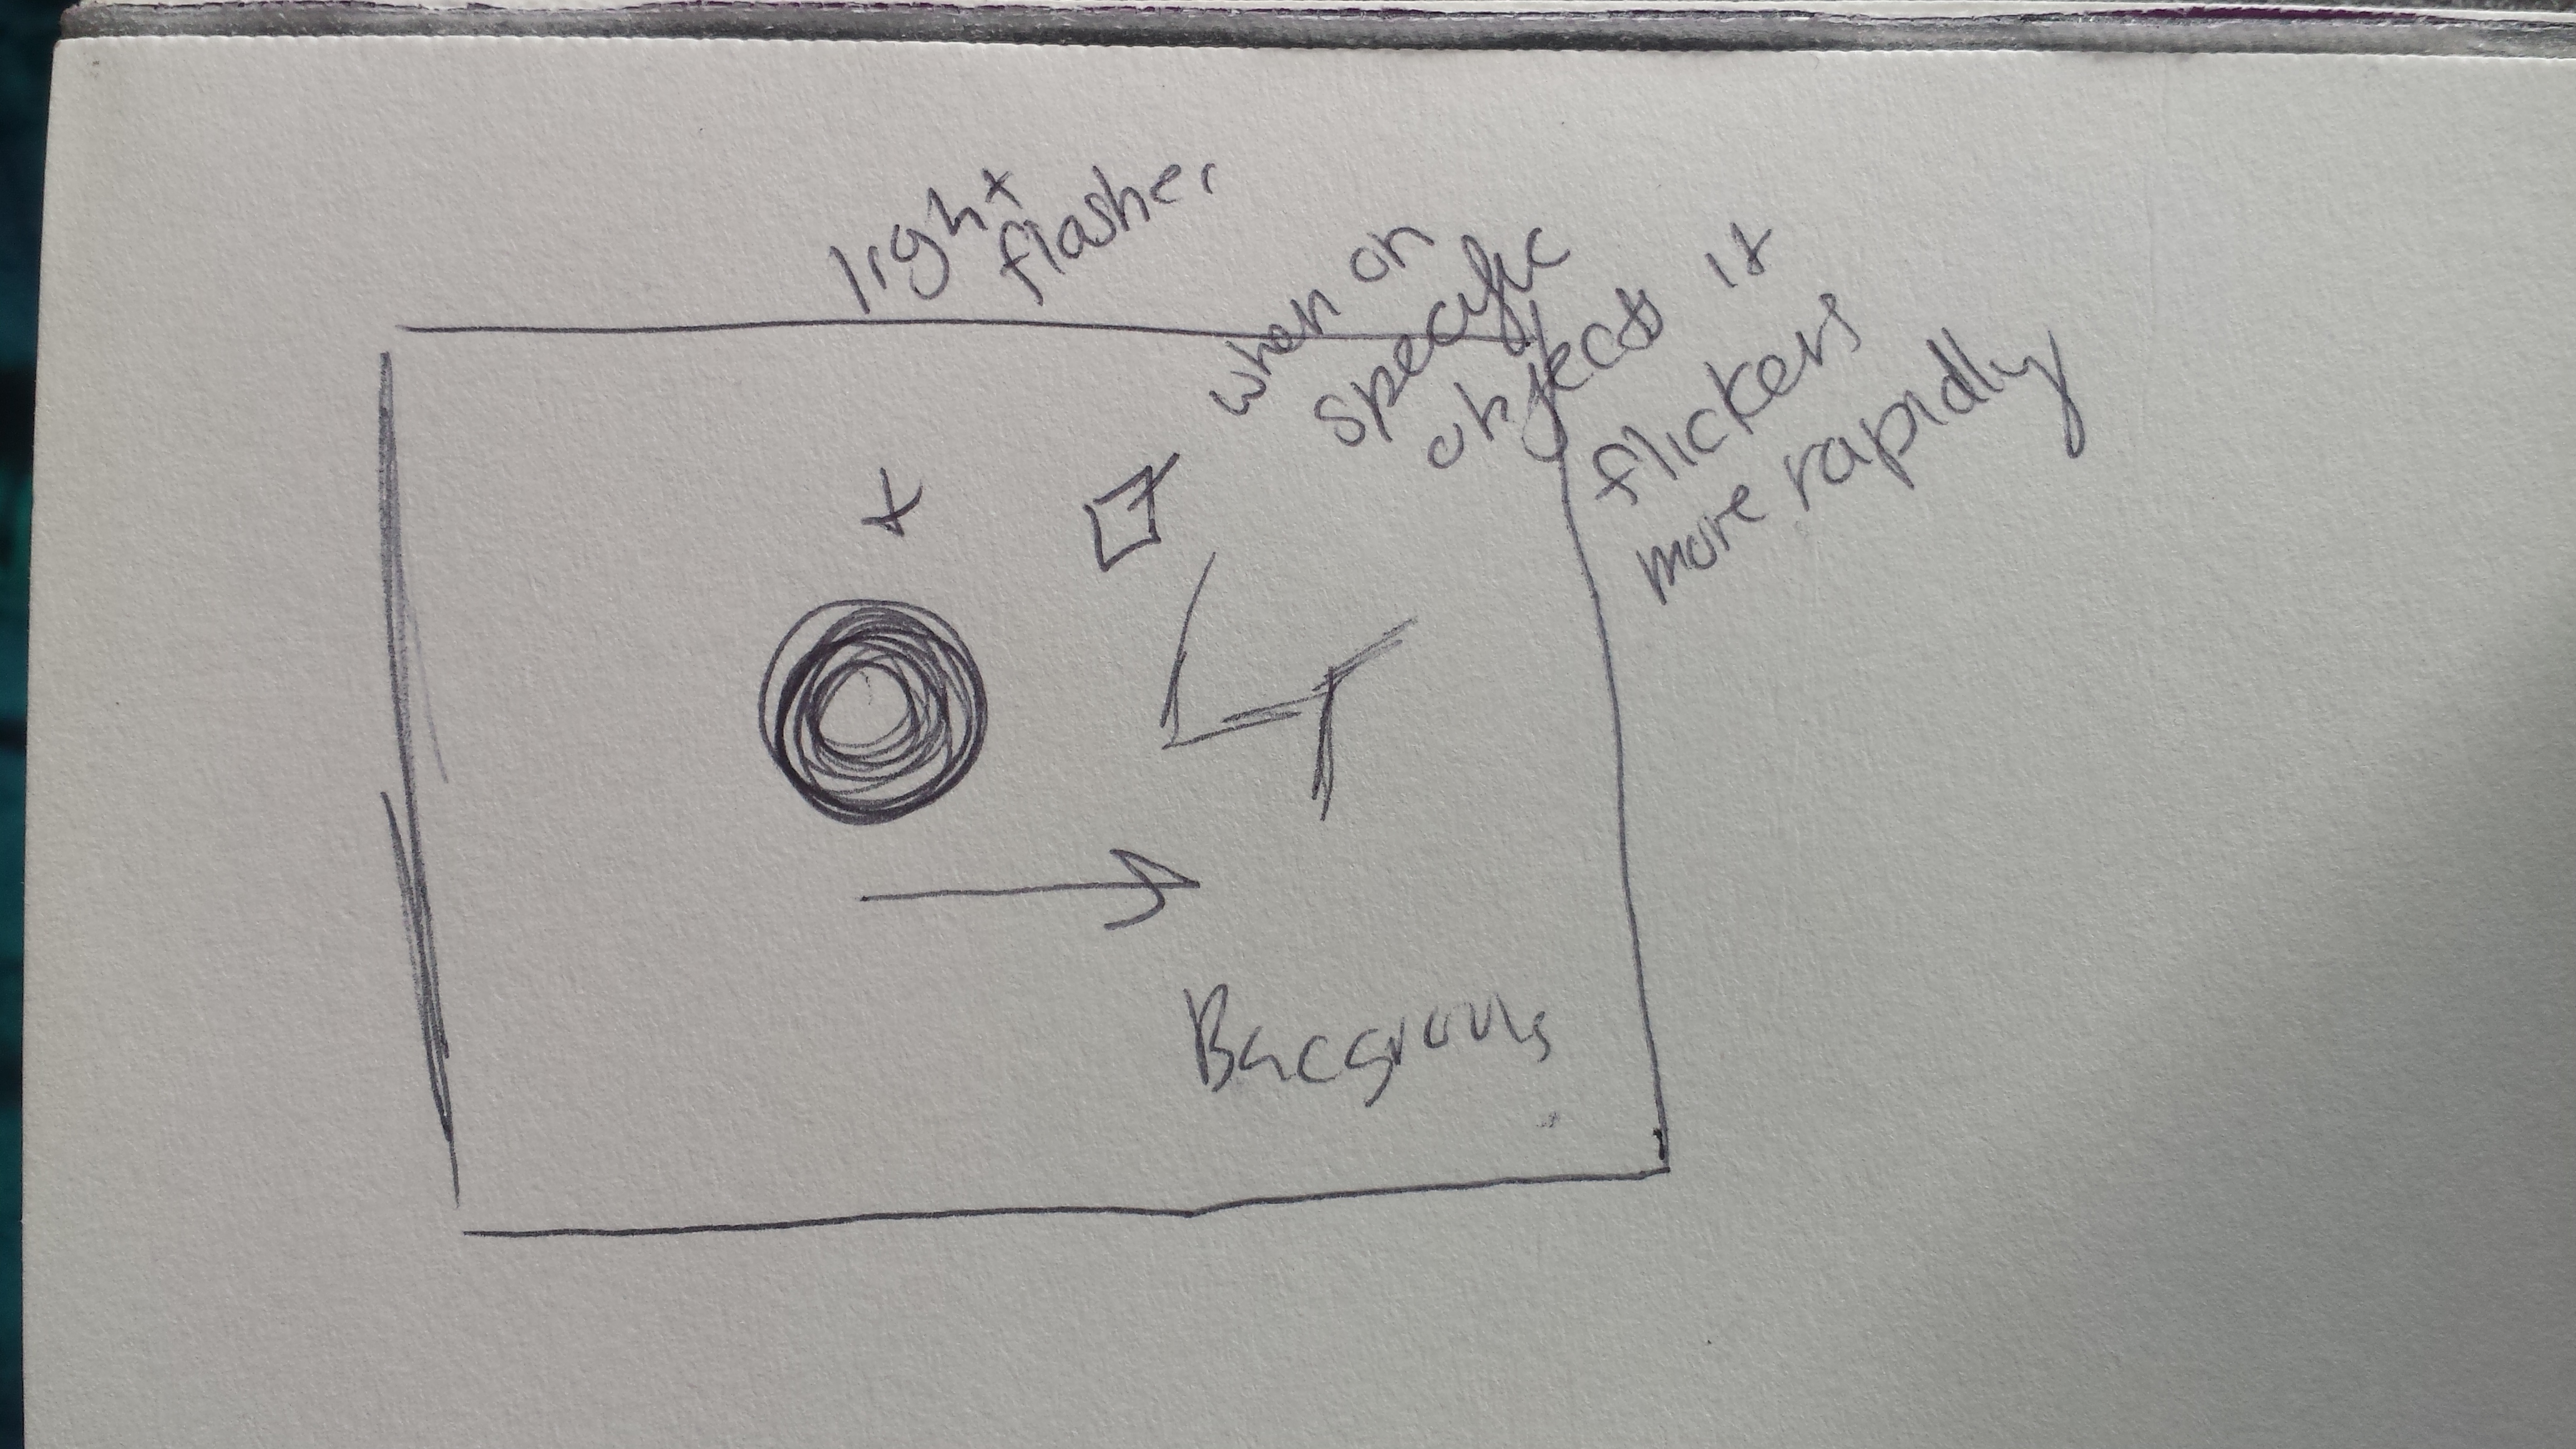
Quick Sketch of the concept

The Cave, is not so much a game as it is an experience, at least, that’s what I envisioned it to be. Though the program is fully functional, including the changing the flashlight size and moving its x position on the screen, their is no audio of dripping water in the cave, no eerie voices or music to set the tone. At least, not yet.

How it Works:

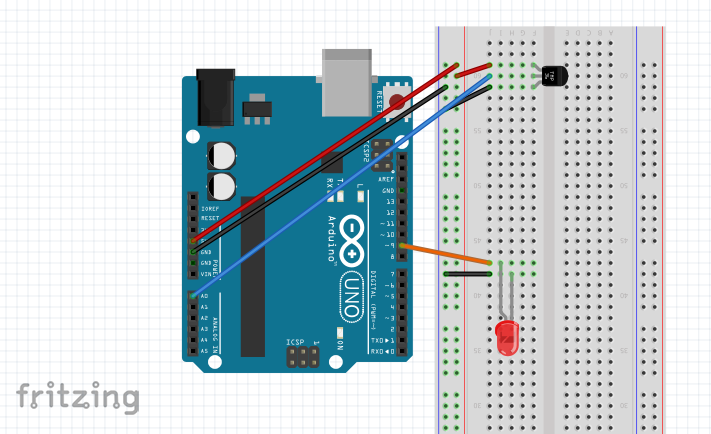
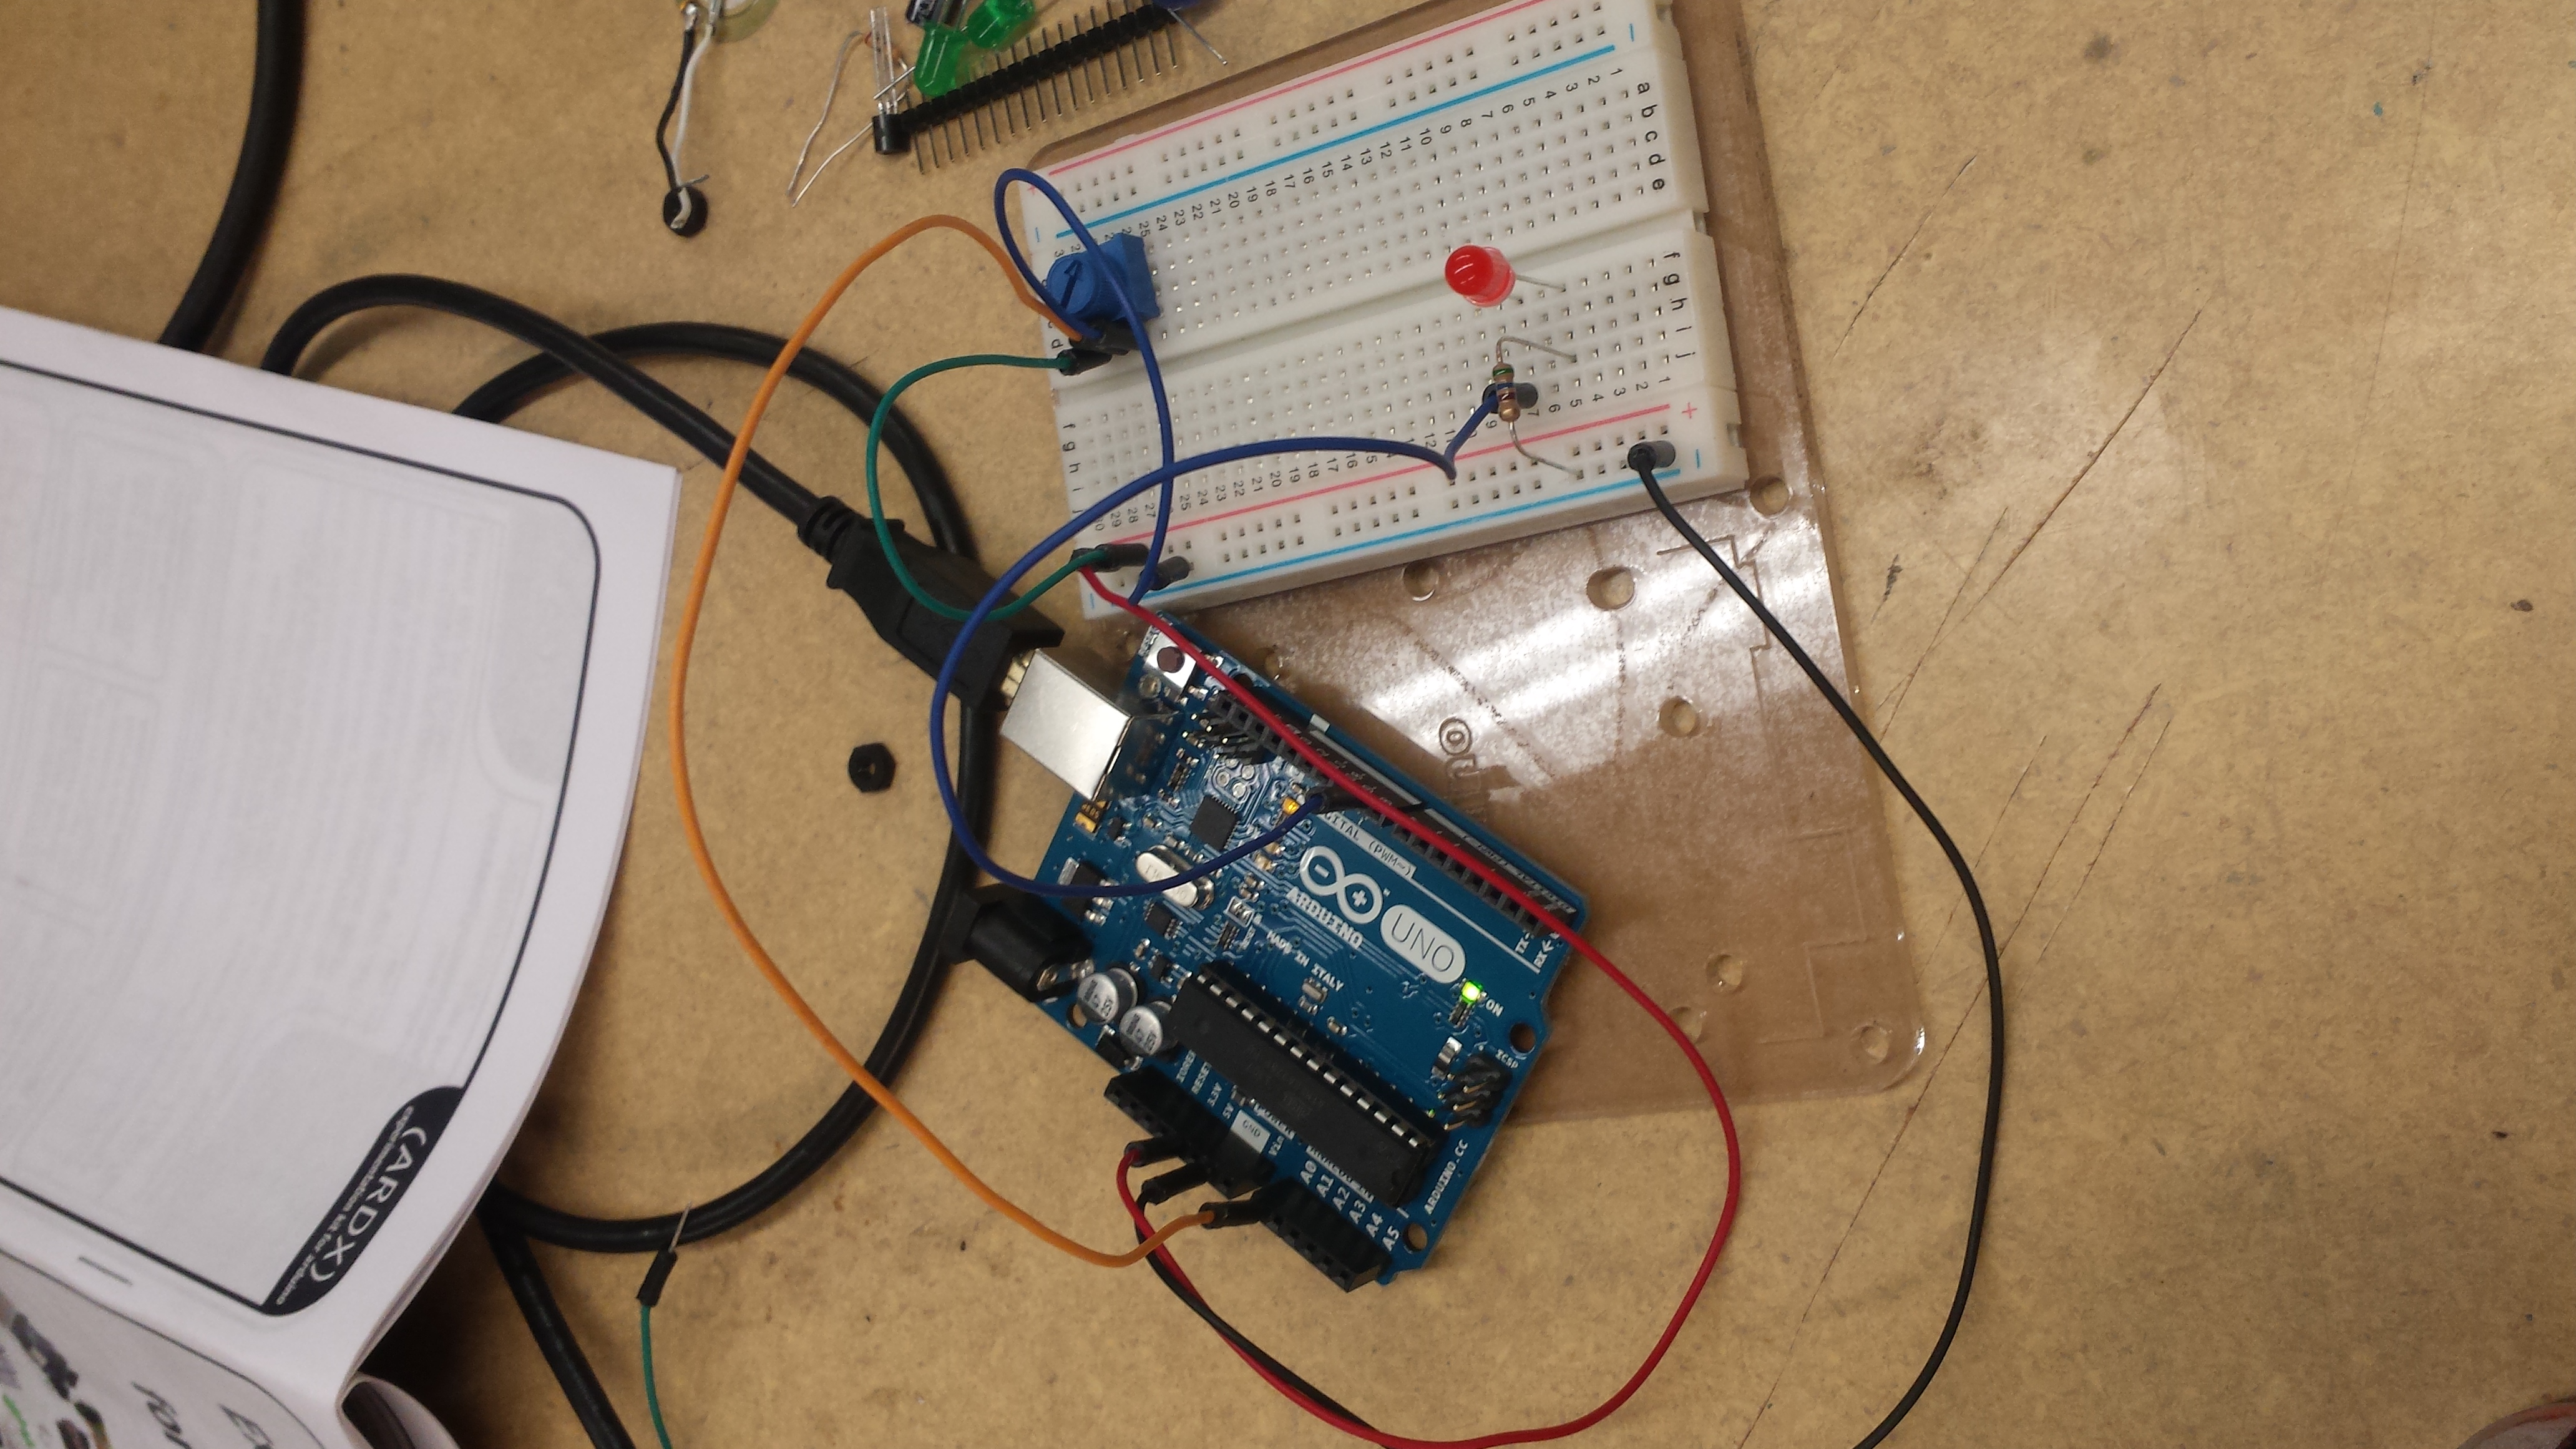
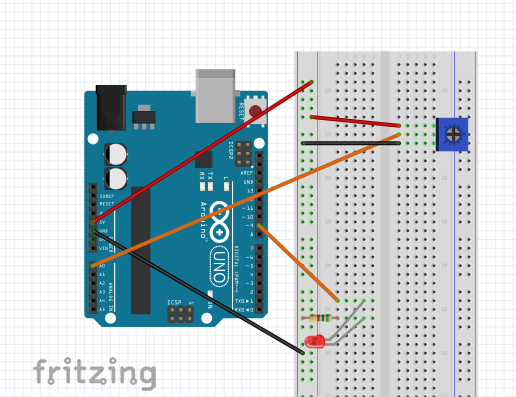
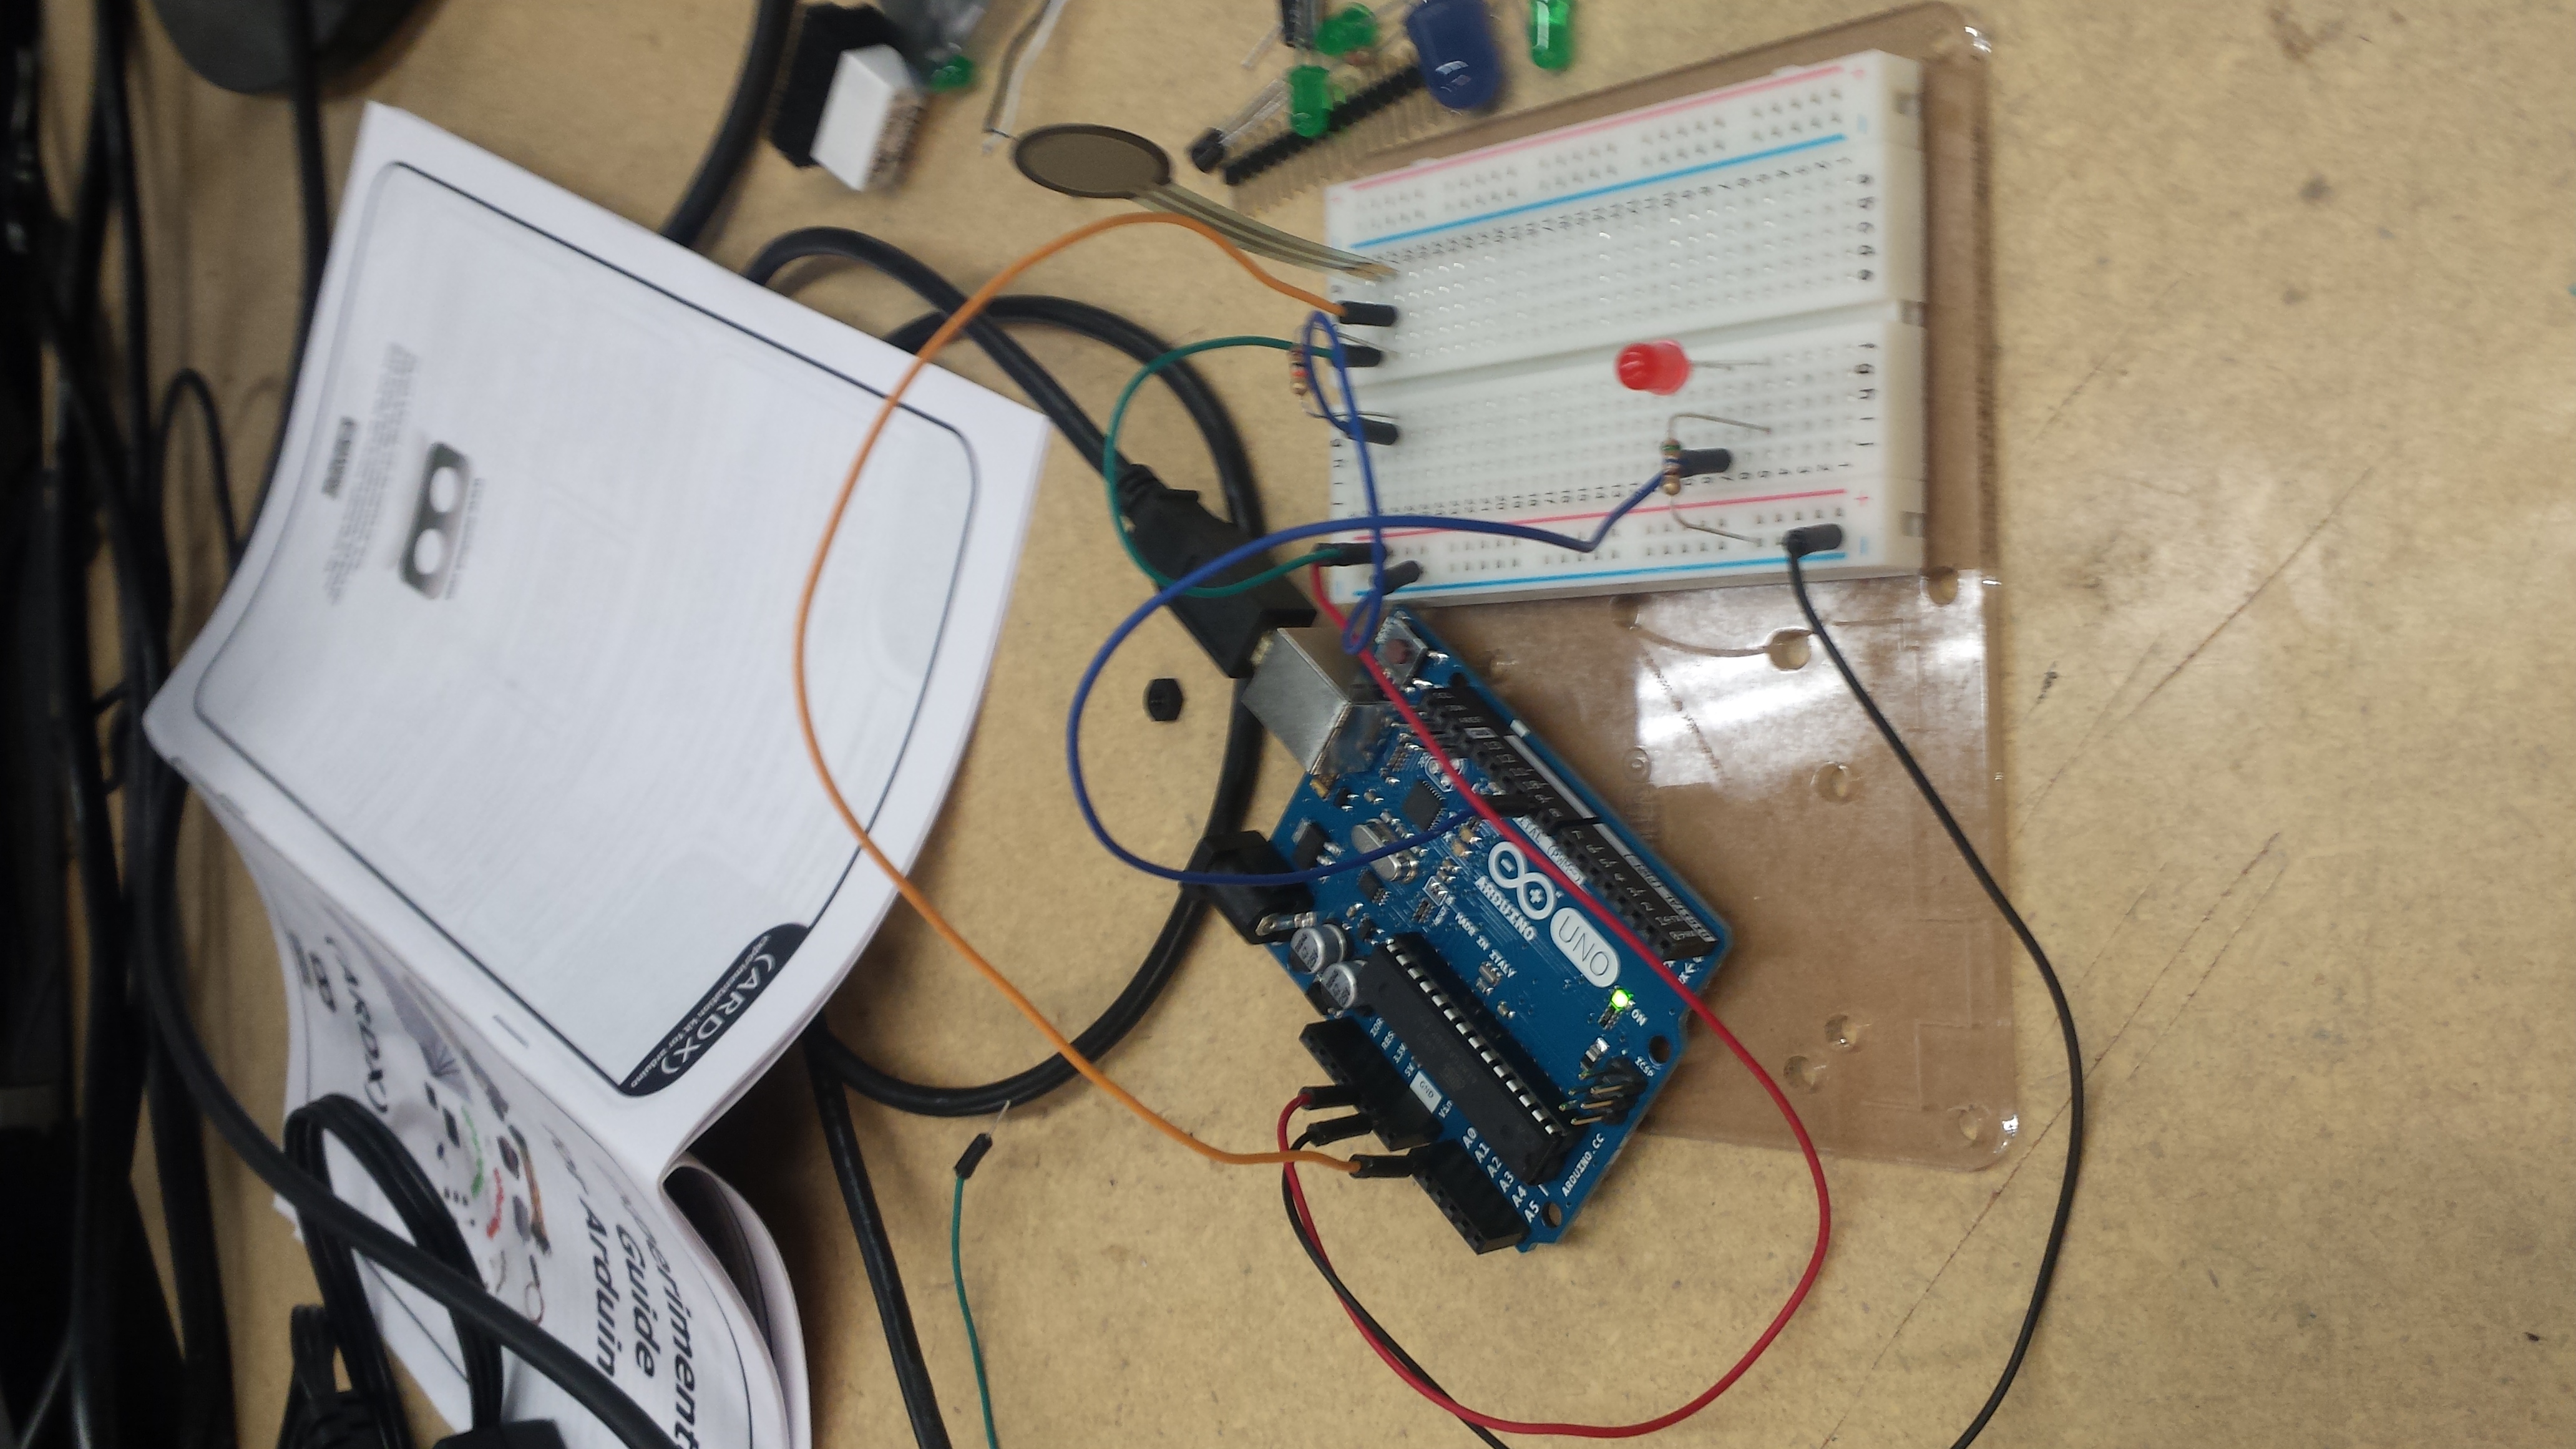
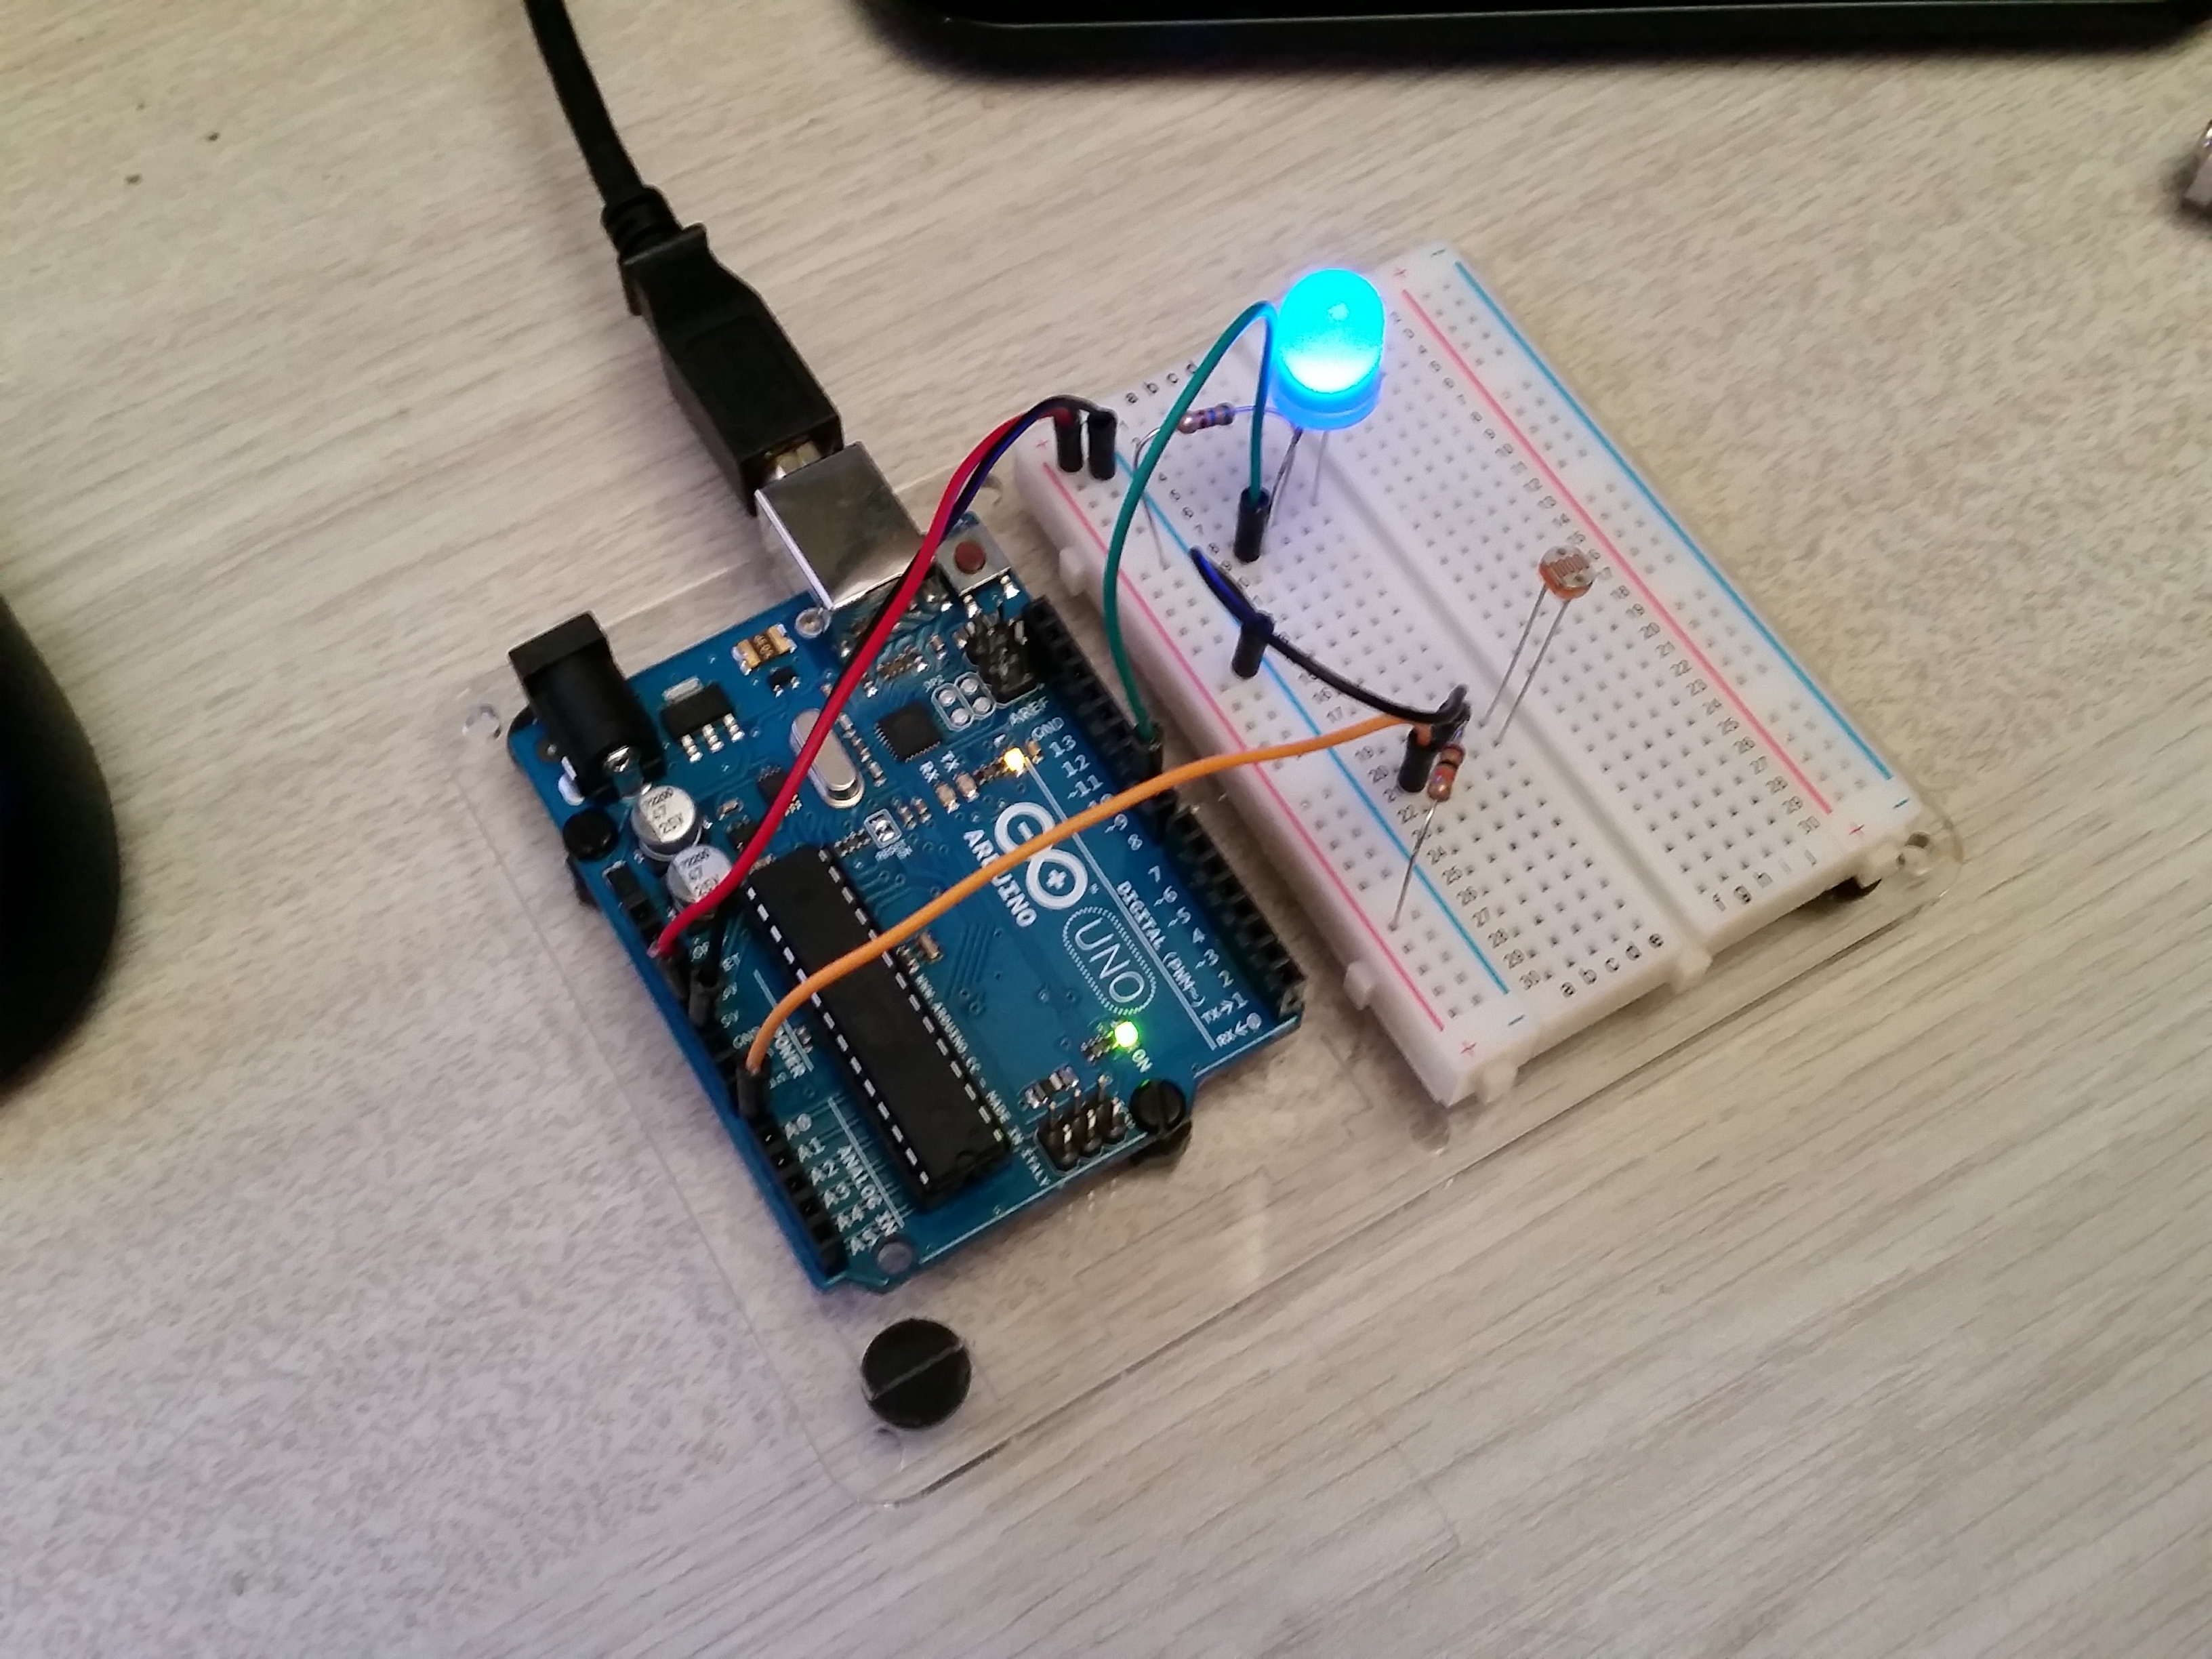
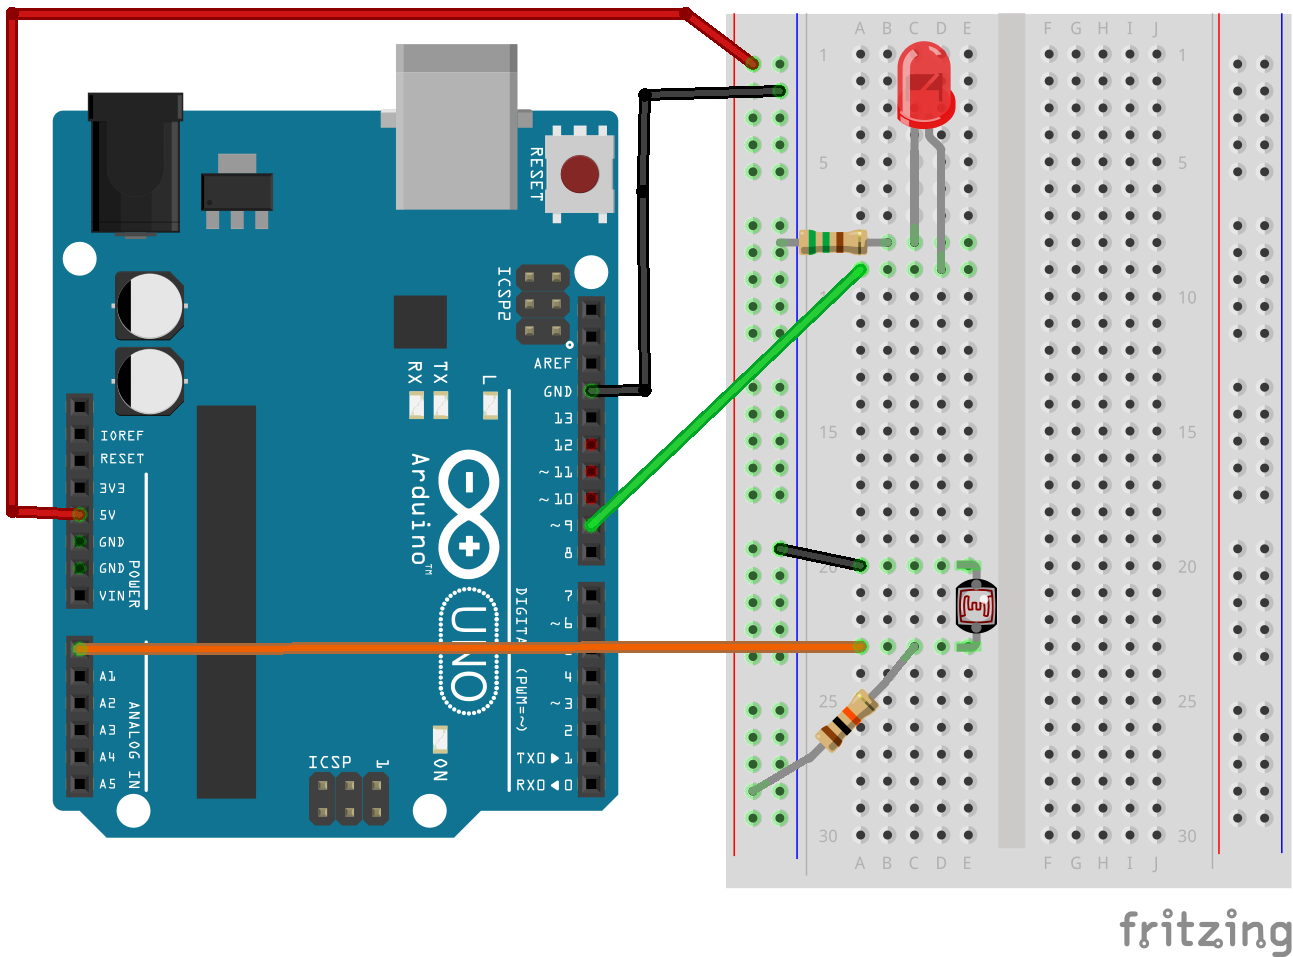
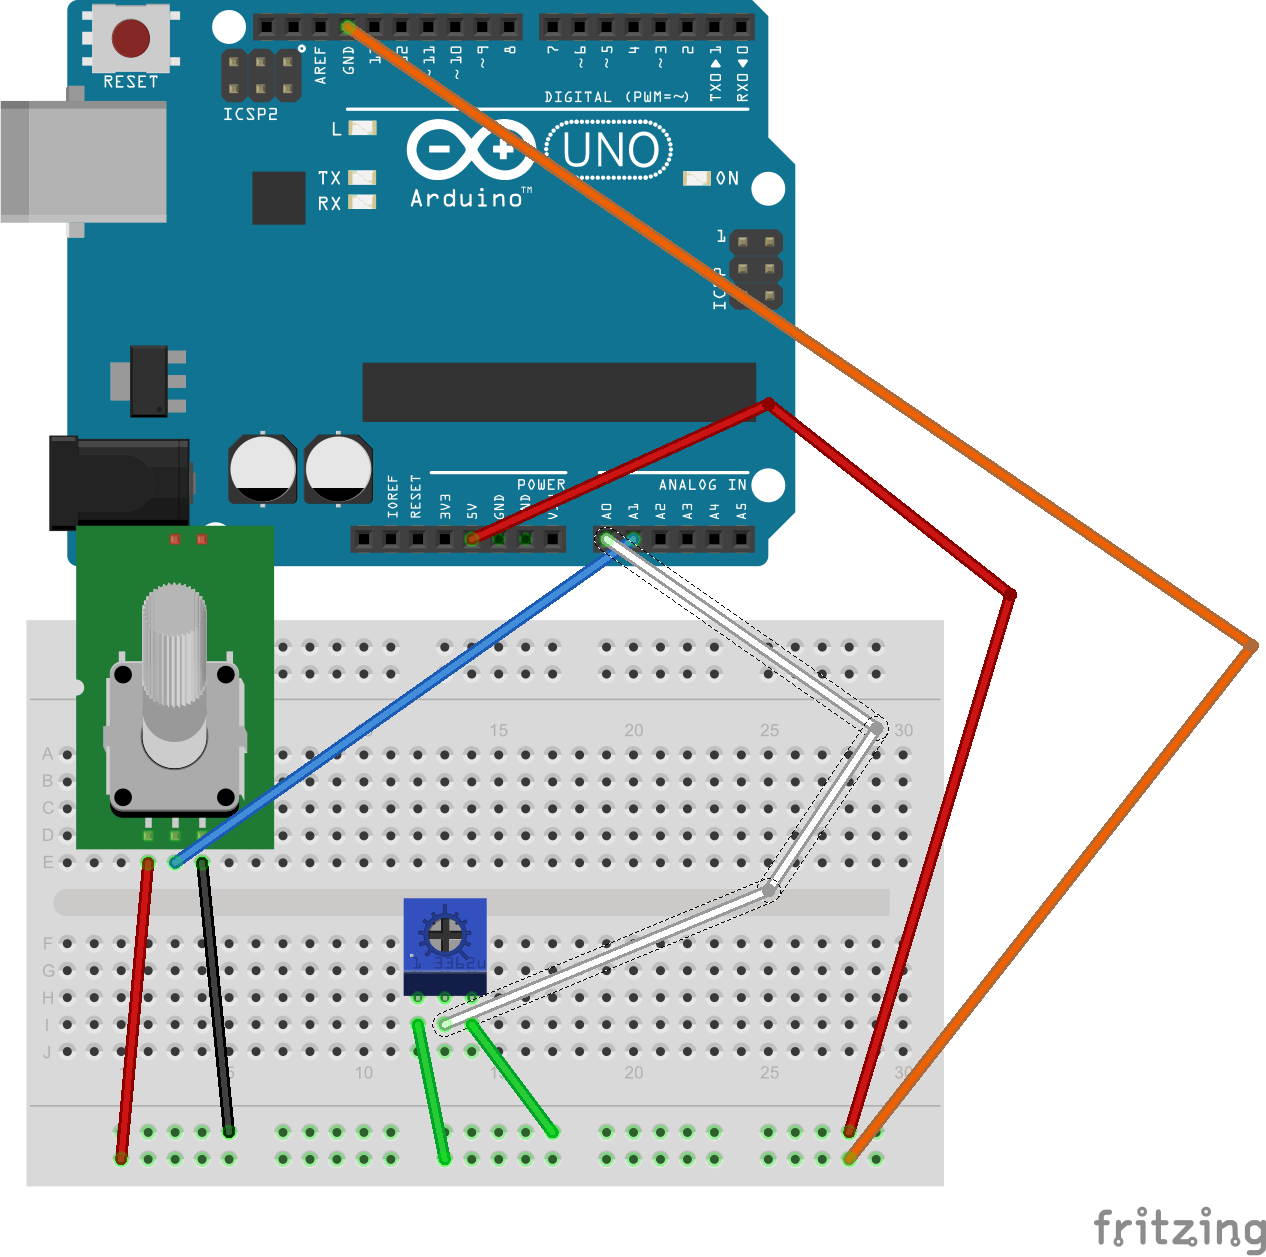
Essentially the player is in control of two functions. You use the large, stick potentiometer to change the size of the flashlight, and the small blue one to shift it on the x-axis.
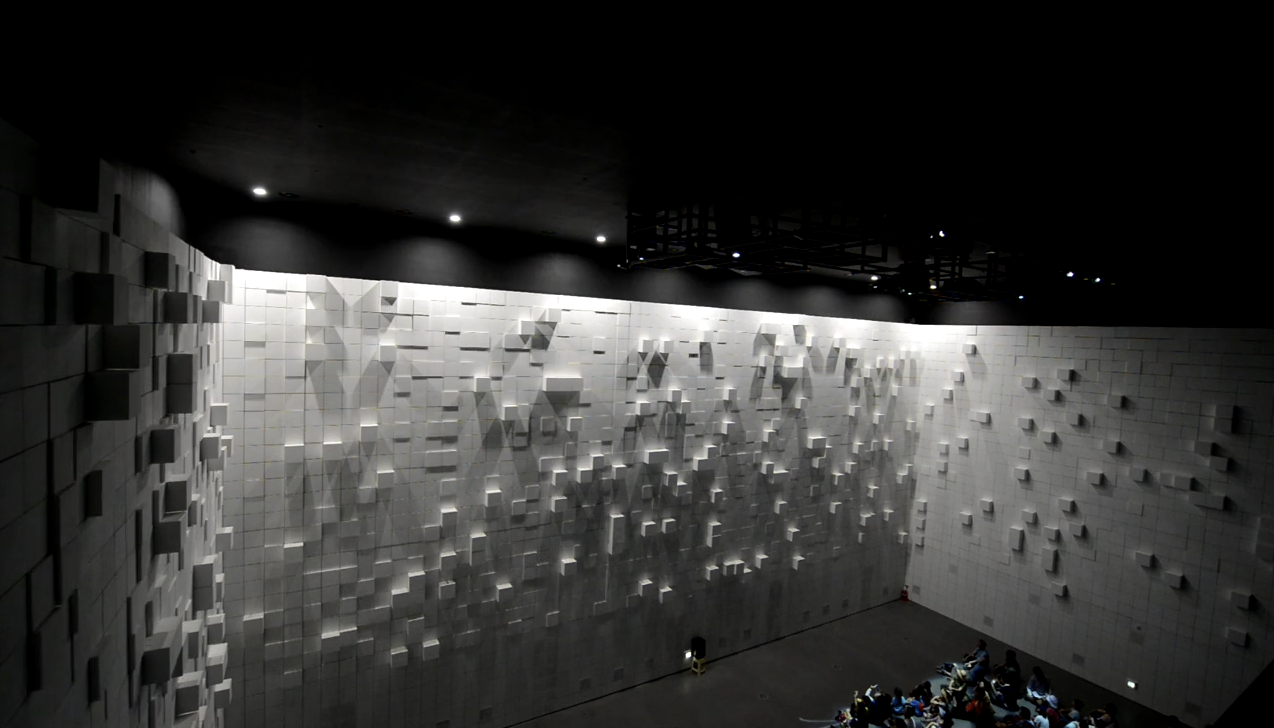
moving Playing the game

The goal of the game is to find all three clues which you do by pointing the flashlight across the screen. Once a clue is spotted the light will flicker wildly and then the play while be moved on different y-axis of the screen in order to find the next clue.

hallo final

Problems:

noticed with the sliding potentiometer I was having issues (it kept jumping from value to value randomly), so I switched to another twisting potentiometer which fixed the problem. Also, once the player hits the third clue, I’ve been having issues changing the screen. Hopefully with some more time and coding I’ll be able to fix these issues.

diagram diagram


//game in which you are trying to find 3 instances of murder. Once all three are found the image reveals itself

//background image

PImage backg0;
PImage back1;
PImage back2;
PImage mid3;
PImage mid4;
PImage fro5;
PImage fro6;
PImage fro7;


float lightx;
float lighty;
float opacity=300;
float opacityb=0;
float circ1=100;
float change=0;

//locations of the clues
float clue1x;
float clue2x;
float clue3x;


//blood stains/horror
PImage dripblood;
PImage bottomstain;
PImage hands;
PImage topstain;
PImage lizzie;
PImage crimescene;

float mecirc=50;
//big circle stuff
float bigcx;
float bigcy;


float circlebig=50;
float flashclick=0;

//moving lizzie
float move=753;


float secC=0;
//game counter, counting to see if the images have bee located
//begin at the top, go to middle, then go to the bottom

//load text "Something Happened Here..."
//find the clues
float gamecounter=0;

// This Processing program reads serial data for two sensors,
// presumably digitized by and transmitted from an Arduino. 
// It displays two rectangles whose widths are proportional
// to the values 0-1023 received from the Arduino.
 
// Import the Serial library and create a Serial port handler
import processing.serial.*;
Serial myPort;   
 
// Hey you! Use these variables to do something interesting. 
// If you captured them with analog sensors on the arduino, 
// They're probably in the range from 0 ... 1023:
int valueA;  // Sensor Value A
int valueB;  // Sensor Value B
int counter= valueA;
float outcircle;
//distance between flashlight and ci
 float d;
 float mapB;
 
void setup(){
 size(838,450);
 // List my available serial ports
  int nPorts = Serial.list().length; 
  for (int i=0; i < nPorts; i++) {
    println("Port " + i + ": " + Serial.list()[i]);
  } 
   // Choose which serial port to fetch data from. 
  // IMPORTANT: This depends on your computer!!!
  // Read the list of ports printed by the code above,
  // and try choosing the one like /dev/cu.usbmodem1411
  // On my laptop, I'm using port #4, but yours may differ.
  String portName = Serial.list()[2]; 
  myPort = new Serial(this, portName, 9600);
  serialChars = new ArrayList();
 
  //drawing the background
backg0= loadImage("0Background.png");
back1= loadImage("1back.png");
back2= loadImage("2back.png");

mid4= loadImage("4middle.png");
fro5= loadImage("5front.png");

fro6= loadImage("6front.png");
fro7= loadImage("7fronts.png");
mid3= loadImage("3middle.png");


//drawing the blood stain DONT FORGET BLUR
dripblood= loadImage("blood.png");
bottomstain= loadImage("bottomstain.png");
hands= loadImage("hidhands.png");
topstain= loadImage("top stain.png");
lizzie= loadImage("lizzie2.png");
 
opacity1= map(d,0,valueA,0,250);


}
float opacity1;

void draw(){
  // Process the serial data. This acquires freshest values. 
 //value of y
 lighty=250;
  processSerial();
 //background
  image(backg0,0,0);
  image(back1,48,-11);
  image(back2,-9,-2);
  image(mid3,506,87);
  image(mid4,287,257);
  image(fro5,0,32);
  image(fro7,324,385);
  image(fro6,284,146);
  
  //blood stains/horror
image(dripblood,636,-2);
image(bottomstain,-91,31);
image(hands,161,171);
image(topstain,-91,31);
image(lizzie,move,91);

  
  noStroke();
  smooth();
float cirx=80;
//mapping


 //bigger circles
 
for(bigcx=11; bigcx<width; bigcx=bigcx+58){
for(bigcy=26; bigcy<height;bigcy=bigcy+47){     //if the distance between the flashlight and the circles is less then 25 and          //mapping the opacity to the distance of the light source. as it increases so does the opacity         float d= dist(valueB,lighty,bigcx,bigcy); //  opacity1= map(d,0,valueA,0,250); //    if ((dist(valueB,lighty,bigcx,bigcy)<25)&&(valueA>=cirx)){
//      opacity1=0;
//      
//    }else{
//     opacity1=map(d,0,valueA,0,250);
//      
//    }
  
    if (valueA< =7){       opacity1=248;     }else{       opacity1=map(d,0,valueA,0,250);            }          fill(0,0,0, opacity1);//opacity1    ellipse(bigcx,bigcy,cirx,cirx); //  println("opacity1", opacity1, "valB:", valueB, "valA", valueA);               //locations of the clues       clue1x=248; clue2x=656; clue3x=832;               while ((valueB==clue3x)&&(gamecounter>2)){
     opacity1=0;
     
   }
   }
        
   //if the flashlight is on the clue add to counter and move to next line in image
  if((dist(valueB,lighty,clue1x,254)< =5)||(valueB==clue1x)){         secC= random(15);       gamecounter=1;           }else{     secC=secC;      lighty=lighty;        }    if (gamecounter==1){      lighty=10;                }    if ((dist(valueB, lighty, clue2x,13)<5)||(valueB==clue2x)&&(gamecounter>=1)&&(lighty==10)){
     
     secC= random(40);
     gamecounter=2;
     lighty=130;
          
   }
   
   if ((dist(valueB, lighty, clue3x,13)<5)||(lighty==130)||(gamecounter>=2) ){
     lighty=130;
     
     secC= random(40);
     gamecounter=3;
     
   }if((gamecounter==2)&&(valueB==clue3x)){
     gamecounter=3;
     opacity1=random(100);
     
   }
   if((gamecounter==3)&&(valueB==clue3x)){
     
    move= random(753);
     
     
   }


 }


   fill(255,200,0,0);
   rect(clue1x,254,5,5);
   rect(clue2x,13,5,5);
   rect(clue3x,140,5,5);
  //flashlight
    //change the blue, ie the last number to lighten it
  fill(254,255,0,25*1/2*secC);
  //the size of the flashlight is being mapped to the mouse
  lightx= map(mouseX,0,width,0,850);
//   lighty= map(valueB,0,height,0,200);
   
  ellipse(valueB, lighty,flashclick,flashclick);
  //main center circle
fill(254,255,0,secC);
  ellipse(valueB,lighty,valueA,valueA);
  //outside rim
  fill(254,255,0,secC*1/2);
  outcircle= valueA+(valueA+(valueA*1/2));
  ellipse(valueB,lighty, outcircle,outcircle);
  //changing the opacity of the flashlight
        if (valueA< =7){  
 secC=0;         
  counter=valueA;}         
 while((valueA>counter)){
         secCsecC+ 5;
          counter=valueA;
          
        }
        
         while (valueA 0) {
    char aChar = (char) myPort.read();
 
    // You'll need to add a block like one of these 
    // if you want to add a 3rd sensor:
    if (aChar == 'A') {
      bJustBuilt = false;
      whichValueToAccum = 0;
    } else if (aChar == 'B') {
      bJustBuilt = false;
      whichValueToAccum = 1;
    } else if (((aChar == 13) || (aChar == 10)) && (!bJustBuilt)) {
      // If we just received a return or newline character, build the number: 
      int accum = 0; 
      int nChars = serialChars.size(); 
      for (int i=0; i < nChars; i++) {int n = (nChars - i) - 1; int aDigit = ((Integer)(serialChars.get(i))).intValue();         
 accum += aDigit * (int)(pow(10, n));  }      
   // Set the global variable to the number we captured.     
 // You'll need to add another block like one of these      
  // if you want to add a 3rd sensor:  
 if (whichValueToAccum == 0) {valueA = accum;// println ("A = " + valueA)  } 
else if (whichValueToAccum == 1) {valueB = accum; // println ("B = " + valueB);}         
// Now clear the accumulator 
serialChars.clear();bJustBuilt = true;} 
else if ((aChar >= 48) && (aChar < = 57)) {
      // If the char is between '0' and '9', save it.
      int aDigit = (int)(aChar - '0'); 
      serialChars.add(aDigit);
    }
  }
}

Aurdion code:

// program reads two analog signals from two potentiometers 
 
int sensorValue0 = 0;  // variable to store the value coming from the sensor
int sensorValue1 = 0;  // variable to store the value coming from the other sensor
 
void setup() {
  Serial.begin(9600);  // initialize serial communications    
}
 
void loop() {
 
  // Read the value from the sensor(s):
  sensorValue0 = analogRead (A0);  // reads value from Analog input 0
  sensorValue1 = analogRead (A1);  // reads value from Analog input 1    
 
  Serial.print ("A"); 
  Serial.println (sensorValue0); 
  Serial.print ("B"); 
  Serial.println (sensorValue1);  
 
  delay (50);   // wait a fraction of a second 
}
 
/*
 
*/

Assignment 10C : Temperature Sensing

In Fritzing:

assignment 10C temperature sensing

In Action:

The Code:

const int ledPin = 9;
const int potReader = A0;

void setup(){
  pinMode(ledPin, OUTPUT);
  pinMode(potReader, INPUT);
}
void loop(){
  int potVal = analogRead(potReader);
  int ledVal = potVal * 255.0 / 1024;
  analogWrite(ledPin, ledVal);
  Serial.print("temperature is ");
  Serial.println(potVal);
  delay(10);
}

Assignment 10B

Potentiometer

In IRL:

20141028_184904

In Fritzing:

assignment 10B potentiometer fritzing

In Action:

Squeeze Sensor

In IRL:

20141028_185519

In Fritzing:

assignment 10B force sensor fritzing

In Action:

I used the same code for both, described here:

const int ledPin = 9;
const int potReader = A0;

void setup(){
  pinMode(ledPin, OUTPUT);
  pinMode(potReader, INPUT);
}
void loop(){
  int potVal = analogRead(potReader);
  int ledVal = potVal * 255.0 / 1024;
  analogWrite(ledPin, ledVal);
  delay(10);
}

Assignment 10B- Squeezing

Screen Shot 2014-10-27 at 20.28.48


/*
 * Force Sensitive Resistor Test Code
 *
 * The intensity of the LED will vary with the amount of pressure on the sensor
 */

int sensePin = 2;    // the pin the FSR is attached to
int ledPin = 9;      // the pin the LED is attached to (use one capable of PWM)

void setup() {
  Serial.begin(9600);
  pinMode(ledPin, OUTPUT);  // declare the ledPin as an OUTPUT
}

void loop() {
  int value = analogRead(sensePin) / 4; //the voltage on the pin divded by 4 (to scale from 10 bits (0-1024) to 8 (0-255)
  analogWrite(ledPin, value);        //sets the LEDs intensity proportional to the pressure on the sensor
  Serial.println(value);              //print the value to the debug window
}

Looking Outwards: Sensors and Shields

Adafruit Color Sensors

I found this particular sensor to be extremely exciting because I am really interested in color theory. One of the projects I was thinking of was a simple matching game when an individual would see a color on a screen, out of reach, and try and match that color exactly using an assortment of objects around them. I would also enjoy using this sensor for my own personal painting practice in order to discover interesting color combinations.

light_1356demo_LRG


Flex Sensor 2.2

For this sensor, I thought it would be interesting in performance pieces. I really would enjoy being able to use the movements of my body to control sound and visuals. These would either have to be built into cloths or somehow hidden under makeup because I think it would be physically interesting to have someones face being able to control these elements as well and not just through a camera lens. I wounded how sensitive these sensors are.

https://www.sparkfun.com/products/10264

10264-01

Adafruit 9-DOF IMU Breakout

This is a combination accelerometer, gyroscope, and magnetometer. It is noted as acceptable for motion tracking. I could possibly use this in some type of motion tracked object such as an instrument that is played by music, or a device that uses motion to decide how to play music. I could make a ball that always lights an led that is on the top of the ball. I could make an object which screams when it is falling by having it know when no gravity or little force is present (as in during a freefall). I could make an object that vomits when it is dizzy by using the rotational sensing from the gyro. I could make a robot that is scared of magnets and runs from them. The possibilities for a 9DOF IMU are endless. I think it would be most interesting to make a small bot that screams when falling, runs from magnets, and vomits when it gets dizzy. To me this is interesting because running from fears, screaming, and getting nauseated are very human things to do which makes it odd and unnecessary for a robot to do them. This would be one step closer to robots with feelings or Skynet.

9DOF

VCNL4000 Proximity/Light sensor

This is a proximity sensor for small distances. I imagine using it for making different tones based on how far your hand is held over it. It could also be incorporated in a light which turns on when your hand is near it, but changes hue based on how close your hand gets to it. It could also be incorporated with an electromagnet to accomplish levitation. The magnet is strengthened when the object is too far, and weakened when it is too close. The two ideas together would be interesting to me because levitation is amazing, but levitation projects I’ve seen don’t incorporate interactivity.
proximity_sensor

Continue reading

Circuit #9 – The Photoresistor

The code as seen in the ARDX Kit book:

/*
  * A simple programme that will change the intensity of
  * an LED based  * on the amount of light incident on 
  * the photo resistor.
  * 
  */

//PhotoResistor Pin
int lightPin = 0; //the analog pin the photoresistor is 
                  //connected to
                  //the photoresistor is not calibrated to any units so
                  //this is simply a raw sensor value (relative light)

//LED Pin
int ledPin = 9;   //the pin the LED is connected to
                  //we are controlling brightness so 
                  //we use one of the PWM (pulse width
                  // modulation pins)
void setup()
{
  pinMode(ledPin, OUTPUT); //sets the led pin to output
}

/*
 * loop() - this function will start after setup 
 * finishes and then repeat
 */
void loop()
{
  int lightLevel = analogRead(lightPin); //Read the
                                         // lightlevel
  lightLevel = map(lightLevel, 0, 900, 0, 255); 
        //adjust the value 0 to 900 to
        //span 0 to 255

  lightLevel = constrain(lightLevel, 0, 255);//make sure the 
                                             //value is between 
                                             //0 and 255
  analogWrite(ledPin, lightLevel);  //write the value
}

Here is the video of the working circuit:

Here is a picture:

circuit9

Here is a fritzing diagram:

photoresistor_diagram_mkellogg


Written by Comments Off on Circuit #9 – The Photoresistor Posted in Uncategorized

Looking Outwards Arduino Parts

When looking at the different extensions, ports and shields available for Arduino I found myself drawn to shields that Arduino could manipulate visually. So with that in mind here’s a list of them I liked:


Adafruit NeoPixel Shield for Arduino- 40 RGB LED Pixel Matrix

Adafruit NeoPixel Shield for Arduino - 40 RGB LED Pixel Matrix


http://www.adafruit.com/products/1430

Basically what this is a shield made out of different colored LED lights. Just looking at this I found myself wondering how I could imagine multiple ways of manipulating the intensity of the lights in different ways. I’d also potentially be interested in using this shield with sound and having the audio manipulate the colors and their intensity. As such, I could see myself working with both this in conjunction with the Adafruit “Music Maker” MP3 Shield.

Adafruit

http://www.adafruit.com/products/1788


2.8” TFT touch shield for Arduino with Resistive Touch Screen


2.8


http://www.adafruit.com/products/1651

I was interested in this extension just because of the interface and the potential manipulation ability the actual user would have in drawing on the screen. It detects finger presses anywhere on the screen which is another capability I could potentially mess with, maybe playing with the intensity of the actual touch and the image created. I think this would be really fun to work with and I’d be interested in potentially using it the most.


Looking Outwards: Components

The Adafruit CC3000 WiFi Breakout lets your Arduino connect to the internet through a wifi network. This seemed like an obvious choice for the sorts of projects I want to make where internet connectivity is a must. Hopefully this module can connect to the CMU wifi network so that my Arduino can be connected to the internet anywhere on campus!

The Adafruit Ultimate GPS also seemed like a must-have. Being able to react to some input and mark an arbitrary location on a map is very powerful.

It would probably be a good idea to get this sheild with a built in GPS module (micro SD storage) and then connect the wifi module to it.

Looking Outwards – Arduino/Physical Computing

Space Replay – Julinka Ebhardt, Francesco Tacchini and Will Yates-Johnson

To be honest, I’m still not sure what I’m looking at. Space Replay is a floating ball that records and plays back the sounds it hears, providing a strange memory  device to the space it inhabits. the piece was made by three Royal College of Art students working with the IED program, which ‘explores ways to convey information by creating meaningful experiences, through critical visualisation, data manifestation & physical computing, grounded in social & cultural theory.’

It’s just so surreal. The ball floats because whatever gas is inside it means that it’s neutrally buoyant. But this thing does not seem like a ballon, so it’s initially met with confusion. An abstract object doing abstract things in the physical space. I would have to say that, while its two main elements (physical presence and sound presence) are both strong, I don’t see any way in which they connect.

Hyper-Matrix – Jonpasang

Hyper_Matrix_Jonpasang_03

Hyper-Matrix is a kinetic landscape created by Jonpasang for the Hyundai Motor Group Exhibition Pavilion in Korea. It consists of 3 walls made out of thousands of small white cubes. These cubes are motorised, allowing them to move in and out of the wall, which creates a massive physical screen.

I find the way that this is able to redefine space in a novel fashion wonderful. It is pure abstraction, inspired by the pixellated abstraction of a compute screen, made manifest. I Do have to say that I don’t like that it is presented s a performance. this destroys the freedom of the viewer to approach this space in their own way, and I think a continually moving set of walls is more interesting.

“Painting with a digital brush” – Teehan+Lax

This piece consists of a projection system that maps ascii characters on a grid. The system reads the hue and value of the space (here a black wall with with white paint) and dynamically assigns characters to the grid based on this. the piece was made partially as an attempt to reclaim ascii as a creative medium.

I enjoy the way that this piece links mediums in a new and interesting way.  Seeing it in action is also interesting, in that the drawing have this living hectic quality to it. Although this is an interesting curio, it really seems like a curio more than anything.