 Summary: Simple android application that allows you to sketch your own game levels for a Pacman-style game.
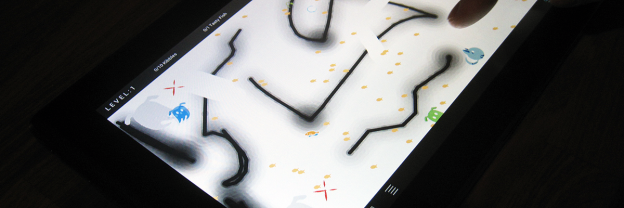
Abstract: Ever wish you could draw your own levels? Sketch-a-Level is a simple Android application that allows the user to draw their own mazes for a Pacman style game. Test out your maze drawing skills by quickly making walls, passageways, teleportation portals, and traps.
Repository: https://github.com/yvonnehidle/sketch-a-level/tree/master/SaL_PacKitty
Summary: Simple android application that allows you to sketch your own game levels for a Pacman-style game.
Abstract: Ever wish you could draw your own levels? Sketch-a-Level is a simple Android application that allows the user to draw their own mazes for a Pacman style game. Test out your maze drawing skills by quickly making walls, passageways, teleportation portals, and traps.
Repository: https://github.com/yvonnehidle/sketch-a-level/tree/master/SaL_PacKitty
SKETCH-A-LEVEL :: ABOUT
Sketch-a-Level was an exploration into the idea that users should be able to generate or “sketch” their own game levels. Initially the project was a literal interpretation of this concept with a more physical user interaction and more emphasis on hardware and computer vision. Later, as hardware limitations and issues related to the computer analyzing complex analog data were encountered, the project transitioned into a completely screen based interaction in the form of a simple and fairly straightforward Android application for touchscreen devices, primarily tablets.
Youtube video explaining how the application works:
Vimeo video, same as the video above but higher quality:
http://www.vimeo.com/65792229
Link to project write-up
http://golancourses.net/2013/wp-content/uploads/2013/05/hidle_sketch-a-level.pdf
Related blog posts on WireCat
http://www.arealess.com/sketch-a-level-progress-to-date/
http://www.arealess.com/sketch-a-level/
         |
SKETCH-A-LEVEL :: SOME PROCESSTHE ORIGINAL IDEA ISSUES WITH ORIGINAL IDEA / EVOLUTION OF THE PROJECT Finger tracking was so-so. I intially was using a Kinect with reading glasses to enable me to track a finger at a close range (within 2 feet). Even with the glasses, however, I was unable to get close enough to the image. This wouldn’t have been a problem if I didn’t need the data from my RGB camera as well. Confusing? Okay, well basically I needed the depth image for blob detection/finger tracking and I needed the RGB image for the creation of a collision map which the digital characters could interact with. Ultimately I ended up switching to blob detection using a regular webcam, but that proved to finicky as the lighting had to be just right. In order to get the lighting correct (so it could counter the light from the projector), I needed to mount lights close to the sketch or close to the camera. This made for an even more complex rig. That’s when I started thinking about mounting the camera AND the projector underneath the table. Then I would use clear glass instead of frosted glass. Vellum instead of paper. And lastly I would use fiducial markers for finger tracking. This probably would have worked, but I would still need a better projector and this ultimately would be expensive. That’s when it was suggested that I make an application for a touchpad/tablet. I had made simple applications in the past and I figured this would be a good excuse to try and get better at it. Ergo, Sketch-a-Level for Android. And while I thought my issues would pretty much end there, I actually encountered quite a few problems I had never encountered before and therefore had no idea how to fix. I struggled primarily with “out of memory” errors, which I later partially resolved by managing my images better. I also ran into a lot of problems with frame rate and character control. Alas, however, I did in the end have a working code which I am relatively happy with. |