KelseyLee-Motion in LEDs
Motion in LEDs is a project about movement visualization.
I began by creating a bracelet, which can be worn on the ankle and wrist. It is made from an Arduino Nano, LEDs, and an accelerometer and continuously blinks through a preset pattern. The faster the movement detected, the more quickly the cyclic LED pattern blinks. If the user is moving very fast, and reaches a specified threshhold, the bracelet will briefly flash blue. The wearer can also switch through the three preset patterns when achieving a high enough X-tilt.
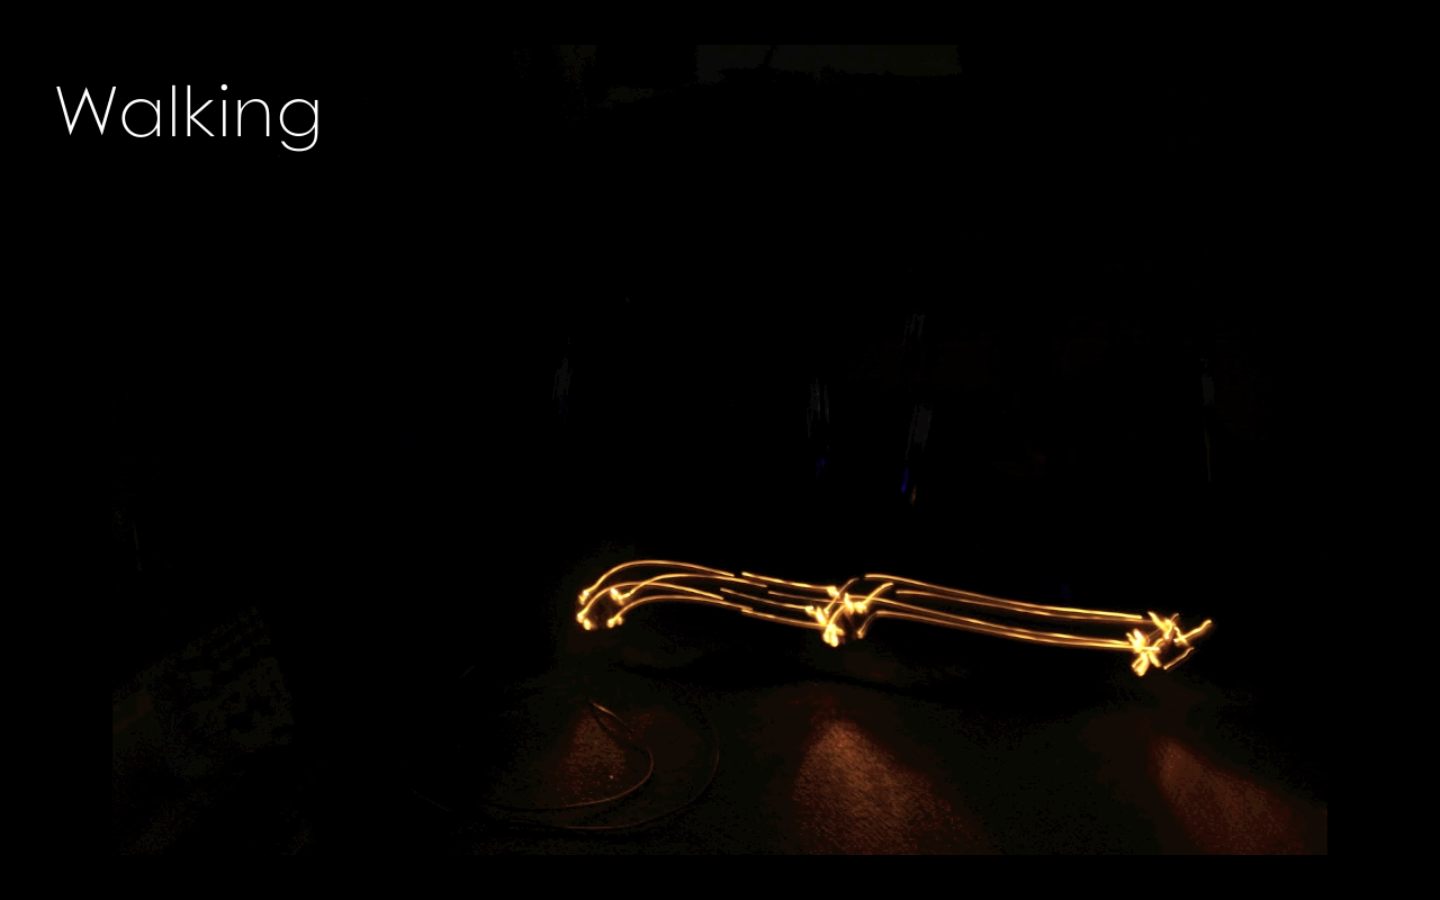
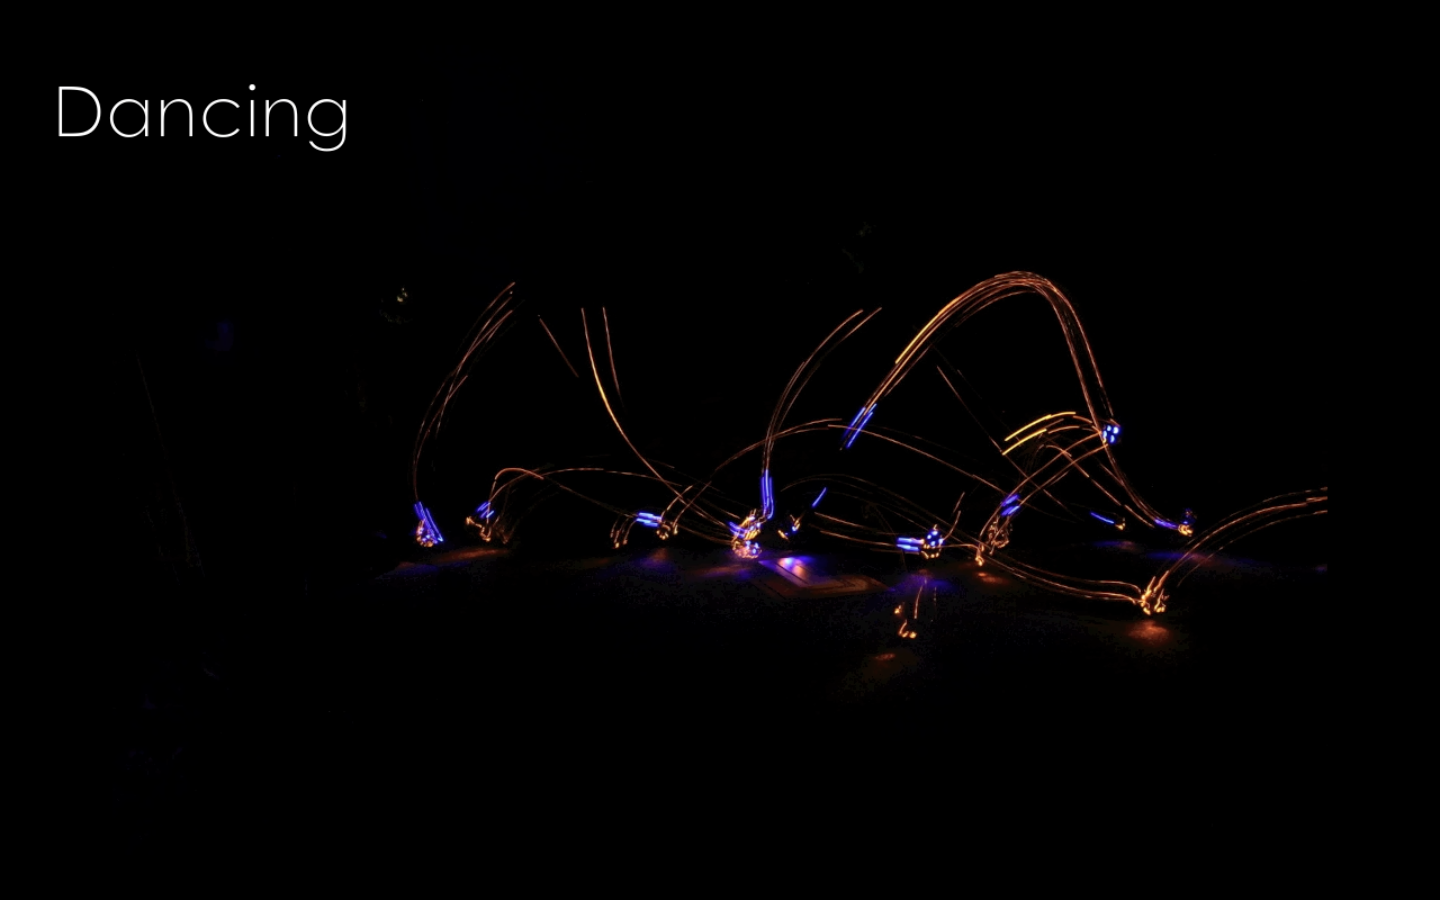
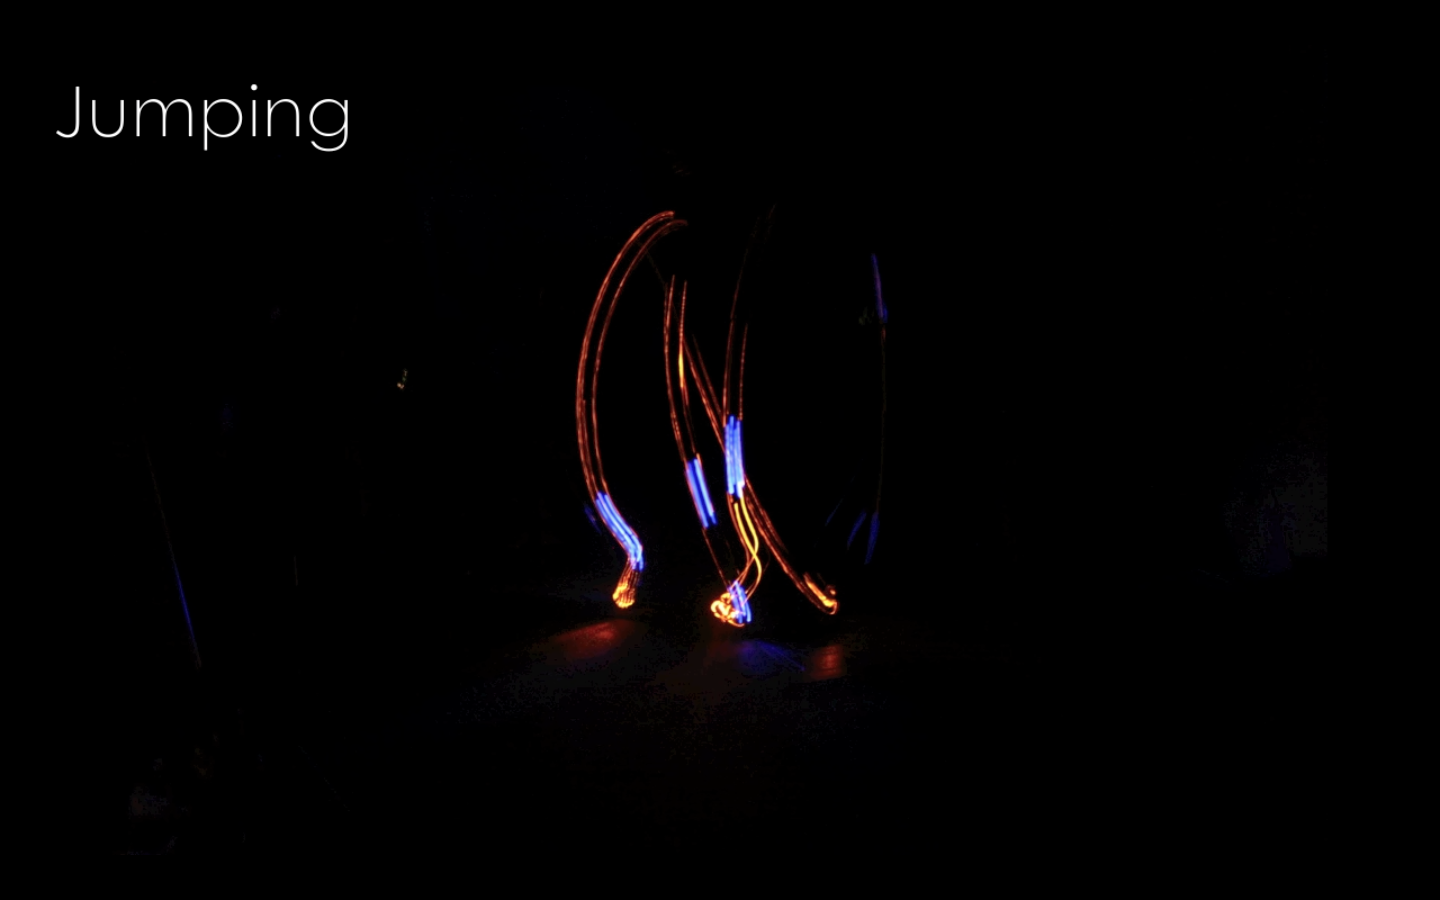
I then took long-exposure photographs of people wearing this bracelet. I asked them to walk, dance, jump or do whatever they felt like and then tagged each photo with that action. The resulting photos are then records of their movement in the form of light.
[youtube=http://www.youtube.com/watch?v=cxdjfOkPu-E&w=500]
[youtube=http://www.youtube.com/watch?v=6ydeY0tTtF4&w=500]
Materials Used Include:
- Arduino Nano
- 16 super bright yellow LEDs
- 8 super bright blue LEDs
- wire
- accelerometer
- black fabric
- velcro
- Duracell instant USB charger
I first started to design the bracelet. I was originally thinking of linear patterns, but later realized that cyclic patterns would be more interesting. I decided upon 2 concentric circles of different color LEDs and used powerpoint slides to prototype what different patterns would look like.
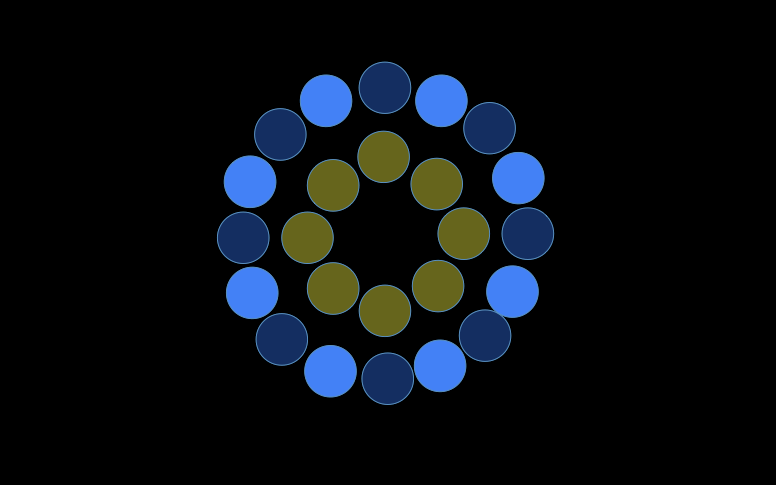
I then bought supplies to build the actual bracelet.Based on the properties of the Super Bright Blue LEDs and Super Bright Yellow LEDs, to be able to power the 36 LEDS that I originally envisioned (24 outside, 8 inside) I would needs to wire the outer LED circle as 8 pairs of LEDS in serial, and I would need to wire the inner LED circle as 4 pairs of LEDs in parallel. I would loose some freedom in controlling the lights, because i would have to light up pairs of lights at once, however this was a better compromise compared to using less LEDs or making an even more complex circuit to work with. Since the design was cyclic, I decided to wire the LEDS that were in serial, diagonally across from each other. This resulted in a lot of crossed wires and potential for shorts due to all the wires crossing over the circle’s center. After soldering all the wires and LEDs in place I made sure to use hot glue and insulte the connections so they would not touch.
I then worked on the fabric bracelet that would hold the LED circle, arduino, accelerometer, and wires. The bracelet has a pocket to hold all of the electronics and closes with a piece of velcro so that it’s easy to be put on. With the flexible design it could also be worn on the wrist and arm.

Finally, all that was left was to take long-exposure photographs of people moving with the bracelet on. Photos ranged from about 3 seconds to 20 seconds long and were taken in mostly pitch black rooms for maximum impact.
[youtube=”http://www.youtube.com/watch?v=nMa3lzXvga8&feature=youtu.be&w=500″ title=”Motion_In_LEDs” width=”549″ height=”332″]
(c) 2024 Interactive Art and Computational Design, Spring 2012 | powered by WordPress with Barecity