Working with Motors:
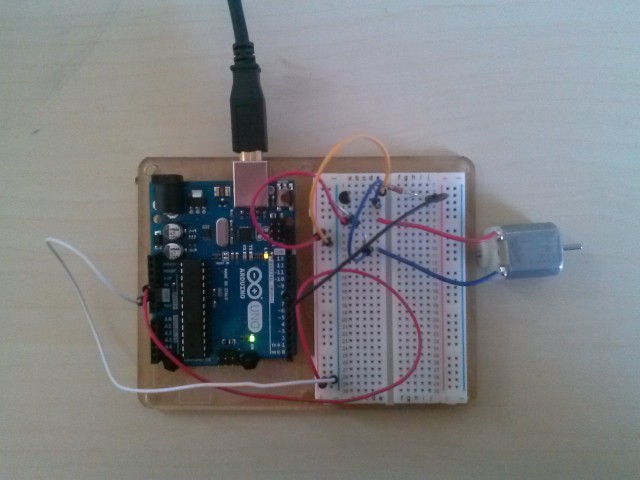
Circuit 3: Toy Motor
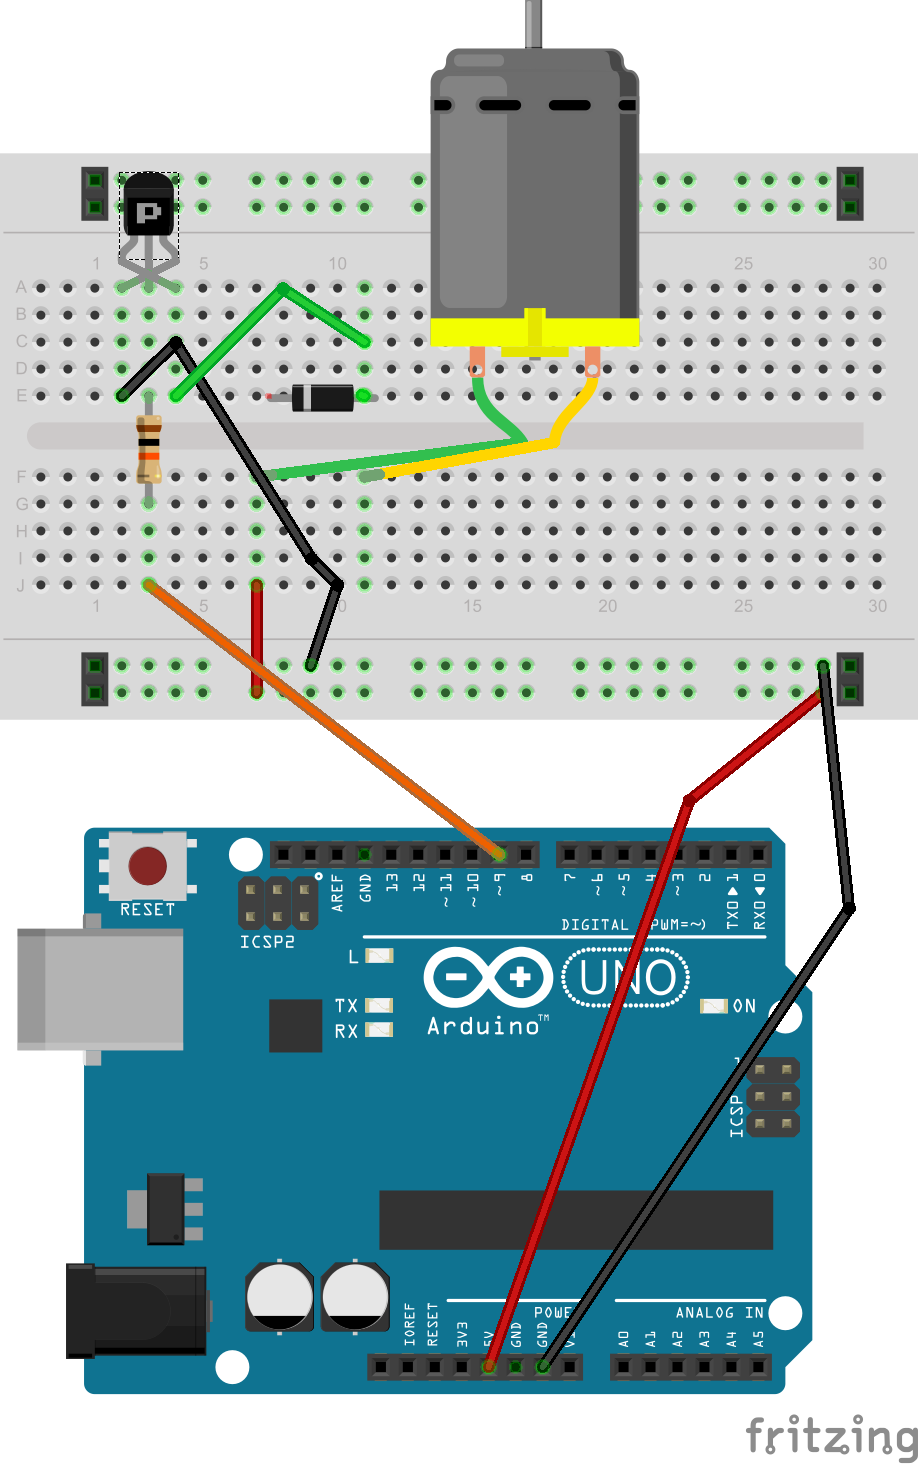
Circuit 3 diagram
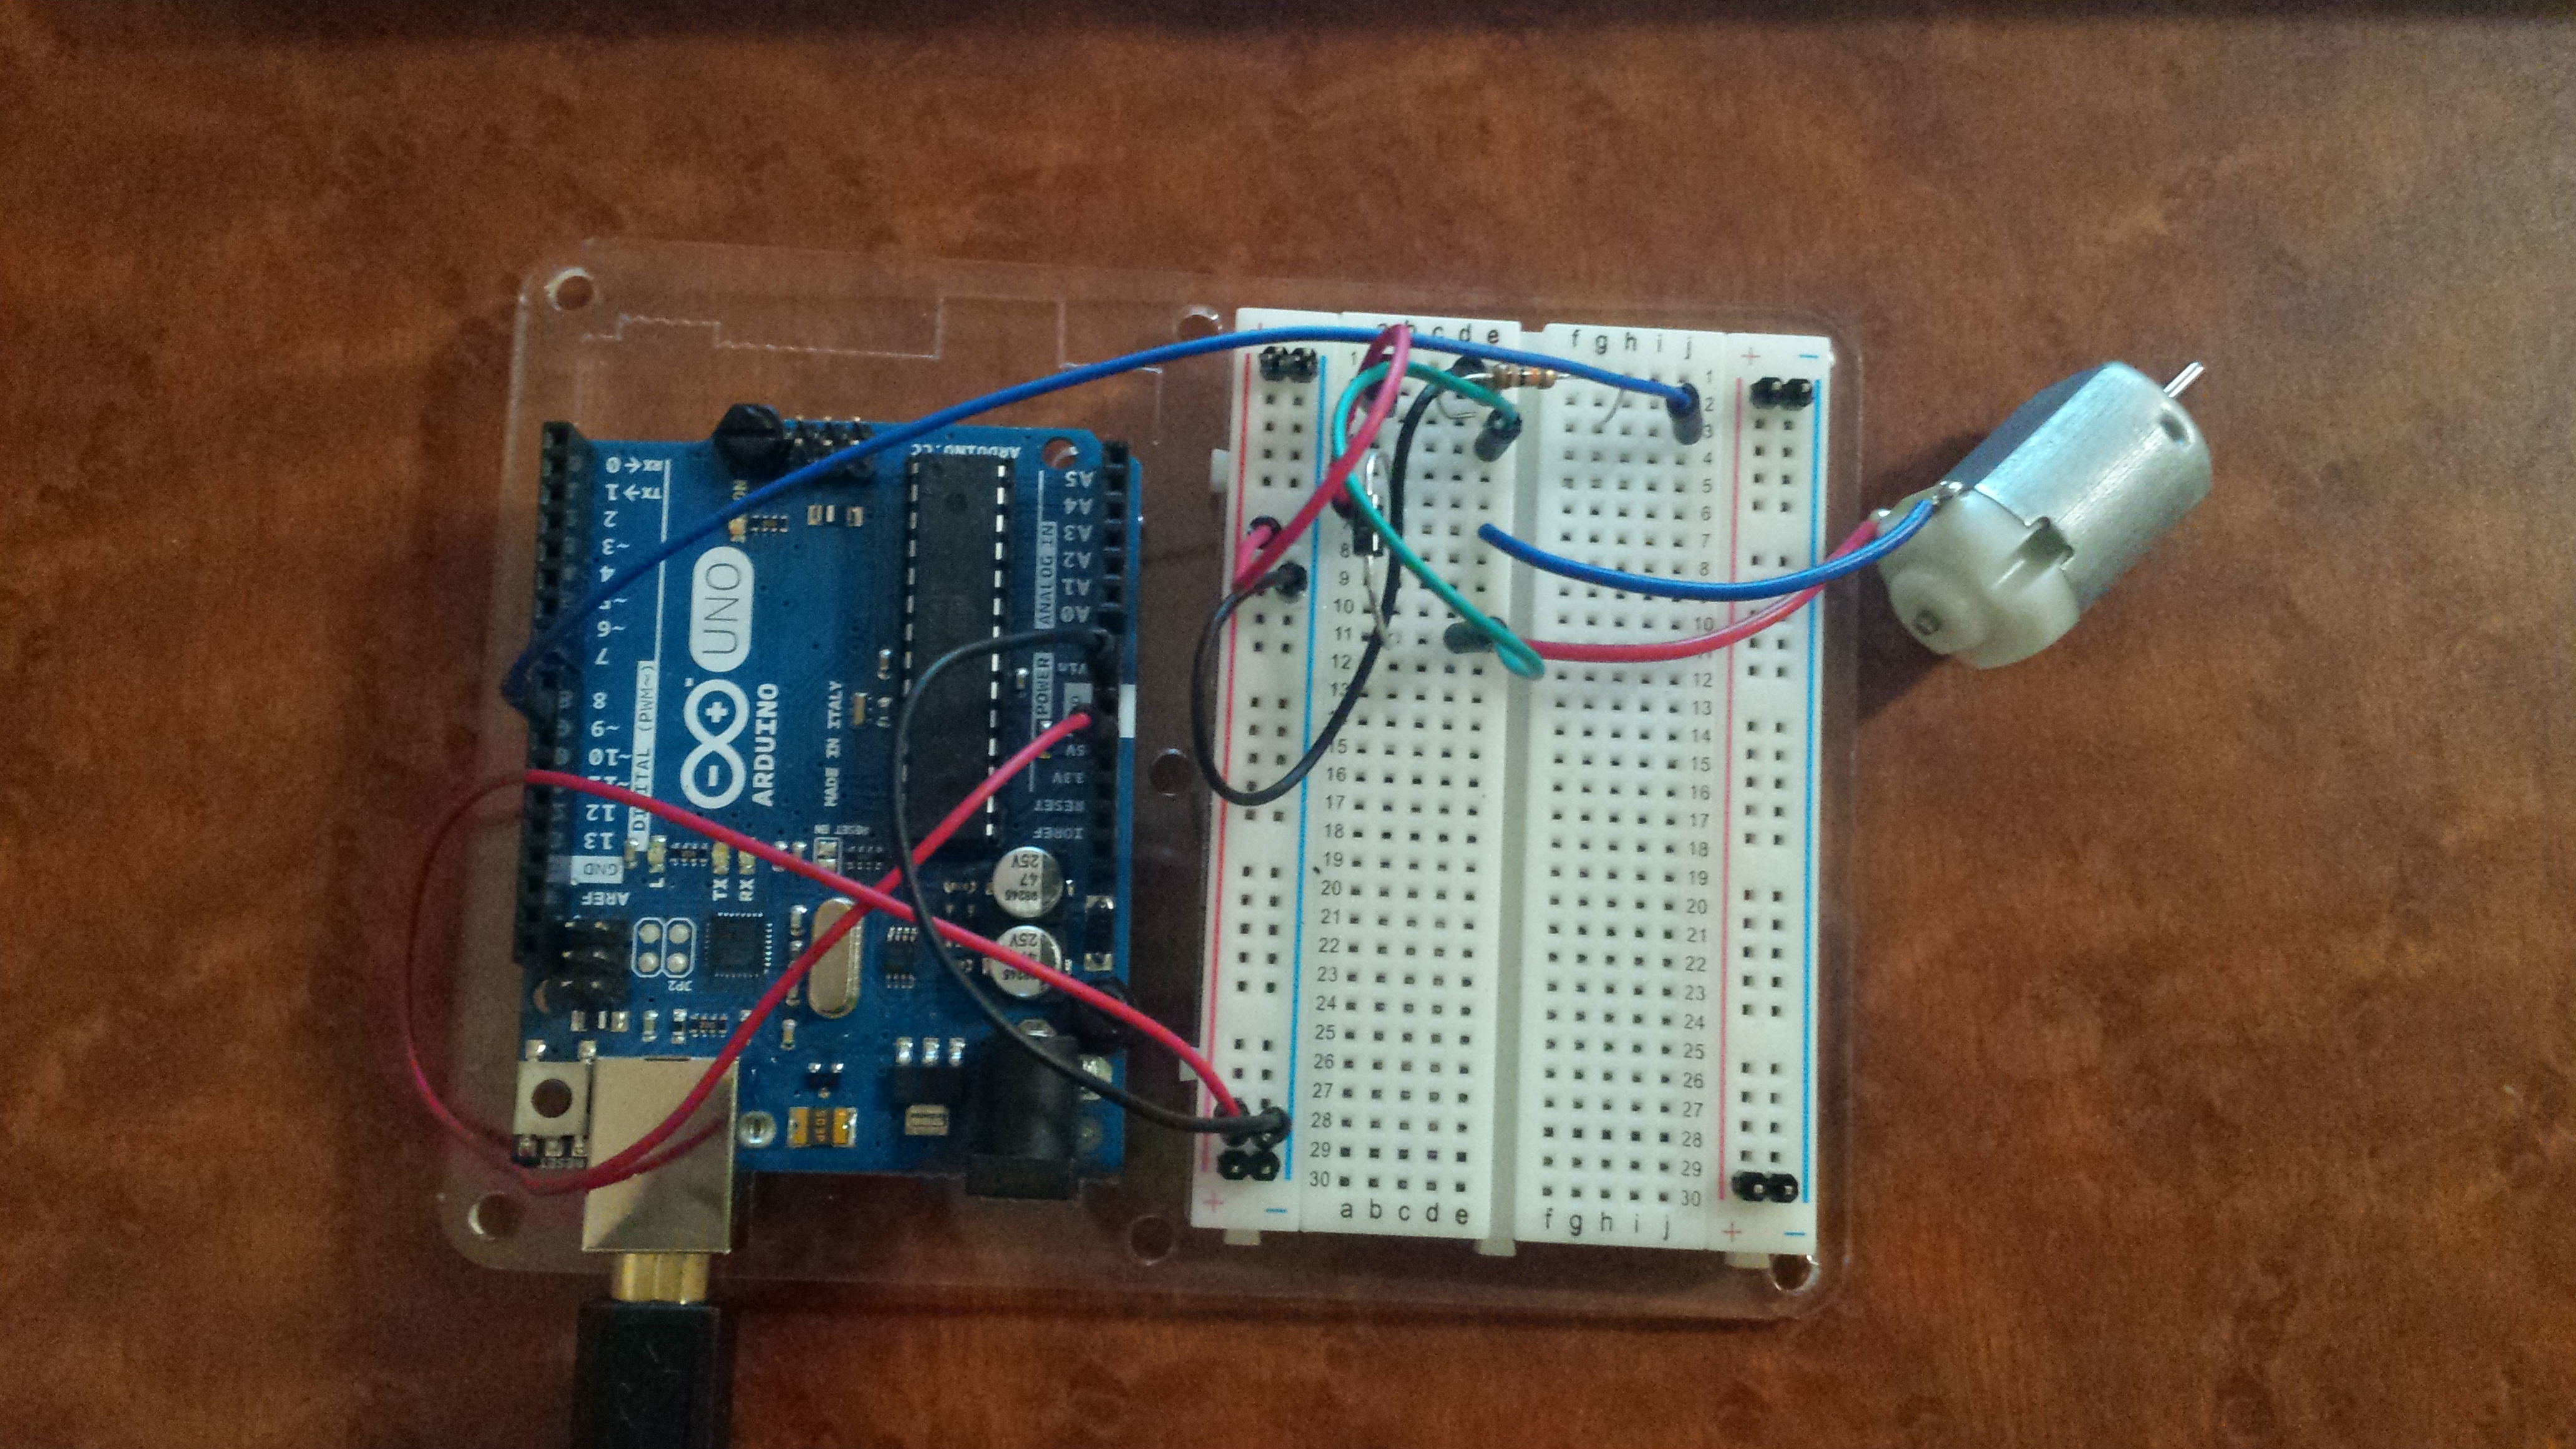
Circuit 3
Code:
/* -----------------------------------------------------------
* | Arduino Experimentation Kit Example Code |
* | CIRC-03 .: Spin Motor Spin :. (Transistor and Motor) |
* -----------------------------------------------------------
*
* The Arduinos pins are great for driving LEDs however if you hook
* up something that requires more power you will quickly break them.
* To control bigger items we need the help of a transistor.
* Here we will use a transistor to control a small toy motor
*
* http://tinyurl.com/d4wht7
*
*/
int motorPin = 9; // define the pin the motor is connected to
// (if you use pin 9,10,11 or 3you can also control speed)
/*
* setup() - this function runs once when you turn your Arduino on
* We set the motors pin to be an output (turning the pin high (+5v) or low (ground) (-))
* rather than an input (checking whether a pin is high or low)
*/
void setup()
{
pinMode(motorPin, OUTPUT);
}
/*
* loop() - this function will start after setup finishes and then repeat
* we call a function called motorOnThenOff()
*/
void loop() // run over and over again
{
motorOnThenOff();
//motorOnThenOffWithSpeed();
//motorAcceleration();
}
/*
* motorOnThenOff() - turns motor on then off
* (notice this code is identical to the code we used for
* the blinking LED)
*/
void motorOnThenOff(){
int onTime = 2500; //the number of milliseconds for the motor to turn on for
int offTime = 1000; //the number of milliseconds for the motor to turn off for
digitalWrite(motorPin, HIGH); // turns the motor On
delay(onTime); // waits for onTime milliseconds
digitalWrite(motorPin, LOW); // turns the motor Off
delay(offTime); // waits for offTime milliseconds
}
/*
* motorOnThenOffWithSpeed() - turns motor on then off but uses speed values as well
* (notice this code is identical to the code we used for
* the blinking LED)
*/
void motorOnThenOffWithSpeed(){
int onSpeed = 200; // a number between 0 (stopped) and 255 (full speed)
int onTime = 2500; //the number of milliseconds for the motor to turn on for
int offSpeed = 50; // a number between 0 (stopped) and 255 (full speed)
int offTime = 1000; //the number of milliseconds for the motor to turn off for
analogWrite(motorPin, onSpeed); // turns the motor On
delay(onTime); // waits for onTime milliseconds
analogWrite(motorPin, offSpeed); // turns the motor Off
delay(offTime); // waits for offTime milliseconds
}
/*
* motorAcceleration() - accelerates the motor to full speed then
* back down to zero
*/
void motorAcceleration(){
int delayTime = 50; //milliseconds between each speed step
//Accelerates the motor
for(int i = 0; i < 256; i++){ //goes through each speed from 0 to 255 analogWrite(motorPin, i); //sets the new speed delay(delayTime); // waits for delayTime milliseconds } //Decelerates the motor for(int i = 255; i >= 0; i--){ //goes through each speed from 255 to 0
analogWrite(motorPin, i); //sets the new speed
delay(delayTime); // waits for delayTime milliseconds
}
}
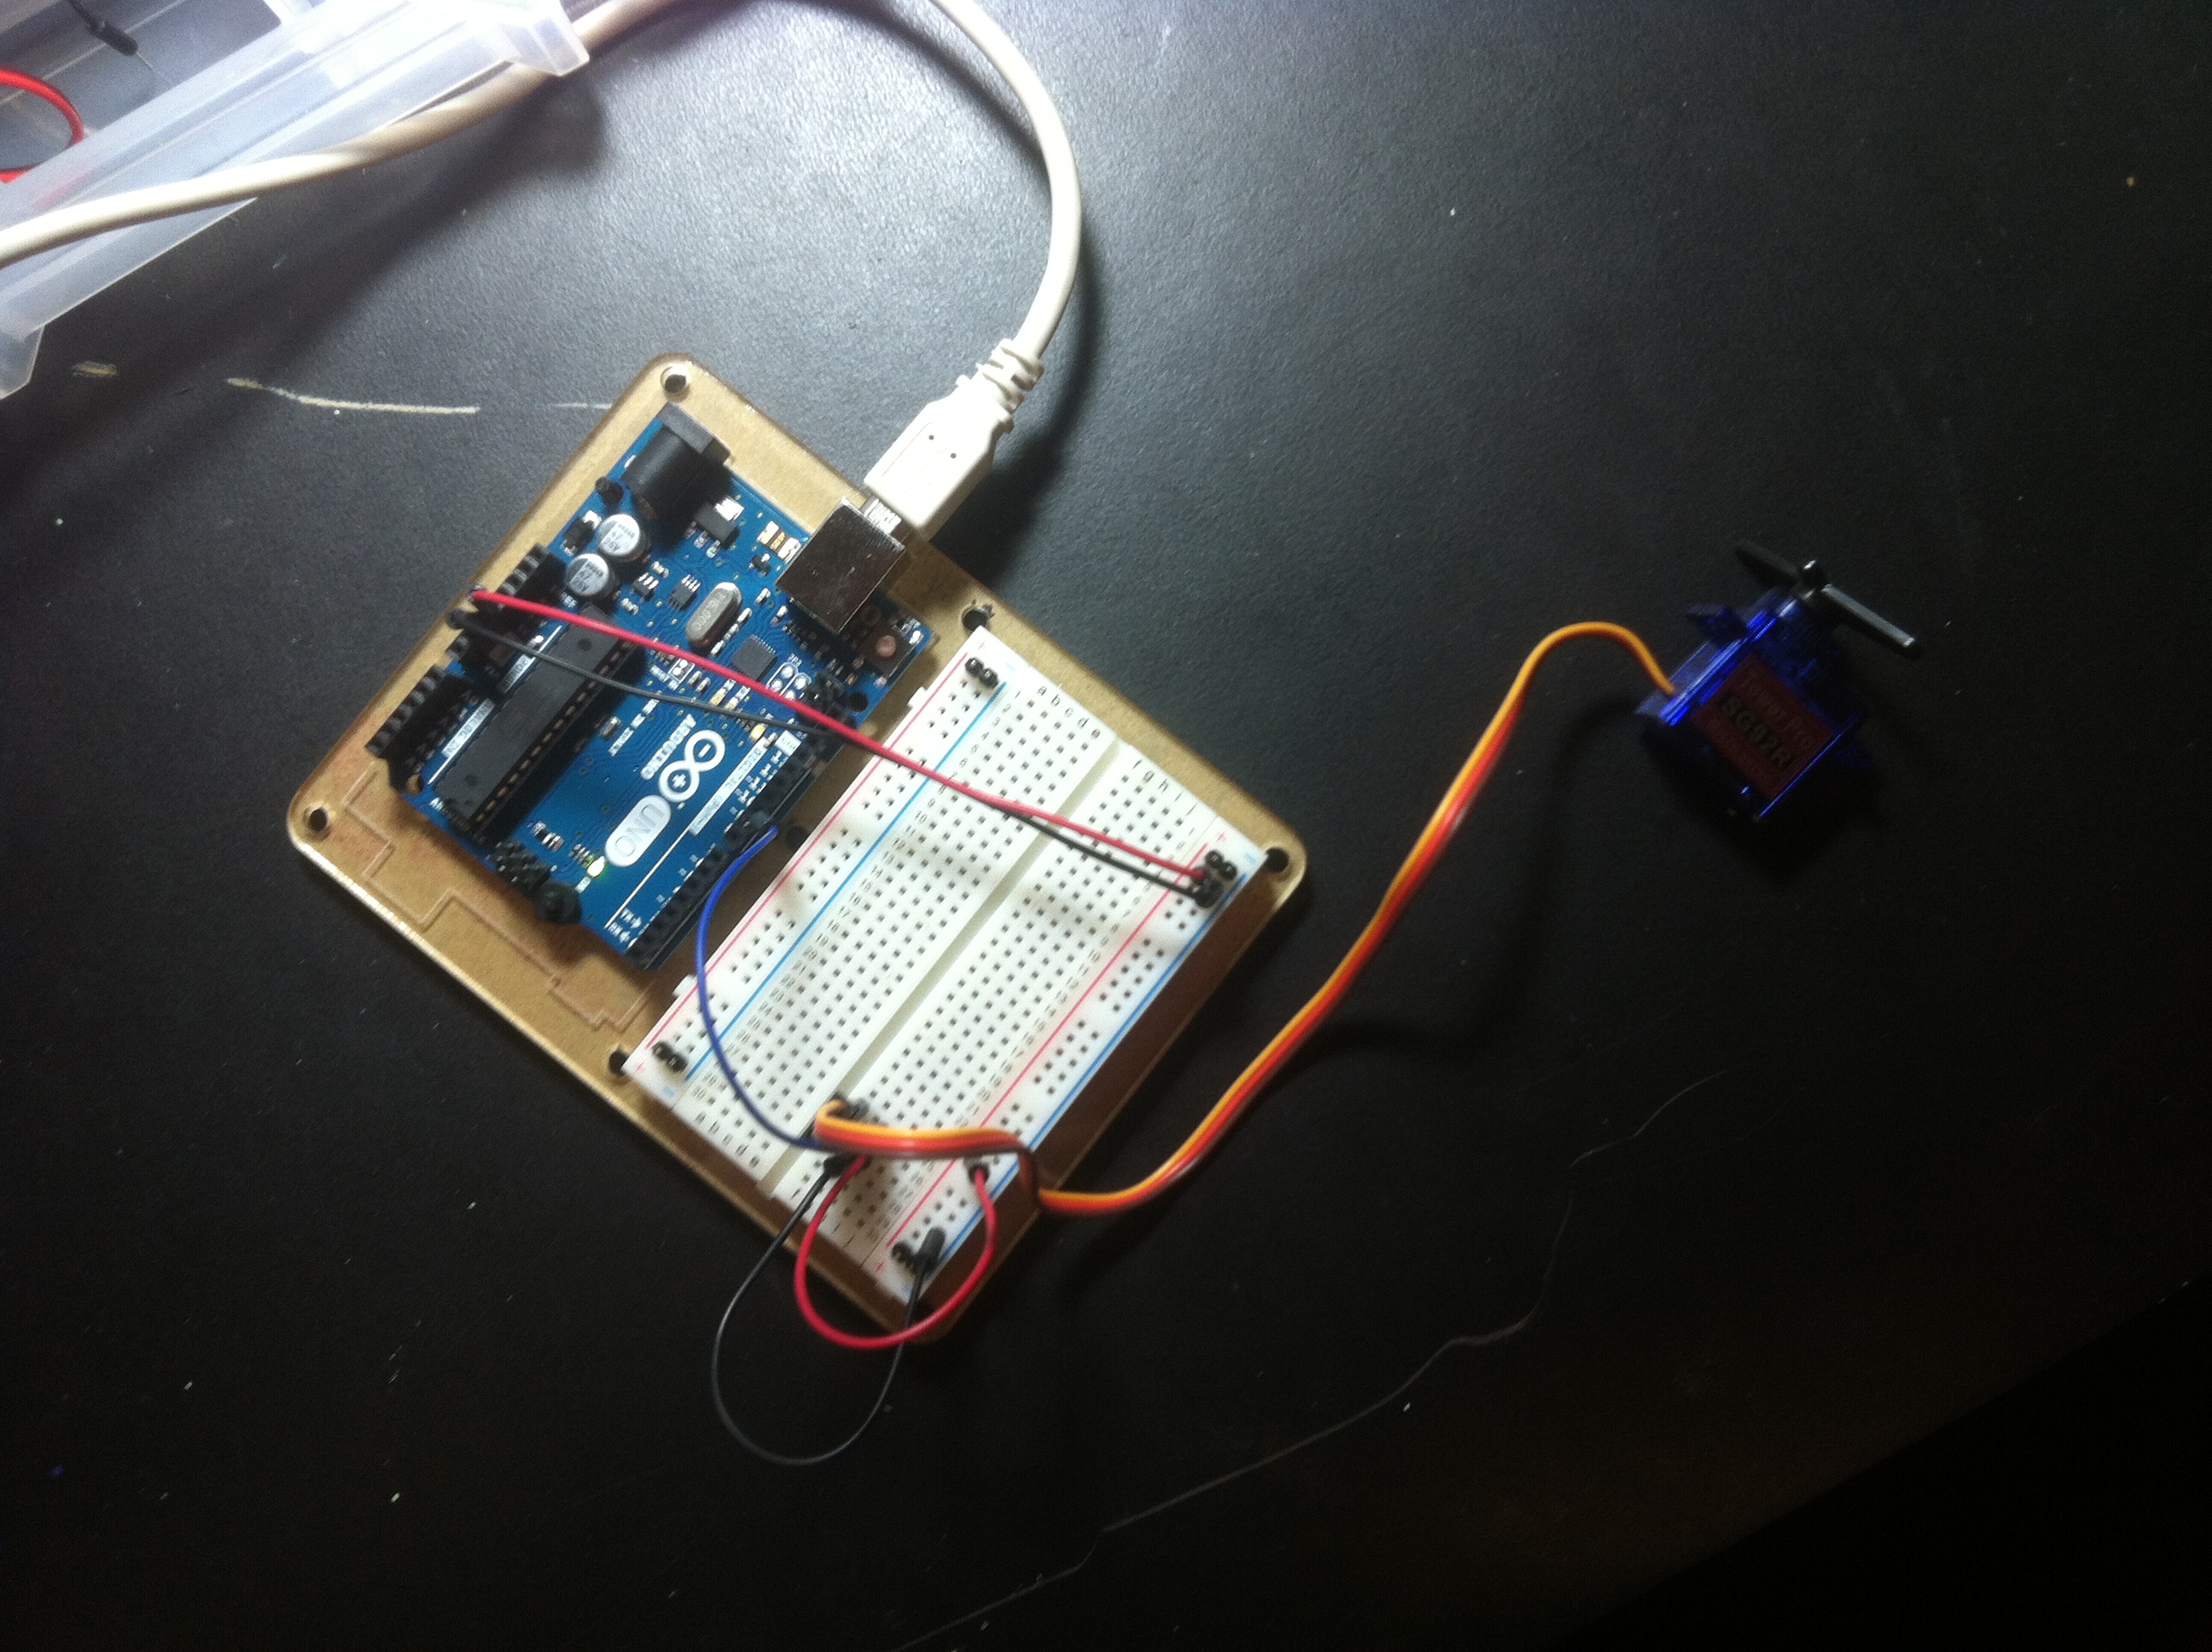
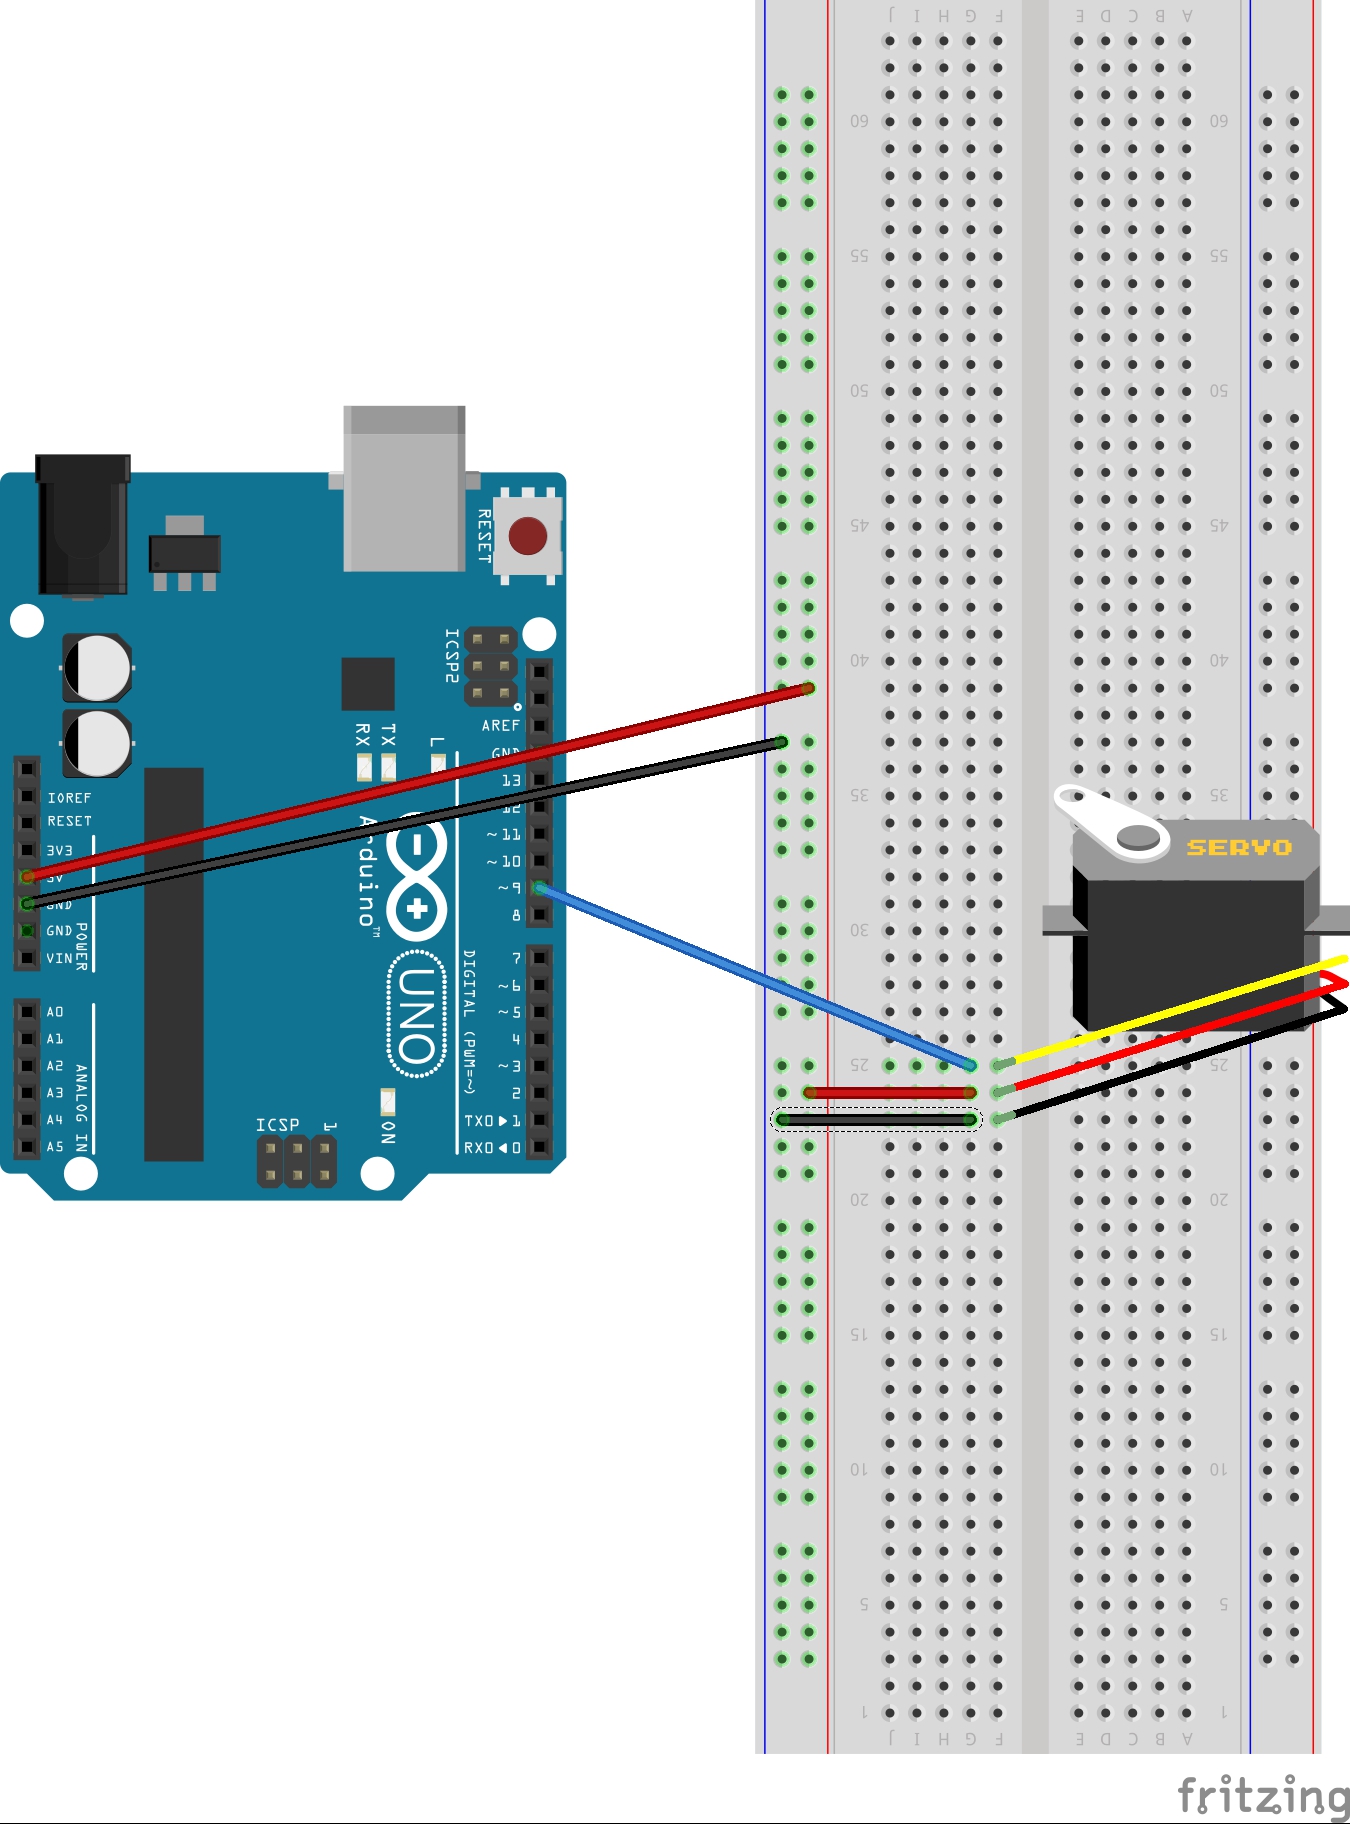
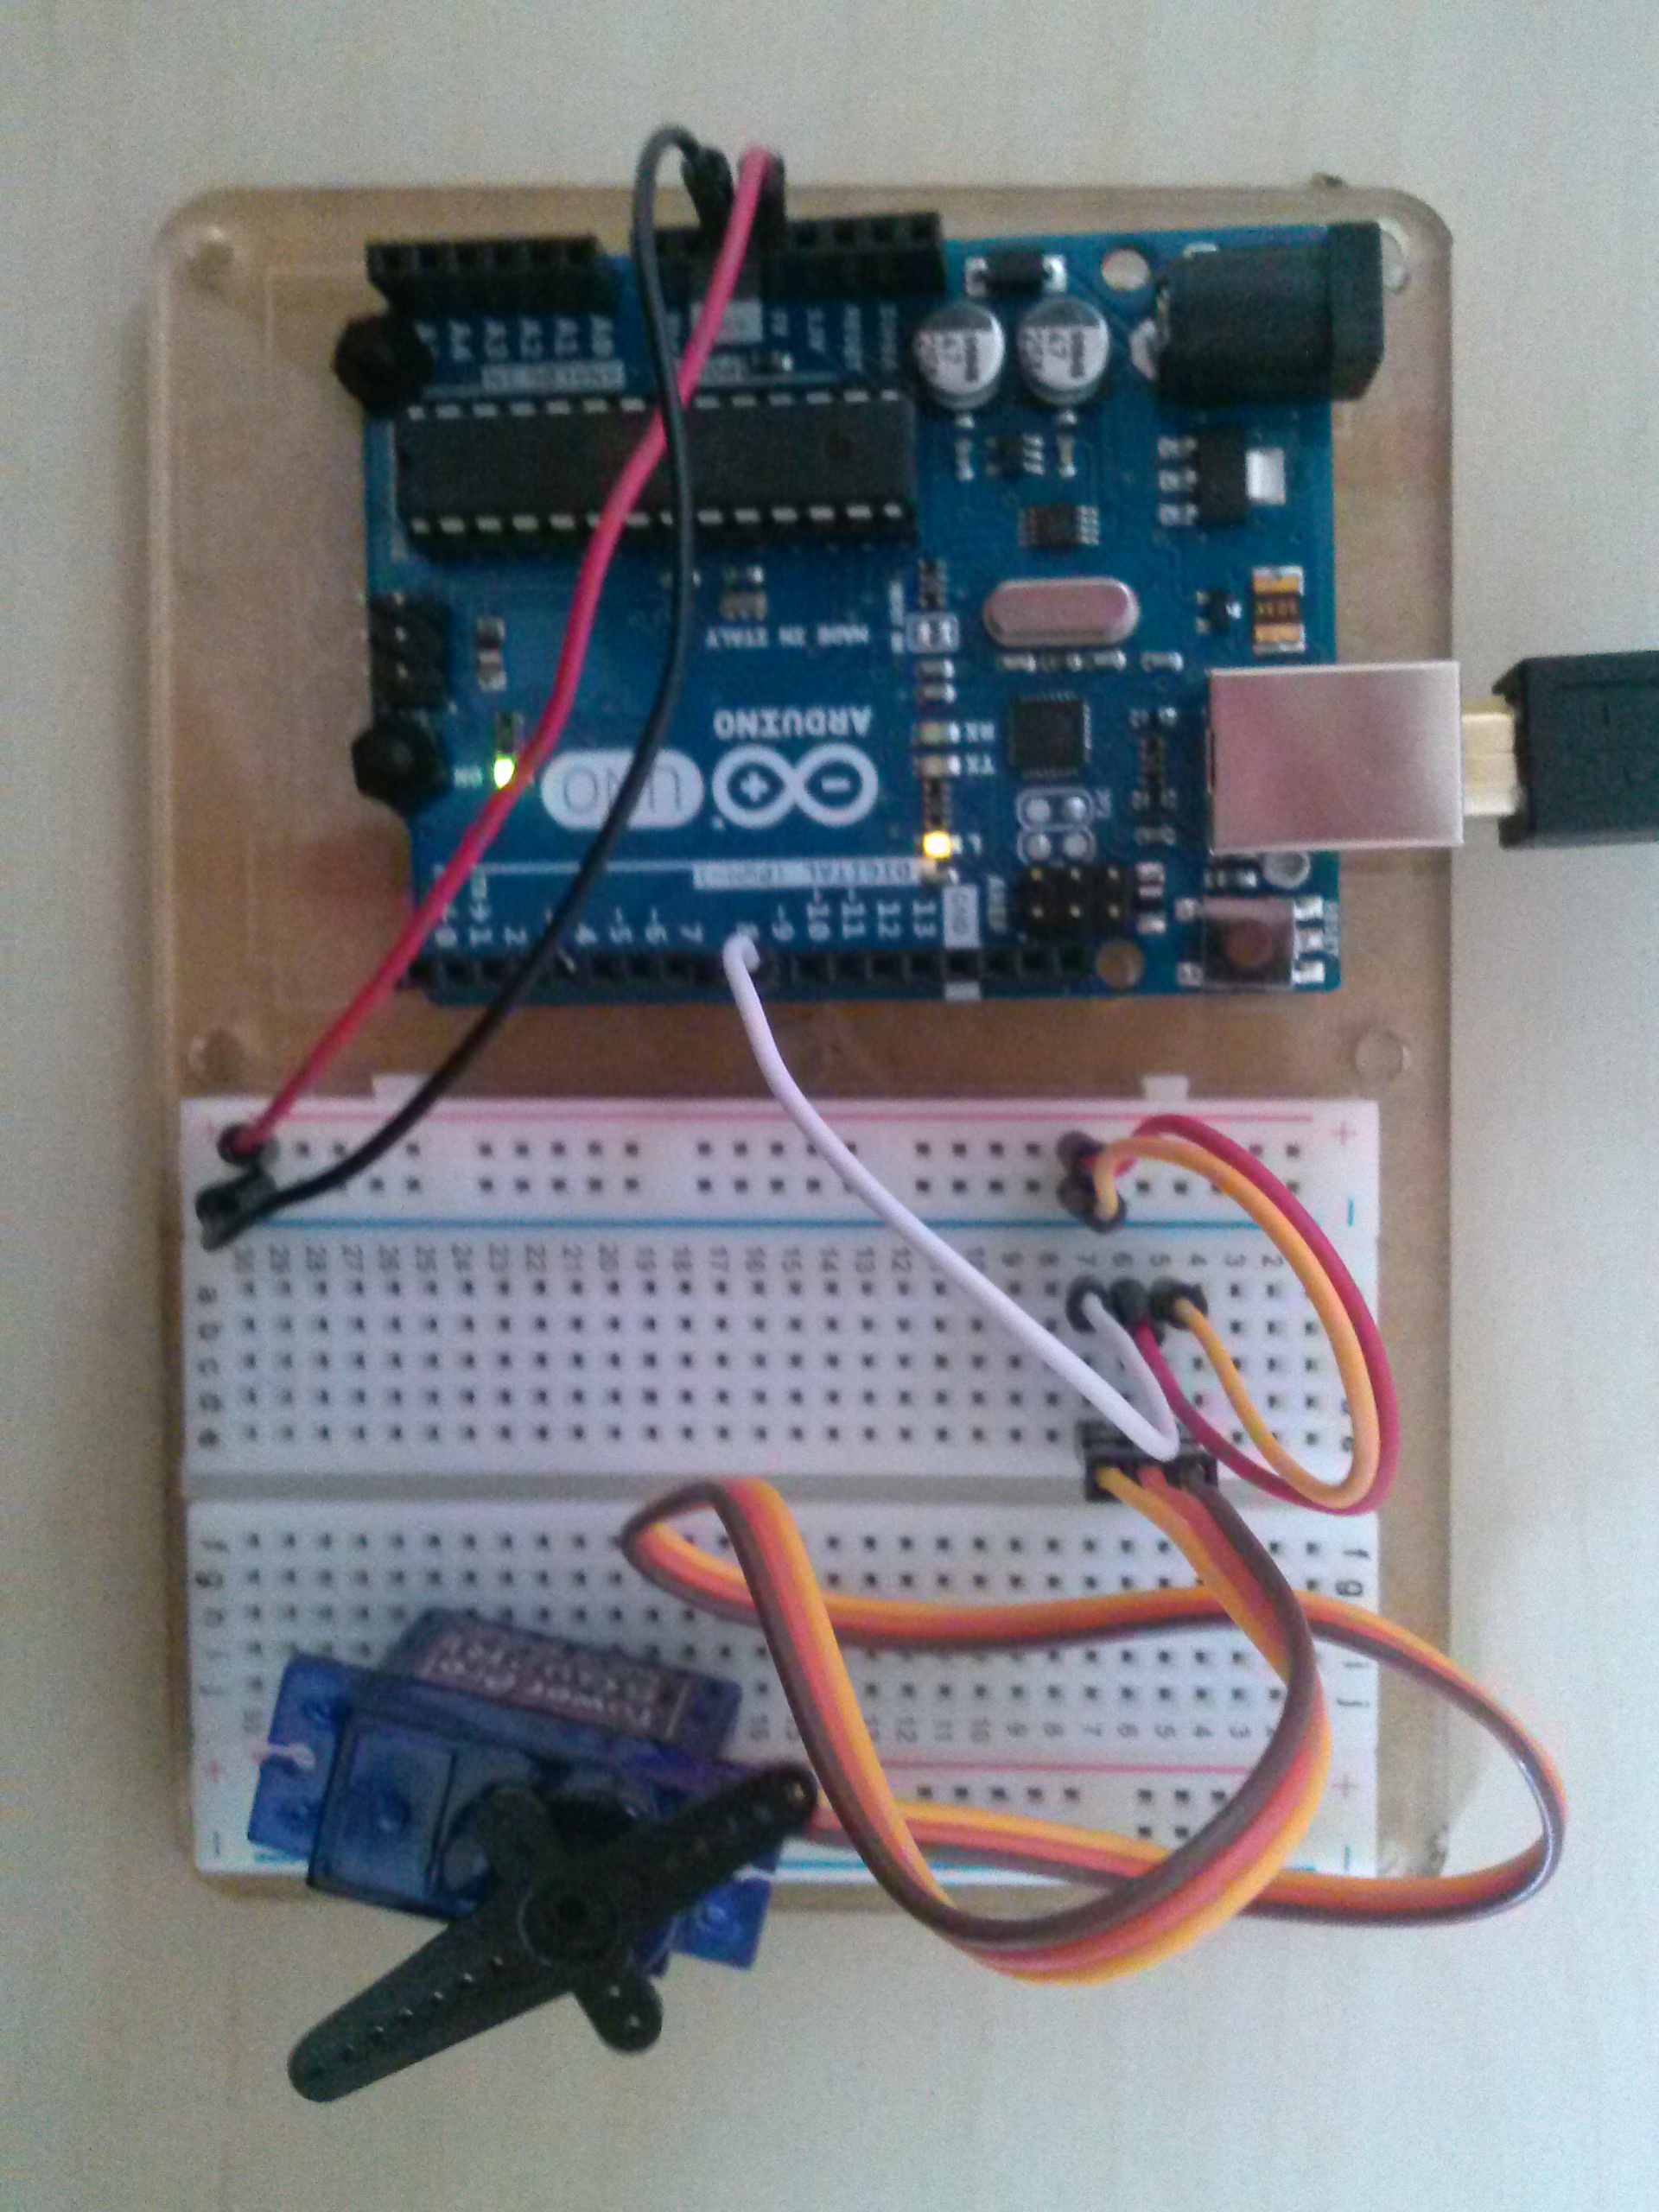
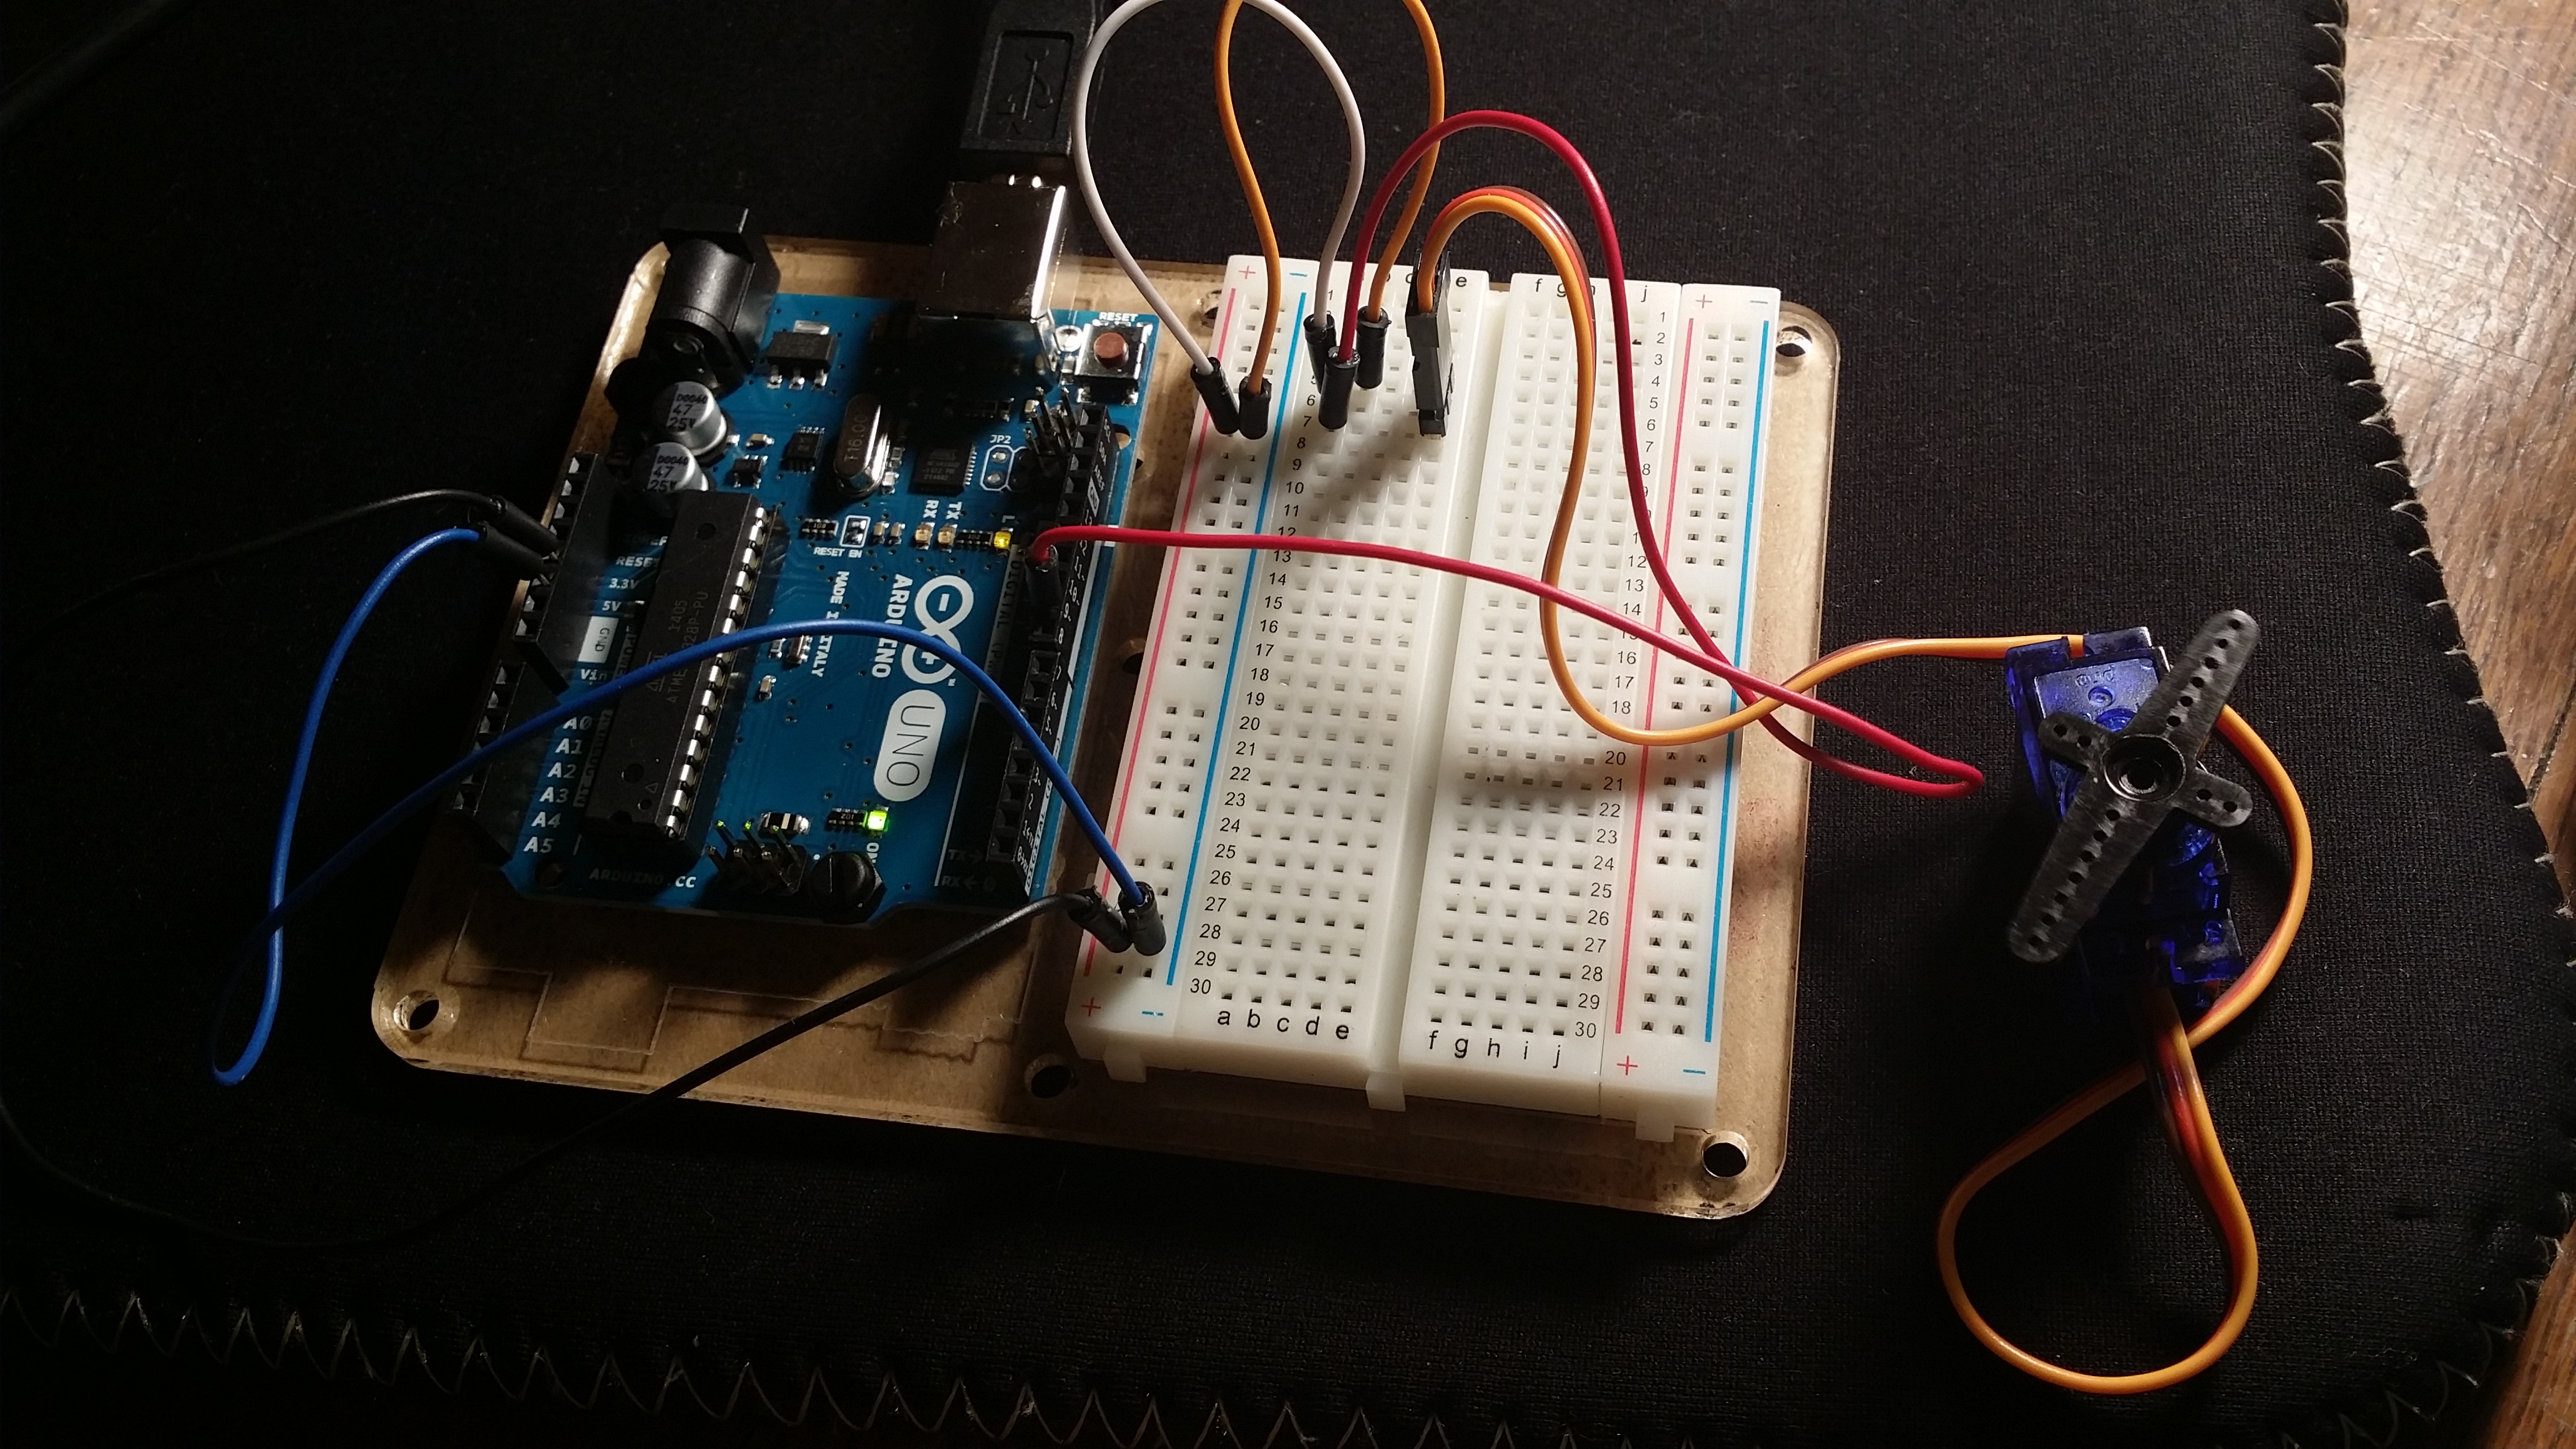
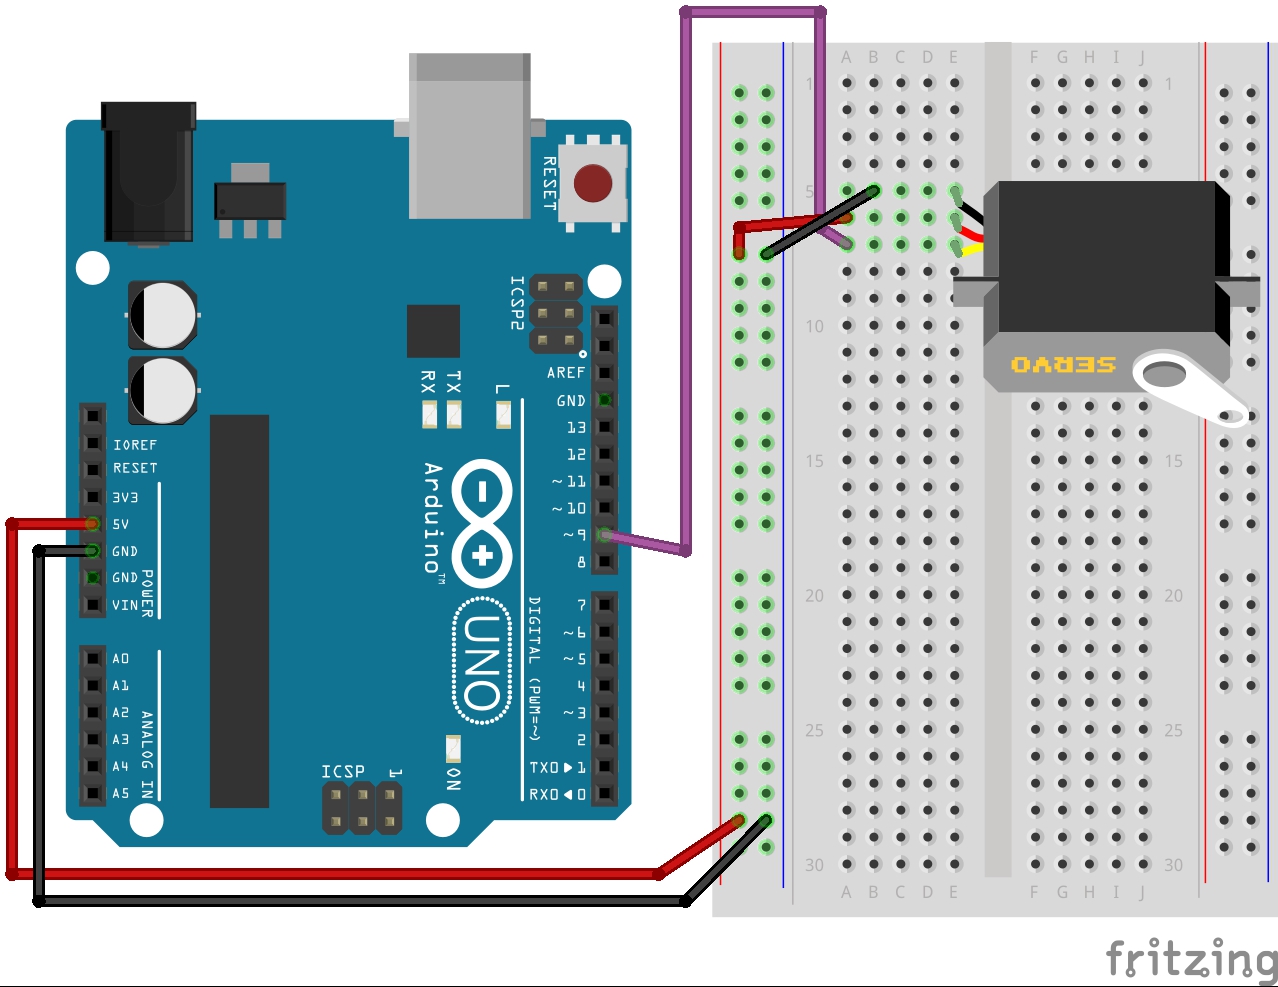
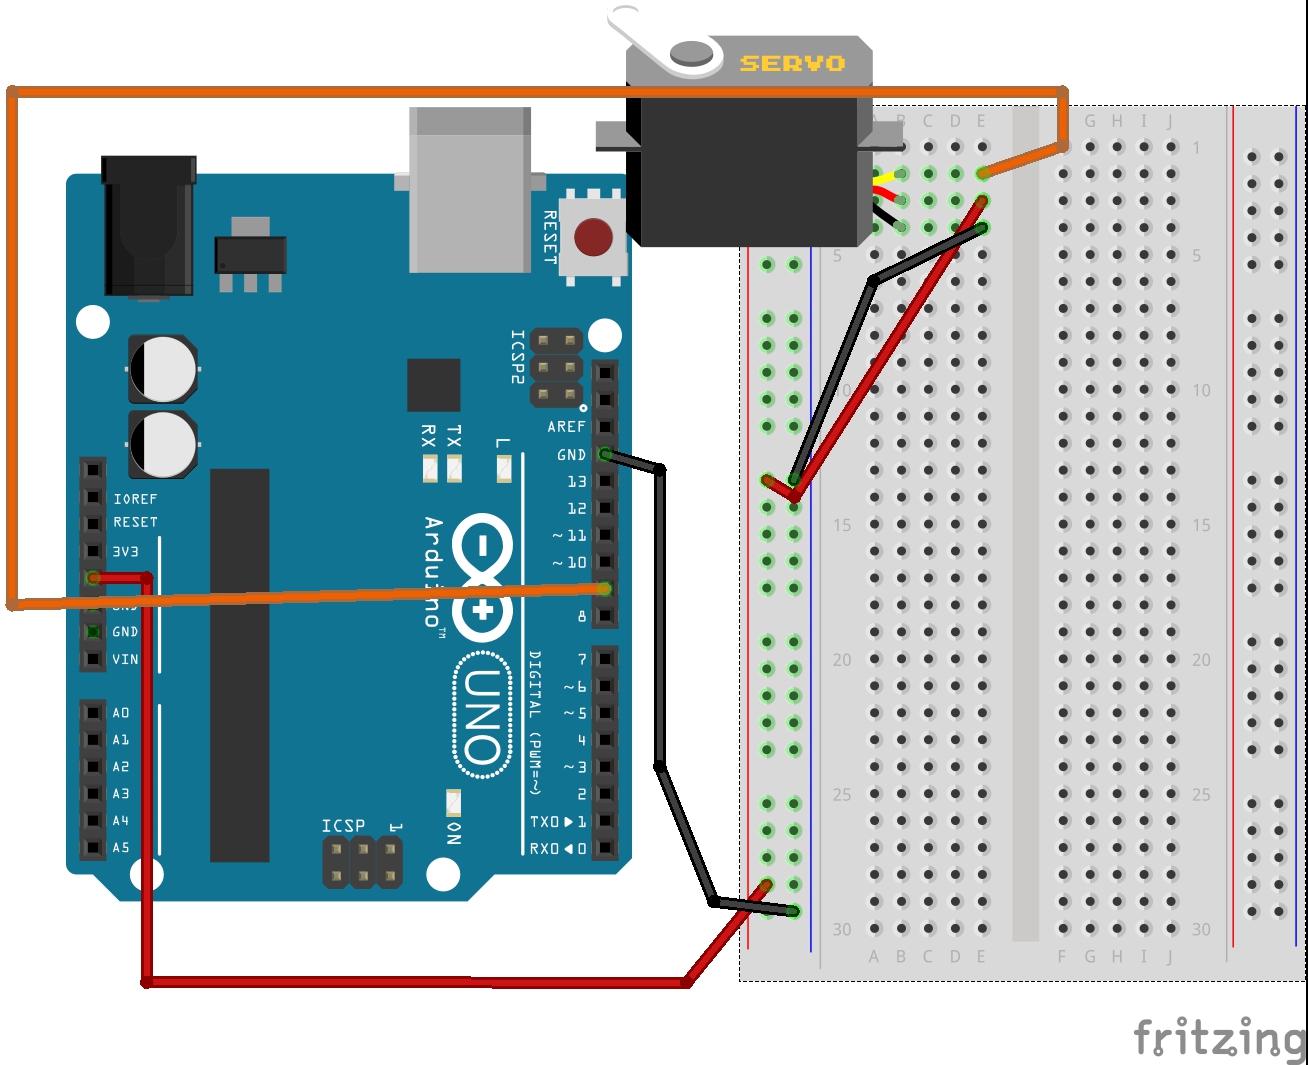
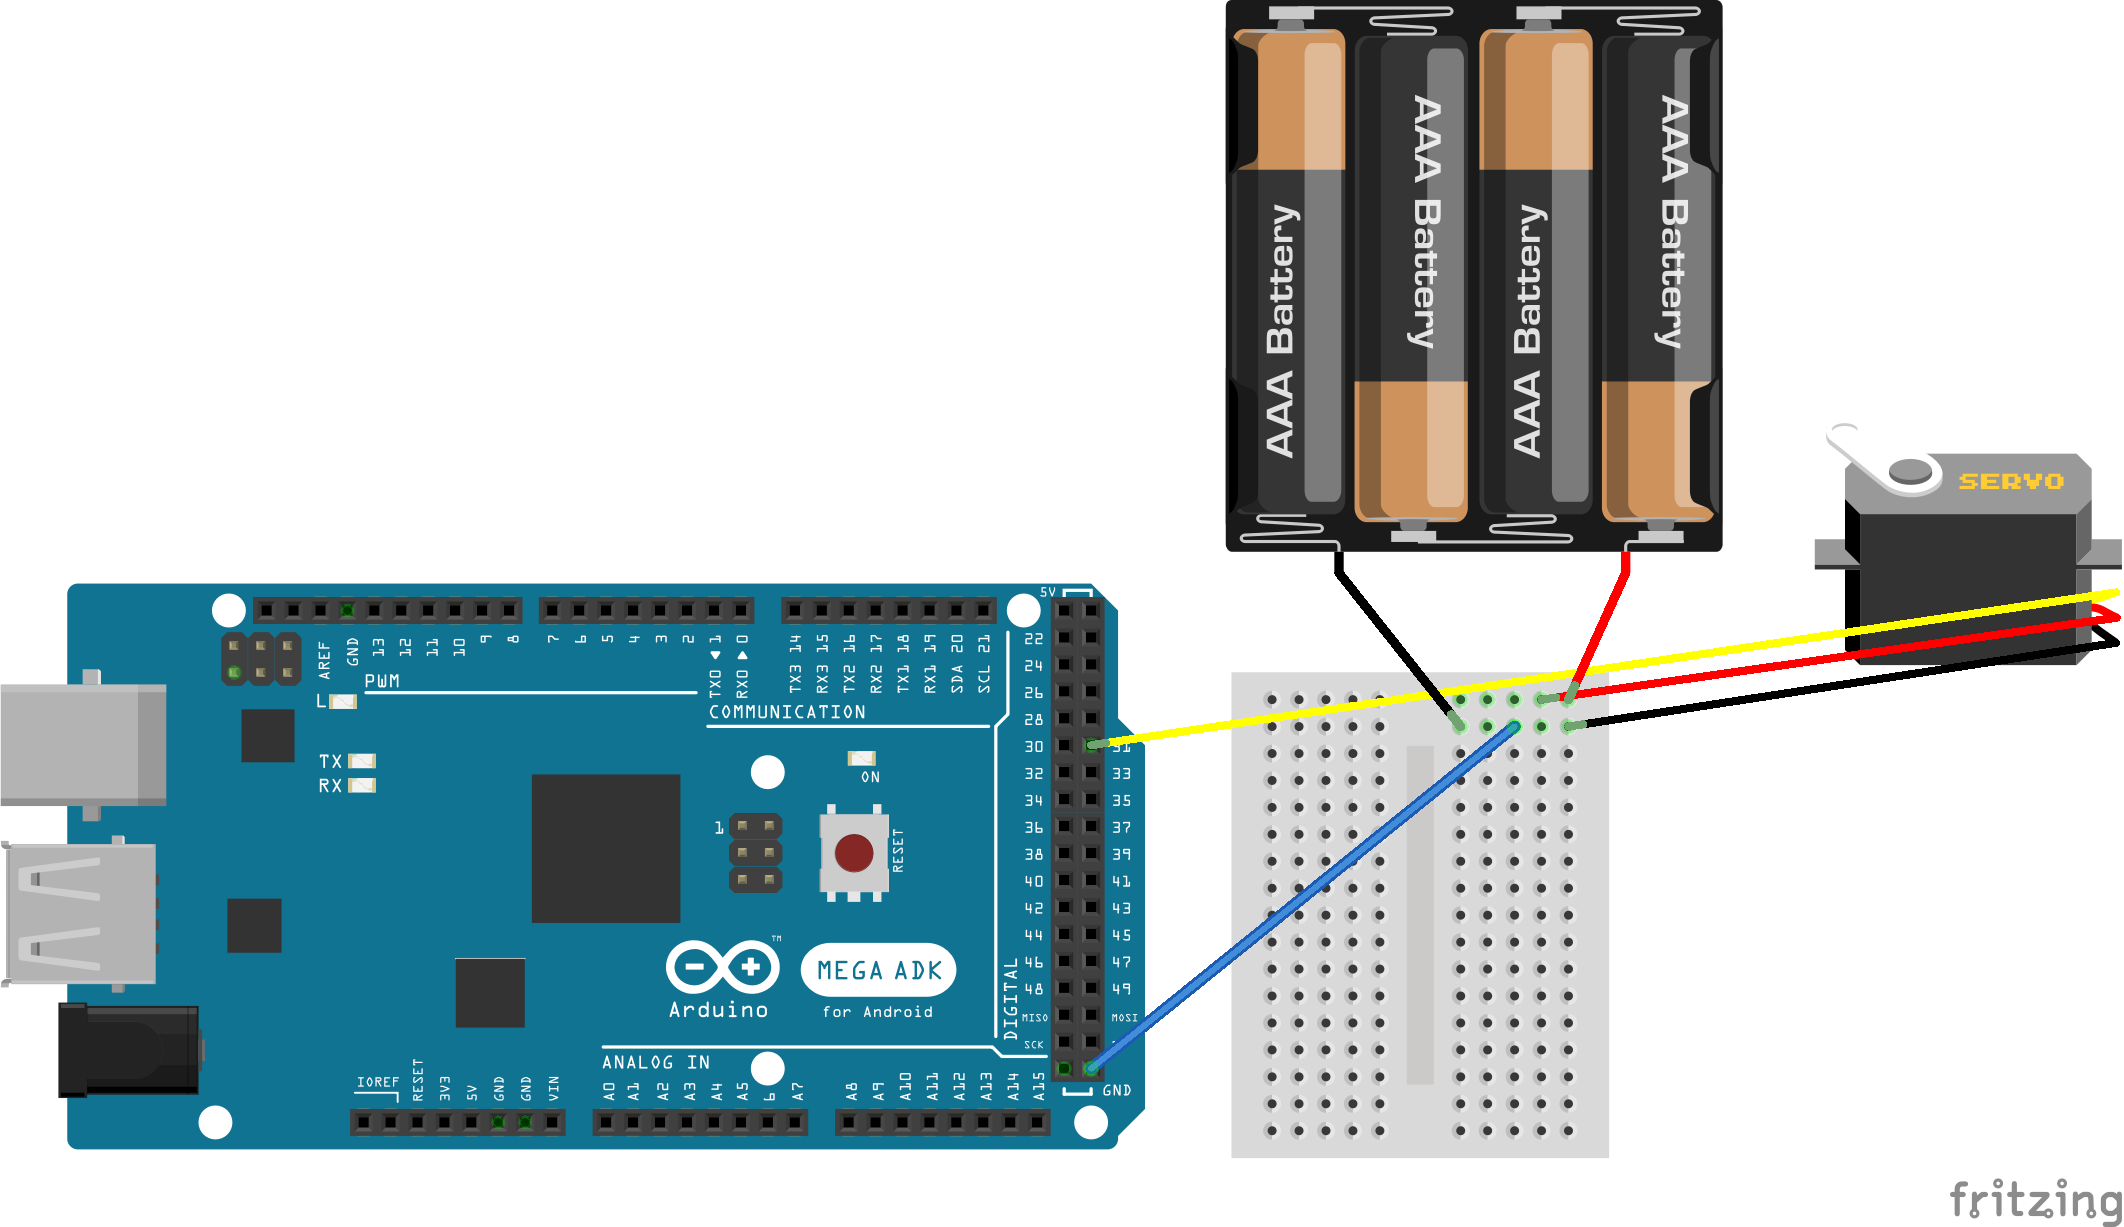
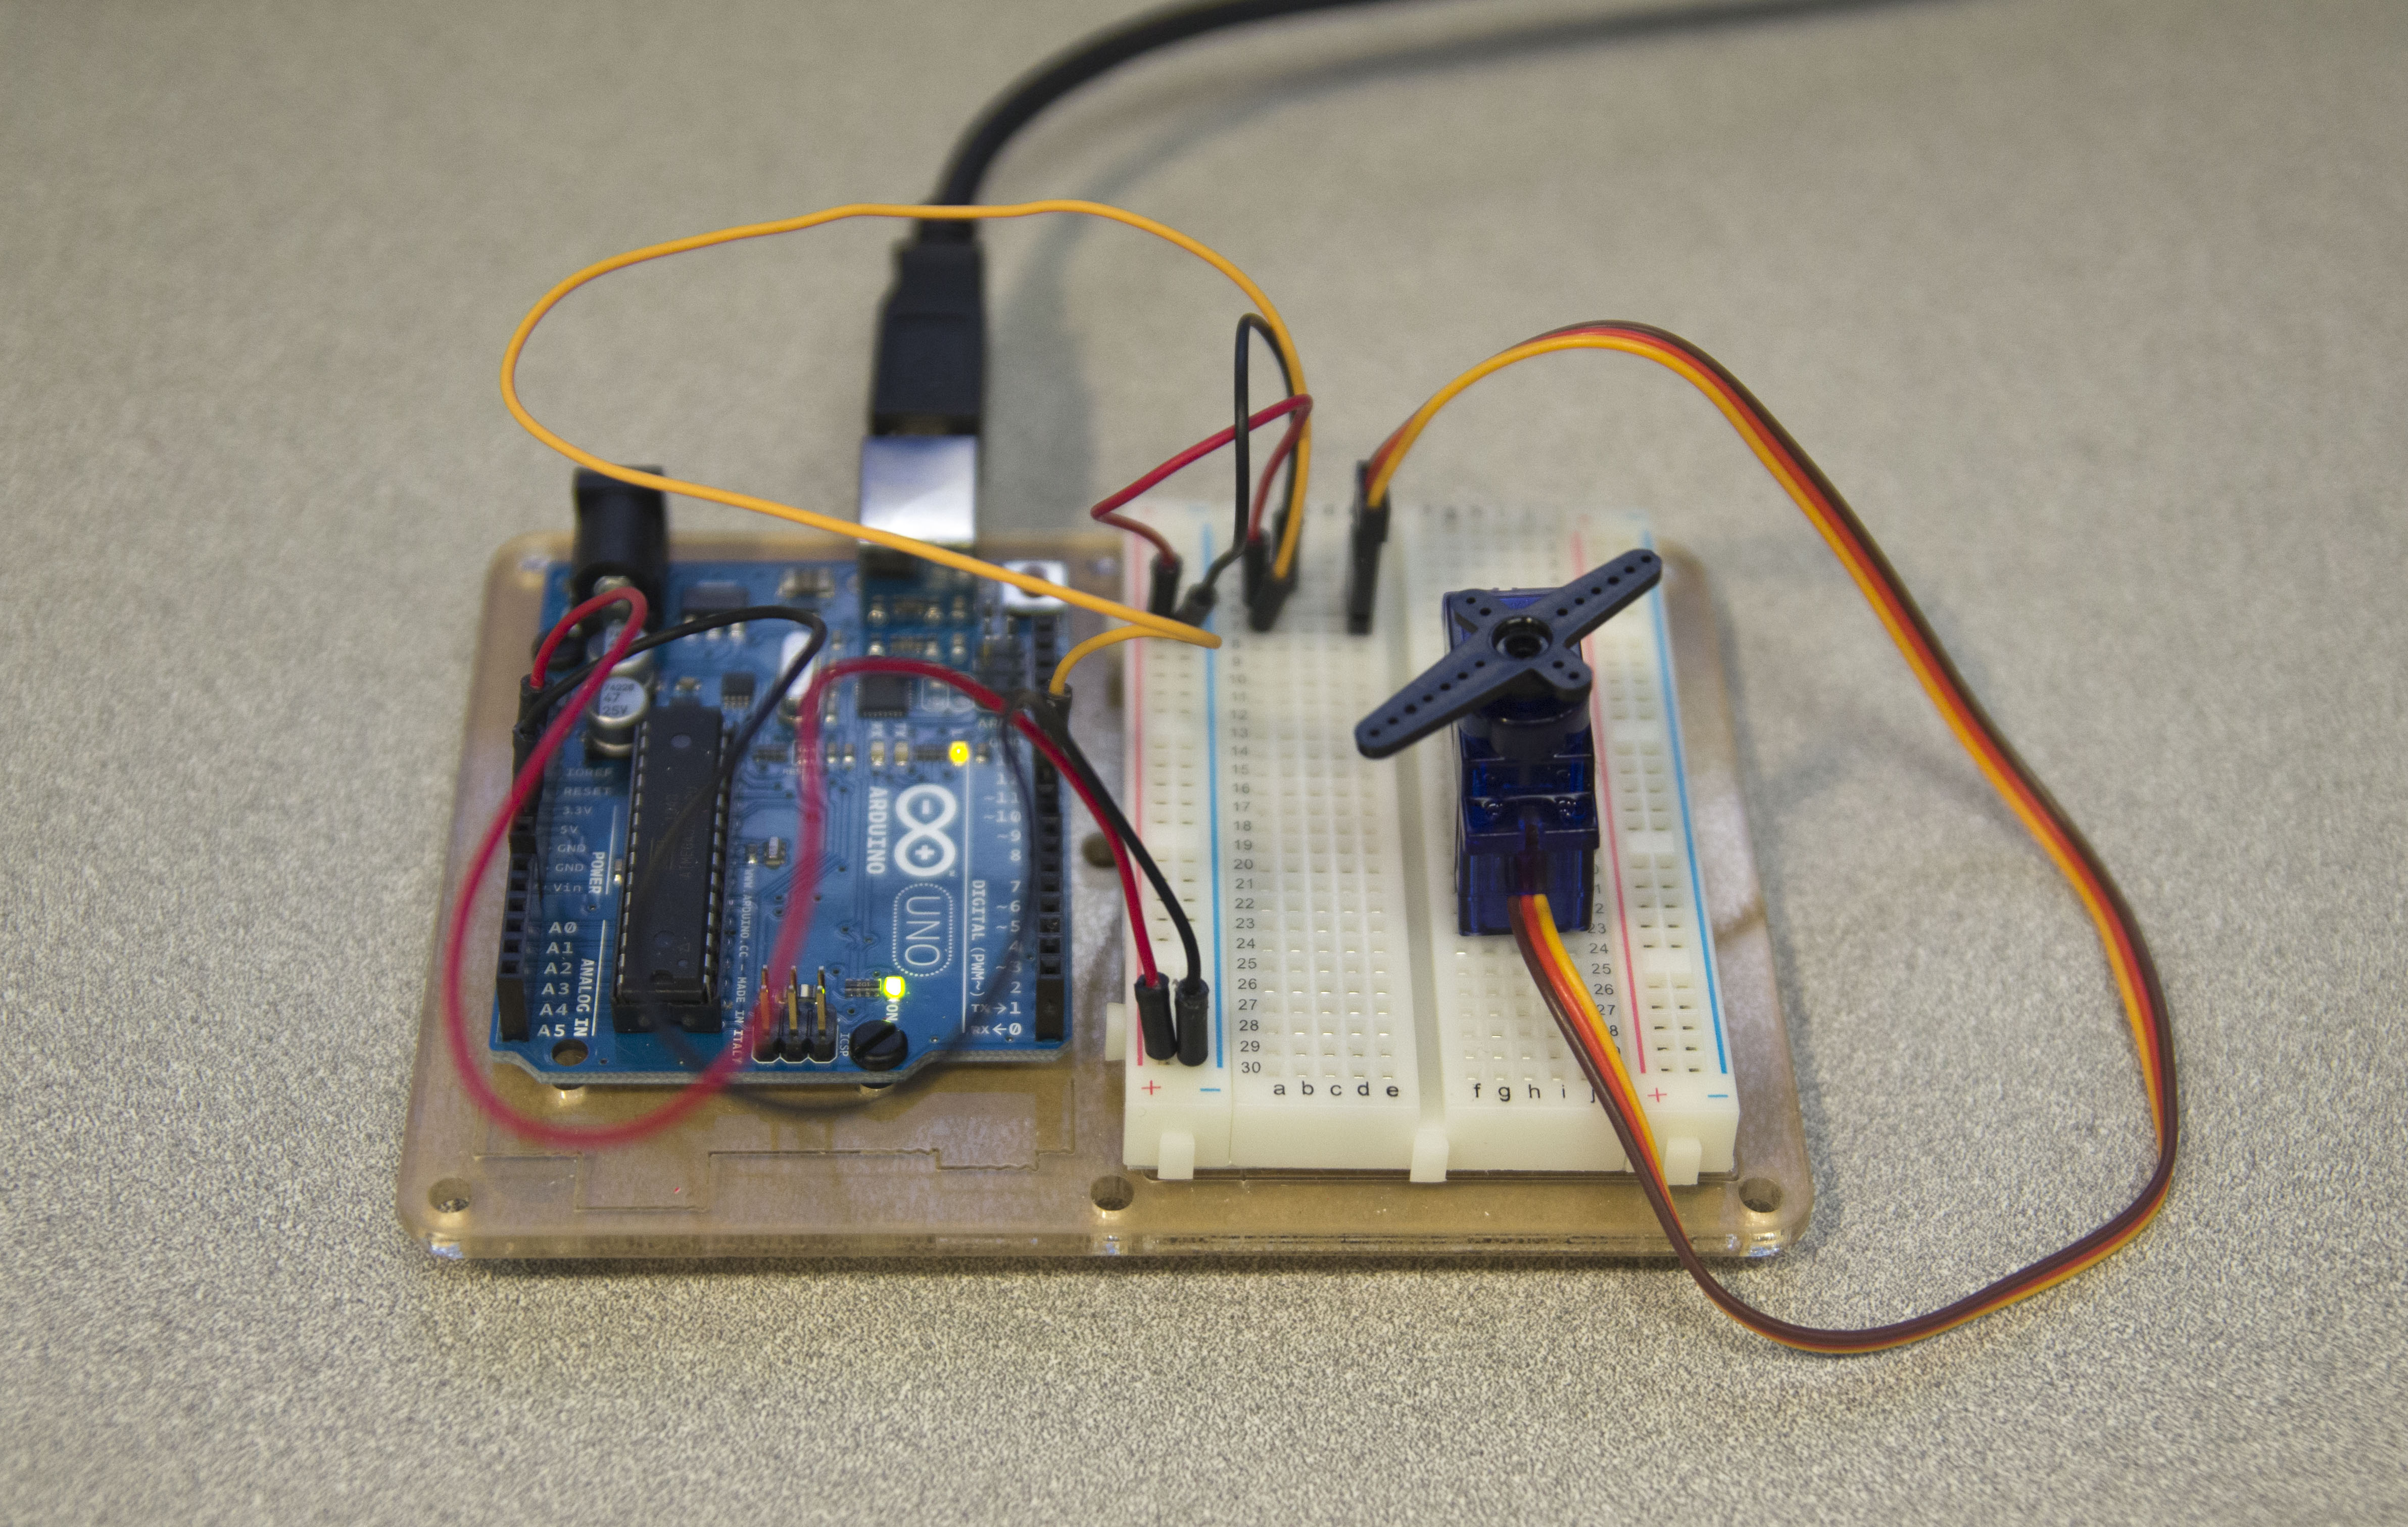
Circuit 4: Servo
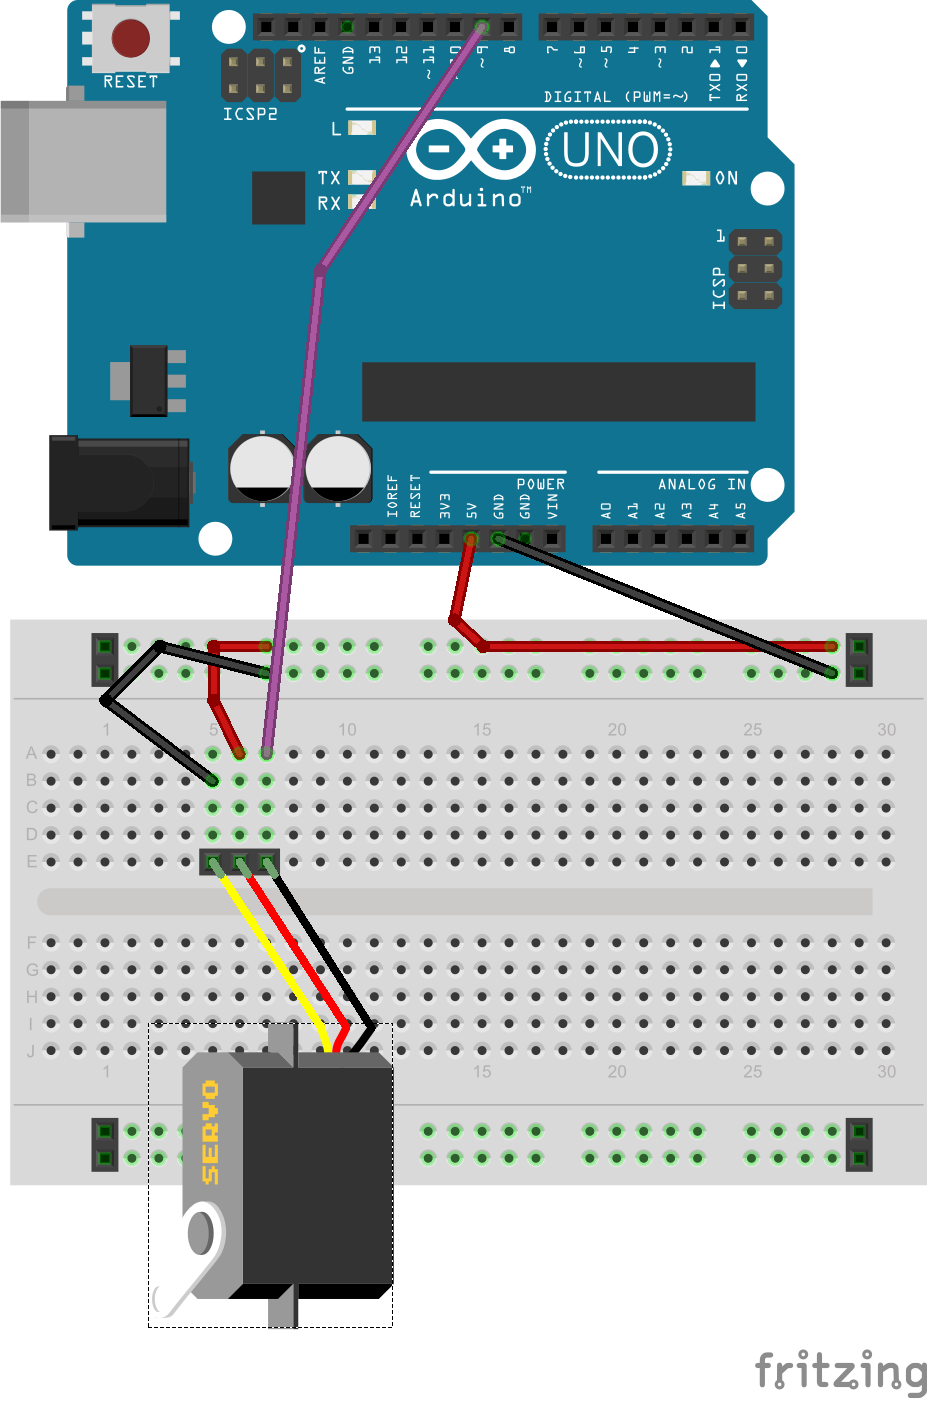
Circuit 4 diagram
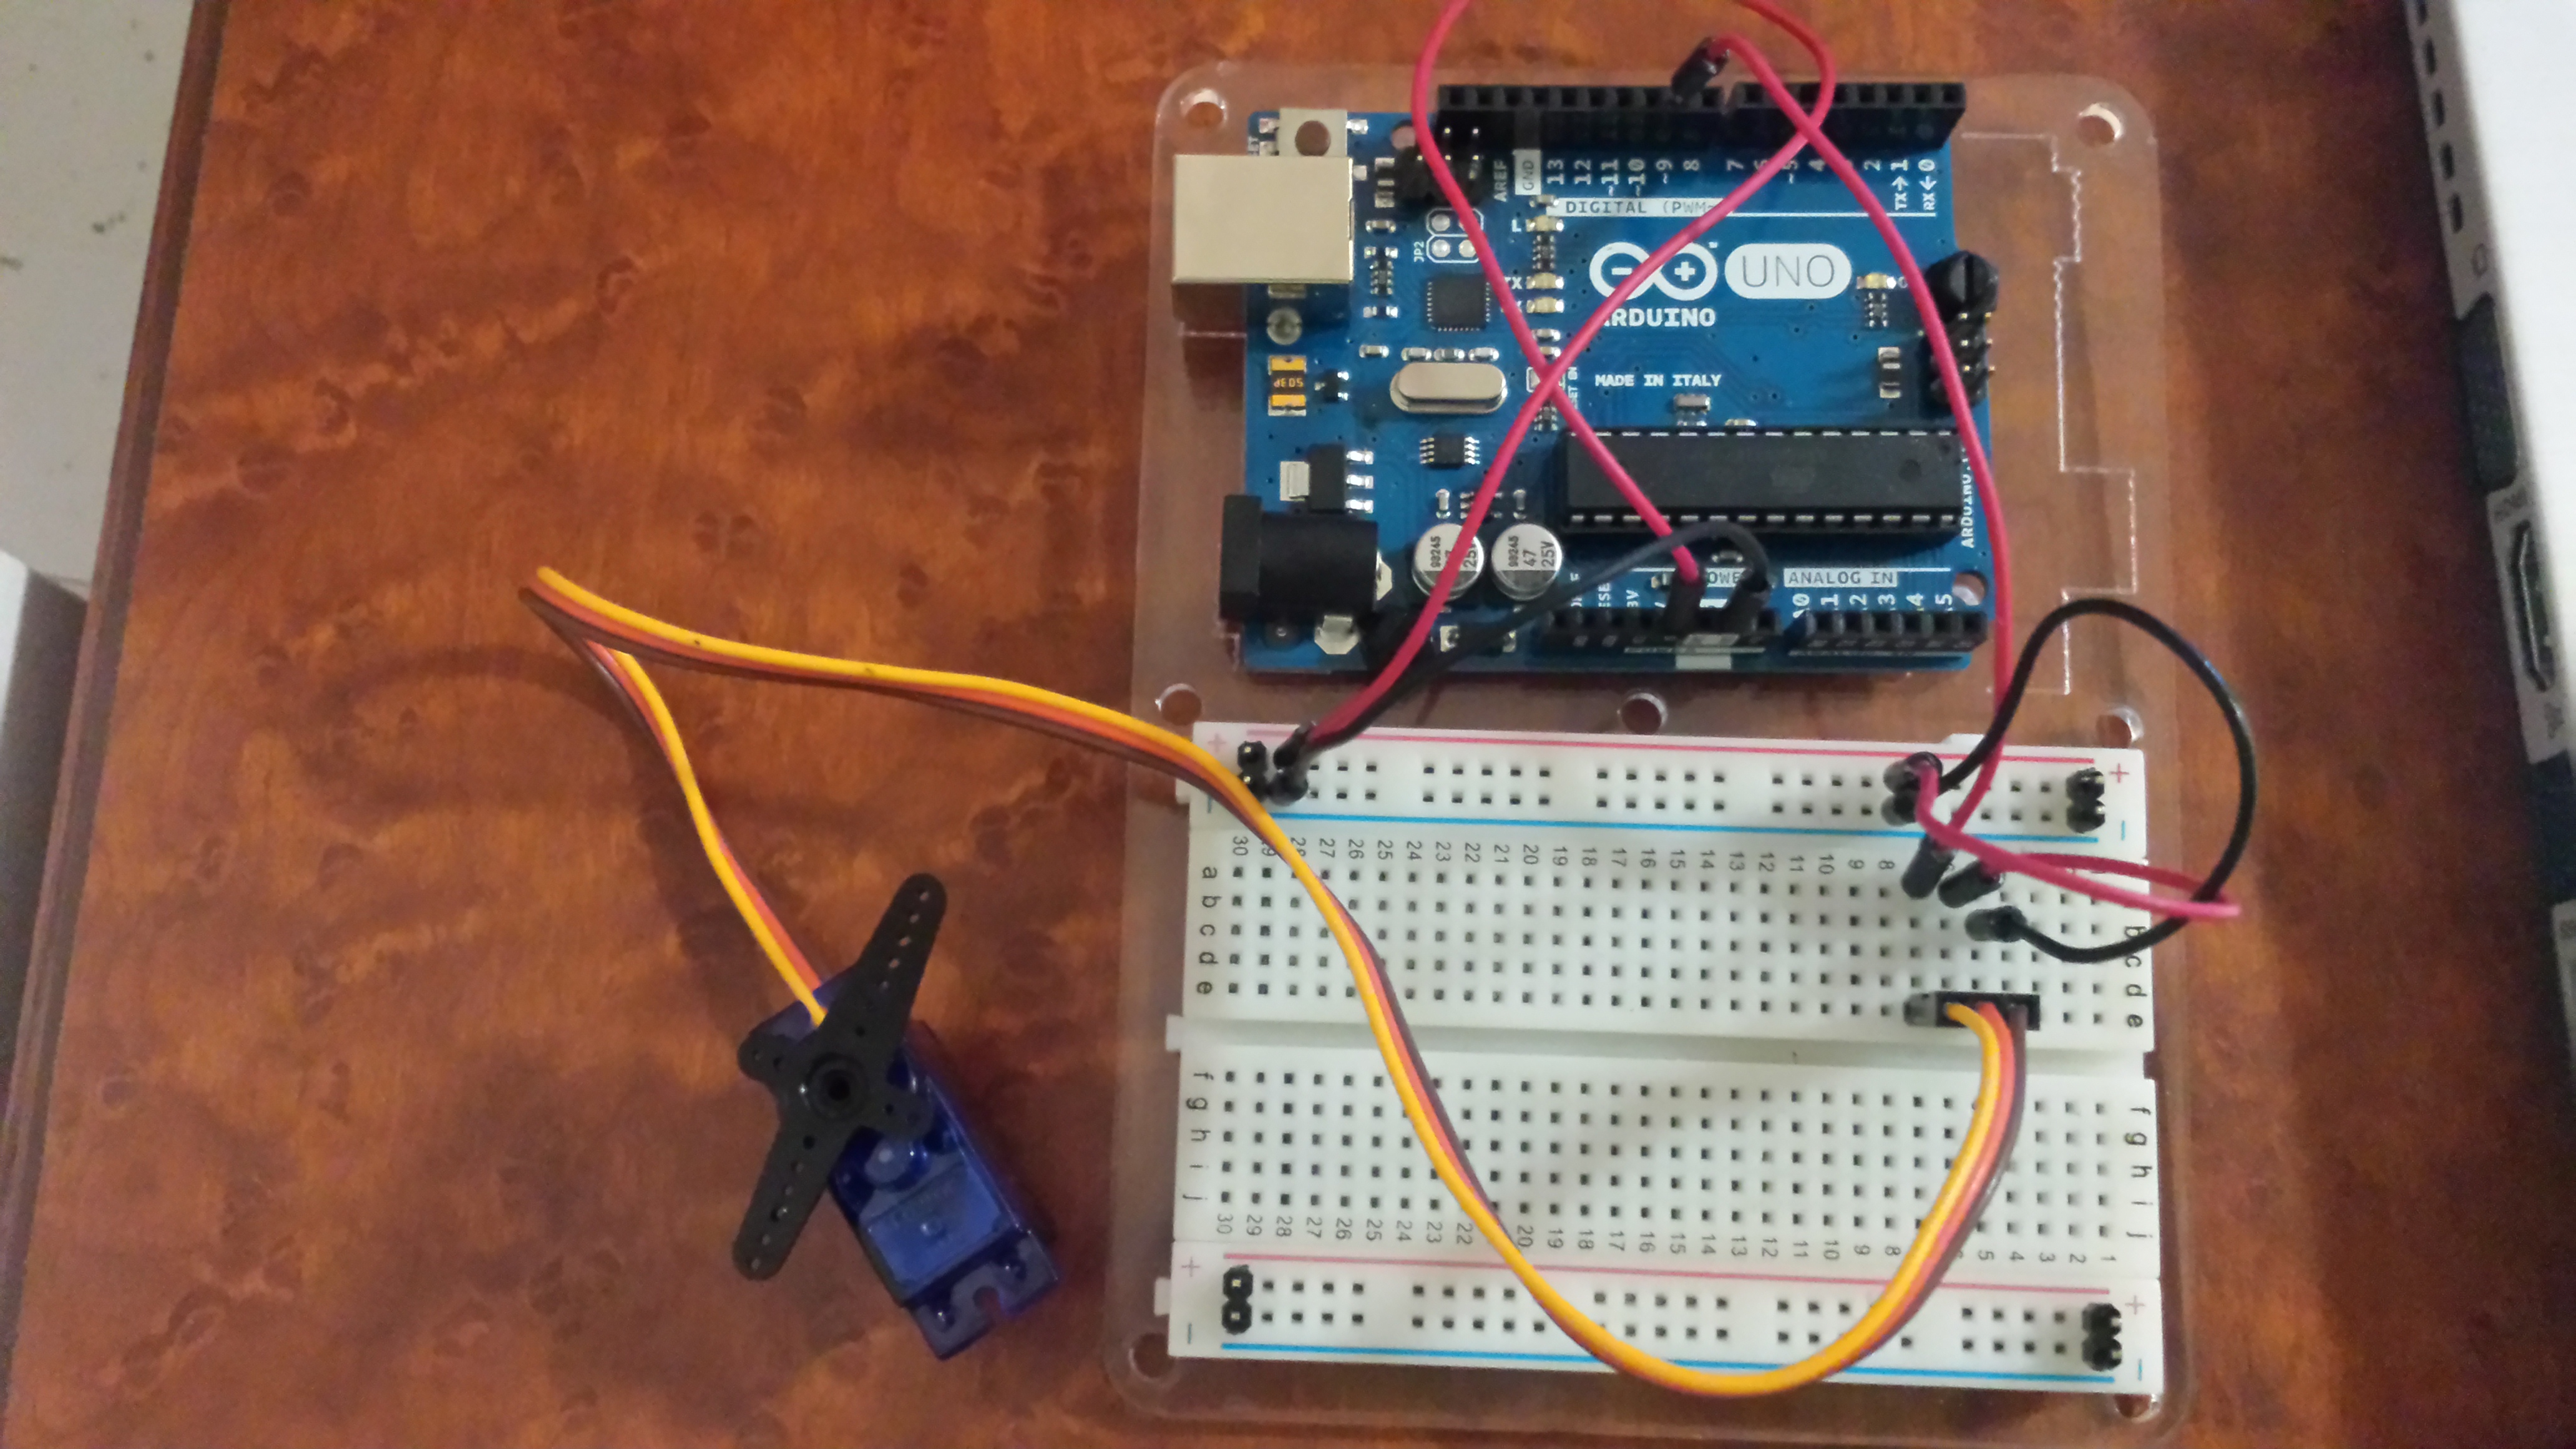
Circuit 4
Code:
// Sweep
// by BARRAGAN

#include

Servo myservo;  // create servo object to control a servo
                // a maximum of eight servo objects can be created

int pos = 0;    // variable to store the servo position

void setup()
{
  myservo.attach(9);  // attaches the servo on pin 9 to the servo object
}


void loop()
{
  for(pos = 0; pos < 180; pos += 1)  // goes from 0 degrees to 180 degrees
  {                                  // in steps of 1 degree
    myservo.write(pos);              // tell servo to go to position in variable 'pos'
    delay(15);                       // waits 15ms for the servo to reach the position
  }
  for(pos = 180; pos>=1; pos-=1)     // goes from 180 degrees to 0 degrees
  {
    myservo.write(pos);              // tell servo to go to position in variable 'pos'
    delay(15);                       // waits 15ms for the servo to reach the position
  }
}


