Two Computers, OSC, and an Arduino

For this project, Golan gave me permission to work on communication between two computers which are remotely connected via the network (thanks Golan!).  I wanted to do this as it is a critical component in making my final project work, which is in essence a telepresent robot student (more details to come!) .  Here is a video of it working:

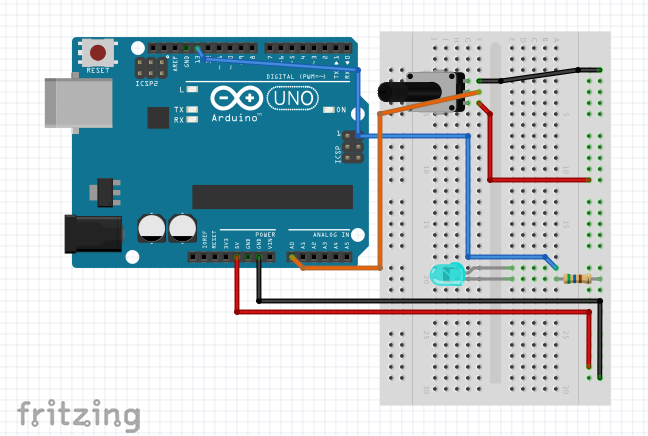
Primarily using Processing and Arduino, I used the oscP5 library by Andreas Schlegel for the communication between the computers, and just plain Serial to control the Arduino.  Overall, the communication pipeline looks like this:

Computer 1 -> Computer 2 -> Arduino

Lag appeared to be minimal, and the OSC interface was very fast and worked well for my needs.

Here is the Processing Code that uses OSC to communicate between two computers:(adapted from an excellent tutorial here: http://learning.codasign.com/index.php?title=Sending_and_Receiving_OSC_Data_Using_Processing)

/* --- PRE SETUP --- */
//pre setup network:
import java.net.InetAddress;

InetAddress inet;

String myIP;

//pre setup OSC:
import oscP5.*;
import netP5.*;
 
OscP5 oscP5;
NetAddress myRemoteLocation;

//pre setup Arduino:
import processing.serial.*;
Serial port;
 
/* ----- SETUP ----- */
void setup() {
  size(400,400);
 
  /* --- PREPARE NETWORK: --- */
  //get this computer's ip:
  try {
    inet = InetAddress.getLocalHost();
    myIP = inet.getHostAddress();
  }
  catch (Exception e) {
    e.printStackTrace();
    myIP = "couldnt get IP"; 
  }
  println(myIP);
  
  /* --- PREPARE OSC: --- */
  //this computer's port
  oscP5 = new OscP5(this,5001);
 
  //sender ip and port (replace with real IP:)
  myRemoteLocation = new NetAddress("127.0.0.1",6002);
  
  /* --- PREPARE ARDUINO: --- */
  println("Available serial ports:");
  println(Serial.list());
  port = new Serial(this, Serial.list()[5], 9600);  
   
}
 
/* --- MAIN LOOP --- */
void draw() { }
 
void mousePressed() {  
  // create an osc message
  OscMessage myMessage = new OscMessage("/test");
 
  myMessage.add(123); // add an int to the osc message
  myMessage.add(12.34); // add a float to the osc message 
  myMessage.add("hello other computer!"); // add a string to the osc message
 
  // send the message
  oscP5.send(myMessage, myRemoteLocation); 
}


void oscEvent(OscMessage theOscMessage) 
{  
  // get the first value as an integer
  int firstValue = theOscMessage.get(0).intValue();
 
  // get the second value as a float  
  float secondValue = theOscMessage.get(1).floatValue();
 
  // get the third value as a string
  String thirdValue = theOscMessage.get(2).stringValue();
 
  // print out the message
  print("OSC Message Recieved: ");
  print(theOscMessage.addrPattern() + " ");
  println(firstValue + " " + secondValue + " " + thirdValue);

  //send message to Arduino:
  port.write('a');
}

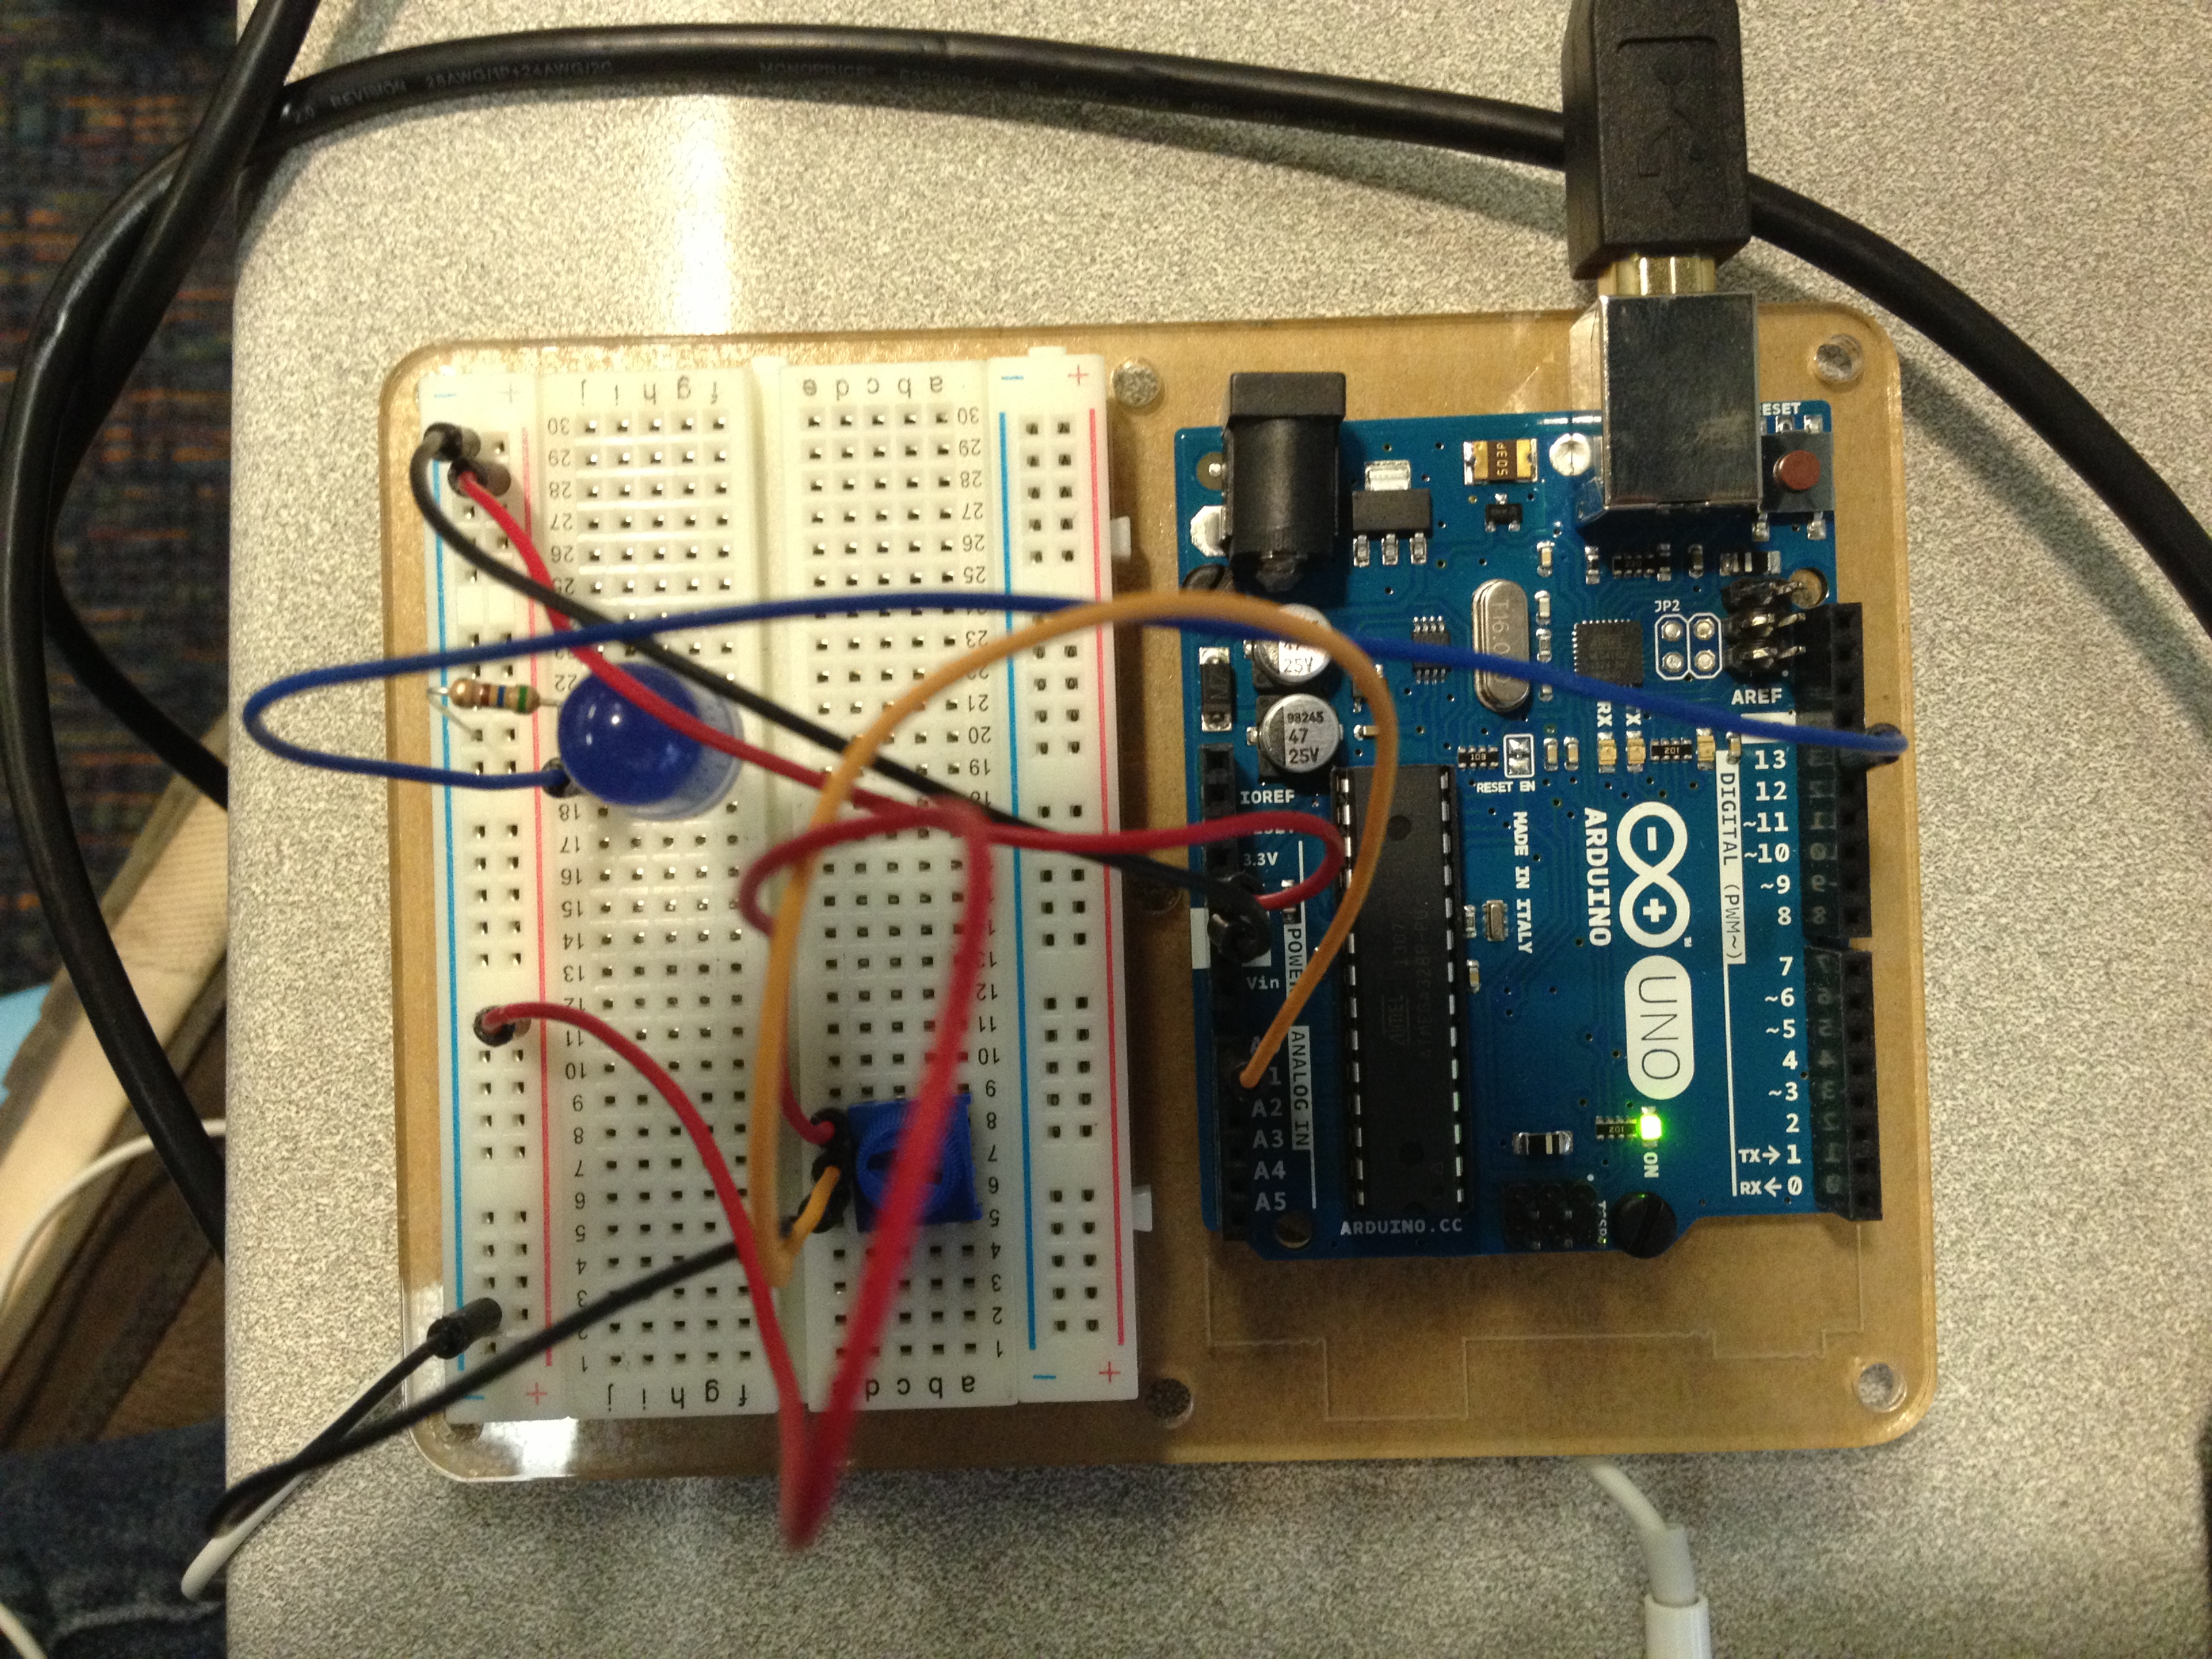
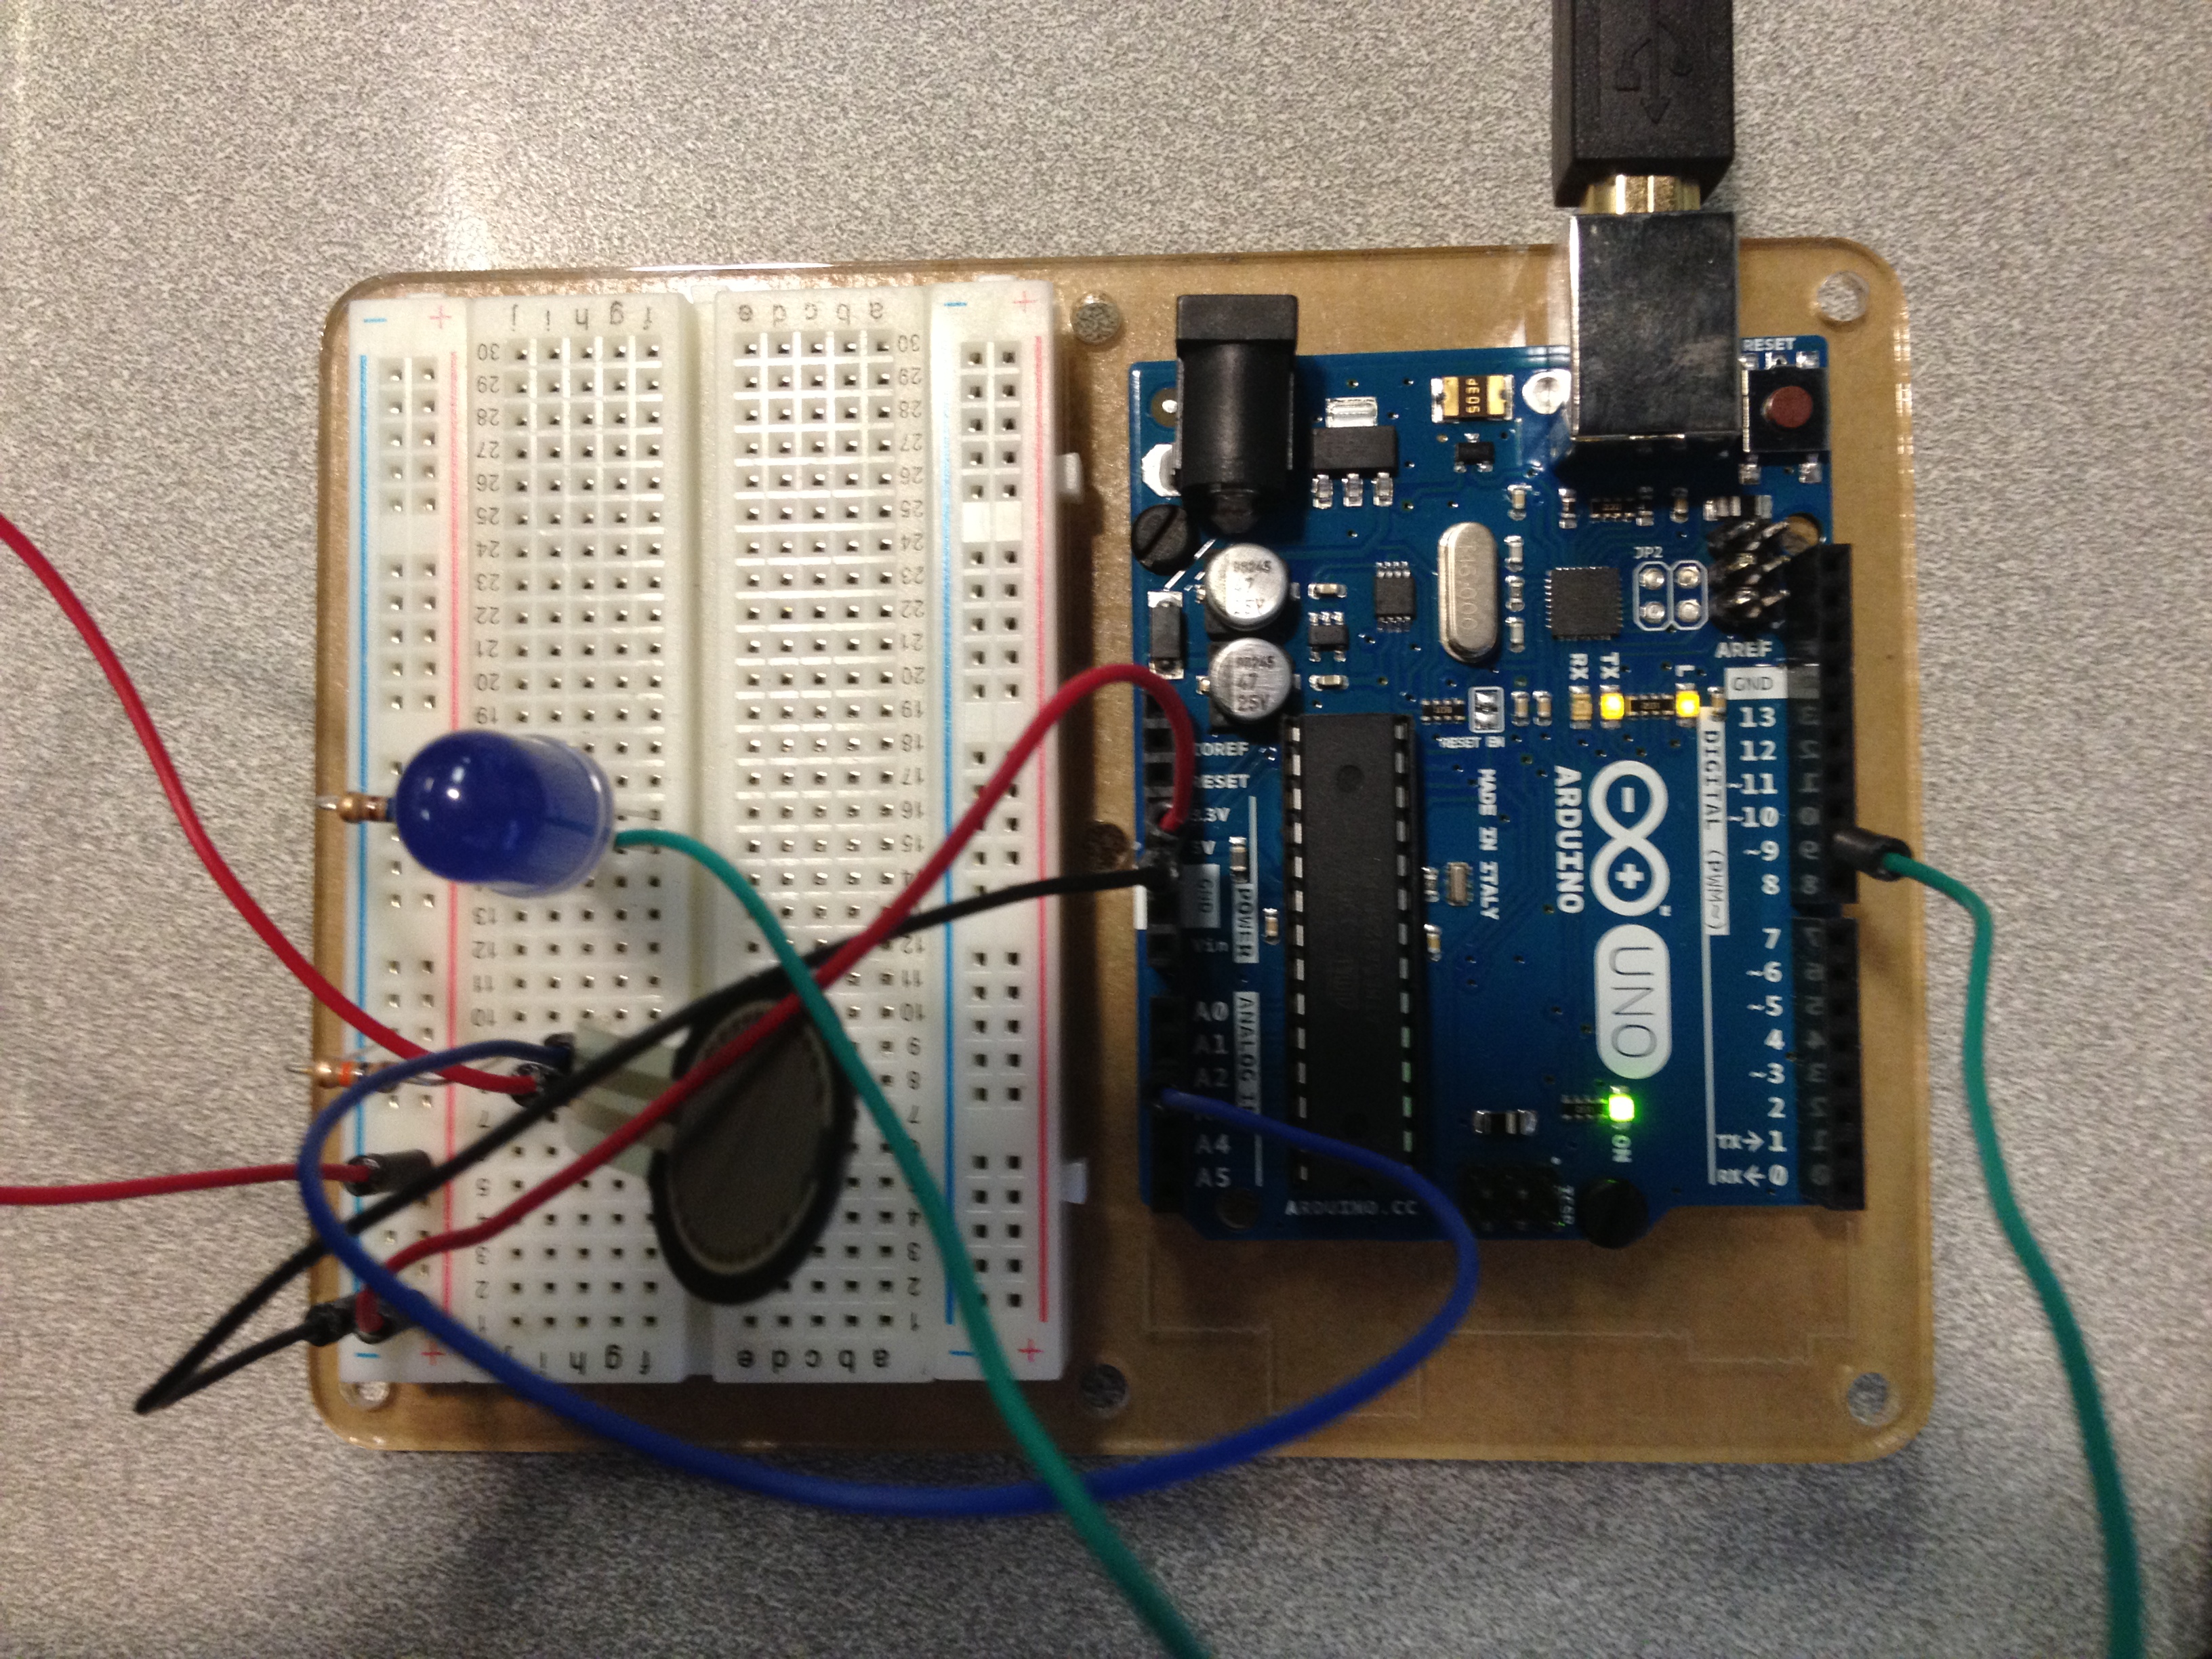
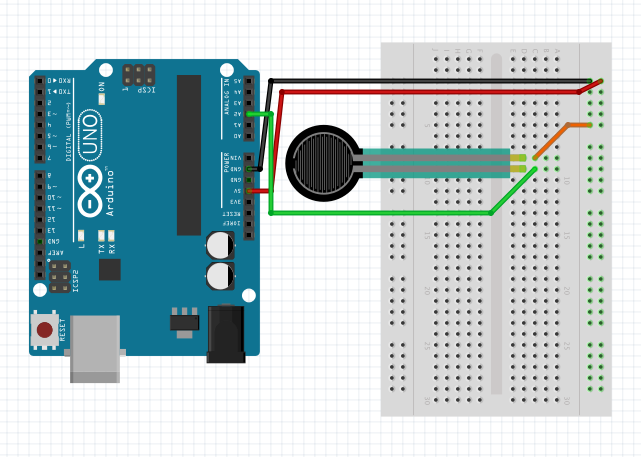
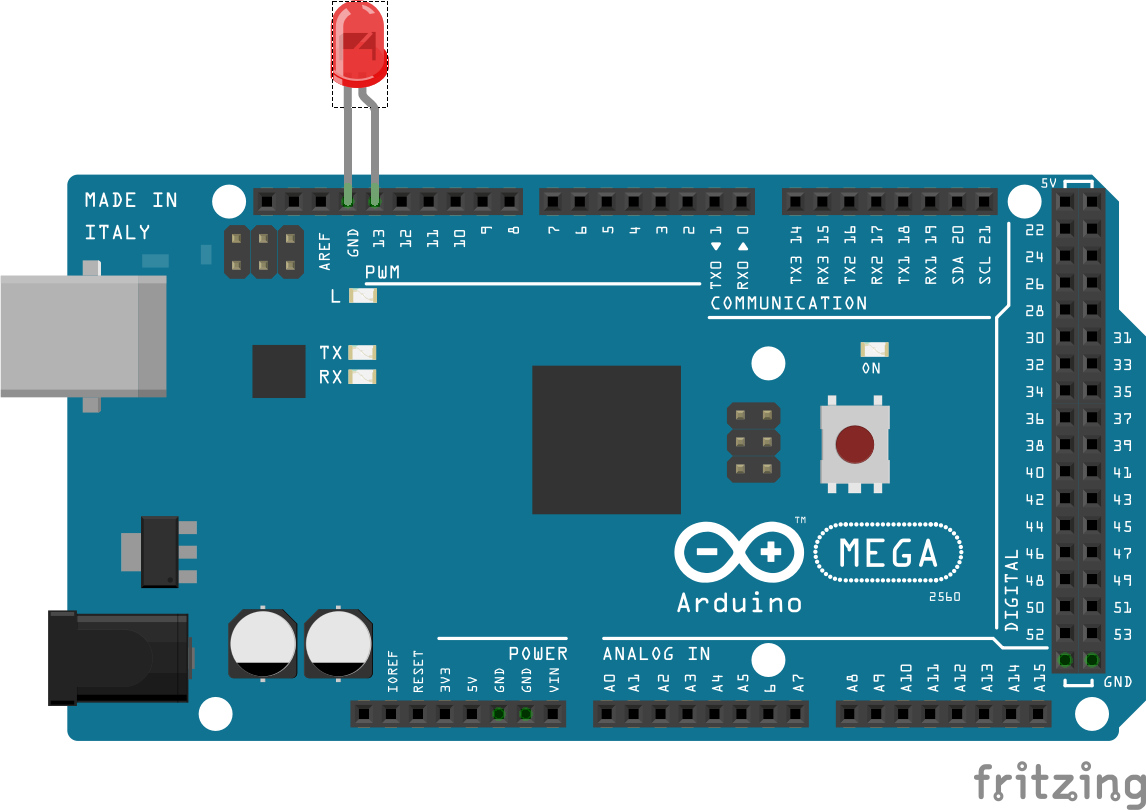
Arduino code was very simple: it just checks for input and turns led on and off. (Adapted from Dimmer example:)

/* --- PRE SETUP --- */
int ledPin = 13;
boolean on = false;

/* ----- SETUP ----- */
void setup() {
  // initialize the serial communication:
  Serial.begin(9600);
  // initialize the ledPin as an output:
  pinMode(ledPin, OUTPUT);
}

/* --- MAIN LOOP --- */
void loop() {
  byte brightness;

  // check if data has been sent from the computer:
  if (Serial.available()) {
    // read the most recent byte (which will be from 0 to 255):
    brightness = Serial.read();
    // set the brightness of the LED:
    if(on == true) {
      digitalWrite(ledPin, HIGH);
      on = false;
    } else {
      digitalWrite(ledPin, LOW);
      on = true;
    }
  }
  
}

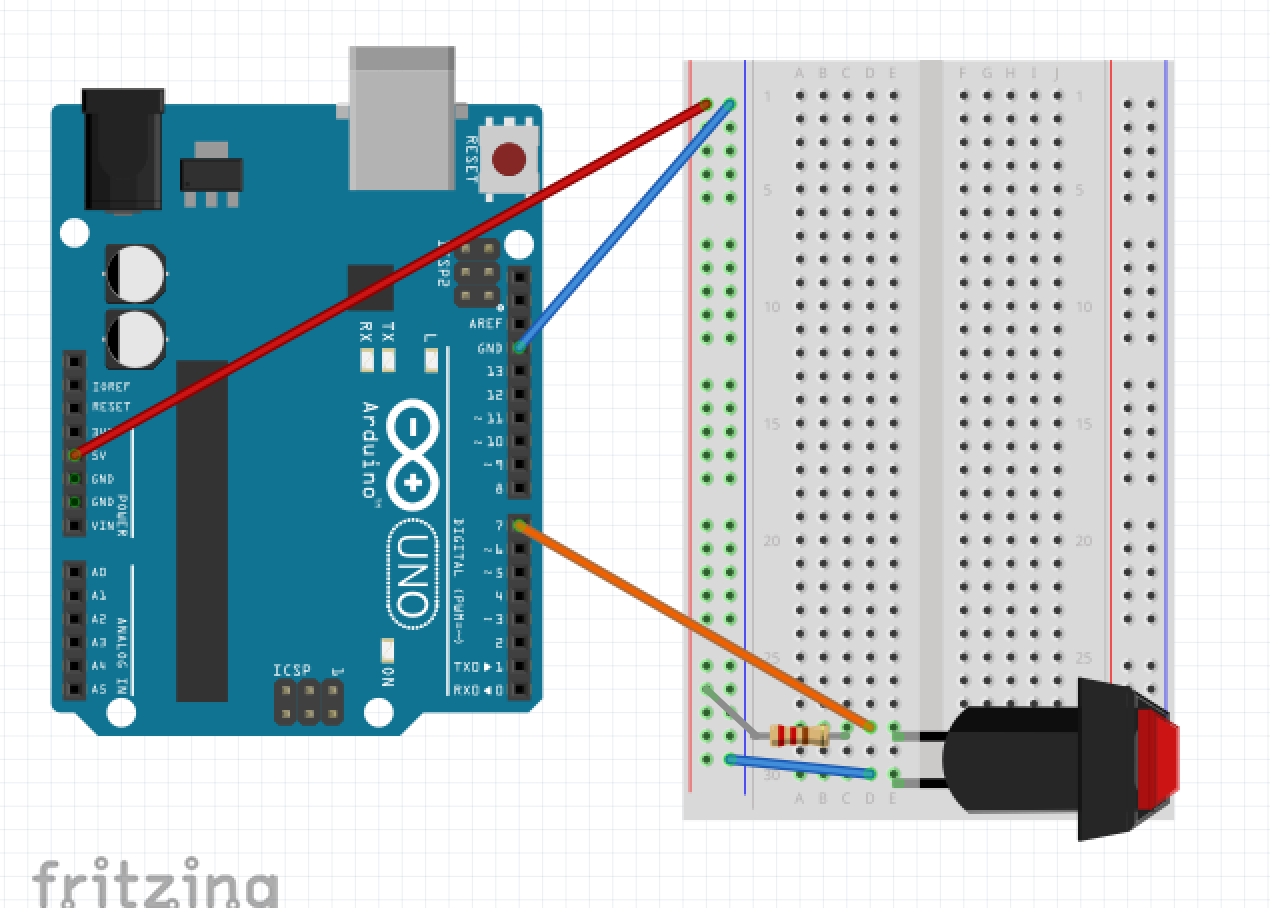
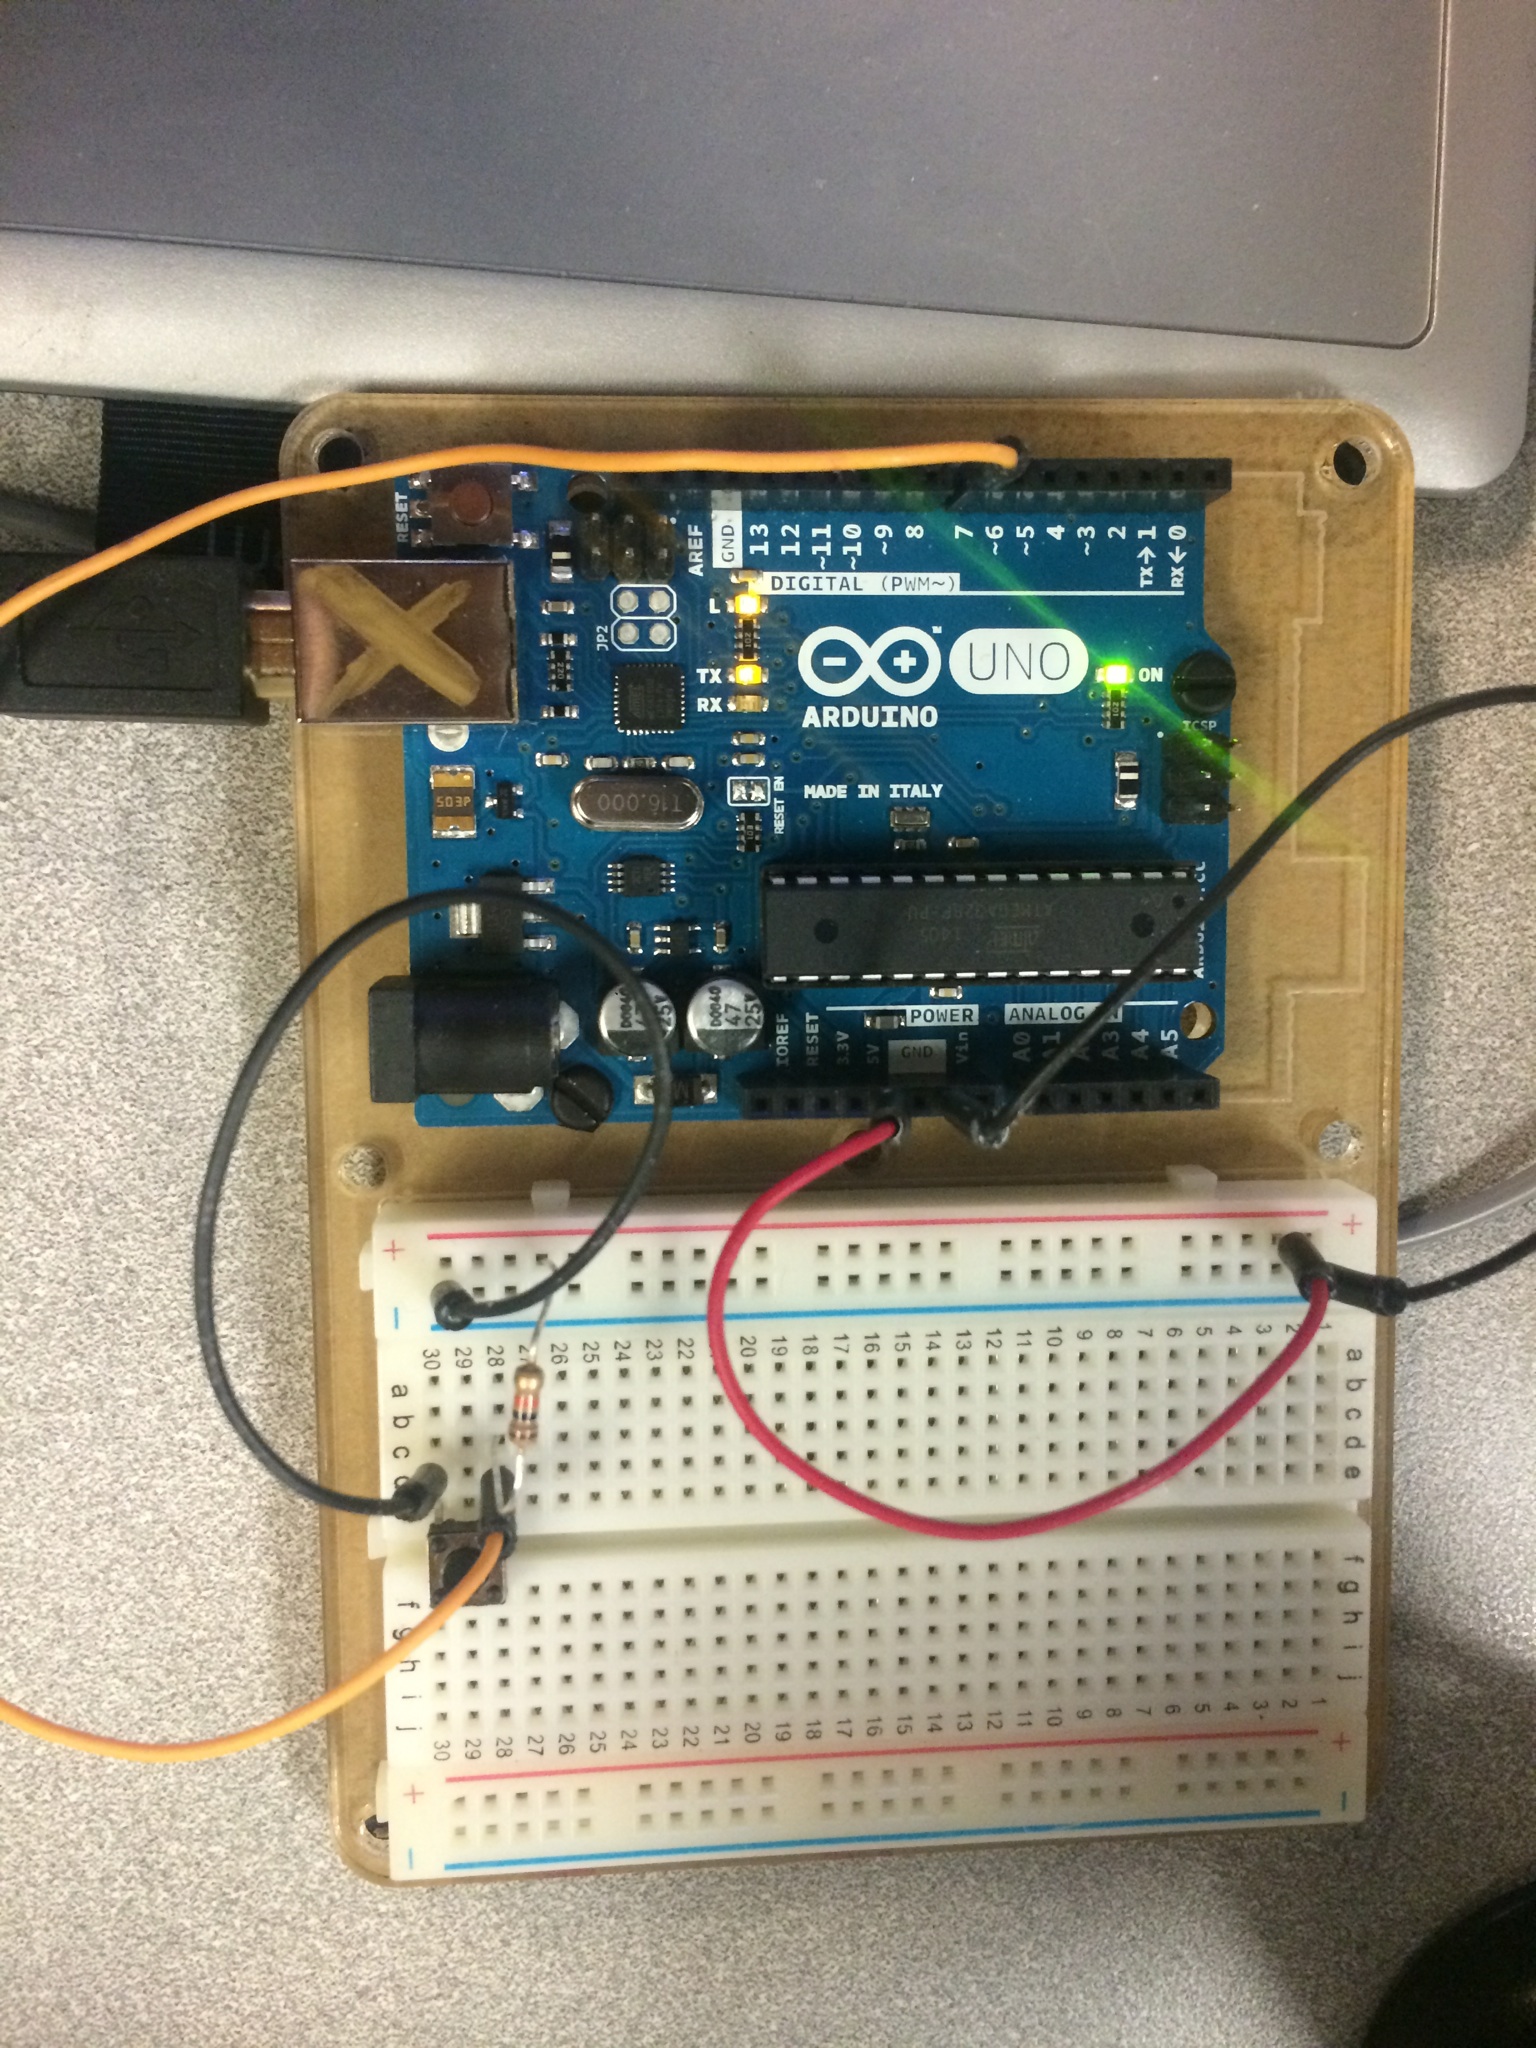
The Arduino was just for testing. As such, there is just a single LED:

arduinoled

MAJ: Looking Outwards #7

Admiration: Puppet Parade

Puppet Parade, by Emily Gobeille and Theo Watson of Design I/O, is an interactive instillation that uses arm motions to puppeteer giant projected creatures. This project uses openFrameworks 007, an infra-red camera, and two Kinects to track motions and translate them into visuals. Puppet Parade was featured at the 2011 Cinekid festival.

I enjoy the bright, gaudy-yet-simplistic visuals that characterize Puppet Parade. I’m particularly impressed with how simple hand-motions create such a complex environment, and would be interested to see the process of fine-tuning the projected outputs of these simple inputs.

For more info on Puppet Parade, click here. For more info on Design I/O, click here. For more on Cinekid, click here.

Surprise: The Treachery of Sanctuary

The Treachery of Sanctuary, conceived and directed by Chris Milk, is an interactive triptych depicting inspired by the cave drawings on the walls of Lascaux. From left to right, each screen represents birth, death, and regeneration. Infra-red sensors and Kinect cameras are used to sense participants. The Treachery of Sanctuary made its debut at The Creators Project: San Francisco 2012.

I’m impressed by the visual effects The Treachery of Sanctuary utilizes. The fluidity of the bird’s wings is quite striking, and I imagine how harrowing it must feel to become the subject of such projections.

For more on The Treachery of Sanctuary, click here. For more on Chris Milk, click here. For more on The Creators Project, click here.

What Could Have Been: Bird on a Wire

Bird on a Wire was created by Ben Light, Christie Leece, Inessah Selditz, and Matt Richardson, for a Master’s course at NYU’s Interactive Telecommunications Program (ITP). The birds animate when a specific phone-number is called.

I like the playful interaction Bird on a Wire has the potential to inspire, but I do have a nitpick: the flight of the birds is not fluid. I think more variation regarding the birds’ flight paths and animations would give this instillation the finishing touch it needs, although I understand such an addition is not critical to the success of the project itself.

For more on Bird on a Wire, click here. For more on Ben Light, click here.  For more on Christie Leece, click here. For more on Inessah Selditz, click here. For more on Matt Richardson, click here.

TWEETING OBJECTO

I decided to do the button that tweets.  It took me some time to figure out the code but with the help of Luca, I was able to successfully tweet with the press of a button. In my code, I decided to have the arduino Serial print an “A” when ever the button was down and then have Processing read that “A” and then post a status to twitter.

<iframe width=”560″ height=”315″ src=”//www.youtube.com/embed/7m2t1GF-ueM” frameborder=”0″ allowfullscreen></iframe>

Screen Shot 2014-11-17 at 8.38.48 PM


Arduino
const int buttonPin = 2;    
 
// variables will change:
int buttonState = 0;  
int buttonPressed = 0;// variable for reading the pushbutton status
 
void setup() {
  Serial.begin(9600);  // initialize serial communications   
 
}
 
void loop(){
  buttonState = digitalRead (buttonPin);
  if (buttonState==1 && buttonPressed==0){
    Serial.println("A");
    buttonPressed=1;
  }
  else if (buttonState==0 && buttonPressed==1) {
    buttonPressed=0;
  }
  
 
  delay (10);   // wait some number of milliseconds
 
}


Processing
import processing.serial.*;
import com.temboo.core.*;
import com.temboo.Library.Twitter.Tweets.*;

Serial myPort;

ArrayList serialChars;      // Temporary storage for received serial data
int whichValueToAccum = 0;  // Which piece of data am I currently collecting? 
boolean bJustBuilt = false; // Did I just finish collecting a datum?

// Create a session using your Temboo account application details
TembooSession session = new TembooSession("salexy", "myFirstApp", "111dc69fd5864a3e95ef1ed410610654");

void setup() {
  int nPorts = Serial.list().length; 
  for (int i=0; i < nPorts; i++) {   println("Port " + i + ": " + Serial.list()[i]);   }   String portName = Serial.list()[4];    myPort = new Serial(this, portName, 9600);   serialChars = new ArrayList(); }   void draw() {   while (myPort.available () >0) {
    char aChar = (char) myPort.read();
    
    if (aChar=='A') {
      //println ("hi");
      runStatusesUpdateChoreo();
    }
  }
}

void runStatusesUpdateChoreo() {
  // Create the Choreo object using your Temboo session
  StatusesUpdate statusesUpdateChoreo = new StatusesUpdate(session);

  // Set credential
  statusesUpdateChoreo.setCredential("Pawalkerology");

  // Set inputs
  statusesUpdateChoreo.setAccessToken("1202876874-AcWWhnbZYZHGMPhDNPRBfXHhrXfEQxIn5P3KK8W");
  statusesUpdateChoreo.setAccessTokenSecret("JN1DpjlZ6tKZ8II676KJB2cZL5kqgw7DxAOcMctj72CGZ");
  statusesUpdateChoreo.setConsumerSecret("K2jfW0ANoGzMowlHABOov3evxzI10C8HxMCuX7PFSvb5OLGb0v");
  statusesUpdateChoreo.setStatusUpdate("This Documentation Tho!");
  statusesUpdateChoreo.setConsumerKey("B6QwcUz3de2dWGcq4wzqjqwHr");

  // Run the Choreo and store the results
  StatusesUpdateResultSet statusesUpdateResults = statusesUpdateChoreo.run();
  
  // Print results
  println(statusesUpdateResults.getResponse());

}

Food, Art and Social Media

The concept of food in social media is one that most people are probably familiar with. Most of the times, when food appears on social media its a either in a facebook post detailing all the delicious food you will be eating, or have eaten, as seen in below.

However, when it comes to food, art and social media the bag is pretty mixed. Sure their are plenty of tumblrs detailing food, as far as I have searched, I haven’t found any artist who does what I want to do. However, I was inspired  the project Pentametron. Pentametron  uses twitter posts to make poetry. I just like the concept of a being that exists in the internet tweeting existential/funny things.  My, subtweeting subs, looks to tweet sassy things about other subs based off of real subtweets made by celebrities and individuals. Examples of such ‘subtweets’ include:

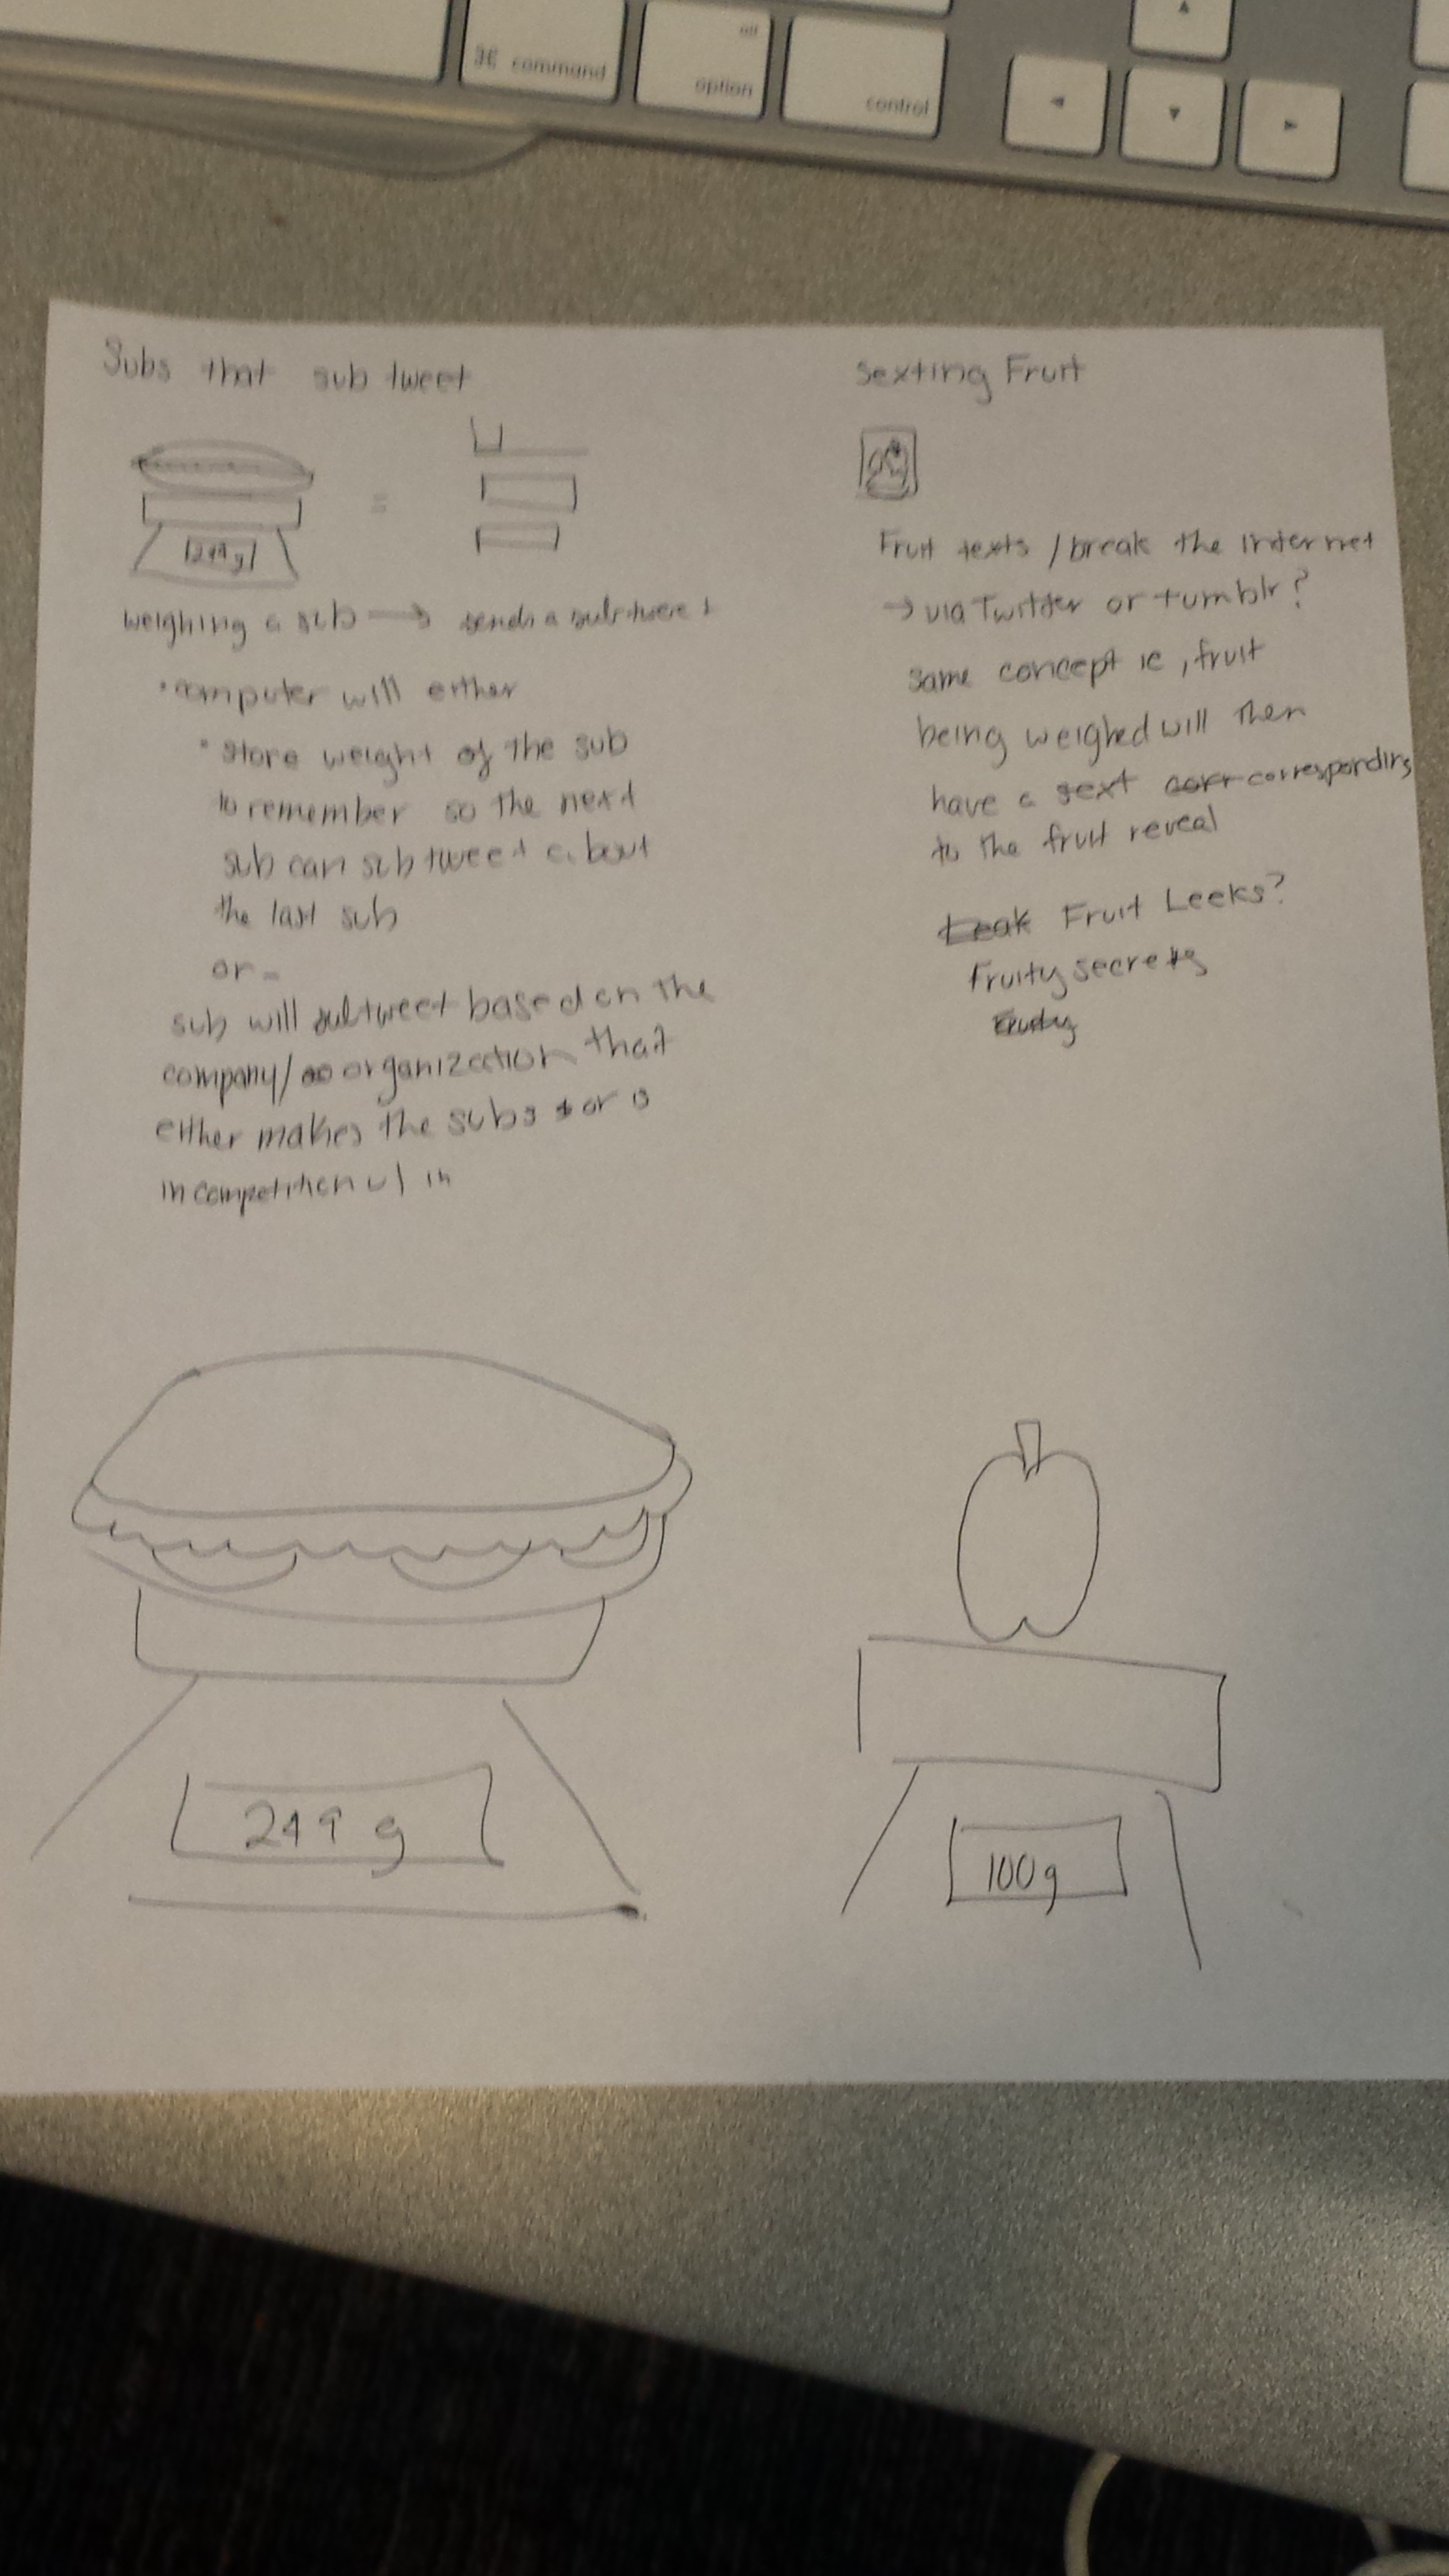
Kim Kardashian subtweeting Amber Rose


Meek Mill subtweeting Chris Brown


Adam Levine Subtweeting…Lady Gaga


Lady Gaga subtweeting adam levine subtweeting her

How it works.20141117_200254

I plan on creating a database of phrases to tweet and a database of types of subs, their weights and the restaurant chains that make them. I will then have the sub tweet a random set of phrases either to the company or just as a status update.


For my second idea it is based on a project I did for my EcoArt class. For that class I created a series of photographs called sexting fruit. Basically the premise for that was again, based off of a social phenomenon, ie, leaked sexts from celebrities. With that concept in mind a created a series of fruits in compromising positions and then released the images in some text messages. I feel that programing a computer to send the sexts via twitter will also go along with the social media angle of the project. It will use the same weigh–> tweet concept as my original concept except fruit will be weighed in this case instead of subs. I am leaning towards my original concept with the potential of actually combining these ideas (ie being able to tweet just words for the subs and images for the fruit) as another possibility.

Button that Tweets

Using arduino and processing, I made a button that will tweet the exact hour, minute, and second that it is pushed.

Screen Shot 2014-11-17 at 7.56.29 PM


The tweet from the video ^^^~^^~^^~^^~^^^

Arduino Code:


//Will Taylor - Tweeting App

// Create a session using your Temboo account application details
TembooSession session = new TembooSession("willtaylorvisual", "myFirstApp", "9eeb4f289ddf4ae28ab9426f0956347d");

import com.temboo.core.*;
import com.temboo.Library.Twitter.Tweets.*;
import processing.serial.*;
ArrayList serialChars;
Serial myPort;

void setup() {
// List my available serial ports
int nPorts = Serial.list().length;
for (int i=0; i < nPorts; i++) {
println("Port " + i + ": " + Serial.list()[i]);
}

String portName = Serial.list()[5];
myPort = new Serial(this, portName, 9600);
serialChars = new ArrayList();
}

void processSerial() {

while (myPort.available () > 0) {
char aChar = (char) myPort.read();

// You'll need to add a block like one of these
// if you want to add a 3rd sensor:
if (aChar == 'A') {
// Run the StatusesUpdate Choreo function
println("You did it you piece of shit! Good fucking job!");
runStatusesUpdateChoreo();
}
}
}

void runStatusesUpdateChoreo() {
// Create the Choreo object using your Temboo session
StatusesUpdate statusesUpdateChoreo = new StatusesUpdate(session);

// Set inputs
statusesUpdateChoreo.setAccessToken("2774482314-jR8gqVBzWk08Wh4SEpsmTZazMT7i4MBVHAP5fwl");
statusesUpdateChoreo.setAccessTokenSecret("2GUsUWfMBAdXLadA1XjATxHzJB8e5AMQxWtyofGRRNiTf");
statusesUpdateChoreo.setConsumerSecret("7KMu4Ky2OAFtmmDpepEeemlgozoomvd2tAIq98lrdzFAbdiuPY");
statusesUpdateChoreo.setStatusUpdate("Test tweet for status update app! Button pushed @ " + hour() + ":" + minute() + "." + second());
statusesUpdateChoreo.setConsumerKey("TSake54GKJUnG9bugX3NAhkbJ");

// Run the Choreo and store the results
StatusesUpdateResultSet statusesUpdateResults = statusesUpdateChoreo.run();

// Print results
println(statusesUpdateResults.getResponse());

}

void draw(){
processSerial();
}


Processing Code:


// Will Taylor - Tweeting App Arduino

const int buttonPin = 9;
int buttonValue = 0;
boolean tweet = false;
void setup() {
Serial.begin(9600);
pinMode(buttonPin, INPUT);
}

void loop() {
buttonValue = digitalRead(buttonPin);
if (buttonValue == HIGH && tweet == false){
Serial.println("A");
tweet = true;
} else {
Serial.println("B");
tweet = false;
}

delay(100);

}


Variable Resistors (Circuits 08 & 13)

IMG_2003

/*
  Analog Input
 Demonstrates analog input by reading an analog sensor on analog pin 0 and
 turning on and off a light emitting diode(LED)  connected to digital pin 13. 
 The amount of time the LED will be on and off depends on
 the value obtained by analogRead(). 
 
 The circuit:
 * Potentiometer attached to analog input 0
 * center pin of the potentiometer to the analog pin
 * one side pin (either one) to ground
 * the other side pin to +5V
 * LED anode (long leg) attached to digital output 13
 * LED cathode (short leg) attached to ground
 
 * Note: because most Arduinos have a built-in LED attached 
 to pin 13 on the board, the LED is optional.
 
 
 Created by David Cuartielles
 modified 30 Aug 2011
 By Tom Igoe
 
 This example code is in the public domain.
 
 http://arduino.cc/en/Tutorial/AnalogInput
 
 */

int sensorPin = A0;    // select the input pin for the potentiometer
int ledPin = 13;      // select the pin for the LED
int sensorValue = 0;  // variable to store the value coming from the sensor

void setup() {
  // declare the ledPin as an OUTPUT:
  pinMode(ledPin, OUTPUT);  
}

void loop() {
  // read the value from the sensor:
  sensorValue = analogRead(sensorPin);    
  // turn the ledPin on
  digitalWrite(ledPin, HIGH);  
  // stop the program for  milliseconds:
  delay(sensorValue);          
  // turn the ledPin off:        
  digitalWrite(ledPin, LOW);   
  // stop the program for for  milliseconds:
  delay(sensorValue);                  
}

Screen Shot 2014-11-17 at 7.34.17 PM

IMG_2005

/*
 * Force Sensitive Resistor Test Code
 *
 * The intensity of the LED will vary with the amount of pressure on the sensor
 */

int sensePin = 2;    // the pin the FSR is attached to
int ledPin = 9;      // the pin the LED is attached to (use one capable of PWM)

void setup() {
  Serial.begin(9600);
  pinMode(ledPin, OUTPUT);  // declare the ledPin as an OUTPUT
}

void loop() {
  int value = analogRead(sensePin) / 4; //the voltage on the pin divded by 4 (to scale from 10 bits (0-1024) to 8 (0-255)
  analogWrite(ledPin, value);        //sets the LEDs intensity proportional to the pressure on the sensor
  Serial.println(value);              //print the value to the debug window
}

Screen Shot 2014-11-17 at 7.39.57 PM

PushButtons (Circuit 07)

IMG_1999

/*
  Button
 
 Turns on and off a light emitting diode(LED) connected to digital  
 pin 13, when pressing a pushbutton attached to pin 2. 
 
 
 The circuit:
 * LED attached from pin 13 to ground 
 * pushbutton attached to pin 2 from +5V
 * 10K resistor attached to pin 2 from ground
 
 * Note: on most Arduinos there is already an LED on the board
 attached to pin 13.
 
 
 created 2005
 by DojoDave 
 modified 30 Aug 2011
 by Tom Igoe
 
 This example code is in the public domain.
 
 http://www.arduino.cc/en/Tutorial/Button
 */

// constants won't change. They're used here to 
// set pin numbers:
const int buttonPin = 2;     // the number of the pushbutton pin
const int ledPin =  13;      // the number of the LED pin

// variables will change:
int buttonState = 0;         // variable for reading the pushbutton status

void setup() {
  // initialize the LED pin as an output:
  pinMode(ledPin, OUTPUT);      
  // initialize the pushbutton pin as an input:
  pinMode(buttonPin, INPUT);     
}

void loop(){
  // read the state of the pushbutton value:
  buttonState = digitalRead(buttonPin);

  // check if the pushbutton is pressed.
  // if it is, the buttonState is HIGH:
  if (buttonState == HIGH) {     
    // turn LED on:    
    digitalWrite(ledPin, HIGH);  
  } 
  else {
    // turn LED off:
    digitalWrite(ledPin, LOW); 
  }
}

Screen Shot 2014-11-17 at 7.25.47 PM

arduino button tweets wee

tweets!: Screen Shot 2014-11-17 at 7.29.16 PM

fritzing:
Screen Shot 2014-11-17 at 7.38.11 PM

arduino pic:
IMG_4819

arduino code:

const int buttonPin = 7;     // the number of the pushbutton pin
 
int buttonState = 0;         // variable for reading the pushbutton status
 
void setup() 
{
//initialize serial communications at a 9600 baud rate
Serial.begin(9600);
 
pinMode(buttonPin, INPUT); 
}
 
void loop(){
  // read the state of the pushbutton value:
  buttonState = digitalRead(buttonPin);
  Serial.print(buttonState);
 
  delay(10);
}

processing code:


import com.temboo.core.*;
import com.temboo.Library.Twitter.Tweets.*;

// Create a session using your Temboo account application details
TembooSession session = new TembooSession("clarence", "myFirstApp", "c7192b9a881f4d4cae8bbd3c39d9f897");

void setup() {
  // Run the StatusesUpdate Choreo function
  runStatusesUpdateChoreo();
}

void runStatusesUpdateChoreo() {
  // Create the Choreo object using your Temboo session
  StatusesUpdate statusesUpdateChoreo = new StatusesUpdate(session);

  // Set inputs
  statusesUpdateChoreo.setAccessToken("549952908-x2iw8OJ8mvhElgoYtB8BJBCaFwSHXJh3RPbgjeZY");
  statusesUpdateChoreo.setAccessTokenSecret("XOvV1qgaO9eaqAjGsrvKvxy1oFijBSOhI3hyJOWJv6qhc");
  statusesUpdateChoreo.setConsumerSecret("Z22ucs7ArRU2c2ta81KnmKOrLvvqkC1z21Dk6hC69gNieq7iVq");
  statusesUpdateChoreo.setStatusUpdate("CLARENCE LUVS THIS BEAUTIFUL WORLD");
  statusesUpdateChoreo.setConsumerKey("3sHH6QuXsowjA2eLIkk6MVSp4");

  // Run the Choreo and store the results
  StatusesUpdateResultSet statusesUpdateResults = statusesUpdateChoreo.run();
  
  // Print results
  println(statusesUpdateResults.getResponse());

}

Object That Tweets: Ticklish Object

This is a rock that tweets its laughter when it is tickled or poked. Tickling it harder will make it laugh more.
This is more of a fun little tech demo than anything.
Apologies for the ugly code…

Screen Shot 2014-11-17 at 5.08.52 PM

Screen Shot 2014-11-17 at 5.23.15 PM

Processing code:

import processing.serial.*;
import com.temboo.core.*;
import com.temboo.Library.Twitter.Tweets.*;

Serial myPort;   

int valueA;  // Sensor Value A
int valueB;  // Sensor Value B

int oldValueB;
int finalPressure = 0;
boolean foundPressure = false;
int resetTimer = 0;
 
//------------------------------------
void setup() {
  size(300, 200);
 
  // List my available serial ports
  int nPorts = Serial.list().length; 
  for (int i=0; i < nPorts; i++) {
    println("Port " + i + ": " + Serial.list()[i]);
  }
 
  String portName = Serial.list()[9];
  myPort = new Serial(this, portName, 9600);
  serialChars = new ArrayList();
}
 
float round(float number, float decimal) {
  return (float)(round((number*pow(10, decimal))))/pow(10, decimal);
} 
 
//------------------------------------
void draw() {
 
  // Process the serial data. This acquires freshest values. 
  processSerial();
 
  background (150);  
  
  if(!foundPressure && valueB < oldValueB) {
    finalPressure = oldValueB;
    foundPressure = true;
    runStatusesUpdateChoreo();
  }
  if(foundPressure) {
    resetTimer++;
    if(resetTimer > 1000) {
      resetTimer = 0;
      foundPressure = false;
      finalPressure = 0;
      oldValueB = 0;
      valueB = 0;
    }
  }
  
  text ("old pressure: "+oldValueB, 80, 35);
  text ("pressure: "+valueB,        80, 55);
  text ("final pressure: "+finalPressure,  80, 75);
}

ArrayList serialChars;      // Temporary storage for received serial data
int whichValueToAccum = 0;  // Which piece of data am I currently collecting? 
boolean bJustBuilt = false; // Did I just finish collecting a datum?
 
void processSerial() {
 
  while (myPort.available () > 0) {
    char aChar = (char) myPort.read();
 
    // You'll need to add a block like one of these 
    // if you want to add a 3rd sensor:
    if (aChar == 'A') {
      bJustBuilt = false;
      whichValueToAccum = 0;
    } else if (aChar == 'B') {
      bJustBuilt = false;
      whichValueToAccum = 1;
    } else if (((aChar == 13) || (aChar == 10)) && (!bJustBuilt)) {
      // If we just received a return or newline character, build the number: 
      int accum = 0; 
      int nChars = serialChars.size(); 
      for (int i=0; i < nChars; i++) { 
        int n = (nChars - i) - 1; 
        int aDigit = ((Integer)(serialChars.get(i))).intValue(); 
        accum += aDigit * (int)(pow(10, n));
      }
 
      // Set the global variable to the number we captured.
      // You'll need to add another block like one of these 
      // if you want to add a 3rd sensor:
      if (whichValueToAccum == 0) {
        valueA = accum;
        // println ("A = " + valueA);
      } else if (whichValueToAccum == 1) {
        oldValueB = valueB;
        valueB = accum;
        // println ("B = " + valueB);
      }
 
      // Now clear the accumulator
      serialChars.clear();
      bJustBuilt = true;
 
    } else if ((aChar >= 48) && (aChar < = 57)) {
      // If the char is between '0' and '9', save it.
      int aDigit = (int)(aChar - '0'); 
      serialChars.add(aDigit);
    }
  }
}

String getLaughText(int p) {
  String result = "";
  
  p = p/75;
  for(int i = 0; i < p; i++) {
    result += "ha";
  }
  result += "!";
  
  return result;
}

// Create a session using your Temboo account application details
TembooSession session = new TembooSession("ticklishobject", "myFirstApp", "d6a74398d87c4963b7ce4951f8d291c9");

void runStatusesUpdateChoreo() {
  // Create the Choreo object using your Temboo session
  StatusesUpdate statusesUpdateChoreo = new StatusesUpdate(session);

  // Set inputs
  statusesUpdateChoreo.setAccessToken("2881358115-wqORtFIwM25CwVfrw7xB6ZBElOZ9wTiVDotqiwV");
  statusesUpdateChoreo.setAccessTokenSecret("lB7M7Yr08lM6wda6W2h9oOaIdXuiFiO7i3Y67owkdKHJK");
  statusesUpdateChoreo.setConsumerSecret("aDUmwJyDtIS0WuIdyq8U322FB5gxBL7GDfUfsVXP01ca8XcGTg");
  statusesUpdateChoreo.setStatusUpdate(getLaughText(finalPressure));
  statusesUpdateChoreo.setConsumerKey("eGeUwIZoaLGkhC8FlwpfaFwBZ");

  // Run the Choreo and store the results
  StatusesUpdateResultSet statusesUpdateResults = statusesUpdateChoreo.run();
  
  // Print results
  println(statusesUpdateResults.getResponse());

}

Arduino code:

// This Arduino program reads two analog signals, 
// such as from two potentiometers, and transmits 
// the digitized values over serial communication. 
 
int sensorValue0 = 0;  // variable to store the value coming from the sensor
int sensorValue1 = 0;  // variable to store the value coming from the other sensor
 
void setup() {
  Serial.begin(9600);  // initialize serial communications    
}
 
void loop() {
 
  // Read the value from the sensor(s):
  sensorValue0 = analogRead (A0);  // reads value from Analog input 0
  sensorValue1 = analogRead (A2);  // reads value from Analog input 1    
 
  Serial.print ("A"); 
  Serial.println (sensorValue0); 
  Serial.print ("B"); 
  Serial.println (sensorValue1);  
 
  delay (50);   // wait a fraction of a second, to be polite
}