Tutorials Towards an Immersive Environment
Contents:
- Template Project
- Landscaping with Terrain and ProBuilder
- Finding and Importing Assets
- Materials and Shaders
- Lighting in Unity
- Sound in Unity
- Recording HD Videos from Unity
- Optional: Particle Systems
- Optional: Interaction
Template Project
Download THIS VERY IMPORTANT UNITY PACKAGE (“expressiveEnvironment”, 320MB). This will provide some starting materials for your project. To get started,
- Launch Unity; Create a new 3D core project; with Unity open, double-click the downloaded package, and import all. IMPORTANT: Under Scenes, double-click the “template” scene. You should see a world with a red floor.
- Make note of the GoldPlayer, a character with a built-in camera and footstep audio. When you click “play”, you’ll be able to use this character to walk around and see the world.
- Make note of the “SoundSphere” and the “SoundCube” objects. These are a Sphere and a Cube which have Audio sources added to them.
- Make note of the GoldPlayer interactable Cubes. These have text messages and can perform some operations, such as “opening the door” slab.
- Experiment with adding another model (such as the fish object); add a material to it; change its color. In the Inspector window, add a “Collider” so that the fish has some physics: Add component > Physics > Box Collider. Play the game!
Landscaping with Terrain and ProBuilder
Terrain
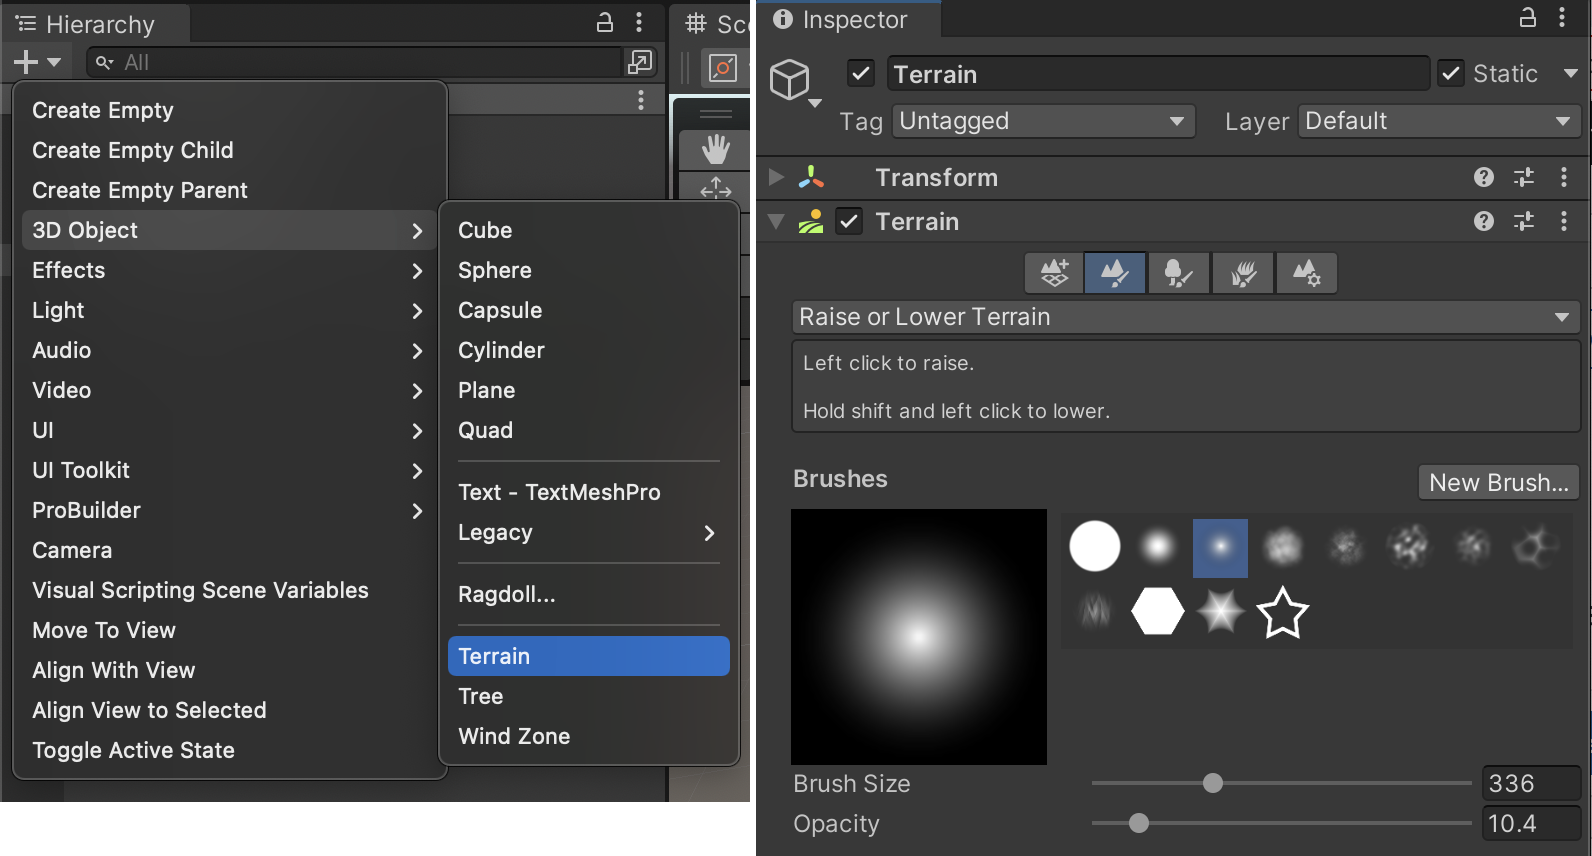
You can sculpt terrain in Unity using the built-in Terrain tool. Access it from the 3D hierarchy (create a Terrain object just as you would a Cube), and then use the brushes (in the Inspector) to “paint” the height of its surface. Afterwards you can give it materials and textures. Note: the dimensions of Terrain objects are HUGE (each one is like a kilometer on a side).
Here is a tutorial by Prof. Pedercini:
ProBuilder
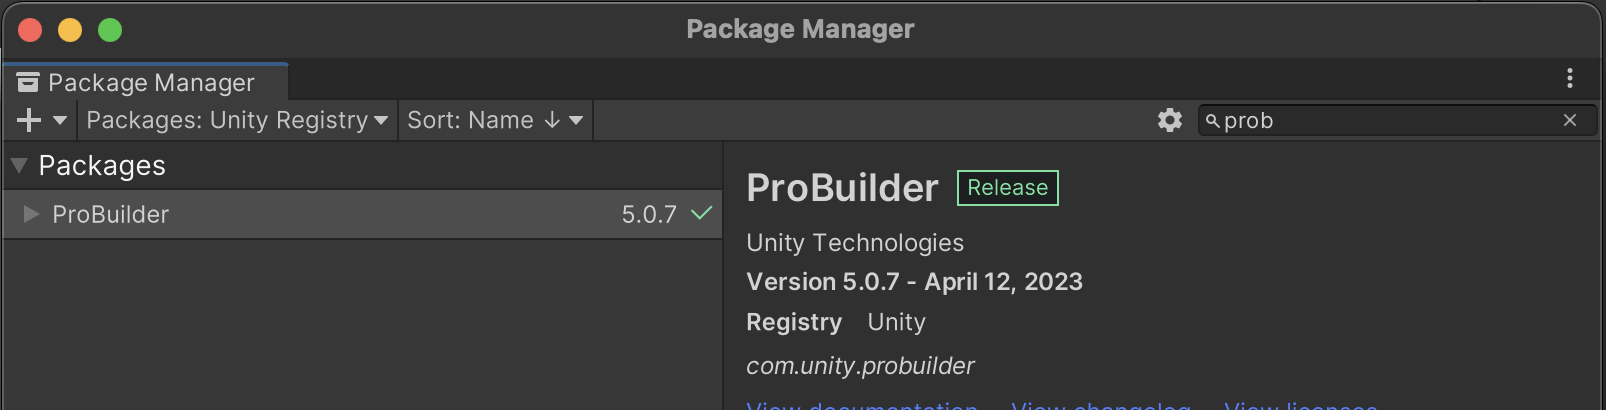
You can create simple 3D objects directly in Unity using ProBuilder, which is a free plugin. To install it, go Unity→Window→Package Manager; under Packages, select Unity Registry (not “In Project”); select ProBuilder.
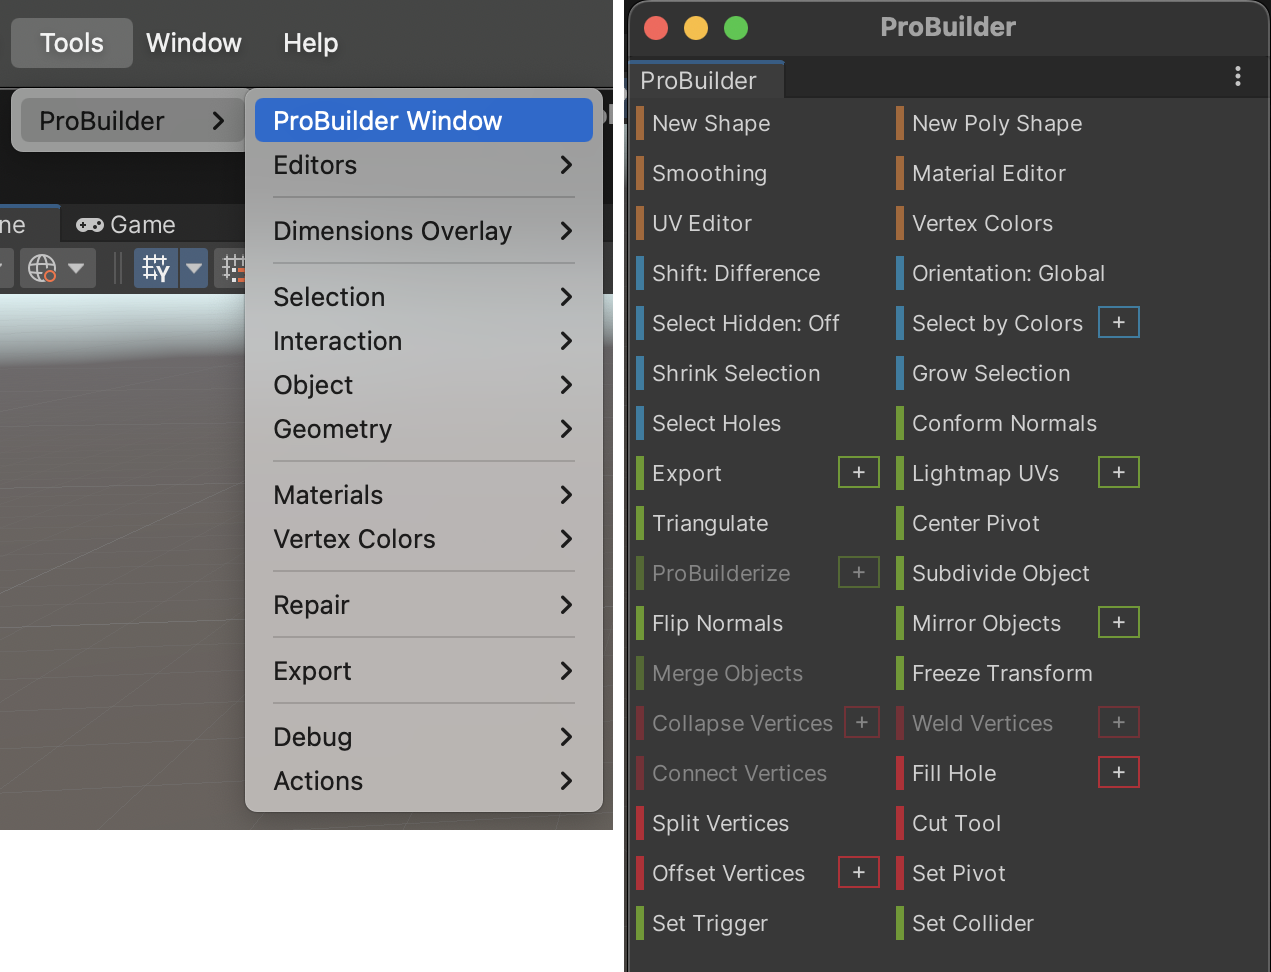
Once this is installed, you can access ProBuilder using its own special tool palette. ProBuilder creates its own format of objects which are editable in nice ways.
Here is a tutorial:
Finding and Importing Assets
For your Immersive Environment project, it’s anticipated that you will import 3D models that you obtain online—most likely, free ones. There are plenty of websites with free assets online but many of them are sketchy and the models aren’t “game-ready”. Some recommended sites are:
- Unity Asset Store (Filter by Free under “Pricing”).
- https://sketchfab.com/3d-models/ (Select Downloadable).
- Turbosquid and Blendswap
The tutorials below explain how to import assets you find online.
Here is the model for the Police Car that Paolo discusses. Steps:
- Download the model in OBJ format from Sketchfab. Uncompress its Zip file. Note that there is another zip file inside the zip file that contains the actual model.
- In Unity, in Assets, create a folder, and name it something like “mycar”.
- Into this folder, drag the files: Mondeo_NYPD.obj, Mondeo_AO.png, Mondeo_Dif.png, Mondeo_Metal.png, Mondeo_Normal.png, Mondeo_Roug.png. Be sure you have all 6 files.
- Drag the car model into the scene. Observe that it is comprised of separate components. In the object hierarchy, select its top level object and all of its components; then scale it correctly.
- In Assets, right-click to create a new material, and give it a name (“carMaterial”). Drag this material onto the car. Make sure to drag it onto all of the components of the car, too (such as the tires).
- Double-click the carMaterial. In its inspector, drag “Mondeo_AO.png” into the little square labeled Occlusion. Fiddle with the slider to see what it does.
- Drag “Mondeo_Normal.png” (the purple one) into the little square labeled Normal Map. (Click the little “Fix” button if it reports a small problem.) Fiddle with the number showing the strength of the effect.
- Drag “Mondeo_Dif.png” into the little square labeled “Albedo”. Feel free to give it an overall color/tint.
- Drag “Mondeo_Metal.png” into the little square labeled “Metallic”. Fiddle with the Smoothness slider.
- Likewise, the Roughness image can go in Detail Mask.
Recommendations:
- I recommend you look for generic-looking items to assemble and recombine in new ways, and that you avoid using models that are already digital sculptures, highly stylized, or full scenes.
- Use low poly count models. When visualizing a model’s wireframe, if the edges are so dense that they blend together, the model is definitely too detailed for this purpose. As a rule of thumb, when choosing a model stay below 100K triangles.
- The best type of files are FBX and OBJ. You can import .blend files directly if you have Blender installed.
- Note: Some models will not import properly. If they have messy geometry, dark faces or holes, it’s probably easier to find an alternative model.
- Some textures and materials may not work. This situation is common; you may have to recreate materials within Unity.
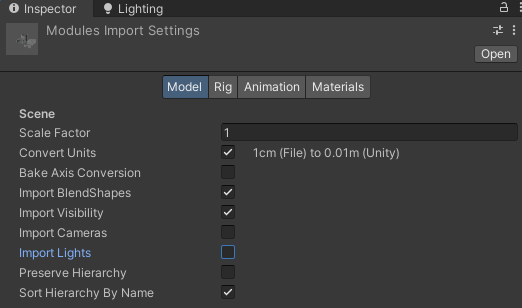
- Different modeling softwares use different units of measure, so assets may appear tiny or gigantic when imported. If they are way off scale, try to fix the scale factor in the panel below (you’ll have to hit apply).
In any case, scale the assets, don’t scale the player – it may seem easier but it’s going to cause all sort of problems.
Less Common Importing Situations
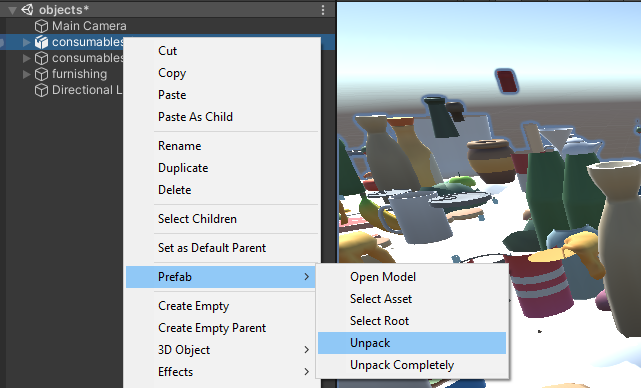
Packed or Prefab assets
Imported objects might appear as prefab: prepackaged objects with associated components. Their icon will look different in the hierarchy. To work with a prefab (for example, copy-pasting an object within it) you’ll need to unpack it:
Models with Built-in Lights and Camera
Some models come with their own cameras and lights. You generally do not want to import these additional components. The lights will add to your own making the scene overexposed, and the camera might take over the player camera. Select the asset in unity in the project panel and deselect camera and light in import settings. (You’ll have to hit apply.)
Materials and Shaders
The easiest way to customize a found 3D asset is by changing the material. Here’s a tutorial going though a “chicken museum”. It gets a bit technical, don’t worry if you don’t understand certain things.
Recording HD Videos from Unity
This simple tutorial shows how to record HD videos using the free, official Unity Recorder, which can be installed using the Package Manager. The recordings end up in your project folder, the same as where the assets folder is (not in assets.) Note the helpful “wildcards” available for naming your video recordings, shown at 2’50”.
Lighting in Unity
The light game objects are quite straightforward components to use.
However in a 3D engine the lighting depends on a variety of other factors such as:
- Materials: they contain information like color, texture, and how they reflect light (or better, simulate light reflection). The logic that govern light reflection (and more) in a material is defined by scripts called shaders. Shader programming is hard but you can use and tweak existing shaders.
- Textures: texture images are properties of the materials but their mapping, or how they wrap around meshes, depends on the model. Texture mapping is a complex process that can’t be done in Unity so we won’t talk about it. If a model comes with a texture properly mapped, you can try to modify the image in photoshop, but creating your own textures is beyond the scope of this class.
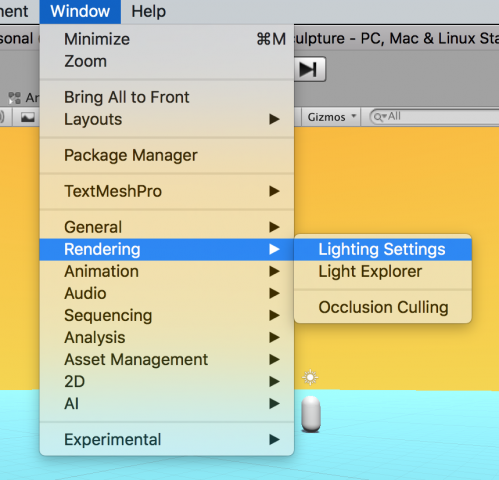
- Ambient light and other global settings: they are a lot, and they are in the “lighting” panel. You should always keep it open next to the inspector (menu window > rendering > lighting settings). We’ll just look at the skybox and the fog. We will not get into baking lights and other rendering pipelines.
- Post-processing effects – they are a bit like Instagram filters applied to the image after it’s been rendered. Activating post-processing effects is a bit tricky but the template I’m giving you should have them already set up. Just add the effects on the “Post Processing effects” object, activate each.
Lighting Basics and Changing the Skybox:
Two easy ways to change the Skybox, are to either fiddle with the default Gradient Skybox (as described in the video below), or to install one of these Free Skyboxes at the Unity Asset Store (through the Package Manager), and drag it onto your scene:
Advanced lighting tutorial including post processing effects:
Sound in Unity
Adding sound is the most effective way to create an atmosphere and it’s also very easy.
Optional: Particle Systems
Particle systems are a common type of effect in real time 3D. In Unity they can be created without any programming.
Optional: Interaction
You should not attempt to create a game but you can introduce some element of interaction without coding by using scripts I included in the template.