Category Archives: Uncategorized

Chanamon Ratanalert

14 May 2014

tl;dr
– this class is awesome, you should take it
– nothing is impossible/just try it regardless
– be proud of your projects

As my junior year draws to a close, I look upon my semester with disdain. Though not because I hated this semester, but rather I am saddened by its finish. I never would have thought that I could come so far in the three years I’ve been in college. I thought my “genius” in high school was my peak. I thought it was good enough—or as good as it was going to get. This course has brought that potential much higher—way beyond what I could have ever imagined I was capable of. And I don’t mean this in terms of intelligence. The experiences I’ve had in the past three years have brought my perseverance potential light years beyond what I could have had if I didn’t go to this school and push my way into this class’ roster.

What have I learned from this course you may ask? The main takeaway I received from this class that I’m sure was intentionally bludgeoned into all of us, was that whether or not something is impossible, you should just try it. The possibility of achieving your goals, believe it or not, increases when you actually reach for them. This mentality has produced amazing projects from the course’s students that I could never have thought to witness right before my eyes. I always felt that those amazing tech or design projects I saw online were like celebrities: you knew they grew from regular people, but you never thought you’d see one in the same room as you.

I will also forever take with me the idea that how you talk about your project is just as important as the project itself. This seems obvious and you’d think that you’ve talked up a project enough, but, as it can be seen with some of my peers’ projects this semester: the right documentation and public potential you give your project can make a world of difference.  How you present a project will determine how it will be perceived. That self-deprecating thing that most people do when they talk about themselves to garner “oh psh, you’re great”s and “what are you talking about, it’s wonderful”s doesn’t work too well for most projects. Looking down upon your own project will make others look down upon it too, and not see it for what it is at that moment. Sure, often times your project might actually stink, but you don’t want others to know that.

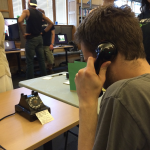
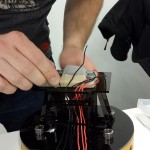
You also have to be careful about how much you reveal about your project. You may think that the technical aspects of how many programs are running in the backend or how many wires you needed to solder together is interesting, but it’s really not. If someone looking at your project cares in that much detail, they’ll ask. You have to present your project for what it is at the moment someone sees it, not what it was a couple hours ago while you were booting it up. It’ll be important to say how you created the project (especially if it was in a new and interesting way), but the extra details might be better off left out. But I digress.

I value this course in more ways than I can describe. Let’s just say that I’m very thankful to have been scrolling through CMU’s schedule of classes on the day just before Golan picked his students. Luck could not have been more on my side. Of course, after the class started, luck was no longer a factor—just hard work. And I’m glad to have needed to put in all that hard work this semester. Without it, I would not have realized what great potential there is inside of me and inside of everyone, for that matter. You always feel like there’s a limit within you so when you think you’ve hit it, you never dare to push past it in fear of breaking. This course has annihilated that fear because I’ve realized that the limit only exists within our minds. Okay, maybe I’m getting a little carried away here, but even so, limitless or not, if there is anything you want to try, just try it.

Chanamon Ratanalert

14 May 2014

bannerSm2

Tweet: Tilt, shake, and discover environments with PlayPlanet, an interactive app for the iPad

Overview:
PlayPlanet is a web (Chrome) application made for the iPad designed for users to interact with it in ways other than the traditional touch method. PlayPlanet has a variety of interactive environments from which users can choose to explore. Users tilt and shake the iPad to discover reactions in each biome. The app was created such that the user must trigger events in each biome themselves, unfolding the world around them through their own actions.

Go to PlayPlanet
PlayPlanet Github

My initial idea had been to create an interactive children’s book. Now you may think that that idea is pretty different than what my final product is. And you’re right. But PlayPlanet is much more fitting toward the sprout of an idea that first lead to the children’s book concept. What I ultimately wanted to create was an experience that users unfold for themselves. Nothing to be triggered by a computer system. Just pure user input directed into the iPad via shakes and tilts to create a response.

After many helpful critiques and consultations with Golan and peers (muchas gracias to Kevyn, Andrew, Joel, Jeff, and Celine in particular), I landed upon the idea of interactive environments. What could be more user-input direct than a shakable world that flips and turns at every move of the iPad. With this idea in hand, I had to make sure that it grew into a better project than my book had been looking.

The issue with my book was that it had been too static, too humdrum. Nothing was surprisingly, or too interesting, for that matter. I needed the biomes to be exploratory, discoverable, and all-in-all fun to play with. That is where the balance between what was already moving on the screen and what could be moved came into play. The environments while the iPad was still had to be interesting on their own, but had to be just mundane enough that the user would want to explore more—uncover what else the biome contained. This curiosity would lead the user to unleash these secrets through physical movement of the iPad.

After many hours behind a sketchbook, Illustrator, and code, this is my final result. I’m playing it pretty fast and loose with the word “final” here, because while it is what I am submitting as a final product for the IACD capstone project, this project has a much greater potential. I hope to continue to expand PlayPlanet, creating more biomes, features, and interactions that the user can explore. Nevertheless, I am proud of the result I’ve achieved and am thankful to have had the experience with this project and this studio.

Shan Huang

14 May 2014

One sentence tweetable version: Stitching sky views from all over Manhattan into an infinite sky stream.

In the process of inspiration searching for my final project, I was fascinated by the abundance of data in Google Street View, a web service that grants you instant access to views from all over the globe. I really enjoyed taking street view tours in places I had never been to, or even heard of, like a lonely shore on the north border of Iceland. But as I rolled my camera upwards, I saw buildings and the sky intersecting at the skyline, and the skyline was extending way beyond the view itself, beyond the street, the city and even the country, the continent. So I was inspired to make some sort of collective sky that creates a journey along a physical or a psychological path.

Scraping

Everything starts with scraping. I wrote some python scripts to query images from the Google Street View Image API and stored metadata such latitude, longitude and panorama id in the filenames. An advantage of Google Street View Image API compared to Google’s other street panorama service is that it auto-corrects the spherical distortion in panorama images. I found it really handy because I could skip implementing my own pano unwrapper. But I had to face its downsides too, meaning the maximum resolution I could get was 640×640 and I had to scrape strategical to avoid exceeding the 25k images/day query quota.

40.7553245~-73.96346984

Typically the sky image I got from each query looks like this. I tried scraping several cities in the world, including Hong Kong, Pittsburgh, Rome and New York, but ultimately I settled on Manhattan, New York because the area had the most variation in kinds of skies (skylines of skyscrapers can look very different from that of a two floor building or a high way). Besides contours of Manhattan sky had the simplest geometric shapes, making shape parsing a whole lot easier. In total I scraped around 25K usable images of Manhattan sky.

QQ20140429-1

Shape parsing

I was the most interested in the orientation of the sky area. More specifically, for each image, I wanted to know where the sky exits on four sides of the image. With the color contour detecter in ofxOpenCv, I was able to get pretty nice contours of skies like this:QQ20140428-14

1 (Contour marked by red dotted line)

From full contours I marked its exits on four sides and computed the direction of the exits. This step gave result like this:

2(Exits marked by colored lines)

These exits helped me in deciding along which axis I should chop the image up. For instance if a sky only had exits on the left and right, I’d certainly subdivide it horizontally. If an image had three exits it would then be subdivided along the axis that had exits on both sides. For four-exit images it didn’t really matter which way to subdivide. And finally, images with one or zero exit were discarded.

3


The above steps resulted in a huge collection of slices of the original images, with metadata marking the exits on each slice. I also computed the average colors of sky and non-sky regions and recorded them in the metadata file. The collection was tremendously fun to play with because each strip essentially became a paint stroke with known features. I had the power to control the width and color of my sky brush at will. My first experiment with this collection was to align all skies with a specific with along a line:

4

In my final video I sorted the images based on color and aligned them along arcs instead of a flat boring straight line. The result is a semi-dreamy, surreal sky composed ball that led people through a psychological journey in New York.


Collin Burger

12 May 2014

loop findr bannerBanner Design by Aderinsola Akintilo

Video:

Loop Findr from Collin Burger on Vimeo.

Tweet:
Loop Findr is a tool that automatically finds loops in videos so you can turn them into seamless gifs.

Blurb:
Since their creation in 1987, animated GIFs have become one of the most popular means of expression on the Internet. They have evolved into their own artistic medium due to their ability to capture a particular feeling and the format’s portable nature. Loop Findr seeks to usher in a new era of seamless GIFs created from loops found in the videos the populate the Internet. Loop Findr is a tool that automatically finds these loops so users can turn them into GIFs that can then be shared all over the Web.

Narrative:
Inception:
The idea for Loop Findr came about during a conversation with Professor Golan Levin about research into pornographic video detection in which the researchers analyzed the optical flow of videos in order to detect repetitive reciprocal motion. During this conversation the idea of using optical flow to detect and extract repetitive motion in videos emerged, and its potential for automatically retrieving nicely-looped, seamless GIFs.

Research:
Professor Levin and I devised an algorithm for detecting loops based on finding periodicity in a sparse sampling of the optical flow of pixels in videos. After doing some research, I was inspired by the pixel difference compression method employed by the GIF file format specification. It became clear to me that for a GIF to appear to loop without any discontinuity, the pixel difference between the first and final frames must be relatively small.

Algorithm:
After performing the research, I decided to implement the loop detection by analyzing the percent pixel difference between video frames.  This is enacted by keeping a ring buffer that is filled with video frames that are resized and and converted to sixty-four by sixty-four, greyscale images. For each potential start of a loop, the percent pixel difference of all the frames within the acceptable loop length range is calculated. This metric is calculated with the mean intensity value of the starting frame subtracted from both the starting frame and each of the potential ending frames. If the percent pixel difference is below the accuracy threshold specified by the user, then those frames constitute the beginning and end of a loop. If the percent pixel difference between the first frame of a new loop and the first frame of the previously found loop is within the accuracy threshold, then the one with the greater percent pixel difference is discarded. Additionally, minimum and maximum movement thresholds can be activated and adjusted to disregard video sequences without movement, such as title screens, or parts of the video with discontinuities such as cuts or flashes, respectively. The metric used to estimate the amount of movement is similar to the one used to detect loops, but in the case of calculating movement, the cumulative percent pixel difference is added for all frames in the potential loop.

Development:
There was approximately a forty-eight hour span between deciding to take on the project and having a functioning prototype with the basic loop detection algorithm in place. Therefore, the vast majority of the time spent on development was dedicated to optimization and creating a fully-featured user interface. The galleries below show the progression of the user interface.

This first version of Loop Findr simply displayed the current frame that was being considered for the start of a loop. Any loops found were simply appended to the grid at the bottom right of the screen. Most of the major features were in place, including exporting GIFs.

The next iteration came with the addition of ofxTimeline and the ability to easily navigate to different parts of the video with the graphical interface. The other major addition was the ability to refine the loops found by moving the ends of the loops forward or backwards frame by frame.

In the latest version, the biggest change came with moving the processing of the video frames to an additional thread. The advantage of this was that it kept the user interface responsive at all times. This version also cleaned up the display of the found loops by creating a paginated grid.

Future Work:
Rather than focus on improving this openFrameworks implementation of Loop Findr, I will investigate the potential of implementing a web-based version so that it might reach as many people as possible.  I envision a website where users might be able to just supply a youTube link and have any potential loops extracted and given back to them. Additionally, I would like to employ the algorithm along with some web crawling and find loops in video streams on the internet or perhaps just scrape popular video hosting websites for loops.


Andrew Russell

12 May 2014

Beats Tree is an online, collaborative, musical beat creation tool.

Abstract

The goal of creating Beats Tree was to adapt the idea of an exquisite corpse to musical loops. The first user creates a tree with four empty bars and can record any audio they want in those four bars. Subsequent users then add multiple layers on top of the first track. More and more layers can then be added, however, only the previous four layers are played back at any time. The reason why these are called “trees” is because users can create a new tree branch at any time. If the user does not like how a certain layer sounds, they can easily create their own layer at that point, ignoring the already existing layer.

Documentation

Beats Tree is a collaborative website to allow multiple users to create beats together. Users are restricted to just four bars of audio that, when played back, are looped infinitely.  More layers can then be added on top to have multiple instruments playing at the same time.  However, only four layers can be played back at once.  When more than four layers exist, the playback will browse through different combinations of the layers to give a unique and constantly changing musical experience.

Beats Tree - Annotated Beat Tree

When a tree has enough layers, playback will randomly browser through the tree.  When the active layer is finished being played, the playback will randomly perform one of four actions: it may repeat the active layer; it may randomly choose one of its child layers to play; it may play its parent’s layer; it may play a random layer from anywhere in the tree. When a layer is being played back, its three parents’ layers, if they exist, will also be played back.

Beats Tree - View Mode

Users can also view and playback a single layer. Instead of randomly moving to a different layer after completion, it will simply loop that single layer again and again, with its parents’ layers also playing.  At this point, if the user likes what this layer sounds like, they can record their own layer on top.  If they choose to do so, they can record directly from the browser on top of the old layer.  The old layer will be played back while the new layer is recorded.

Beats Tree - Record Mode

The inspiration for this project came from the idea of an exquisite corpse. In an exquisite corpse, the first member either draws or writes something then passes what they have to the next member. This continues on until all members are done and you have the final piece of art. The main inspiration came from the Exquisite Forest, which is a branching exquisite corpse based around animation.  Beats Tree is like the Exquisite Forest, but with musical beats layered on top each other instead of animations displayed over time.

Github

https://github.com/DeadHeadRussell/beats_tree

Sketches

Here are some sketches / rough code done while developing this application.

Beats Tree - Sketch 1

Beats Tree - Sketch 2

Beats Tree - Sketch 3

Beats Tree - Sketch 4

Nastassia Barber

12 May 2014

dancing men

A caricature of your ridiculous interpretive dances!

This is an interactive piece which gives participants a set of strange prompts (i.e. “virus”, or “your best friend”) to interpret into dance.  At the end, the participant sees a stick figure performing a slightly exaggerated interpretation of their movements.  This gives participants a chance to laugh with/at their friends, and also to see their movements as an anonymized figure that removes any sense of embarrassment and often allows people to say “wow, I’m a pretty good dancer!” or at least have a good laugh at their own expense.

IMG_3555ridiculous dancing

Some people dancing to the prompts.

skeletons

skeletons2

Some screenshots of caricatures in action.

For this project, I really wanted to make people re-examine the way they move and maybe make fun of them a little.  I started with the idea of gait analysis/caricature, but the Kinect was relatively glitchy when recording people turned sideways (the only really good way to record a walk) and has too small of a range for a reasonable number of walk cycles to fit in the frame.  I eventually switched to dancing, which I still think achieves my objectives because it forces people to move in a way they might normally be too shy to move in public.  Then, after they finish, they see an anonymous stick figure dancing and can see the way they move separated from the appearance of their body, which is an interesting new perspective.  The very anonymous stick figure dance is kept for the next few dancers, who see previous participants as a type of “back-up” dancers to their own dance.  All participants get the same prompts, so it can be interesting to compare everyone’s interpretations of the same words.  I purposefully chose weird prompts to make people think and be spontaneous– “mountain,” “virus,” “yesterday’s breakfast,” “your best friend,” “fireworks,” “water bottle,” and “alarm clock.”  It has been really fun to laugh with friends and strangers who play with my piece, and to see the similarities and differences between different people’s interpretations of the same prompts.

Dance Caricature! from Nastassia Barber on Vimeo.

Austin McCasland

12 May 2014

Abstract:

Genetically Modified Tree of Life is an interactive display for the Center for Postnatural History in Pittsburgh.  “The PostNatural  refers to living organisms that have been altered through processes such as selective breeding or genetic engineering.” [www.postnatural.org]

Model organisms are the building blocks for these organisms, also known as Genetically Modified Organisms.

This app shows the tree of life ending in every model organism used to make these GMOs, as well as allowing people to select organisms to read the story behind them.


Description:

History museums are a fun and interesting avenue for people to experience things which existed long ago.  If people want to experience things which have happened more recently, however, there is one outlet – the Center for Postnatural History.  “The PostNatural  refers to living organisms that have been altered through processes such as selective breeding or genetic engineering.” [www.postnatural.org].  Children’s imaginations light up at the prospect of mammoths walking the earth, or terrifyingly large dinosaurs from thousands of years ago, but today is no less exciting.  Mutants roam the earth, large and small, some ordinary and some fantastic.


Take, for example, the BioSteel Goat.  These goats have their genes genetically modified with spider genes so that spider web fibers are produced in their milk.  They are milked, and that milk is processed, creating huge amounts of incredibly strong fiber which is stronger than steel.

The Genetically Modified Tree of Life is an interactive display which I created for the Center for Postnatural History under the advisement of Richard Pell.  This app will exist in its final form as an interactive installation on a touch screen which will allow visitors to come up and learn more about certain genetically modified organisms in a fun and informative way.  The app visualizes the tree of life as seen through the perspective of genetically modified organisms by showing the genetic path of every model organism from the root of all life to the modern day in the form of a tree.  These model organism’s genes are what scientists use to create all genetically modified organisms as they are representative of a wide array of genetic diversity.  Visitors to the exhibit will be able to drag around the tree, mixing up the branches of the model organisms, as well as selecting individual genetically  modified organisms from the lower portion of the screen to learn more about them.  These are pulled from the Center for Postnatural History’s Database.  The objective of this piece is to be educational and fun in an active state, as well as being visually attractive in a passive state.


Tweet:

Visualization of the tree of life as seen by GMOs.


1 2 3

Ticha Sethapakdi

12 May 2014

euphony 1200x400

Tweet
Euphony: A pair of sound sculptures which explore audio-based memories.

Overview
“Euphony” is a pair of telephones found in an antique shop in Pittsburgh. Through the use of an Audio Recording / Playback breakout board, a simple circuit, and an Arduino, the phones were transformed into peculiar sculptures which investigate memories in the form of sound. The red phone is exclusively an audio playback device, which plays sound files based on phone number combinations, while the black phone is a playback and recording device. Together, these ‘sound sculptures’ house echoes of the remarkable, the mundane, the absurd, and sometimes even the sublime.

A Longer Narrative
One day I was sifting through old pictures in my phone, and as I was looking through them I had a strange feeling of disconnect between myself and the photos. While the photos evoked a sense of nostalgia, I was disappointed that I was unable to re-immerse myself in those points in time. It was then that I realized how a photograph may be a nice way to preserve a certain moment of your life, but it does not allow to you actually ‘relive’ that moment. Afterwards, I tried to think about what medium would be simple, yet effective for memory capture that is also immersive. Then I thought, “if visuals fail, why not try sound?”–which prompted me to browse my small collection of audio recordings. As I listened to a particular recording of me and my friends discussing the meaning of humor in a noisy cafeteria, I noticed how close I felt to that memory; it seemed as if I was in 2012 again, a freshman trying to be philosophical with her friends in Resnik cafe and giggling half the time. Thus, I was motivated to make something that allowed people to access audial memories, but in a less conventional way than a dictation machine.

I chose the telephone because it is traditionally a device that accesses whatever is happening in the present. I was interested in breaking that function and transforming the phone into something that echoes back something in the past. As a result, I made it so that it would play recordings that could only be accessed through dialing certain phone numbers and wrote down the ‘available’ phone numbers in a small phone book for people to flip through. This notion of ‘echoing the past’ was incorporated in the second phone, but in a slightly different way. While the first phone (the red one) had the more distant past, the second phone (the black one) kept the intermediate past. With the black phone, I wanted to explore the idea of communication and the indirect interaction between people. I made the black phone into an audio recording and playback device, which first plays the previous recording made and then records until the user hangs up the telephone. All the recordings have the same structure: a person answers whatever question the previous person asked and then they ask a different question. I really liked the idea of making a chain of people communicating disjointly with each other, and since the Arduino would keep each recording I was curious to see whether the compiled audio would be not so much a chain as it was a trainwreck.

People responded very positively to the telephones, especially the second one. To my surprise, there were actually people outside my circle of friends who were interested in the red phone despite it being a more personal project that only had recordings made by me and my family in Thailand. I am also glad that the black telephone was a success and people responded to it in very interesting ways. My only regret was that I was unable to place the phones in their “ideal” environment–a small, quiet room where people can listen to and record audio without any disruptions.

Some feedback:

  • Slightly modify the physical appearance of the phones in a way that succinctly conveys their functions.
  • Golan also suggested that I look into the Asterisk system if I want to explore telephony. I was unable to use it for this project because the phones were so old that, in order to be used as regular phones, they needed to be plugged into special jacks that you can’t find anymore.
  • Provide some feedback to the user to indicate that the device is working. The first phone might have caused confusion for some people because, while they expected to hear a dial tone when they picked up the receiver, they instead heard silence. It also would have been nice to play DTMF frequencies as the user is dialing.
  • Too much thinking power was needed for the black phone because the user had to both answer a question and conceive a question in such a short amount of time. While this may be true, I initially did it that way because I wanted people to feel as if they were in a real conversational situation; conversations can get very awkward and may induce pressure or discomfort in people. When having a conversation, you have to think on your feet in order to come up with something to say in a reasonable amount of time.

Pictures!

Each phone was made with an Arduino Uno and a VS1053 Breakout Board from Adafruit.

Also many thanks to Andre for taking pictures at the exhibition. :)

Github code here.

Kevyn McPhail

12 May 2014


“3D portraits drawn by a light-painting industrial robotic arm.”

Banner


My partner Jeff Crossman and I are working on getting a industrial robotic arm to paint a 3D, digital scan of a person or object, in full color. The project makes use of a kinect to get the scanned image of a person, and uses Processing to output the points and their associated pixel color. From there we use the plugins Grasshopper and HAL in Rhino, to generate the point cloud and subsequently the robot code. The plugins also allow us to control the robot’s built-in ability to send digital and analog signals, which we use pulse a Blinkm led at the end of the arm at precisely the right time, drawing the point cloud.

GIFS!

Here are some of our process photos as well.


Brandon Taylor

08 May 2014

This project is an exploration into an American Sign Language (ASL) translation using 3D cameras.

An automated ASL translation system would allow deaf individuals to communicate with non-signers in their natural language. Continuing improvements in language modeling and 3D sensing technologies make such system a tantalizing possibility. This project is an exploration of the feasibility of using existing 3D cameras to detect and translate ASL.

ASL_Classifier

This project uses a Creative Interactive Gesture Camera as a testbed for exploring an ASL translation system in openFrameworks. The application is split into two parts: a data collection mode for recording training data and a classification mode for testing recognition algorithms. Thus far, only static handshape classification has been implemented. The video below demonstrates the classification mode.


Currently, the classification algorithm is only run when a key is pressed. A likelihood is calculated for each of the 24 static alphabet signs for which handshape models have been trained (the signs for ‘J’ and ‘Z’ involve movements and were thus excluded from this version). The probabilities are plotted over the corresponding letter-sign images at the bottom of the screen. As implemented, the letter with the highest probability is indicated, regardless of the absolute probability (thus a letter will be selected even if the current handshape does not truly correspond to any letter).

American Sign Language signs are composed of 5 parameters:
-Handshape (finger positions)
-Location (location of hands relative to the body)
-Palm Orientation (hand orientation)
-Movement (path and speed of motion)
-Non-Manual Markers (facial expressions, postures, head tilt)

In order to develop a complete translation system, all 5 parameters must be detected. At that point, there is still a language translation problem to account for the grammatical differences between ASL and English. A variety of sensor approaches have been explored in previous research, though to date, no automated system has approached the recognition accuracy of a knowledgable signer viewing a video feed.

At first, I looked into using a Leap Motion controller and/or Kinect. Both devices have been used in previous research efforts (Microsoft Research, MotionSavvy), but both have drawbacks. The Leap Motion has a limited range, making several parameters (Non-Manual Markers, Location, Movement) difficult to detect. The first generation Kinect, on the other hand, lacks the fine spatial resolution necessary for precise handshape detection.

kinect

leapmotion

The Creative Interactive Gesture Camera sits nicely between these sensors with finger-level resolution at a body-scaled range.

CreativeCamera

In fact, it is possible that the Creative 3D camera can detect all 5 ASL parameters. However, due to time constraints, the scope of this project has been limited to static handshape detection. While there are approximately 50 distinct handshapes used in ASL, I have focused on just classifying the alphabet for presentation clarity.

asl_alphabet

The results thus far have been positive, however there remains work to be done. Optimizations need to be made to balance the model complexity and classification speed. While this is not so important as implemented (with on-click classification), for a live system classification speed is an important factor. Also, handshapes that are not used in the alphabet need to be trained. Using only the alphabet makes for a clear presentation, but the alphabet characters are not more important than other handshapes for a useful system. Lastly, as with any modeling system, more training data needs to be collected.

I intend to continue developing this project and hope to make significant progress in the coming months. My current plans are to pursue the following developments in parallel: 1. Train and test the static handshape classifier with fluent signers 2. Implement a dynamic model to recognize signs with motions. I’m also interested in seeing how well the new model of the Kinect will work for such a system.