“Vent At Me” — Final Capstone Project Documentation

by aburridg @ 8:14 pm 28 April 2010

Here’s a link to my project applet: Vent At Me

Motivation and Inspiration

Inspiration:
We Feel Fine
FML

There are many sites which allow people to broadcast their woes and annoyances publicly on the internet. But, I was always interested in how this correlates to cyber privacy: Are there any patterns between what people post publicly on the internet and how comfortable people feel posting certain information on the internet?

I’d also like to thank Patrick (the TA) for his input in helping me figure out what my project’s concept/topic should be.

Methodology

Like with my first project I used Mechanical Turk. I posted the following survey:

1) Vent at me! (Anything goes. Please provide at least one complete sentence.)

2) What is your age and gender?

3) Would you post this vent on the internet if someone could identify you personally?

4) Would you post this vent on the internet anonymously?

I received roughly 500 answers over that past month. However, I only used about 300 of those answers since I only wanted to use vents bigger than a certain length. And, also because quite a few ended up being spam or non-readable (because the participant was not at all familiar with English).

Implementation

Graph Theory…Eh?

One major portion of the implementation involved the use of performance algorithms in order to traverse and interpret graphs. I have never implemented a gui which involved the use of a graph, so this was actually very interesting.

If you are unfortunate enough to understand my code, I apologize for my main (“draw”) function. I tried to keep external function calls to a minimum in order to increase performance. So, there is a lot of redundant code interspersed there.

Another point of the graph is the “spring” force I applied to the nodes in the graph. I used this force in order to make the graphs easier to interpret visually. In general, it works very well. However, it can get hectic when there are too many nodes. In fact, one of the reasons why I wanted the upper bound of the total number of neighbors of a single node to be around 30 (see TF-IDF section).

I learned a lot from coding up this part of the lab–and it was actually the most interesting part for me.

TF-IDF

Wikipedia article

Basically, the algorithm compares the frequency/total number of words of each word in two documents.

I also pruned the algorithm by separating the vents into 8 different categories and filtering out unimportant words. I also pruned the vents themselves–I did not include vents that were less than two sentences.

I’m very pleased by the results–the connected nodes are definitely connected to each other.

Interface

This has been a week point for me in all my projects. Ideally, I wish to post this project on a webpage where I can post specific instructions. I think, once it is adequately explained, it is easy to navigate and have fun with.

However, I am worried that I may have made it too complicated. I didn’t leave my project alone for more than a few minutes during the exhibition because I was worried people wouldn’t understand how to use it. But, everyone seemed happy with the general design of the interface. And, once I explained how to use it, I got good reviews.

Processing to OpenFrameworks to Processing

I feel like I should mention that I did try importing this project to openFrameworks…and learned a lot about the environment when I did. The reason I ported over was in hopes that the project would run faster. However, two weeks was not enough time for me to get comfortable with the interface calls. So, I ended up going back to Processing and using some optimization techniques. The project still runs relatively quickly (especially when it’s not being run on my terribly slow and loud laptop. 😉 ).

Findings

So, a lot of the findings were not surprising. Younger generations are willing to post vents that stretch over every topic, while older generations prefer to only vent publicly about politics on the internet. Females tended to vent for longer than males–and females tended to vent more about their love lives and annoying people.

There were many vents about lack of money. I tried my best to make sure that my data set included a broad set of topics (another reason why I only used 300 out of the 500 vents I collected).

Overall Experience

There were two sides, I’d say…the data collection and the implementation. The data collection was more fun, but more tedious. The implementation was more difficult, but more interesting. I learned a LOT from working with this project. Mainly the following:

– Document Comparison
– “FishEye” technique
– Interfacing
– Graphs

Thanks for the fun experience with the class! I really enjoyed learning about a side of art I actually never even knew existed until this year.
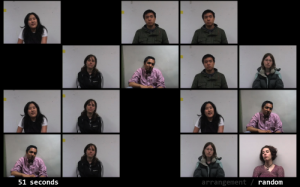
Final Project: Update

by areuter @ 8:23 am 21 April 2010

This is not a final screenshot!! The videos displayed are for testing purposes only.

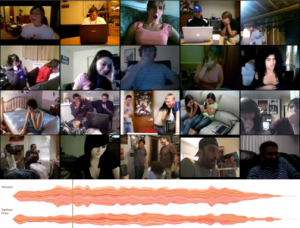
Minute is an investigation into our individually unique perception of time. Participants are asked to perceive the duration of one minute, and a video recording of this minute is added to a database. A visual arrangement of minutes is then created by pulling twenty random videos from the database.

Hardware needs for the showcase on 4/28:
Ideally, a monitor and Mac mini, but a monitor and DVD player could also work.

Some favorites:
Cheng’s Words From Beyond Hope
Paul’s The Central Dimension of Human Personality
David’s Fantastic Elastic Type

Final Project: Ant Farm Unwrapped

by Max Hawkins @ 7:50 am

Architecture for Everyone

F-310

What if creating architecture was something that anyone could do in their back yard? This is the question Ant Farm, the legendary early-70s artist collective asked when they wrote the Inflatocookbook, an a recipe book for inflatable structures that attempted to liberate architecture from the realm of professionals.

With the advent of computer graphics and accessible CAD software Ant Farm’s dream of democratic architecture seems more plausible than ever. With this in mind I wrote a pattern generator for inflatable structures, implemented as a plugin to Google Sketchup. A digital supplement to the Inflatobookbook, it simplifies one of the most difficult parts of making an inflatable: deciding where to cut.

The Software

The hardest thing about building an Ant-Farm-style inflatable is designing the flat cut-out pattern used to create the 3D form. My plugin lets the computer do the thinking for you. All you need to give it is a model.

Existing Software
Cheap Cross-Platform Easy To Use
Lamina $360 Windows Yes
Pepakura Designer $38 Windows Yes
Blender Plugins $0 Windows, Mac, Linux No
Ant Farm Unwrapped $0 Windows, Mac Yes

Before I created my plugin I hoped to modify existing software to create plans inflatables. However I was dissatisfied with the cost and difficulty of existing unfolding software.

Google Sketchup was an ideal platform for my plugin. It’s free, cross-platform, easy to use, and scriptable in Ruby.

The Algorithm

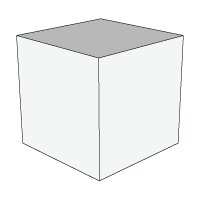
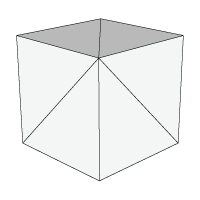
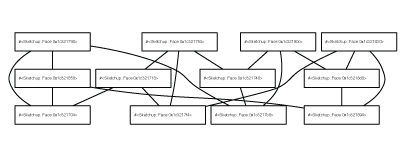
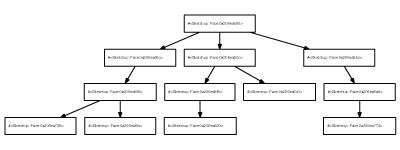
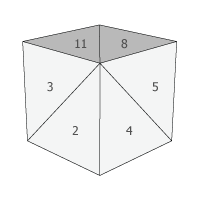
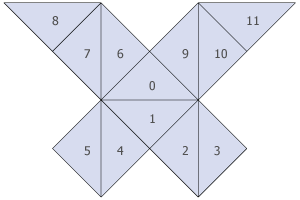
The plugin’s unfolding algorithm is based on a post by StackOverflow user Theran. It works by representing the 3D shape as a graph. Below is an example of how the algorithm works on a cube:

  1. Polygonization

    The sketchup model is converted into triangles—a polygon mesh.

  2. Graph Generation

    The polygon mesh is converted into a graph (in the computer science sense.) Each face is a vertex in the graph, and each edge joining two faces in the polygon mesh is a connection between the two vertices in the graph.

  3. Optimization

    By applying Dijkstra’s algorithm to this graph, we get a tree where every connection represents an edge that we won’t cut, but will ‘fold’ when the structure is inflated.

    The edges to fold are chosen based on how much they would need to bend to achieve the right shape. Edges that connect faces with large angles between their normals are less likely to be used as folds than faces with similar curvature. In the cube below, it’s much more likely that 5 will share an edge with 4 than with 8 because the difference in curvature is small between them.

  4. Flattening

    Once the edges to fold are determined, each face is laid out flat one at a time. The first face placed is the one determined to produce the lowest overall cost by the Floyd-Warshall algorithm. From there, all of the other faces are placed, connected to the other shapes by their fold edges.

    Occasionally two faces will overlap in the unfolding. When this occurs, the program creates a separate shape that doesn’t intersect and continues adding faces off of that new shape.

Simplification and Segmentation

This algorithm can be very slow for more complicated meshes, so it’s a good idea to simplify any model you provide it. I use a piece of software called MeshLab to clean up and simplify the mesh before loading it into Sketchup. The quadratic mesh simplification algorithm available in MeshLab can lower the number of polygons in a model while still maintaining its basic form.

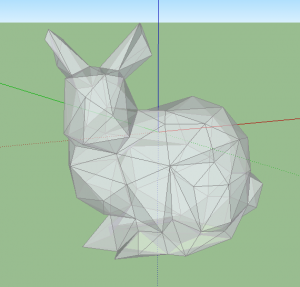
With large models, segmenting the mesh into components before processing can help make the output simpler. In the bunny model I created, I made a separate model for each ear, the head, the tail, the feet, and the body.

In a future version of the plugin, I plan to automate these steps.

The Bunny

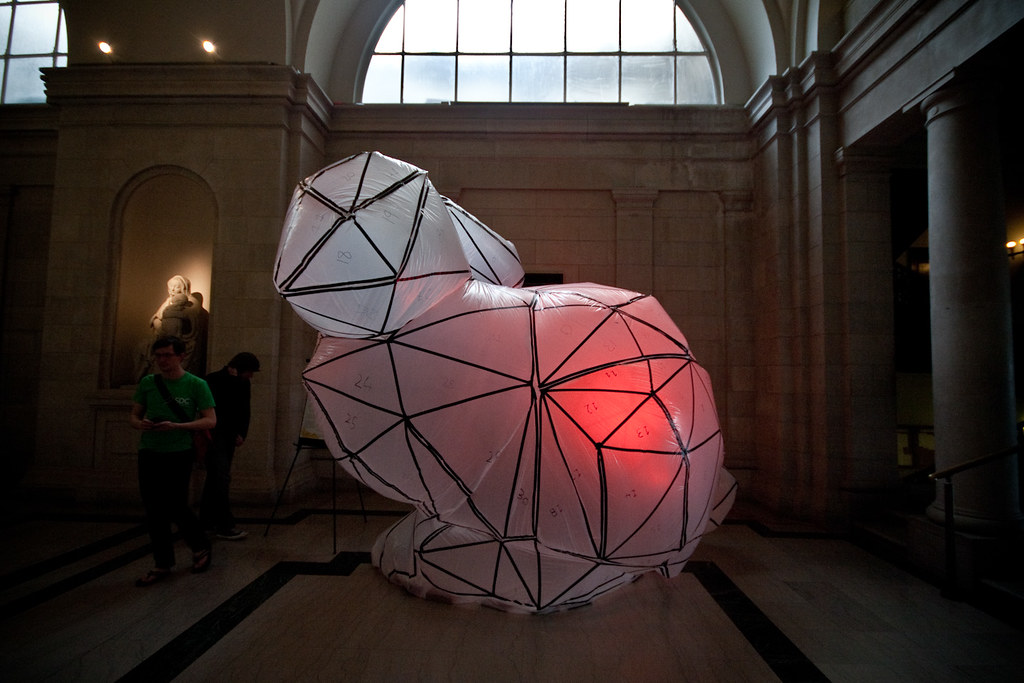
To test my software I decided to build a 12’ tall Stanford Bunny—a classic generic 3D model and somewhat of an in-joke among graphics experts. When a new graphics algorithm is created it’s usually tested first on the Stanford Bunny.

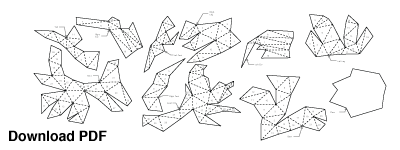
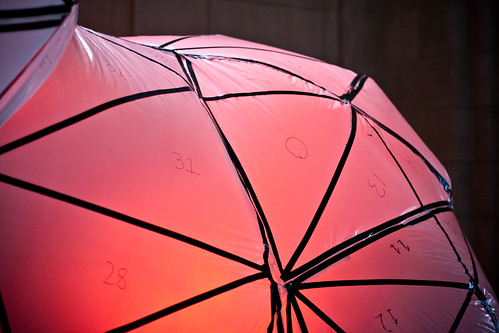
After some pre-processing, I ran my plugin on a model of the bunny. It produced several pieces, available as a printable PDF below. The numbers on the faces represent the order in which the software laid down each face.

Construction

Materials
Item Price
Husky 4 Mil, 10 Ft. x 100 Ft. Clear Polyethylene Sheeting Roll

I used this cheap polyethylene, intended for construction, as a membrane for my inflatable. It’s available in most hardware stores, usually in the paint section.

$43.60
16″ Hand Impulse Bags Sealer (SPB16)

This machine fuses together pieces of plastic to create a thin, tight seal. It greatly simplified the sealing process. In all, I sealed 218 feet of plastic over 125 seams.

$150.49
Utilitech 20″ High Velocity Floor Fan

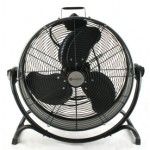
During the final show I inflated the bunny with a borrowed fan. Afterwards I bought this 5000 CFM (cubic feet per minute) output fan from Lowe’s. It inflates the bunny but has trouble maintaining its speed when any pressure is applied to the bunny. I’m thinking of returning it and finding a more powerful fan.

$69.98
Pattern

P1060489

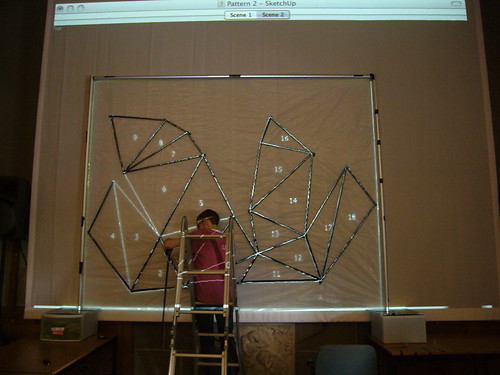
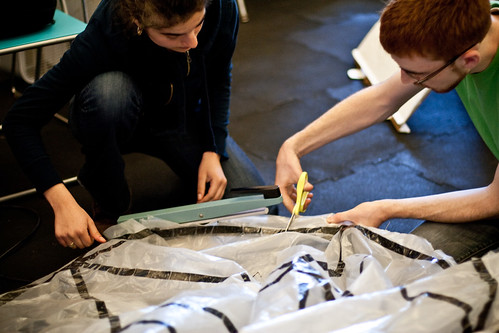
I used a computer projector to get the pattern I had created in Sketchup onto plastic. I put a piece of black electrical tape over each line in the projection and wrote each face’s number using a black sharpie. This step took the most time.

P1060519

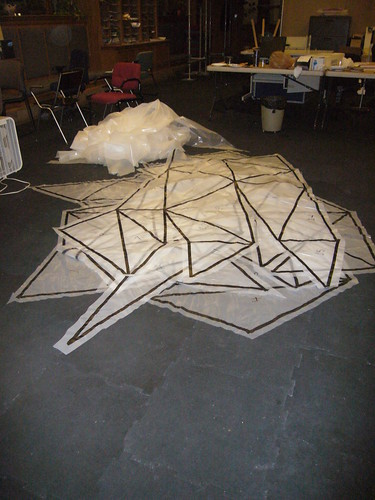
Afterwards I cut out each shape in preparation for sealing, leaving about an inch and a half around the edge for creating a seam.

Sealing

Bunny Bunny.

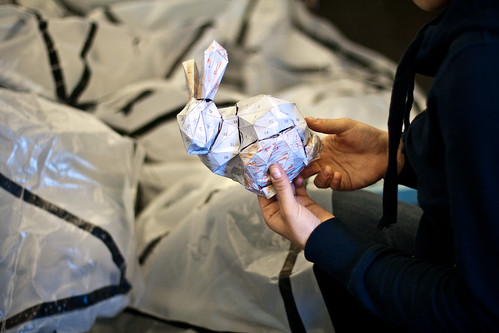
A scale paper model of the bunny helped align the pieces in preparation for sealing.

More Rabbit Construction I.

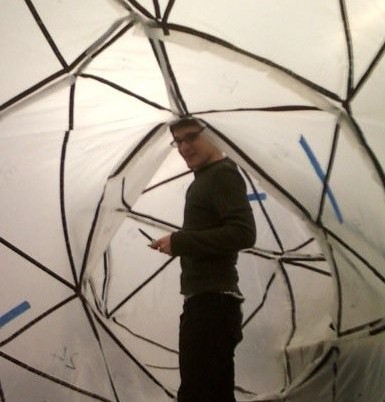
Sealing the bunny is a lot like sewing—It’s done inside out. First I matched up the adjoining faces with the outside, taped sides of the plastic facing in. Then I used the impulse sealer to fuse the plastic at the place where the two pieces overlapped. Since the impulse sealer I used wasn’t big enough, I cut a flap in the excess plastic each time so that it would fit in the machine.

Alternatively, a clothing iron can be used for this step. I prefer the impulse sealer because of the clean seam it creates.

Inflation

I don’t have a picture of how I attached the bunny to the fan. There wasn’t much time before the show to design a proper fan tube, so it’s pretty MacGyver. I just cut a slit in the side of the bunny and attached the plastic to the fan using packing tape. Surprisingly the seal held.

After inflation, I found some holes that the impulse sealer had missed. A friend helped me seal them with packing tape from inside the bunny.

The Show

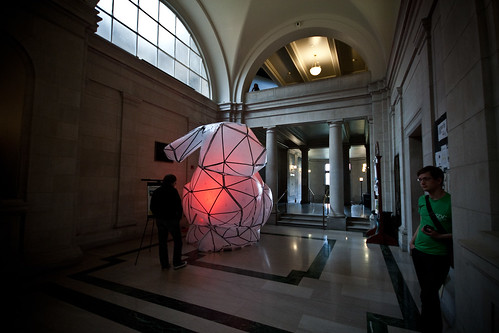
During the show my bunny sat in the hallway of Carnegie Mellon’s College of Fine Arts building. It was backlit with a stage light with a red gel.

STIACD XVIII.

STIACD XIX.

STIACD XXI.

Thanks

This project is funded by a student grant from the Fine Foundation, received through the Electronic Arts area of the Carnegie Mellon School of Art

Thank you to everyone who helped assemble the bunny. You know who you are!

Final Project Preparation: SubFabricator-Explorations in Fabrication

by mghods @ 2:08 am

Project Title:

SubFabricator – Explorations in Subtractive Fabrication

Project Image:

Project Description:

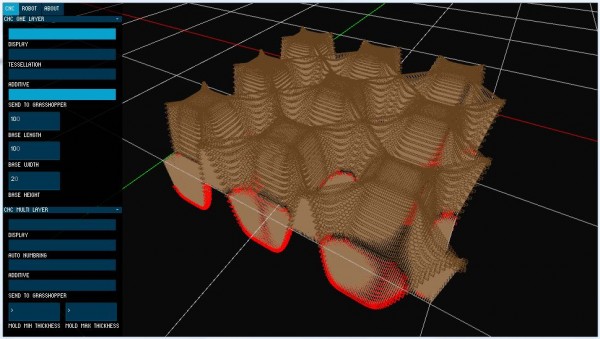
Think of the simplest way to fabricate a sculpture. The answer is removing undesired volume of a bulk material till remaining volume shapes like the desired form. SubFabricator is an interface that enables user to input her/his 2d or 3d drill paths or drill vectors algorithm in Processing. Afterward, the SubFabricator provides visualization of final form  and data for fabricating form (using CNC or 6-axis Milling Robot) through GrassHopper.

Exhibition Requirements:

All I need to exhibit the work is a table or any kind of flat surface for putting laptop and fabricated forms on. A 6.0′ x 3.0′ or 8.0′ x 2.0′ table would suffice.

Among all projects my favorites are:

Project 1 – The World According to Google Suggest by Nara

Project 2 – AI Brushes by xiaoyuan

Project 3 – Trace Modeler by Karl DD

twitter code mod for dog shock collar.

by Mishugana @ 11:14 pm 20 April 2010

import processing.serial.*;
XMLElement xml;
ArrayList Followers = new ArrayList();
Serial myPort;
int temptime=0;
void setup() {
  size(200, 200);
   if (myPort!=null)
   myPort.stop();
   myPort=null;
  xml = new XMLElement(this, “http://rssfriends.com/followers/waffleshop“);
  XMLElement site = xml.getChild(0);
  XMLElement[] siteData = site.getChildren();
  for (int i=0;i<site.getChildCount();i++){
  if(siteData[i].getName().equals(“item”)){
    String sttt =(siteData[i].getChild(0).getContent());
    String[] tokins = split(sttt, ” “);
    if(tokins[0].equals(“Follow”))
    Followers.add(tokins[1]); 
   // if(tokins[0].equals(“Unfollow”))
   // println(tokins[1]);} 
}}}
boolean searchArray(ArrayList alist, String lf) {
  for(int i = 0; i < alist.size(); i++)
    if (alist.get(i).equals(lf))
    return true;
 return false;
}
void draw() {
  background(255);
  xml = new XMLElement(this, “http://rssfriends.com/followers/waffleshop“);
  XMLElement site = xml.getChild(0);
  XMLElement[] siteData = site.getChildren();
  for (int i=0;i<site.getChildCount();i++){
  if(siteData[i].getName().equals(“item”)){
   if (myPort!=null)
    myPort.stop();
    myPort=null;
    String sttt =(siteData[i].getChild(0).getContent());
    String[] tokins = split(sttt, ” “);
    if(tokins[0].equals(“Follow”))
    if (!(searchArray(Followers,tokins[1])))
    {
         if (myPort!=null)
        myPort.stop();
        myPort=null;
      println(tokins[1]);
      temptime=millis();
     
      while ((millis()-temptime)<1000)
      {
      if (myPort==null)
      myPort=new Serial(this, Serial.list()[0], 9600);
      }
 
    Followers.add(tokins[1]); 
    }
}
}}

Final Project Checkpoint

by aburridg @ 10:13 pm 19 April 2010

First off, here’s a screen shot of my final project so far:

My main question to the class was how to improve the interface. I changed the font from when I presented this in the morning. However, I have finished all the back-end calculations. The vast majority of the calculations (such as the neighbors calculation) is done during the loading, so there should not be an issue with speed while the user is actually interacting with the project.

Items Still Needed to Be Completed:

  • Create Histogram on the right hand side of the graph space which contains all vents in the specified filter sorted by either length, profanity, age, or the number of similar vents to it.
  • Make the vent text scroll
  • Add information about the vent below where the vent is displayed: type of vent (indicated by the vent’s associated node’s color), length of vent, level of profanity, and the number of similar vents.
  • Modify length of springs to be dependent how how similar nodes are to each other.
  • Create Main Menu Page that links to the main app, an instructions page, and an information page

Items Needed for Exhibition:

I just need one computer. I can provide my own (however, my computer does sound like a jet engine–if that is an issue).
Some Favorite Past Projects of Fellow Students:

  • Fantastic Elastic: http://golancourses.net/2010spring/03/03/fantastic-elastic-type

    fantastic elastic (work in progress) from David Yen on Vimeo.

  • Gaby’s Music Simulation: http://golancourses.net/2010spring/02/15/project-2-guribe
  • Jon Miller’s Password Visualization: http://golancourses.net/2010spring/01/27/jon-miller-project-1
  • Face Flip http://golancourses.net/2010spring/03/15/faceflip:

    FaceFlip from Max Hawkins on Vimeo.

Natural Processes Color Palettes

by caudenri @ 1:13 pm

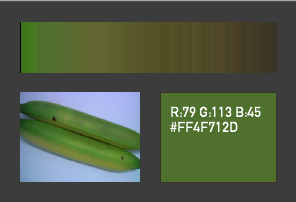
I’ll have more to show on Wednesday, but here’s some images of what I’m getting for the modules displaying gradients.

Interface screenshot

Rolling over the gradient displays the color and the image it came from.

I shouldn’t need any special hardware for the exhibit, I’ll show it on my own computer and I’ll make a poster or printed piece to go along with it (so maybe an easel or something to hold the poster)

Title/Sentence:

ColorShift: Creating color palettes from time lapse photos of items which change color over time.

Other projects I’d like to see at the exhibition:  FaceFlip, Alyssa-  Flower Generation, David- Fantastic Elastic

Interactive Fabrication

by Cheng @ 10:30 am

Shaper

‘Shaper’ is a prototype device that uses a three axis CNC machine to interactively dispense expanding foam material in an additive fabrication process. The device can be controlled directly via a translucent touch screen, allowing the user to look directly into the fabrication area and create physical artefacts with simple gestures.

At the Show: a 1m X 0.5 m space for the 3D printer, two tables by the side to place controlling computer and display printed objects, and a rubbish bin.

Also we’d need a cart to move the whole machine over to studio.

Kaleidoscope Mirror – Progress

by ryun @ 10:27 am

0. Progress

1. Project Image

2. Project Description

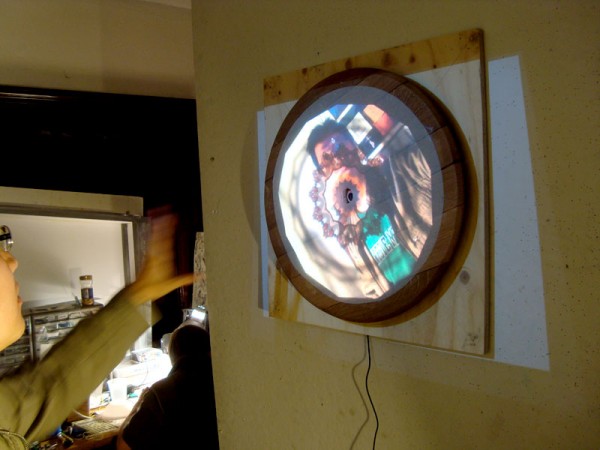
This Kaleidoscope mirror allows the viewers to see themselves with various fun  effect. By rotating the mirror frame. viewers can manipulate their face in realtime and even allows the time travel.

3. Hardware Issue (tricky!!)

1. I need good quality of projector (if poor quality, viewer will see the rectangular edge of the screen – like the projector that I am using for the prototype).

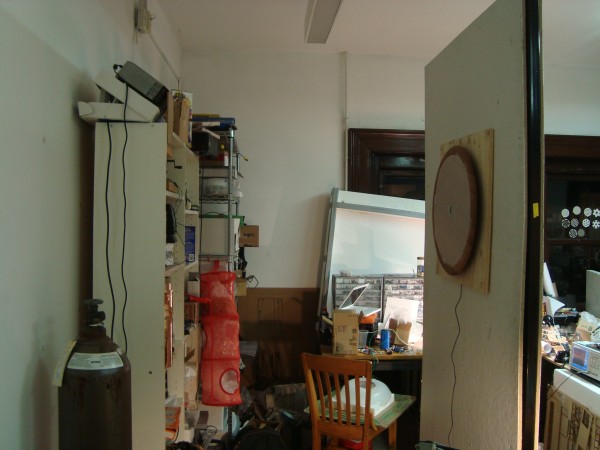
2. The first picture below explains how the mirror setup will be. The projector should be slanted and set up high so that viewer do not block the projected screen.

For the exhibition, my idea is to hang the projector at the bottom of second floor hand-drill (yellow highlight). But I am sure about this idea.

4. Favorite Project

1. David Yen’s elastic type
2. Max’s Tesserae

3. Kuan’s Trees Cycle

Final Project Progress: Flight Maps

by rcameron @ 10:15 am

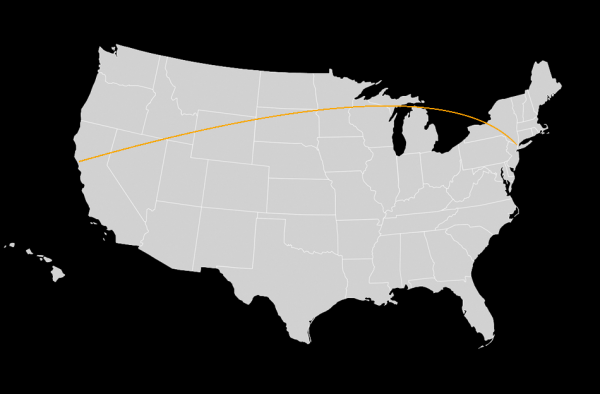
Name: Any ideas? Something that’d make for a catchy url.

It will be presented on my laptop. Currently being moved to HTML5.

Final Project – Recursive Photo Booth

by sbisker @ 10:15 am

Sentence
Recursive Photo Booth uses augmented reality to enable a simple and fun new form of collaborative photography.

Summary of interaction:
Participants can virtually pose with a photo that is taken by the participant before them (who in turn, is posing with the one before *them*, and so on…)

Photo:

Hardware needs:
Video camera / external webcam, OR a high surface (stool? chair on table?) on which to rest laptop computer webcam
Secondary monitor (can bring my own in a pinch)

Favorites:
Project 1:  Pin Numbers, The World According to Google Suggest, Jersey Numbers
Project 2:  Ivy Curtain, Queen
Project 3:  FaceFlip, Chocolate Chocolate Add Some Milk

project listen sketches: progress

by davidyen @ 10:14 am

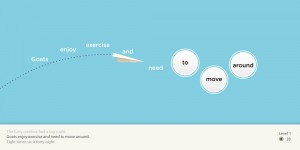
Sentence summary: Mini game sketches for teaching children how to read more fluently.

I could display this on a laptop and possibly a DVD (not sure if I want to do a video instead of running the program, might be easier to explain).

LittleFriends

by kuanjuw @ 10:09 am

Hardware: Projector, camera.
Favorite:
1. Fantastic Elastic Type [David Yen]
2. FaceFlip [Max Hawkins]
3. Tesserae: Making Art Out of Google Images [Max Hawkins]

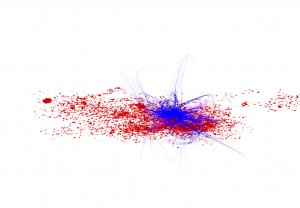
In-Progress Final Project: Typeface Classifier Map

by Nara @ 10:04 am

Progress Report:

PCA is working (using the library at http://johnhugg.com/tuftsgeometry/)

Doing lots of reading on shape detection

Will make interface a little more interactive as well

Final project

by xiaoyuan @ 10:03 am

Get Adobe Flash player

AI-controlled flying, swarming attack saws killing little characters running around, making them bleed, painting the ground with blood.

Favorites:
500 rich people visualization – Paul
2 girls one cup – Paul

Hardware needs:
Computer, monitor, mouse
I expect the game to be playable.

2 Girls 1 Cup Reactions

by paulshen @ 9:57 am

I plan to get a higher-res image when I get home.

Title: 2 Girls 1 Cup Reactions
Description: Analyzing the powers of one shock video.

Equipment:
probably just DVD player on a screen, maybe projector? I could provide my laptop.

Final Project: Progress

by guribe @ 8:06 am

These are some final static 2D images representing different songs. I eventually want to create 3D objects out of the songs, similar to these 2D blueprints.

These images were created out of information parsed from MIDIs.

-The shapes in the center represent the time signature (a square, for example, has four beats in a measure)
-Each side of the center shape represents one beat, so the circles around the center represent full measures.
-Each dot/circle represents a note
-The center dot represents the key it is in (if the song is in C major, the center represents middle C, for example)
-The placement of the other circles represents the distance of the interval from the center note as well as that note’s rhythmic placement within the measure (If the note is played on beat one, it is displayed exactly below the center note, for example)
-The color of the dots represents the instrument that note is played in

***For the final presentation***I will be displaying a series of images on a large poster while showing a recording on my laptop.

Above: Bohemian Rhapsody by Queen

Above: Beethoven's 8th Symphony, 1st movement

Above: Guantanamera by Celia Cruz

Above: I Want to be Sedated by The Ramones

Above: Giant Steps by John Coltrane

Jordan’s Final Project Critique and stuff

by jsinclai @ 7:44 am

Name: Flegs

An interactive installation in the Gates’ Helix that shows what is really happening on the other side of the wall.

Image:

The project:
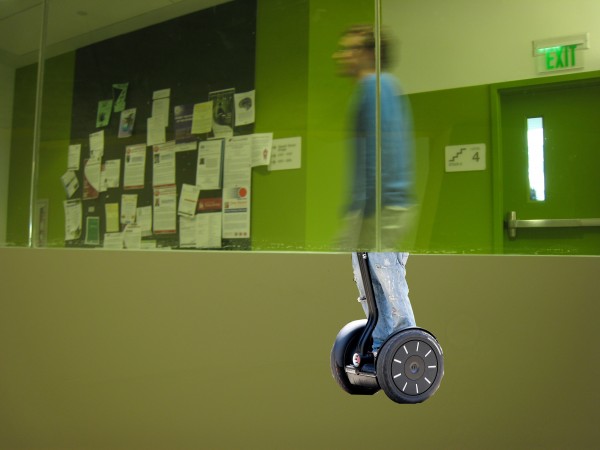
Ideally, this would be an installation in the Gates Helix near the helix entrance to the fourth floor. A camera will detect people on the outside of the helix, and project fake feet in their place.

How this will presented:
I want to be a part of the main exhibit, and having the installation in Gates isn’t being part of the exhibit. What I can do is use a table flipped on its side as a faux wall. I’ll need a table, and a stand/desk for my laptop, my camera, and my projector. Looks like I’ll just be showing a video and a poster. If a TV+DVD player can be provided, that’d be great. Otherwise, my laptop and one of my lab’s 22″ monitors could probably do the trick.I’ll also need a poster stand.
I have class on Wed from noon to 4:30 straight…but I’ll definitely make an effort to be there at least an hour and a half early. Patrick mentioned we can set up in the morning, so I’ll probably do that.
Cheers!

Need:
TV + DVD Player
Poster Stand

Update 4/26/2010:
I installed Flegs today for two hours! It was a lot of fun and I had some great support.
Here’s a pic from setting up:

Digital Owner

by Mishugana @ 11:14 pm 14 April 2010

Project-2 Cell Phone Paint

by Mishugana @ 11:04 pm

Cell Phone paint

createEmptyMovieClip(“pen_mc”,5);
pen_mc.lineStyle(0,0×000000,100);
pen_mc.moveTo(120,160);
var maxBatteryLevel:Number = fscommand2(“GetMaxBatteryLevel”)
var signalStrength:Number;
var hours:Number;
var minutes:Number;

_root.onEnterFrame = function ()
{
getPhoneData();
loadVariables(“accelerometer://data”, _root);
if(isCharging == 1)
{
blueee= random(3);
}

pen_mc.lineStyle(((hours*60)/50),RGBToHex(signalStrength,accY+1000/8,minutes),batteryLevel/blueee);
pen_mc.lineTo(-(-120+accX/4),160+accY/6);
}

function getPhoneData(){

getBatteryLevel();                        // get the battery level

getTime();                                // get hours and minutes

getSignalStrength();                    // get signal strength
}

function getBatteryLevel(){

isCharging = fscommand2(“GetPowerSource”);                            // check if it’s charging or not

var tempLevel:Number = fscommand2(“GetBatteryLevel”);                // get the current battery level

batteryLevel = (Math.round(tempLevel / maxBatteryLevel * 99)+1);        // convert it in a 1 to 5 scale
}

function getTime() {

minutes = fscommand2(“GetTimeMinutes”);                                // get the minutes

hours = fscommand2(“GetTimeHours”);                                    // get the hours
}
function getSignalStrength(){
signalStrength = Math.round(fscommand2(“GetSignalLevel”)*40)+1;
}
function RGBToHex (r, g, b ){
var hex = r << 16 ^ g << 8 ^ b;
return hex;
}

Next Page »
This work is licensed under a Creative Commons Attribution-Noncommercial-Share Alike 3.0 Unported License.
(c) 2016 Special Topics in Interactive Art & Computational Design | powered by WordPress with Barecity