Portrait made by Neural Networks
This portrait was made by neural networks. DMGordon, the subject, discusses his artwork as a machine attempts to recreate him in his own artistic style.

Artistic Process
DMGordon and I talked a lot before I settled on the idea for this project. I was inspired to create this portrait after we looked through his sketchbooks, which were full of interesting drawings and characters. He has a style of sketching that I felt captured his quiddity in an interesting way. I wanted to see what DMGordon would look like if he were rendered in the style of one of the characters he creates. Additionally, by constructing the video in clips showing the style of one sketch at a time, I wanted to emulate the experience of flipping through one of his sketchbooks. Here are the three sketches I used:
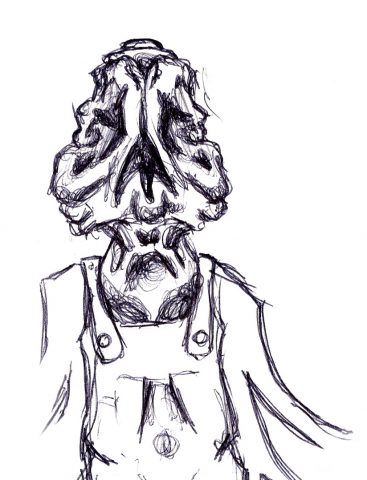
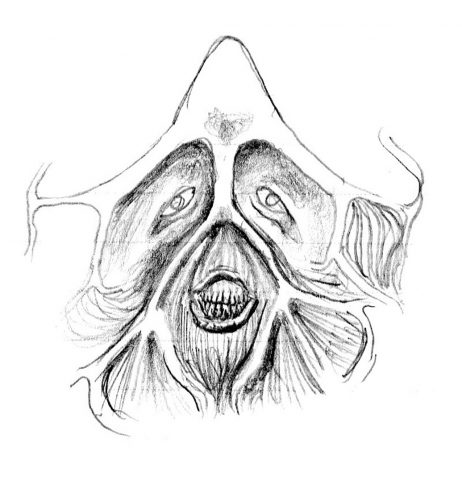
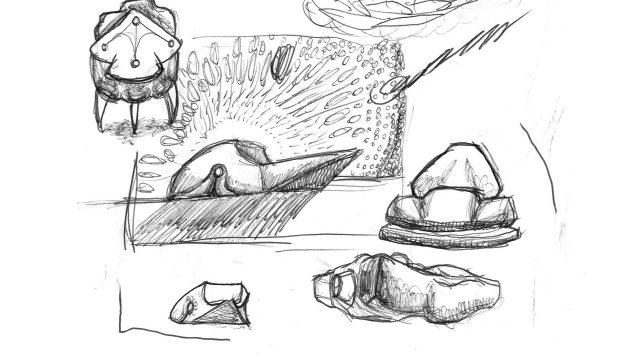
Before I settled on these three sketches, I scanned in dozens of his sketches and experimented on the results that each of them gave when passed through a neural network. I tested out the styles using http://deepart.io, a website that allows you to style transfer individual images. I made the following gif out of the results:
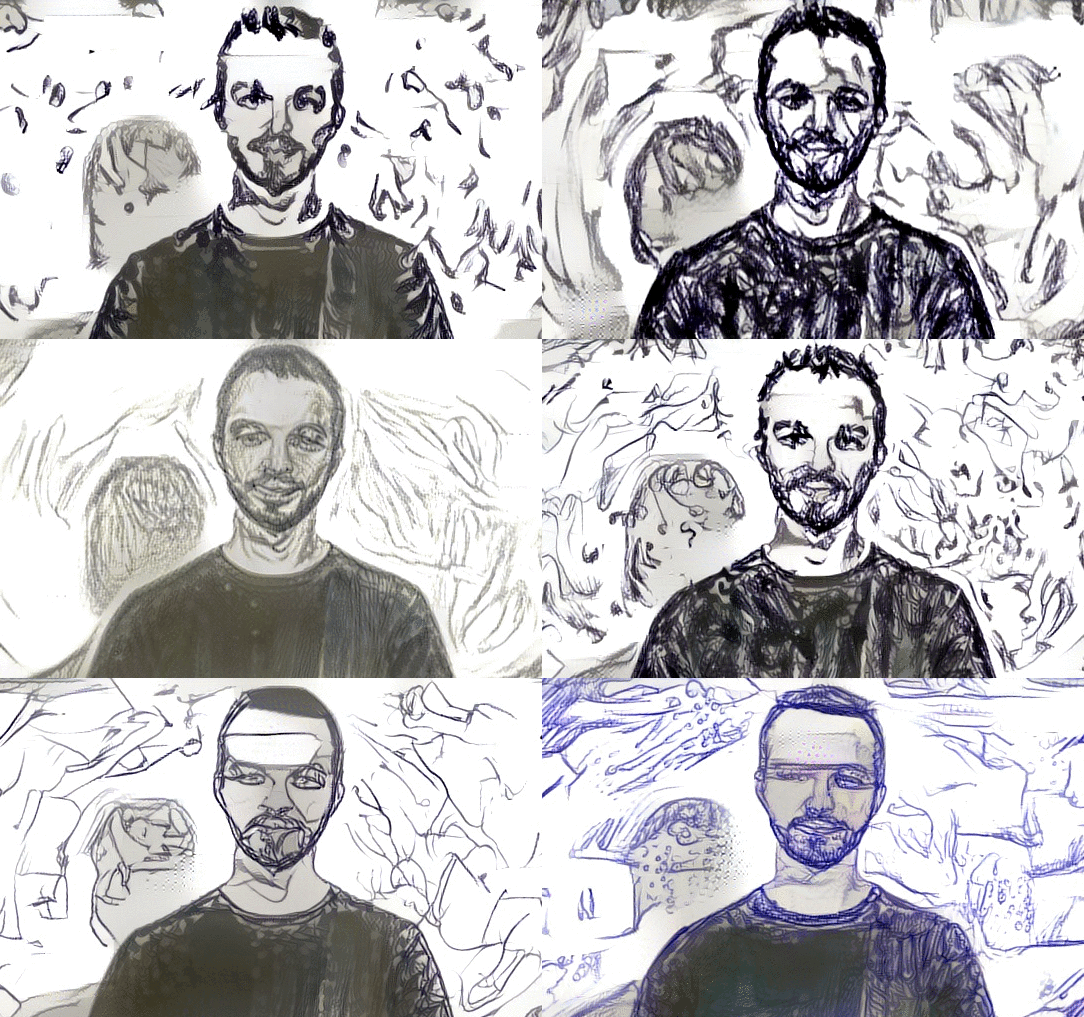
From making this gif I realized that varying between dozens of sketches and colors is visually very unpleasant, and it’s hard to see consistency from image to image. I like the randomness of it, but not so much randomness that it’s hard to look at. I ultimately settled at only using black and white images, and, for the most part, staying consistent with which sketch I used from frame to frame. In terms of the video content, I decided to have DMGordon discuss each sketch as he was rendered in the style of that sketch.
Inspirations
I was inspired a lot by traditional rotoscoping, such as the Take On Me music video and the movie Waking Life. I wanted to see if it was possible to create a similarly interesting effect programmatically.
Technical Process
To create this project, three of DMGordon’s sketches were scanned and passed through a neural net. For each sketch, the neural net developed a style model. Then, the model was transferred one by one onto each frame of video, rendering the frame in the style of the original sketch.
There were two technical pipelines I used, one to generate the style transfer models, and one to apply the style transfer models to a large amount of media.
Tech Part 1: Style Model Transfer
Originally, I attempted to do all of the style transfer locally on my own computer. I downloaded an implementation of the style transfer algorithm on GitHub (there are many), and tried running it on my own laptop. Unfortunately, running one frame through this neural network on my own laptop took about 90 minutes, which wasn’t feasible.
Fortunately, I found an incredible service called Algorithmia that can apply the style transfer in only 10 seconds per image. I would highly recommend this service for any sort of intensive algorithm needs anyone may have. Algorithmia has their own image hosting, and an API to transfer image back and forth from their hosting and run it through their algorithms. I contacted Algorithmia about my project, and they gave me a bunch of free credit – turns out both of the founders went to CMU!

After I had filmed all the video for my project, I went through all the clips and found the ones I liked. Essentially, I edited together my video in normal footage before I processed the effects. Then, for each clip, I developed the following process.
- I used ffmpeg to split the clip into 30fps images.
- Using a python script that I wrote to generate bash script, I uploaded the images to Algorithmia. I ran into an interesting problem doing this, where originally, the script would get stuck after 5 or so images. I fixed this problem by running all the commands as background processes. However, since I was uploading thousands of frames, I wound up accidentally fork bombing my computer once or twice and learned all about fixing that.
- Using another python script I wrote, I passed the images through Algorithmia’s style transfer algorithm (using the models that I generate using AWS – more on that later) in batches of 20. If you do more than 20 images at a time, the requests time out. This script was actually really interesting to write, because I didn’t always want only one style applied to a video. Often, I wanted to randomize which model was applied to a given frame between 2 or 3 options. Additionally, since I trained so many models, I was able to save benchmarks for each style model. Basically, this means that for every sketch I had a “really good model” and a “less good model” and a “weird looking model”, so I was able to randomize the model between these options without actually randomizing the style. It made things look just a bit more visually interesting.
- Using another python script I wrote to generate bash scripts, I downloaded all of the frames from Algorithmia.
- Using ffmpeg, I stitched the frames back together, split off the original audio from the video, and re-combined the audio with the new video.
Tech Part 2: Style Model Generation
I needed to actually generate models to apply to the frames of video. Again, there was no way this process was going to work on my personal computer. Fortunately, Algorithmia has a solution using Amazon Web Services to run a style model training script. After spending several hours on the phone with Amazon trying to convince them to let me use one of their beefy GPU-enabled EC2 instances, I triumphed!
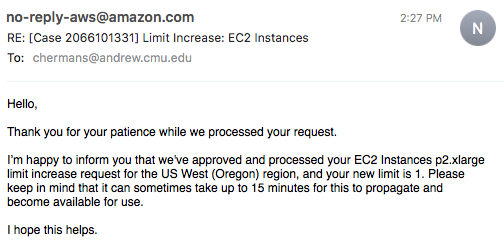
I also managed to get $150 of educational AWS credit, so cost wasn’t a problem. This instance costs about $1 an hour to run, and it takes around 24 hours to train one style model, so it would normally cost about $25 per model. I can only imagine how long it would take without a GPU.
Here’s how I generated the style models:
- Select the sketchbook image I want to use
- Launch an Amazon EC2 p2.xlarge instance using the Algorithmia AMI
- Install the Algorithmia script. This loads the necessary machine learning software and environments that are dependencies to the model training code.
- Start the model training on the style image (using tmux so that I don’t have to leave my computer open for 24 hours)
- Upload the trained model to Algorithmia
Reflection
I feel I’ve created a “portrait machine” with this project, and I think the output is nice but it could be a lot better. For example, in critique, my group pointed out that the video for the interview could be more interesting, and the audio could be cleaner.
There’s definitely room for further experimentation with this project, especially since I’ve worked out all the technology now and still have Algorithmia and AWS credits left.
I’m planning on doing a series, and next trying the same technique on someone whose art uses color, and possibly a digital artist as well.