fourth-Event

Monday Afternoon from Smokey on Vimeo.

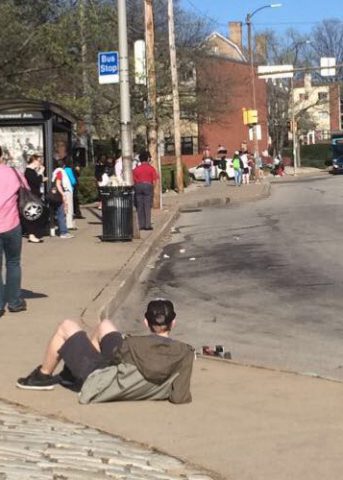
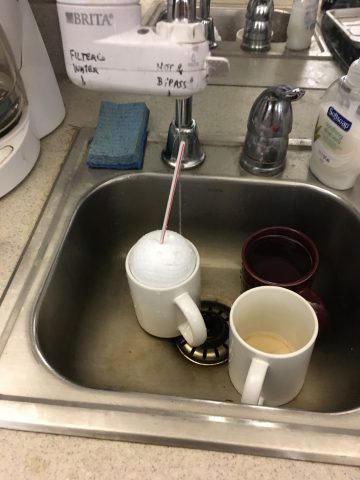
My event process captures a boring non-time; me waiting, hanging with my cat. This ‘downtime’ is something I do every day, yet when I think about or communicate about my day, it is literally the gaps around which my actual ‘events’ take place. This idea wasn’t interesting to me until I realized that this sort of time is basically all my cat does. He chill’s all day long. I captured a few of these downtime moments, emphasis on my cat, I temporally overlapped the moments, and let them loop. In this way drawing focus to small details that otherwise go unnoticed, just like how these moments go unnoticed during our days.

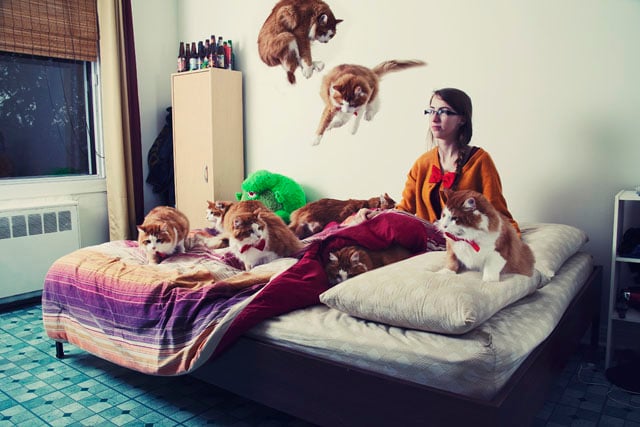
I was further inspired by Cinemagraphs and Afrianne Lupien’s ‘Crazy Cat Portraits’, which do a great job of being a polished and crafted magical photos without loosing a documentation feel.

The system for capturing this was nothing special. Lots of 360 videos without moving a camera, but with moving my cat and myself. Then an After Effects composition to mask out sections, and repeating layers to create the loops for the last step. Some color grading for clarity, not style. Time consuming, but nothing tricky.


Process

This project took a lot of twists and turns, here is a updated review of my progress and how I got here. I wanted to push the boundaries of what I have been doing in 360 video. My main objective was to create something that seemed a little bit magical, while capturing an routine-like event, as looping is amenable to exaggerating and re-conceptualizing routines.

I knew if I could loop 360 with camera movement, I could achieve a solid effect.

My first experiments involved things that moved in some radial way. I could combine rotating objects, with -perhaps- opposing or in-sync camera movement to create visually stunning (and magical) environments.

This ended in disappointment, for while they are interesting in an equirectangular view, the scene itself is just what it is. I was unable to build a rig to rotate the camera that I was pleased with, which I feel was the missing ingredient to this method.

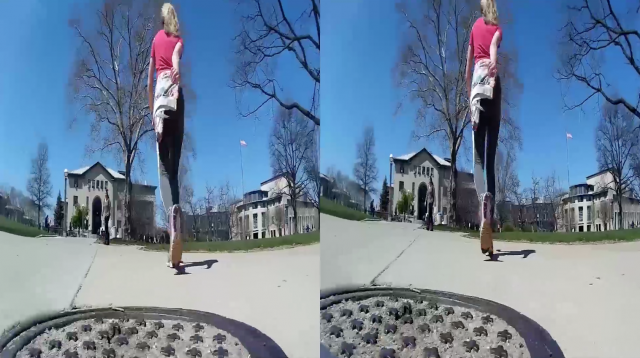
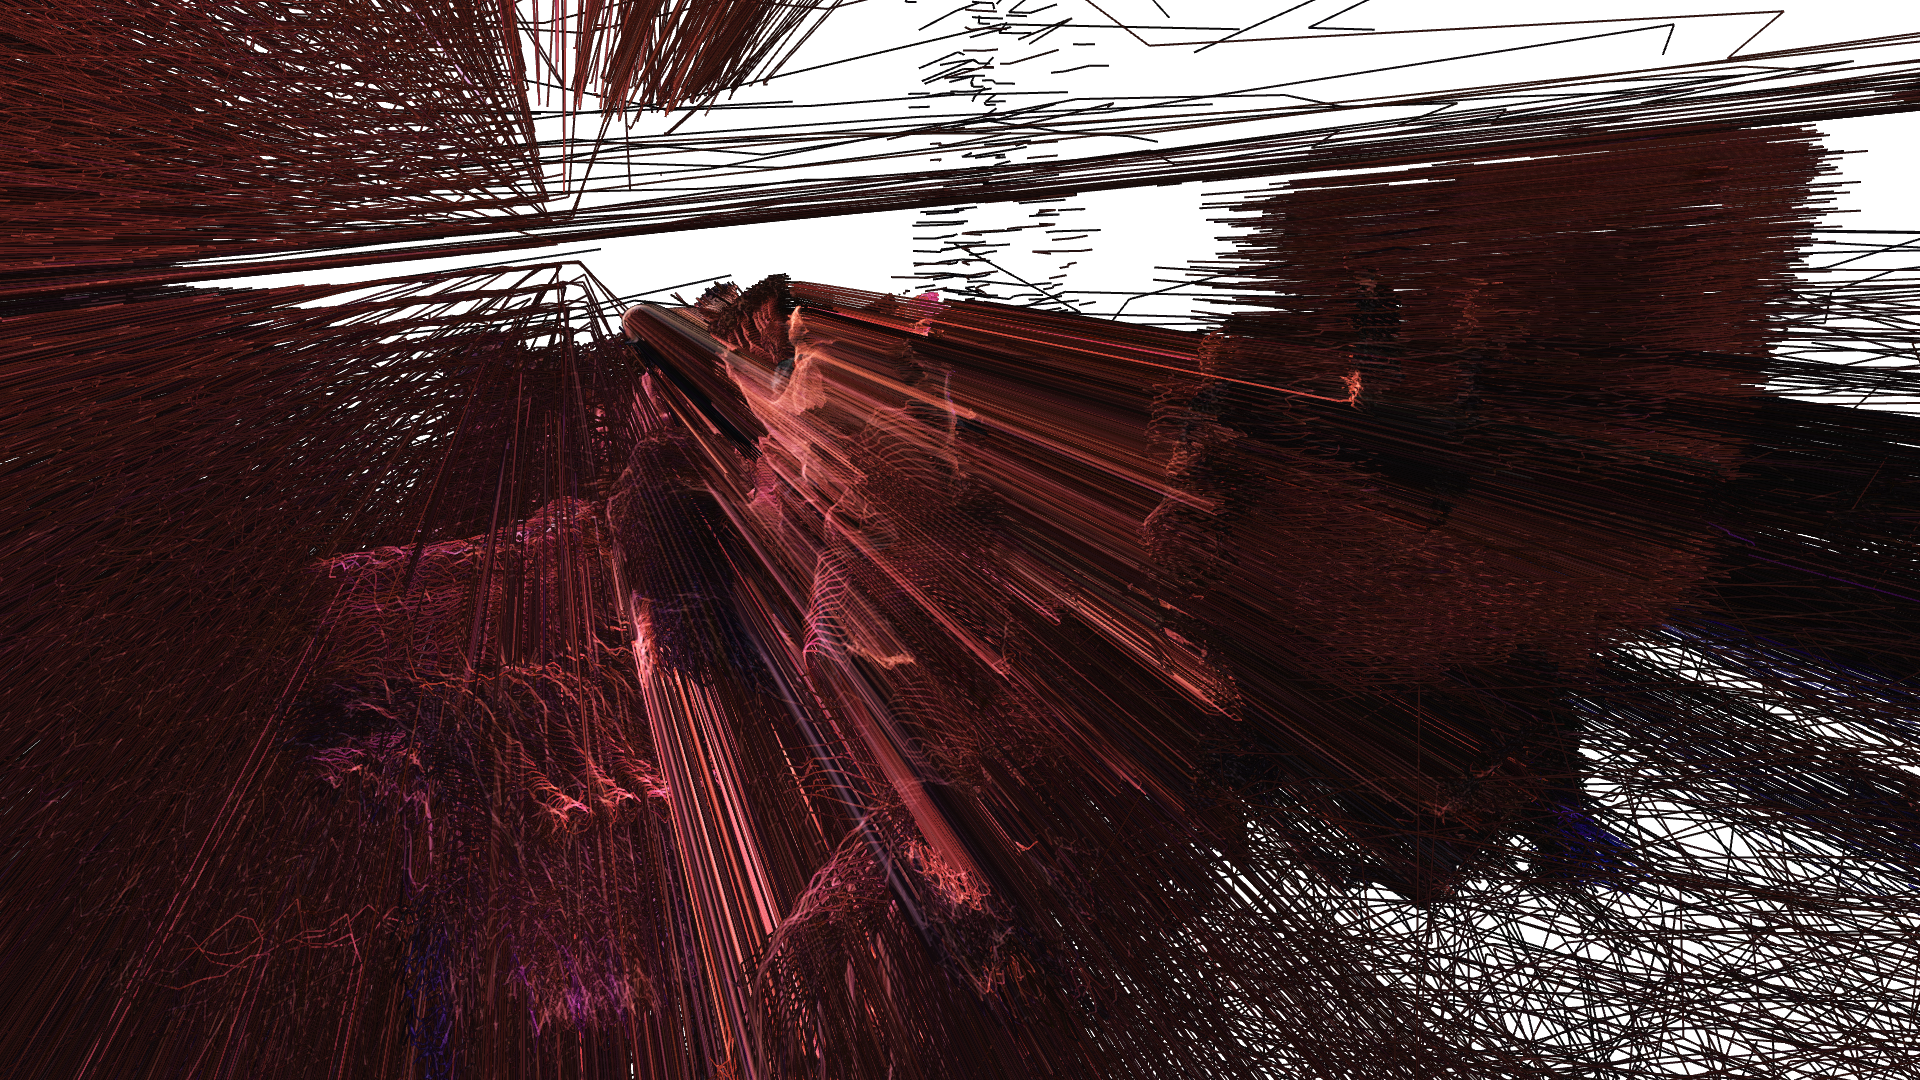
I briefly experimented with larger radial camera movements, which were fascinating to watch in an equirectangular view, as the distortion morphs around.

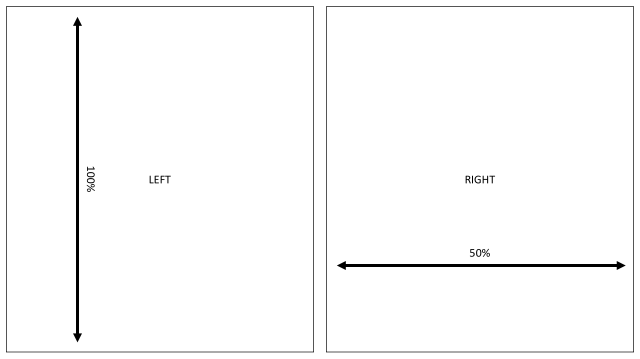
Fascinating, but a proper inquiry into capturing interesting morphing equirectangular scenes is not what I set out to do, and in 360 they are just vomit inducing videos. Stabilizing could give myself some level of ‘freedom’ after the fact to make sure the loop points were perfectly lined up, and help prevent vomit; as well as more ‘perfectly’ (smoothly) morphing shapes. The first technique I tried was manually locking a point into the center of view. 10 seconds with this technique took over 2.5 hours of grinding effort in AutoPano video. The results were not worthwhile, motion blur and perspective distortion was too big of a factor on top of even an ideal single-point stabilization.

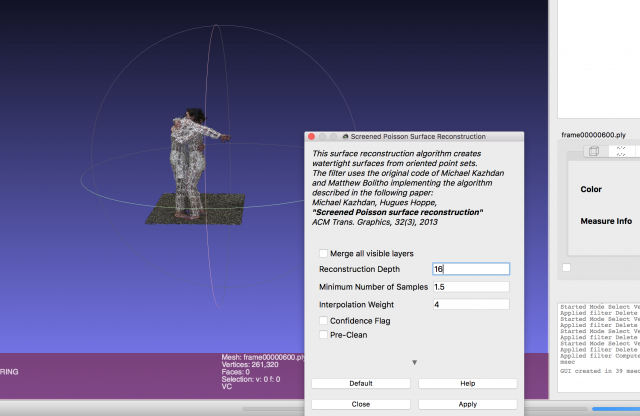
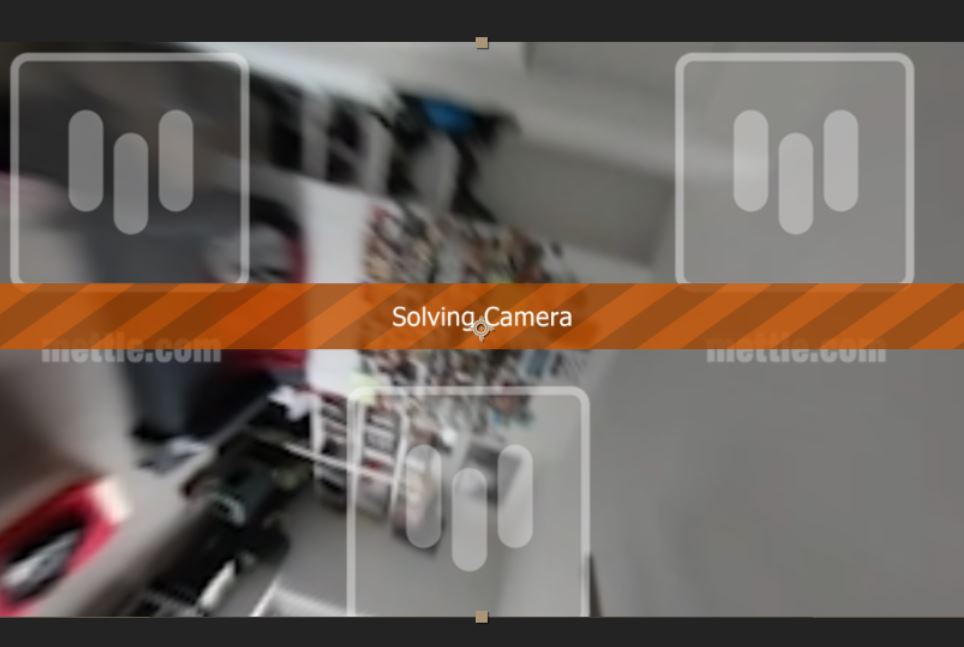
The second method was to transform the video into a cubemap, track points on each face, and stabilize (via warp) the average tracking between faces to create smooth transitions, and convert back to equirectangular. I used Mettle’s after effects plugins to perform this technique, which crashed my computer every time it tried to solve for the camera. While the technique is still conceptually solid, the camera movements, motion blur, and shake amount were seemingly too large for the method to handle.

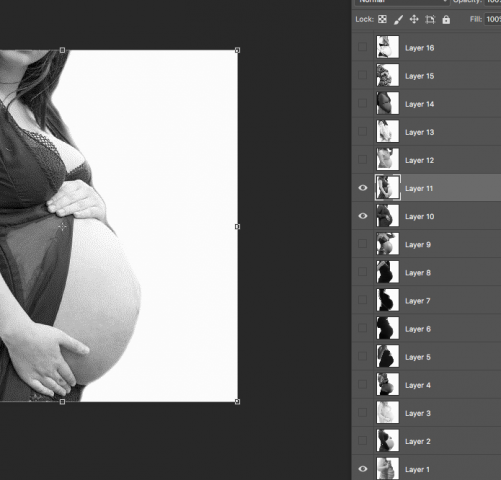
When I finally settled on the method that would be my final project, I did a test shoot one evening. I filmed my room with just my cat in it for over 2 hours. 8.96gb of footage, and my cat almost didn’t move at all.

Sunday Night, Static Cat from Smokey on Vimeo.

In order to get around processing all 9gb of footage, I did the entire composite on the ‘double-bouble’ source footage. Since Samsung Gear 360’s software only wants to stitch SOOC video, I had to export both ‘bubbles’ and stitch with autopano video (which explains the watermarks).

If nothing else, this taught me to film as little extra footage as possible for the sake of processing time later.

For the final project, I thus settled on: Static Camera, myself in the video (to interact with the cat), daytime/window light, and a flat documentary aesthetic. Results above.

a — event

Pose Flatland


why / what

Pose Flatland is a visualisation of a horizontal sheets of commonality, orthogonal to but intersecting with myriad disparate human threads across the world. It does this by overlaying the physical flattened poses of people across the world, letting us discover similar being in distant places. A many (24) eyed world-sized camera.

LIVE DEMO FOR CLASS


how

I adapted an implementation of Real Time Multi-Person pose segmentation, to infer pose skeletons from raw RGB monocular images.
Then, I fed in live video from unsecured ipcameras on insecam.org, processing it frame by frame. After some more optimisations — moving the CPU computation to the GPU — the final network is able to process video at ~10 frames per second into pose skeletons, using a GTX 1080 Ti.

Example output from network:

You can see the pose skeleton overlaid onto a stock photo, with the bones labeled.

I created a webserver exposing this functionality, creating a streams of pose skeletons from a streams of video, and then used p5js to visualise the skeletons, overlaying them into one composition. In this iteration, 24 cameras are overlaid. The cameras cover locations where common human experience occurs – streets, restaurants, the beach, the gym, the factory, the office, the kitchen. For each of those categories, multiple locations from across the world are present.

The visualisation only updates when a camera is active and a person is detected, the final composition varying over time as patterns of activity move over the sampled locations. In the above images, the bottom image is taken near noon in Delhi, whereas the top two are from near noon in New York.

The source code is available here: aman-tiwari/pose-world

prior art

Looking back (especially when coupled with the final visualisaion), this project directly links to Golan Levin’s Ghost Pole Propogator, which uses computer vision algorithms to contract people silhouettes into centerlines.

iciaiot-event

gloeilamp-Event

Underwater RGBD Capture with Kinect V2 and DepthKit 

Can I capture a 3d image of me exhaling/blowing bubbles? 


For my event project, I explored a few possibilities for underwater 3d capture. After briefly considering sonar, structured light, and underwater photogrammetry a try, I settled on using Scatter’s DepthKit software. DepthKit is a piece of software built in OpenFrameworks which allows a depth sensor such as a Kinect (I used the Kinect V2, an infrared “time of flight” sensor) and a standard RGB digital camera (I used the Kinect’s internal camera) to be combined into a “RGBD” video- that is, a video that contains depth as well as color information.


In the past, James George and Alexander Porter produced “The Drowning of Echo” using an earlier version of DepthKit and the Kinect V1. They filmed from above the water, and though many of their shots are abstract, they were able to penetrate slightly below the surface, as well as capture some interesting characteristics of the water surface itself. In some of the shots it is as if the ripples of the water are transmitted onto the skin of the actress. Another project using DepthKit that I find satisfying is the Aaronetrope. I appreciate this project chiefly for its interactivity. It uses several RGBD videos displayed on the web interactively using a webGL library called three.js. http://www.aaronkoblin.com/Aaronetrope/

Along the way, I encountered a few complications with this project. Chiefly, these were due to the properties of water itself. I would obviously need a watertight box to house the Kinect. After much research into optics, I found that near-visible IR around 920NM, the frequency the Kinect uses, is greatly attenuated in water. This means that a lot of the signal the Kinect sends out would simply be absorbed and diffused, and not return back to the sensor in the manner expected.

Some of the papers that informed my decisions related to this project are:  Underwater reconstruction using depth sensorsAbsorption and attenuation of visible and near-infrared light in water: dependence on temperature and salinityUsing a Time of Flight method for underwater 3-dimensional depth measurements and point cloud imaging

With the challenges of underwater optics in mind, I proceeded to construct an IR transparent watertight housing from 1/4in cast acrylic. This material has exceptional transparency, and neither reflected nor attenuated the IR signal or color camera feed. I also attached 1/4-20 threaded bolt to the exterior of the box, to make it magic arm compatible.

I carried out initial testing right in my bathtub. Here, I tested three scenarios: Kinect over water capturing the surface of the water; Kinect over water trying to capture detail beneath the water; Kinect underwater capturing a scene under the water.

It was immediately pretty clear that I would be unable to penetrate the surface of the water if I wanted to capture depth information below the water; I definitely needed to submerge the Kinect. And to my surprise, when I first placed my housing under, it (sort of) worked! The IR was indeed absorbed to a large degree, and the area in which I was able to capture both video and depth data together proved to be very small. But even so, a RGBD capture emerged.

Into the Pool

The CMU pool is available for project testing by special appointment, so I took the plunge! The results I achieved were basically what I expected- the captures are more low-relief than full RGBD, and the depth data itself is quite noisy. I also discovered that the difference in refraction of light throws the calibration of the depth and RGB images way out of whack- manual recalibration was necessary, and even then it was difficult to sync. That said, I did have some great discoveries at this stage. Bubbles are visible! I was able to capture air exiting my mouth, as well as bubbles created by me splashing around.

Lastly, here is an example of where the capture totally went wrong, but the result is still a bit cinematic:

DMGordon – Event

An artificial neural network is a

which

thus, we can then

So now that we’re clear on what exactly in general a neural network is, we can look at what neural networks can do. The field of deep learning is integral to fields of emerging technology such as autonomous vehicles, computer vision, statistical analysis and artificial intelligence.
Recently, a research paper was published which details using neural networks to manipulate images. The basic process is as follows: the network is given an image as an input, which it then tries to change to match a second image.

I trained a neural network with images of fresh fruit matched with images of rotten fruit. The network is thus trained to rot or unrot any image it is given. I then fed the network images that are not fruit. The results have mixed effectiveness:

Net #2:

indreams from David Gordon on Vimeo.

Net #3:

training images:


which is ‘unrotted’ to:

sometimes it makes mistakes:

which is ‘rotted’ to:

actual rotten cucumber:

mistakenly ‘unrotted’ into a strawberry:

but it really knew how to rot watermelons:

‘unrotting’ MJ’s face

Fresh MJ from David Gordon on Vimeo.

Bierro-Event

One hundred balls – One trajectory

The laws of physics can often appear to be very mysterious. In particular, mechanics and the way objects are moving is not necessarily intuitive. The human eye cannot look into the past and it often need helps of equations, sketches or videos to capture the movement that it just saw.

In this project I decided to document and capture the simple event of a ball thrown in the air. My goal was here to recreate the effect seen in the picture above: get a sense of the trajectory of the ball. But I wanted to get away from the constraint of using a still camera and decided to use a moving camera mounted on a robot arm.

Inspirations


This project started for me with the desire of working with the robot arm in the Studio. The work of Gondry then inspired my: if a camera is mounted on the robot and if the robot is on a loop, superimposing the different footages allows the backgrounds to be identical while the foregrounds seem to happen simultaneously, although shot at different times.

Gondry / Minogue – Come into my world

I then decided to apply this technique to show how mechanical trajectories actually occurred in the world, as Masahiko Sato already did in his “Cruves” video.

Masahiko Sato – Curves

The output would then be similar to the initial photo I showed, but with a moving camera allowing to see the ball more closely.


Process

Let me here explain my process in more details.

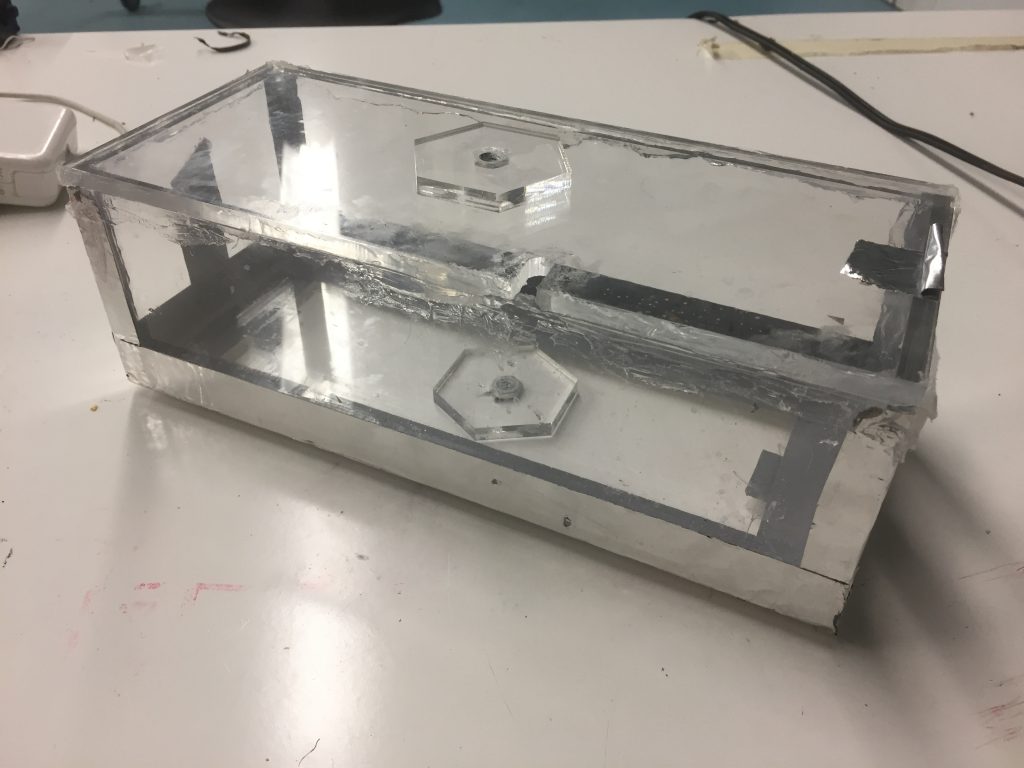
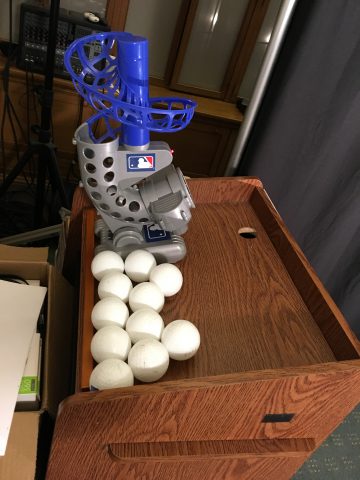
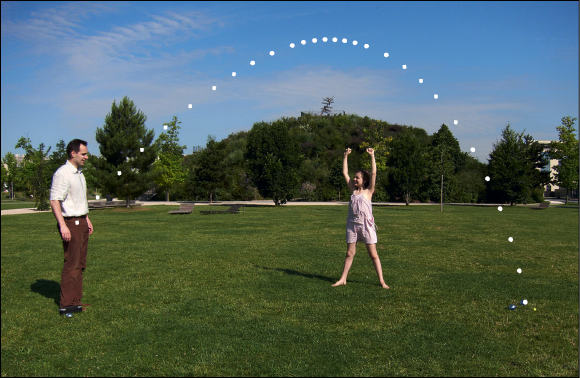
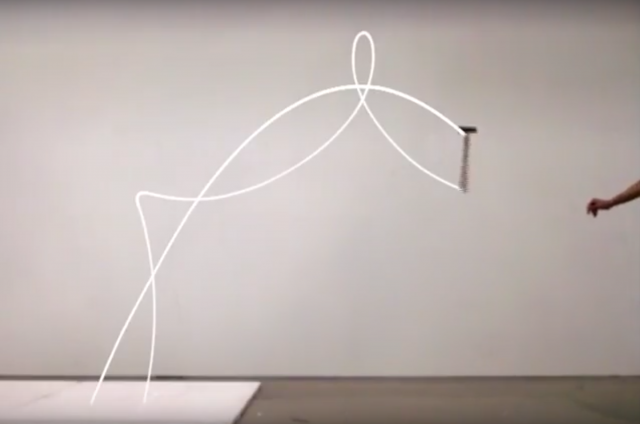
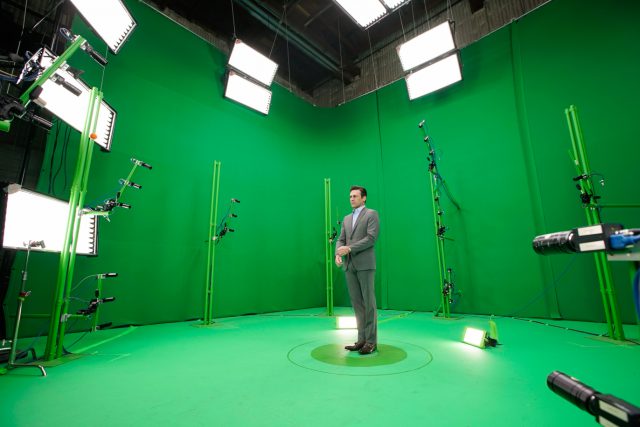
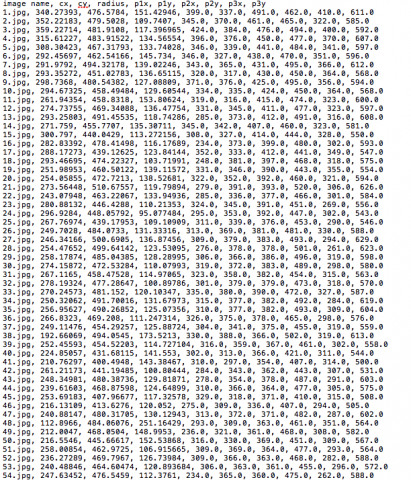
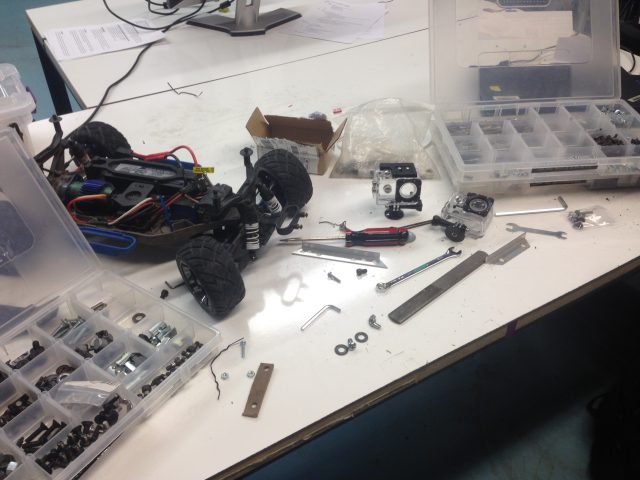
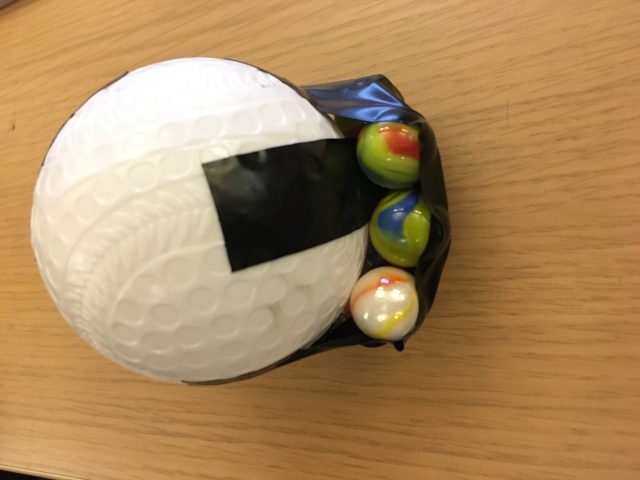
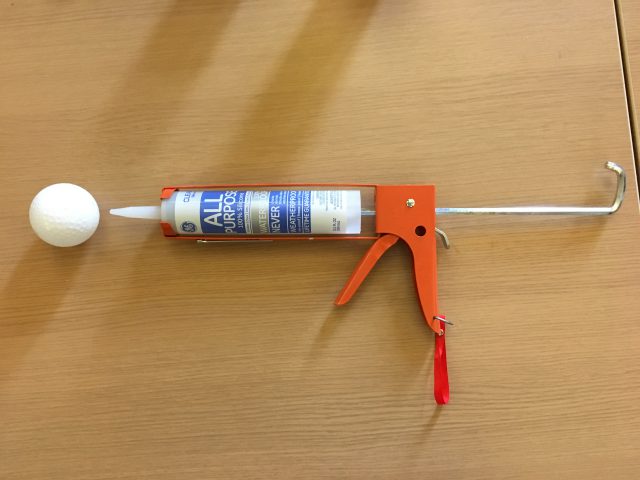
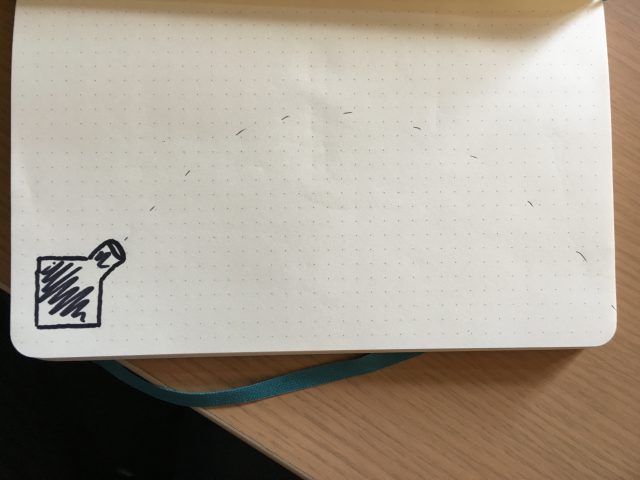
The first part of the setup would consist in having a ball launcher throwing balls that would follow a consistent trajectory.

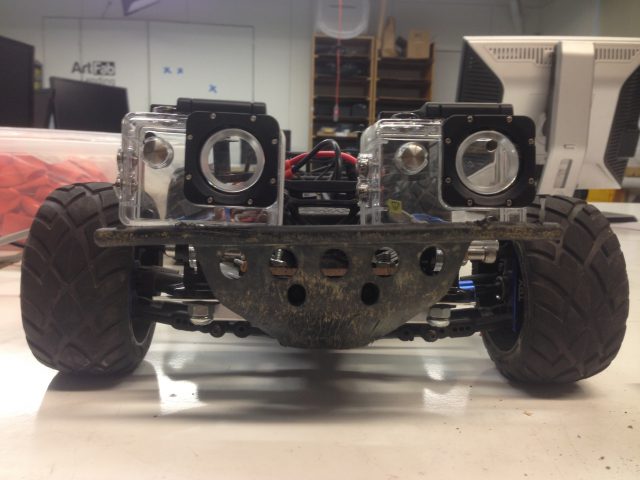
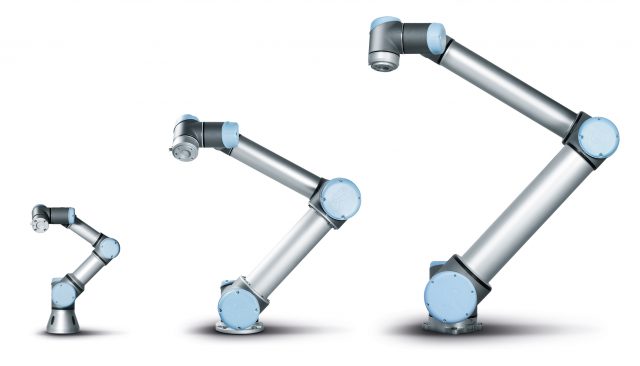
I would then put a camera on the robot arm.

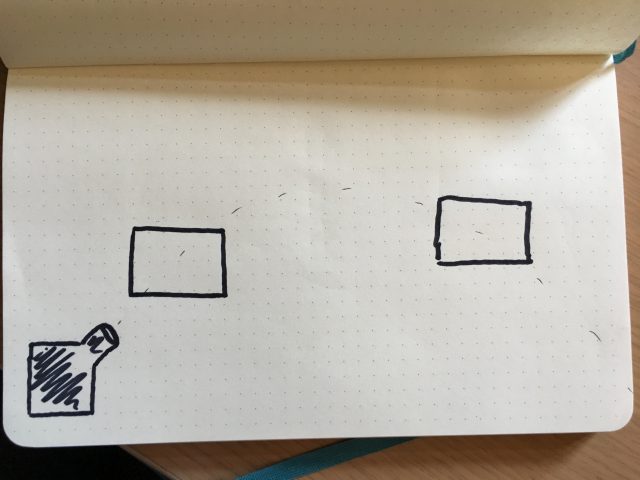
I will have the robot arm move in a loop that would follow the trajectory of the balls.

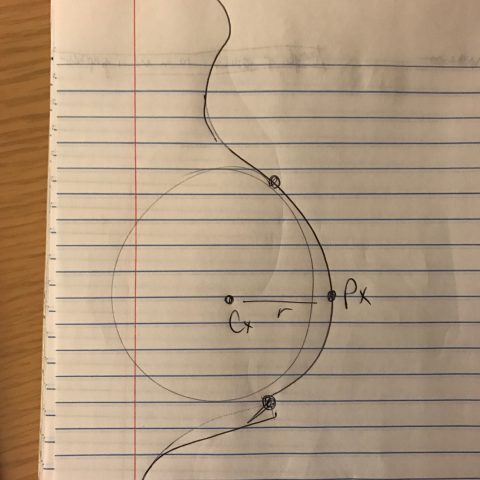
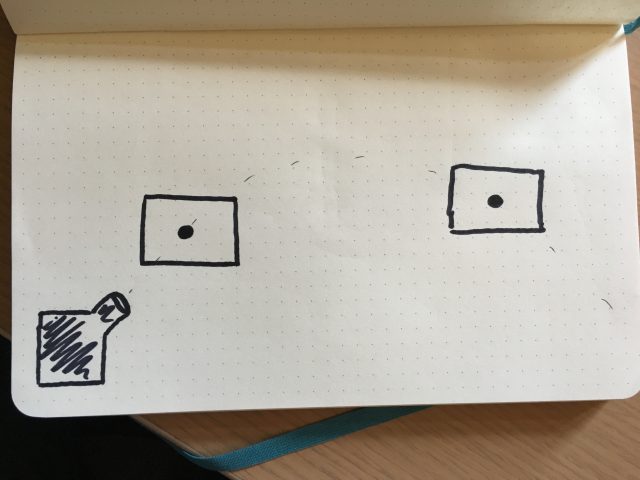
I would then throw a ball with the launcher. The robot (and camera) would follow the ball and keep it in the center of the frame.

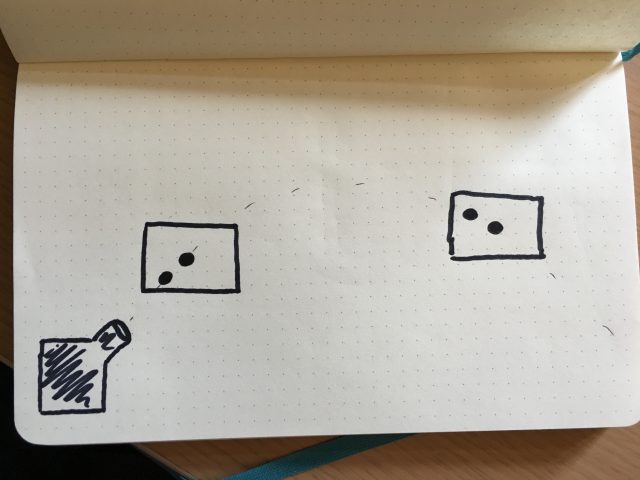
The robot would start another loop and another ball would be thrown,  but with a slight delay compared to the time before. The ball followed would then appear to be slightly off the center of the frame.

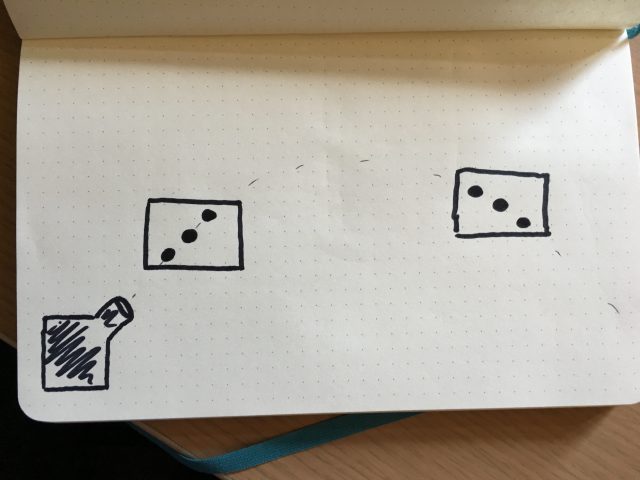
Repeating the process and blending the different footages would do the trick and the whole trajectory would appear to move dynamically.


Robot Programming

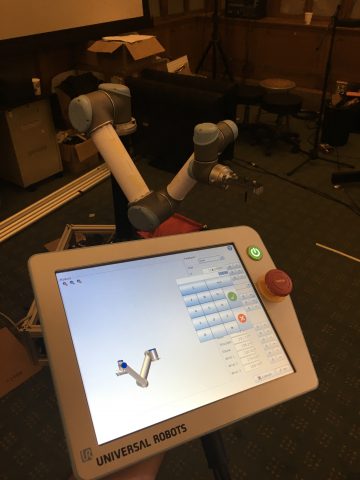
My trouble began when I started programming with the robot. Managing to control such a machine implies writing in a custom language, using inflexible functions, with mechanical constraints that don’t allow to move the robot smoothly along a defined path. Moreover, the robot has a speed limit that it cannot go past and the balls were going faster than this limit.

I then didn’t manage to have the robot follow the exact trajectory I wanted but instead it followed two lines that approximated the trajectory of the balls.

Launcher

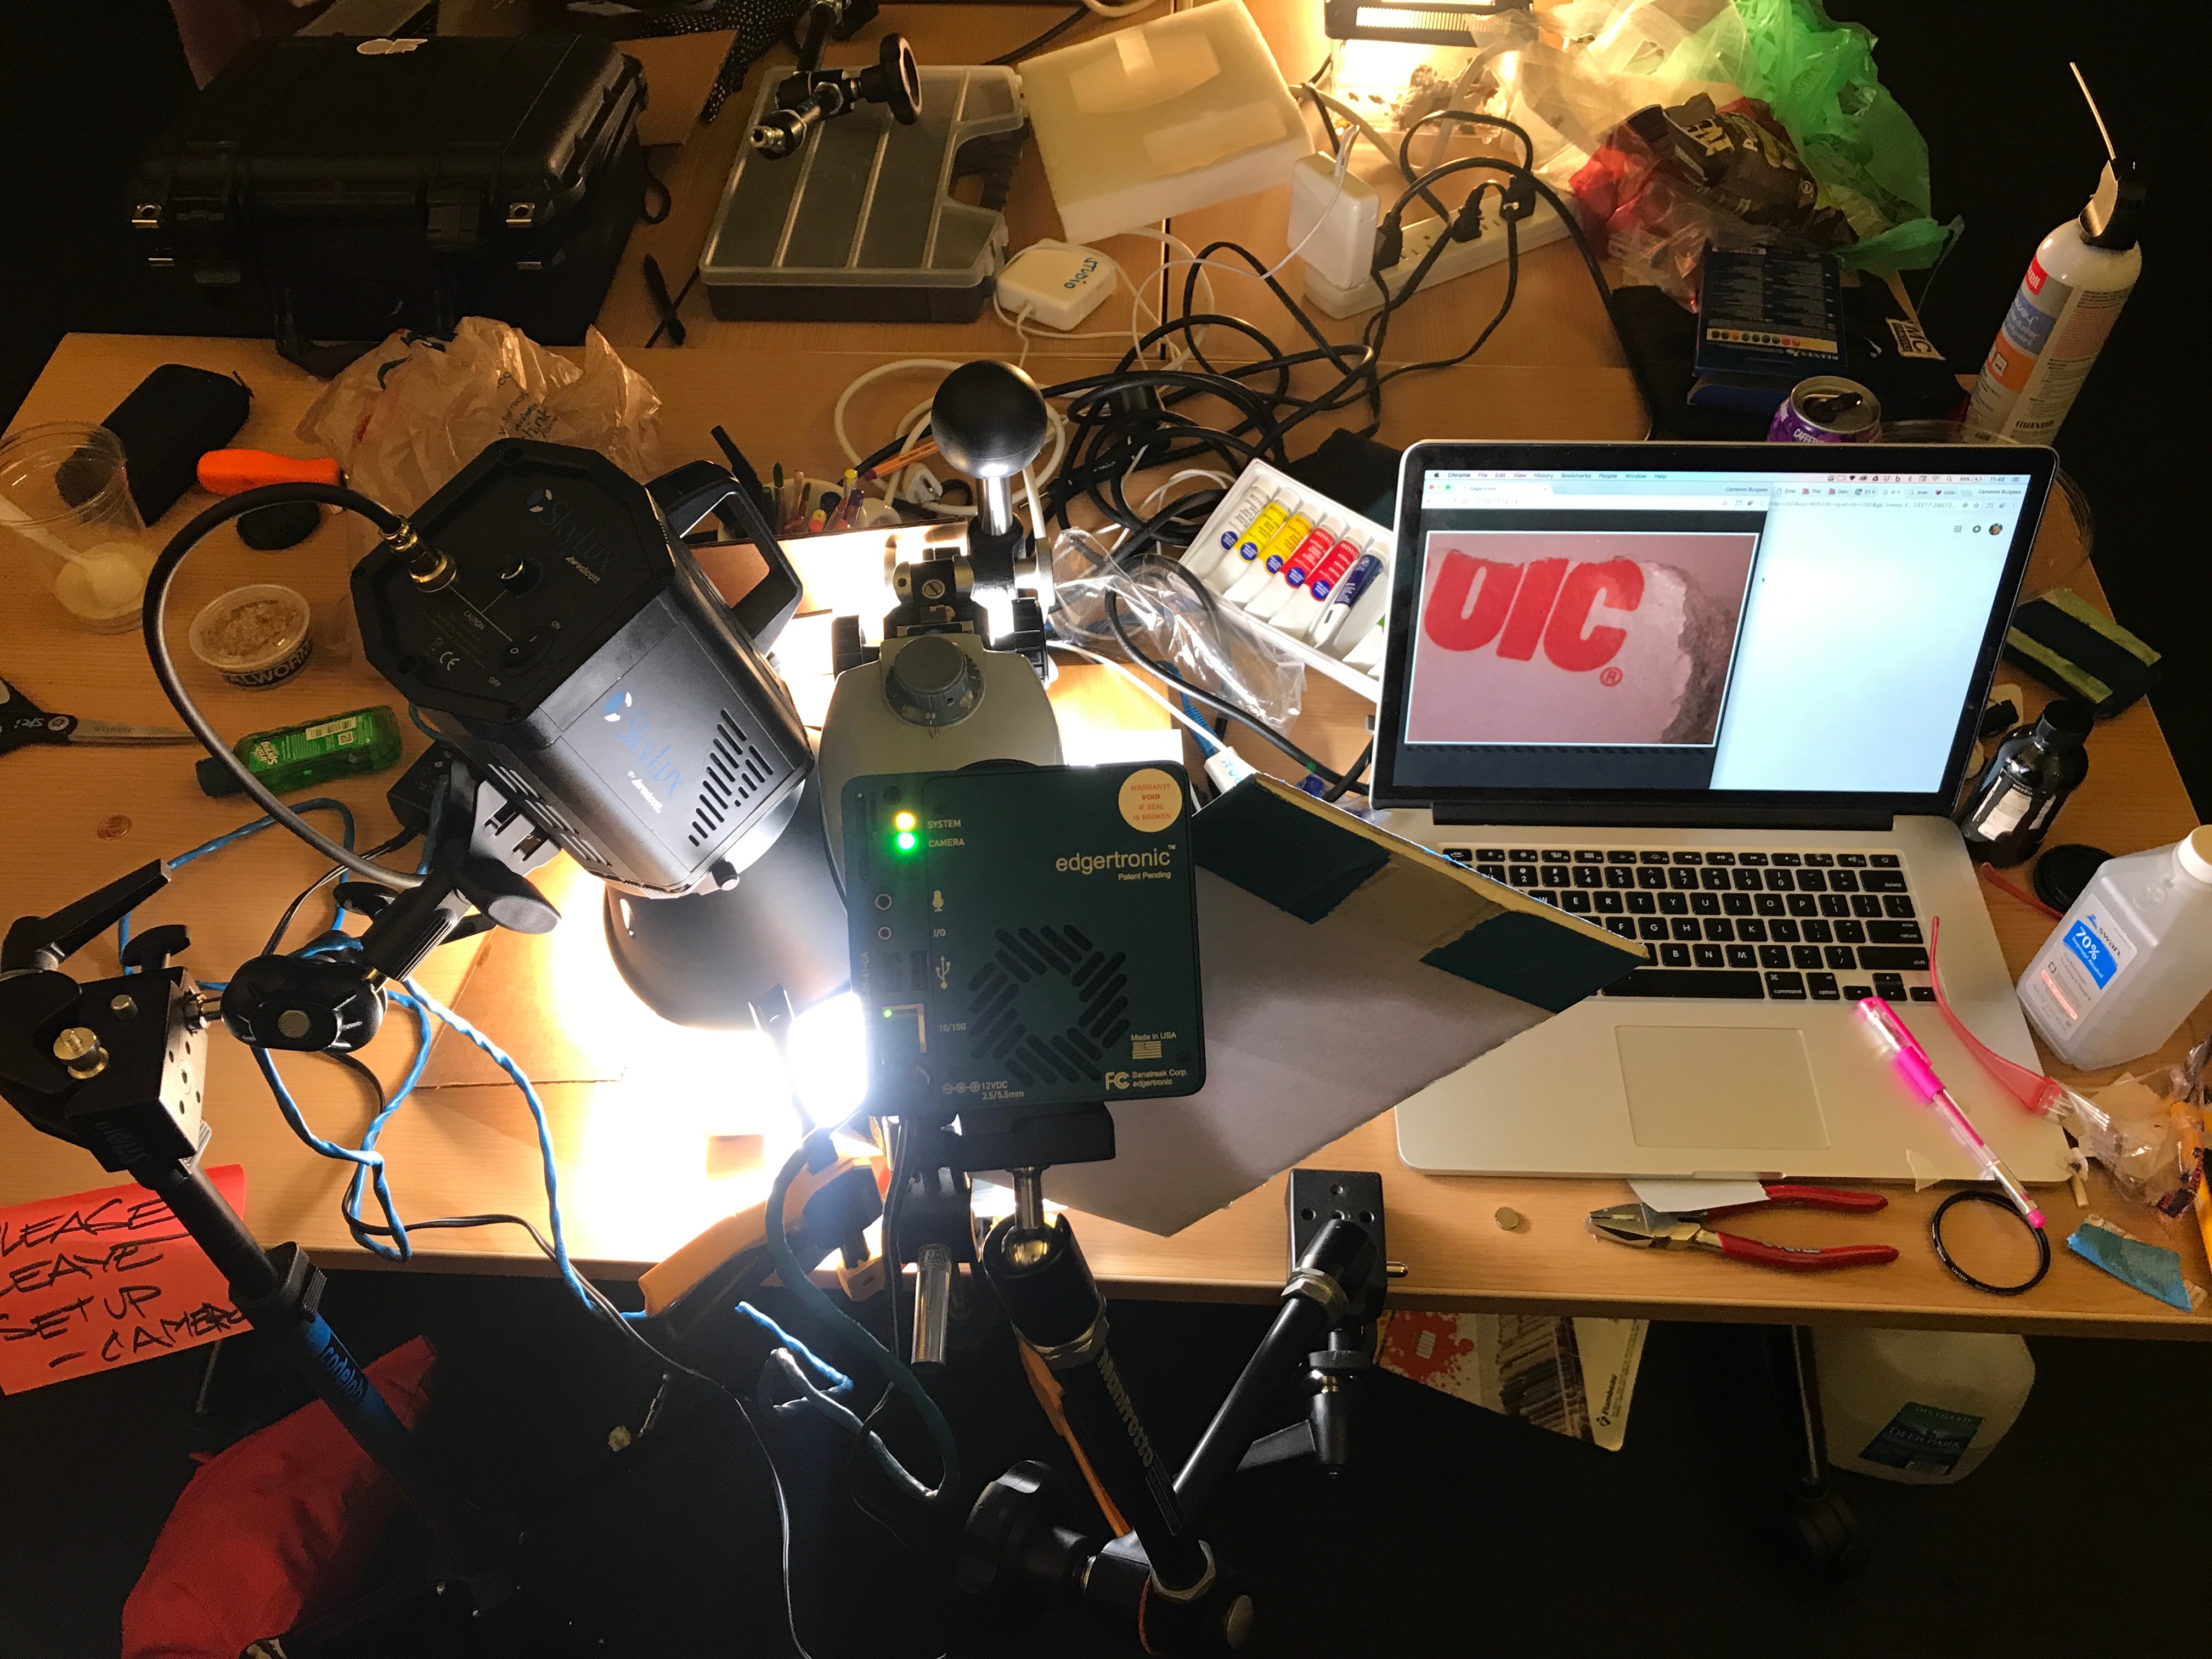
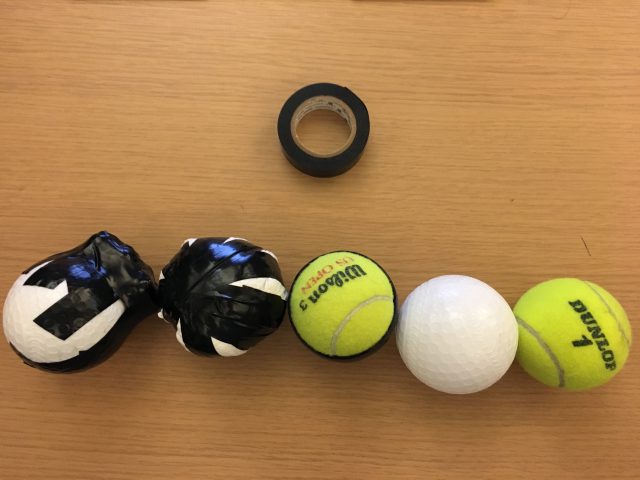
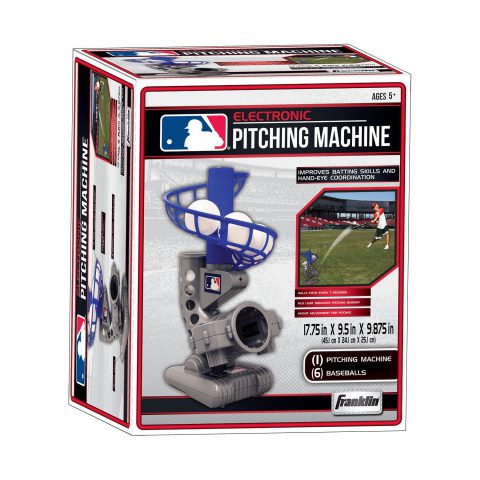
For the launcher, I opted for an automatic pitching machine for kids. It was cheap, but probably too cheap. The time span between each throw was inconsistent and the force applied for each throw was also inconsistent. But now that I had it I had to work with this machine.

Choosing the balls

Choosing the right balls for the experiment was not easy. I tried using the balls that were sold on top of the pitching machine but they were thrown way too far and the robot could only move within a range of a meter.

I wanted to use other types of balls but the machine was only working for balls of a non-standard diameter.


The tennis ball where then thrown to close to the launcher.

I then start trying to make the white balls heavier but it was not really working.


I also tried increasing the diameter of tennis balls, but the throws were again very inconsistent.


At that time I noticed a whole in the white balls and I decided to try and put water in them to make them heavier. The hole was to small to inject water with a straw.


I then decided to transfer water into it myself…

… Before I realized that there was a much more efficient and healthy way to do it.

I finally caulked the holes so that the balls wouldn’t start dripping.


Finally the result was pretty satisfying in terms of distance. However, the throws were still a bit inconsistent. The fact that the amount of water was not the same in each ball probably added to these variations in the trajectories.


Setting

Here is the setting I used to shoot the videos for my project.

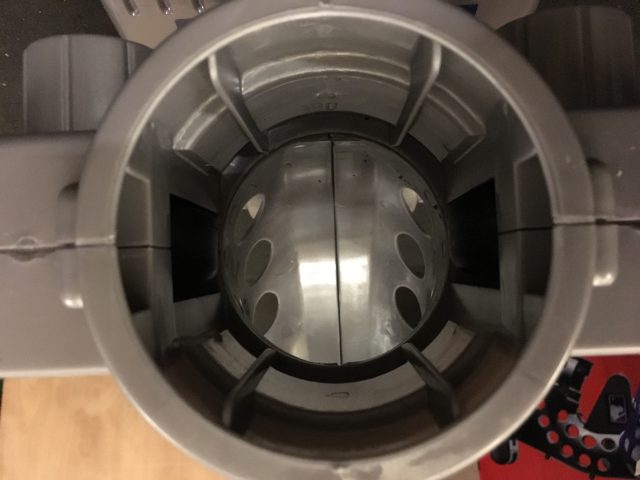
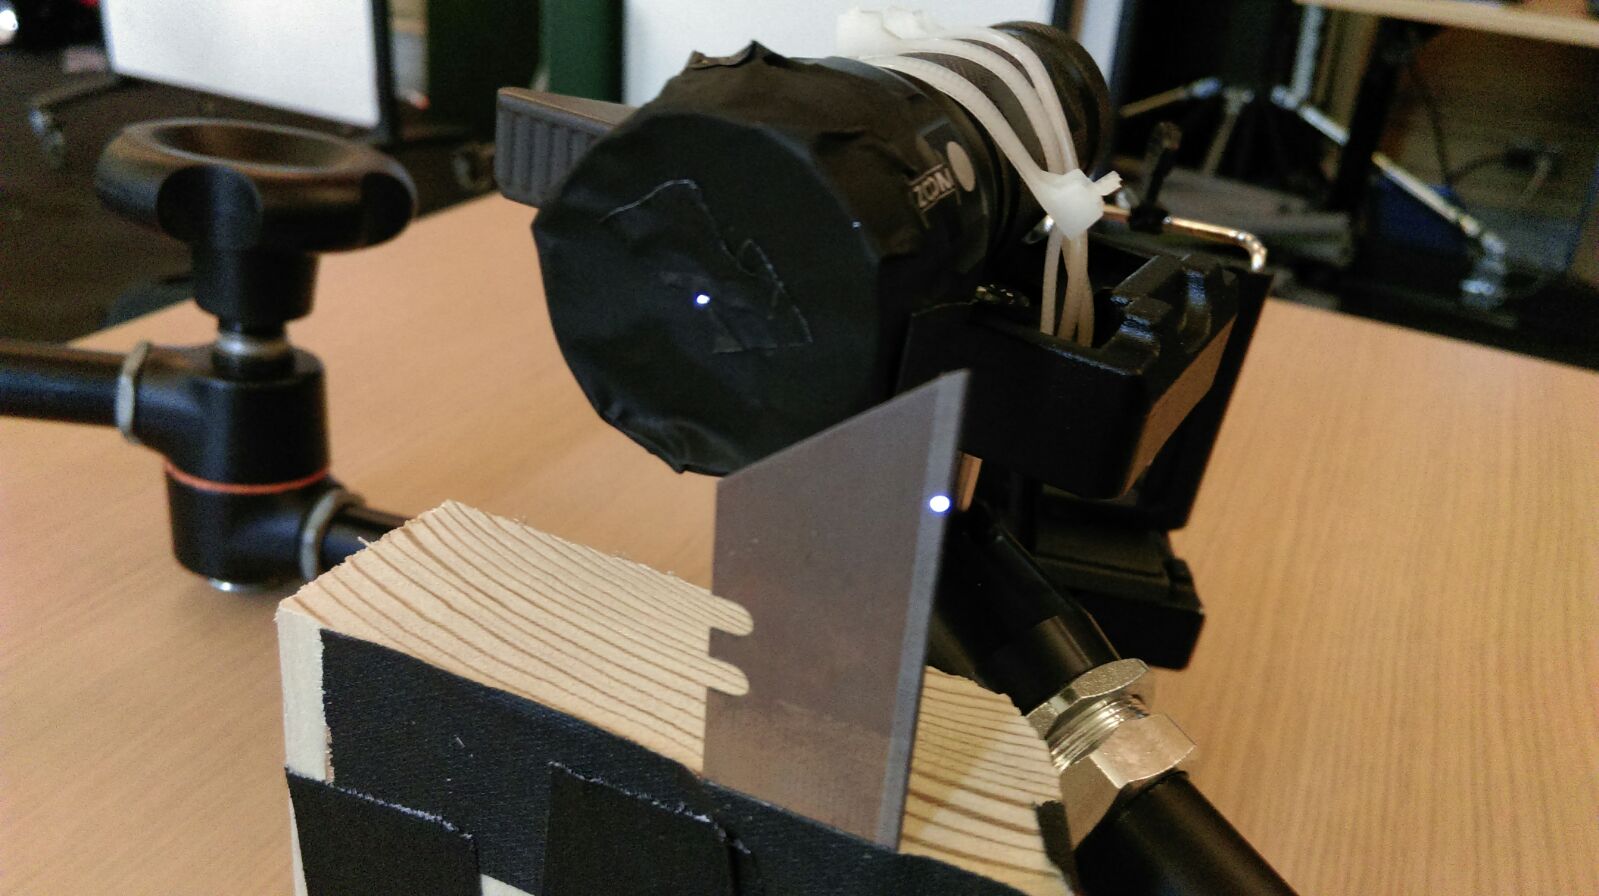
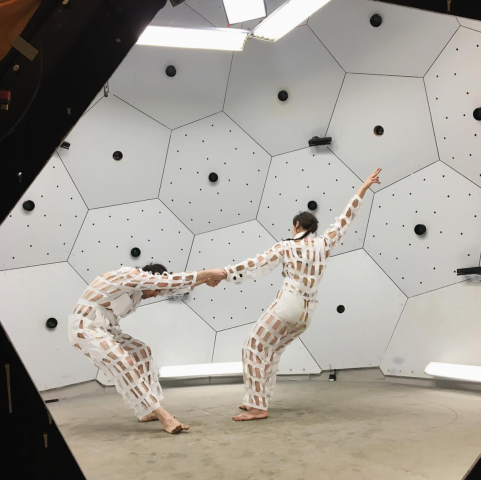
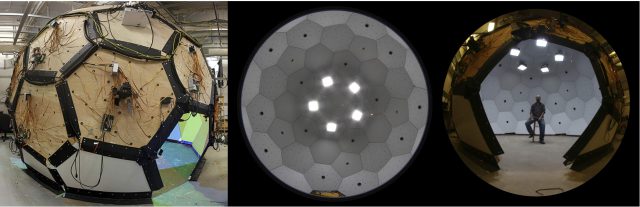
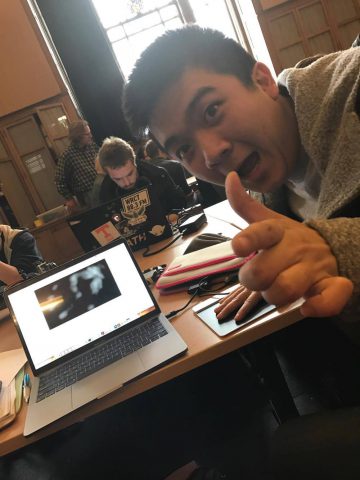
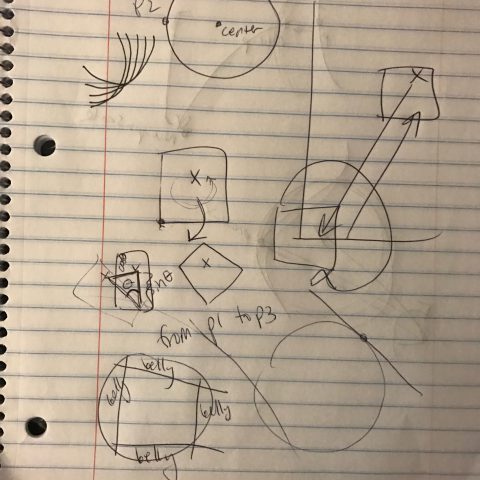
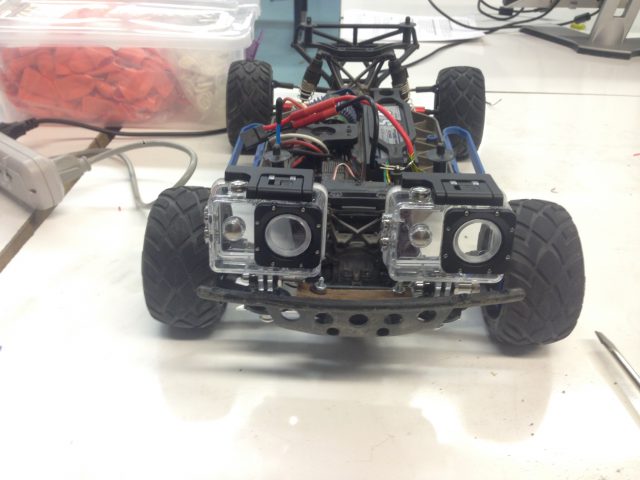
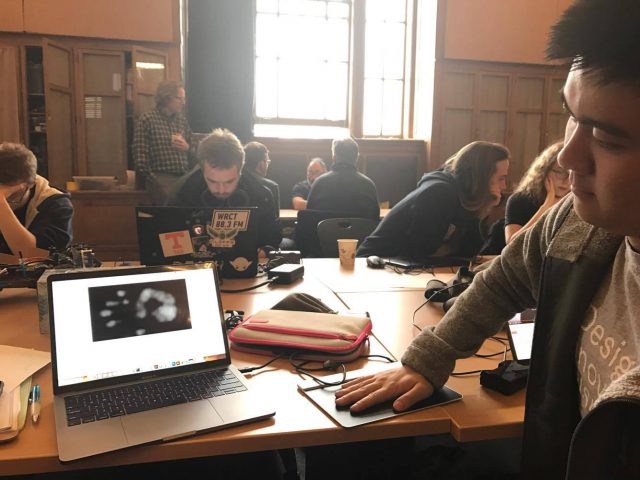
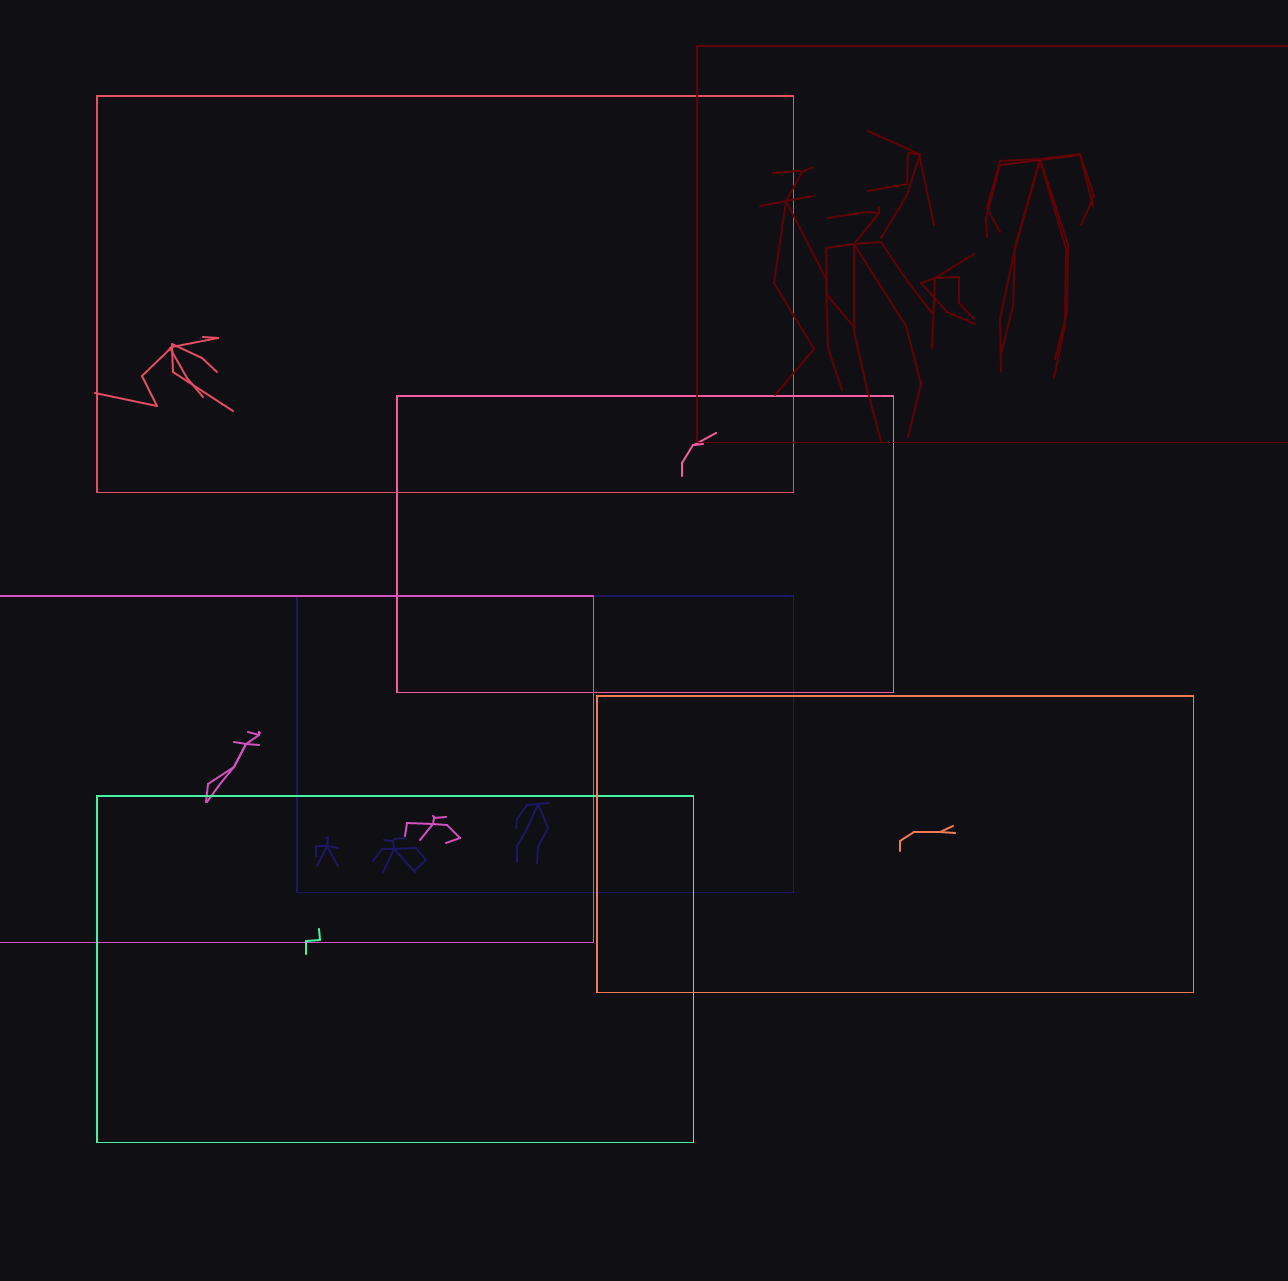
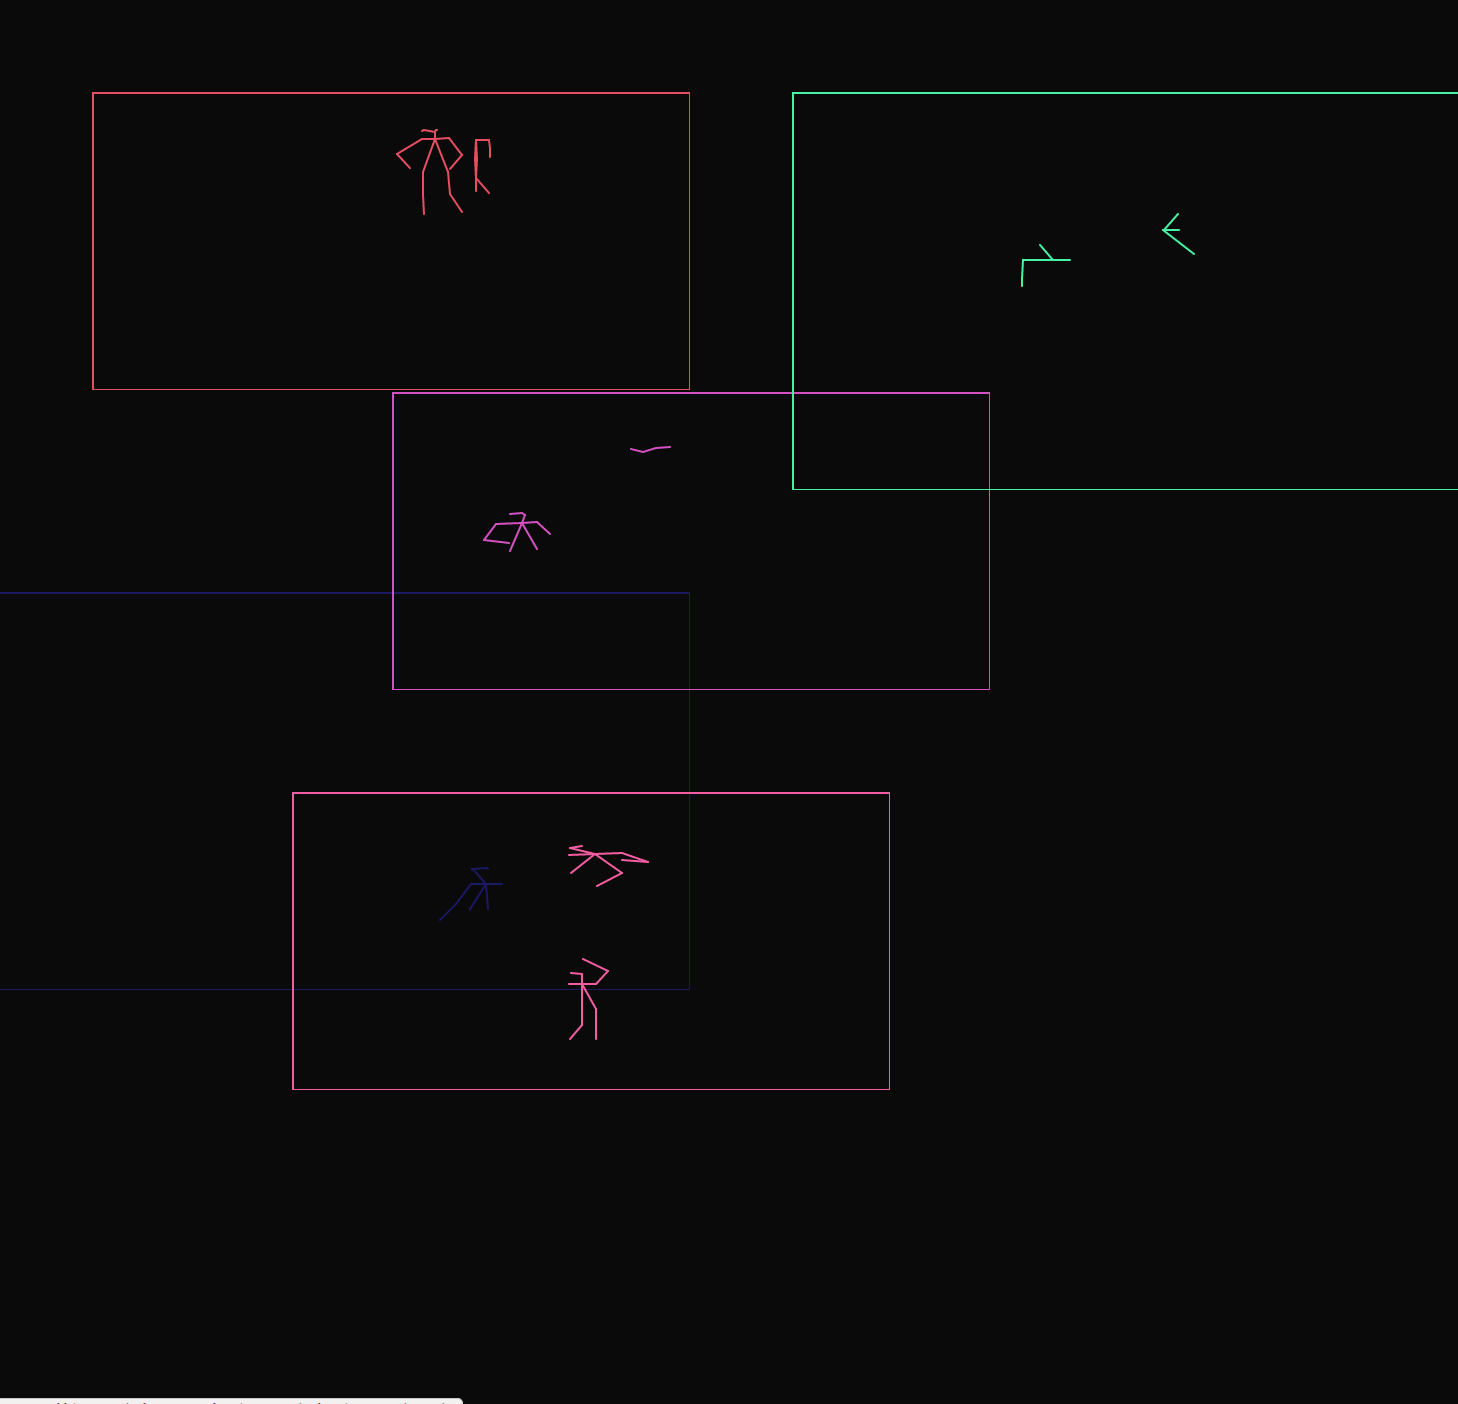
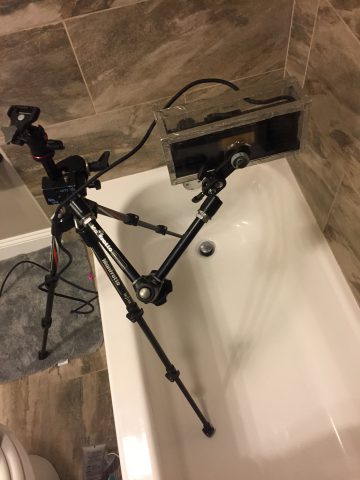
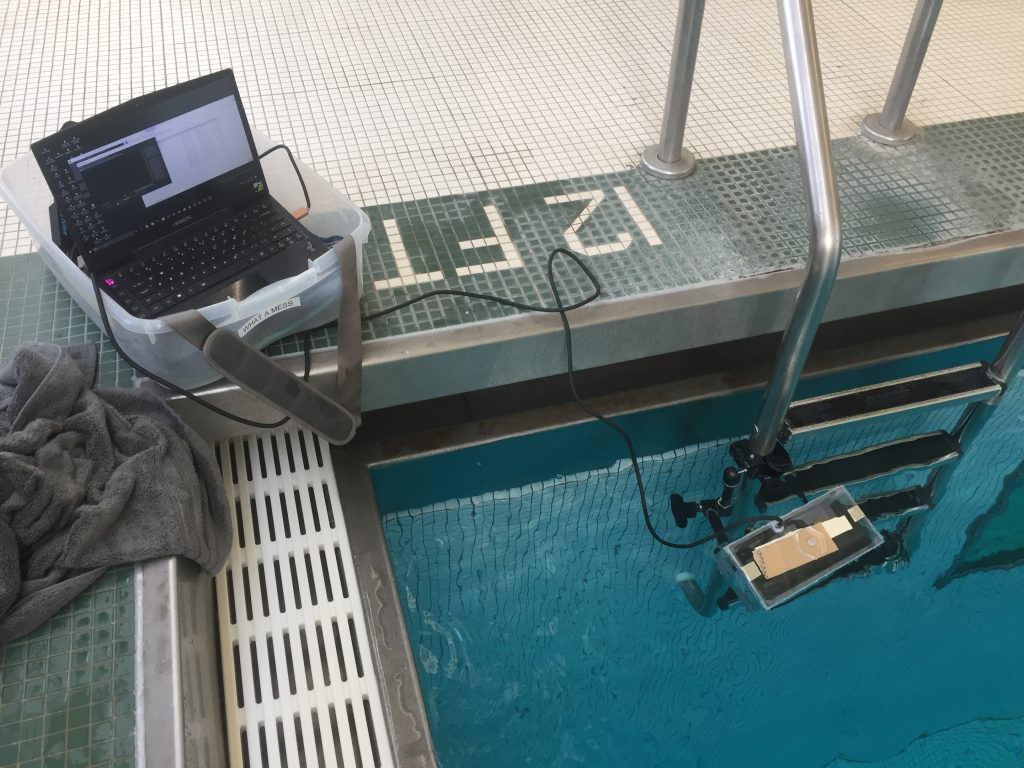
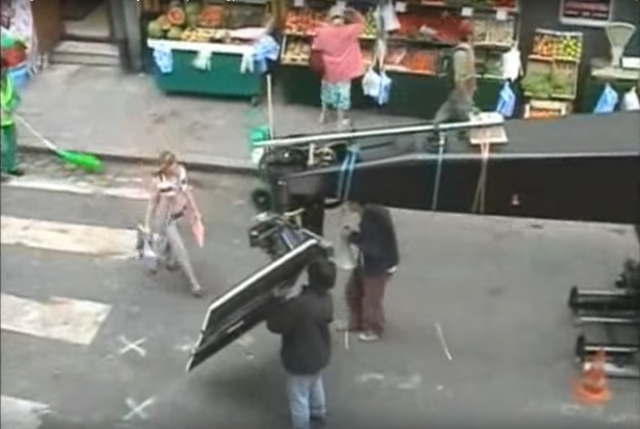
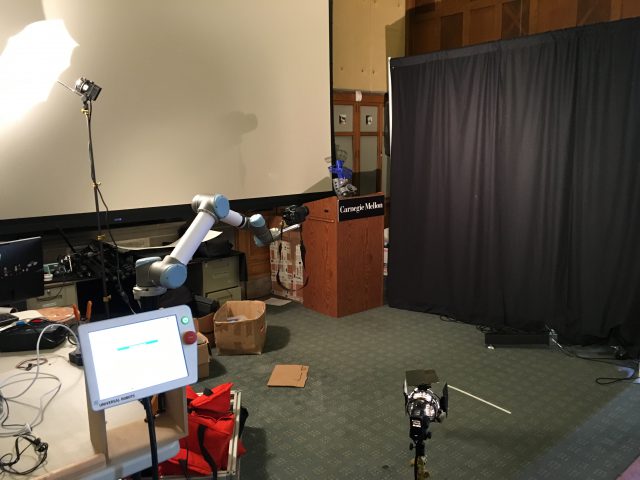
And here is what the scene looked like from a different point of view.


Results

This first video shows some of the “loop footages” put one after the other.

The next videos shows the resulting video when footages are superimposed with low opacity, once the backgrounds have been carefully aligned.

Then, by using blending modes, I was able to superimpose the different footages together to show the balls thrown at the same time. The video below was then actually made out of one launcher, one type of balls and one human.

In this video, I removed the parts where someone was catching balls to give a sense of an ever increasing amount of balls thrown by the launcher.


Next Steps

  • Tweak the blending and the lighting in the final video
  • Try to make a video with “one trajectory”
  • Different angle while shooting the video
  • More consistent weights among the balls

cdslls-event

VISUALIZING SOUND: Schlieren Photography

CONCEPT

I grew up speaking a very specific language known as franglish: a perfect mix of both french and english, stemming from my french upbringing and my english speaking household. Over the years, I acquired an automatic alternation of languages mid-sentence, picking and choosing the words that got closest to the emotion I was hoping to portray. An example: “Mom, where did you put my classeur de maths with the blue carreaux couverture?” Not only did mix words, I also completely reinvented grammatical constructions of sentences. I later added german to the mix, making my vocabulary incredibly precise, but impossible to comprehend for anyone who was not fluent in all three of those languages. My household was bilingual and my primary/secondary education were as well. To put it bluntly, coming here, nobody had any idea what I was talking about.

It led me to constantly consider the weight of my words and the literal meaning of metaphors and expressions. We use the physical to talk about the abstract, but what if the abstract had a physical form?

I rely on my background in science and cognition to create work, this being no different. I was hoping to use the schlieren mirror to visualize the invisible, speech, and the physicality that is associated with language and semantics.


RELATED WORK

  • Iron 3D printed speech bubble


PROCESS AND SETUP

(see process post


Gesaffelstein at 300fps (gif)


Gesaffelstein, at 300 fps (video)


Whiplash drum solo, at 300 fps (video)

FUTURE ITERATIONS

I intend on using the Schlieren for my capstone in order to achieve my first goal, speech. The studio’s mirror is not good enough to show speech by itself, but I am thinking of using a sheet of dry ice to create colliding temperature. Cold air paired with the (real) high speed camera might yield hoped results.

hizlik-Event

Update: As of 2020, an updated documentation for this project is now on my website at hiz.al/3drc.

Inspiration

This project was inspired by C’était un rendez-vous (1976), a high-speed, single-shot drive through the streets of Paris in the early morning. I was really taken by the sounds of the revving engine, the shifting gears, and daredevil speeds through the cramped and winding streets of this old city.

Link: Rendevous (1976)

Description

For this project, originally I wanted to make a parody/recreation of sorts by installing a camera on an radio-controlled (RC) car I have built and used in the past for projects and art. I also decided to use two cameras and create stereoscopic video so the viewer can feel more immersed (using a Google Cardboard or “3D” glasses). This decision was in part for personal reasons (I have never done stereoscopic video before) and a valued suggestion from a fellow classmate. While the first idea was to create a choreographed scene through the streets, sidewalks and buildings of Pitt and the CMU campus, Golan really enjoyed a part of some test footage I shot where I drive underneath a few parked cars. He said there was something very intimate about the underside of a vehicle, something almost not meant to be seen and fascinatingly unique perspective.

Planning

So I decided to work from that and try to capture various interesting places and things from this unique position, with the ability to drive up to 85mph as well. 🙂 After building a rig to hold two GoPro cameras, my car was about 6 inches tall, the perfect and ideal height to be able to drive under short gaps and small areas. The camera lenses were set wider apart than normal human eyes, however that worked to my benefit as that “exaggerated” the 3D depth effect, which helps make objects in the distance look more 3D than real life. This helps because the GoPro cameras naturally have wide-angle lenses that often make close-looking objects appear farther away, so this wide-set camera setup helped bring those far-but-close objects to life.

Filming

I travelled to different on- and off-campus locations, mainly focusing on how to integrate cars and traffic into my shot. While it was fun chasing after cars, driving under buses and even a police traffic stop, many of the more interesting shots came from the social interactions that occurred on-campus. From my high-above viewpoint of a third-floor studio, I was able to chase kids and follow people around campus. One particularly memorable moment was driving through a school tour group. Unfortunately a camera was knocked out of place without me knowing, and I was unable to use much of the day’s footage in the final video. I do, however, include some of my favorites shot in mono form, as a gif, at the bottom of this blog. This is a shot of me waiting for a bus to arrive so I could (safely) drive under the bus as it pulled up:

And this is what my car looks like driving around with two cameras and going under a vehicle:

Editing

Once the footage has been shot, I learned that the process from camera to stereoscopic video on YouTube was very simple. All I have to do edit the footage to be side-by-side within one normal 16:9 video (pref. full HD or higher), with each “eye” scaled to 100% height and 50% width.

A screengrab from the final upload to YouTube looks like this:

When uploading to YouTube, there is a simple checkbox that automatically converts the video a stereoscopic format and creates three versions of the video for public viewing- mono version, anaglyphic version (the red/blue old-fashioned stereoscopic) and VR-ready video. An anaglyphic version may look like this:

and this is what you see through Google Cardboard or similar VR:

Issues

Throughout this project I discovered a few unexpected problems and/or risks:

  • Cameras mis-aligned (esp after bumps/crashes), causing issues with 3D-ness
  • Car sagging/scraping in front (fixed)
  • Car being run over (didn’t happen)
  • Cameras are farther apart than eyes in real life (extreme depth)
  • Rain
  • On-Camera sound is bad

Final Product

Be sure to use a Google Cardboard or similar VR headset to fully enjoy the depth effect! The anaglyphic mode really reduces the color spectrum of the video.

These are some loops that show my favorite moments, some of which are not in the final video (due to camera sync issues or just didn’t make the cut).

sayers-GPRData

As many of you know, I decided to explore ground penetrating radar heavily this semester.  I have been interested in geology combining with artwork for quite a while, although I’m not completely sure why.  A lot of my art has to do with stratospheres of soil/minerals and their makeup.  Although this is primarily a tool for archeology and civil engineering/construction, I found it gave me some really cool data.

I started with the idea that I was going to go to a graveyard to get scans of graves to turn into music (in the process of being set up with GeoSpatial).  Golan was kind of enough to get GeoSpatial to come to CMU campus though, and I decided to look for some of images/things on the campus that most people never see.  Definitely by far the coolest thing was the hidden artwork Translocation by Magdalena Jetelová.  This was an underground room that was put underneath the cut in 1991.  I talked with the lovely Martin Aurand (architectural archivist of CMU) who told me some of the stories about this piece.  In the late 80s/early 90s, a CMU architecture professor that was beloved by many of the staff had died in a plane crash on her way to Paris.  To honor her, the artist Magdalena Jetelová created a room beneath the cut in a shipping container, with lights and a partition.  There was a large piece of acrylic on top of it so that you could actually walk around on top of it.  This artwork was buried somewhere around 2004 however, as water had started to leak in and ruin the drywall/fog the acrylic.  Most people on campus don’t know that it exists.  We were lucky enough to get a scan of this area which went in a grid-like pattern so that I can turn it into an isosurface rendering (more on this later).  

Another area that I wanted to explore was the area by Hunt Library now known as the peace garden.  This used to be a building called Langley Laboratory (although this was often labeled Commons on maps).  I went and visited Julia Corrin, one of the other archivists on campus to look through the archives to find old pictures of CMU.  One part of Langley Laboratory in particular caught my eye as it was a small portion that jutted off the end that appeared in no photographs except the aerial photos and plans.  Julia did not actually know what that part of the building was for and asked me to explore it.  After looking through the GPR data, I don’t believe any remnants of it remained.  It is likely that the building’s foundation was temporary/were completely removed for the creation of Hunt Library.

The last big area I wanted to explore was the Number Garden behind CFA.  This area was interesting particularly because Purnell Center is immediately below it.  This was particularly interesting to scan as we could see the ways that the underground ceiling sloped beneath the ground we were walking on/the random pipes and electrical things that were between the sidewalk and the ceiling.

I also did a lot of research on how GPR works, particularly on the hardware portion and what antennas to use etc.  A short description is GPR works basically by reflecting pulses of radar energy that are produced on a surface antenna.  This then creates wavelengths that go outward into the ground.  If an object is below ground, it will bounce off that instead of merely the ground, and will travel back to the receiving antenna at a different time (in nanoseconds).  There are 2 main important types of GPR images.  The first thing is a reflection profile.  This is the long image that you do an immediate scan.  This will show the bumps in the ground and look like this:

The next is an isosurface rendering.  This is basically what happens if you get a lot of scans in a grid.  If you line up a bunch of the scans, you essentially get horizontal slicing of what you can turn into a 3D model.  This looks something more like this:

In some ways, as far as events, my event was helping to get GeoSpatial involved, doing research to find interesting places to go to, learning a lot about GPR to ask educated questions, and then having the day that we scanned.  The act of scanning itself is an event which can also be captured.

Because the data was slightly difficult to read at first (Thank you Golan for going through it with me through strange photoshop raw files with guessing bits) and getting very sick, I am slightly more behind than I would like.  I have the data and will be meeting with Jesse Styles on Tuesday to get opinions on how I could turn this into a 3D soundscape.  This is a very difficult project for me because it is big, involves people outside of CMU, and every part of it is completely out of my normal wheel-house.  My next big difficulty is going to be learning how to synthesize this into sound, as I very rarely work with it.  I feel like I am still learning a lot throughout this though.  I really want to thank GeoSpatial for being so kind and sharing their time and software with us!

Golan also showed me this super cool artwork made by Benedikt Gross in which he uses computational tractors to create enormous earthworks.  These tractors/bulldozers can be programmed to go in set patterns and can act like a 3D printer/CNC router! 

If you are interested in seeing any of the raw data, reach out to me.  I cannot unfortunately share the SubSite software as Google Drive will only allow me to share it with people at GeoSpatial.

ngdon-event


My event project is a software that takes in lots of different photographs of a certain event as input, then uses computer vision to find the similarity and differences between the images in order to sort them, and finally produce a video/animation of the event by playing the sorted images in sequence.


Animation of a browsing horse and a running horse automatically generated by my program.

(More demos coming soon!)


Inspiration

I was inspired by those animations complied from different photographs Golan showed us on class, eg. the sunset. I thought it’s an interesting way to observe an event, yet aligning the photos manually seemed inefficient. What if I can make a machine that automatically does this? I can simply pose any question to it: How does a horse run? How does a person dance? and get an answer right away.


Eventide, 2004 from Cassandra C. Jones on Vimeo.

I soon found it a very challenging problem. I tried to break it down into many smaller problems in order to solve it.

Background Extraction

I used a general object detection tool powered by neural networks called darknet to find the bounding boxes of objects in an image. However most objects have irregular shapes that do not resemble a box. So finding out exactly which pixels are actually part of the object and which ones are part of the (potentially busy) background is a problem.

After much thought, I finally came up with the following algorithm:

Since I already have the bounding box of the subject, if I extend the bounding box in four directions by say 10 pixels, The content between the two boxes is both a) definitely not part of the subject, and b) visually similar to the background within the bounding box.

The program then learns the visual information in these pixels, and delete everything within the bounding box that look like them.

The results look like this:

Although it is (sort of) working, it is not accurate. Since all future operations depend on it, the error propagation will be extremely large, and the final result will be foreseeably crappy.

Fortunately, before I waste more time on my wonky algorithm, Golan pointed me to this paper on semantic image segmentation and how Dan Sakamoto used it in his project (thanks Golan). The result is very accurate.

The algorithm can recognize 20 different types of objects.
I wrote a script similar to Dan Sakamoto’s which steals results from the algorithm’s online demo. Two images are downloaded for each result: one is the original photo, the other has the objects masked in color. I did some tricks in openCV and managed to extract the exact pixels of the object.


Image Comparison

I decided to develop an algorithm that can decide the similarity between any two images, and to sort all images, I simply recursively find the next most similar image and append it to the sequence.

Since the subject in an image can come in all sorts of different sizes and colors, and might be cropped, rotated, blurred, etc., I tried to use a brute-force window search to counter this problem.

The program scales and translate the second image into tens of different positions and sizes, and overlays it on top of the first image to see how much of them overlaps. A score is thus calculated, and the alignment with the highest score “wins”.

This, although naive and rather slow, turned out to be reasonably accurate. Currently only the outline is compared, I’m thinking about improving it by doing some feature-matching.

Image sorting

To sort all the images, with the information about the similarity (distance) between any two of them, is analogous to the traveling salesman problem:

I simply used Nearest Neighbor to solve it, but will probably substitute it with a more optimized algorithm. Here is a sequence of alignments chosen from 300 photos.

Notice how the horses’ head gradually lowered.

Rendering

I didn’t expect exporting the sequence with all image aligned would be such a headache. Since during the matching phase, the images went through a myriad of transformations, I now have to find out what happened to each of them. And worse, the transformation needs to be propagated from one image to the next. Eventually I have it figured out.

An interesting thing happened: the horses keep getting smaller! I guess it’s because the program is trying to fit the new horses into the old horses. Since this shrinking seems to be linear, I simply wrote a linear growing to counter it:

Sans-background version:

It took a whole night to run the code and produce the above result, so I only had time to run it on horses. I plan also to run it on birds, athletes, airplanes, etc. during the following nights.

mikob – event


I recently got interested in ML algorithms that alter or augment existing images. I was intrigued by the opportunities that these algorithms can expand our existing perception of the world.

CycleGAN

Colorization of grayscale images

What first got into my mind was ultrasound photograph of the fetus. This is an image that is limited to be seen in black and white. How would it feel different if we are able to see this in color? Unfortunately, since there is no ground truth for this image yet, the colorization wouldn’t work for this. However, it revealed how there are things that we desire to see in color.

Another idea came to mind, which is to colorize images of subjects that no longer exist, such as extinct animals. Following is my first attempt at colorizing a photograph of a Tasmanian tiger, which went extinct around 1936:

Then I questioned how the use of color influences our perception and decisions. How would colorization of existing images hint novel insights that wouldn’t have been noticed otherwise? I recognized how colors used in political campaigns were obscured in black and white photographs whereas the use of red and blue today is very explicit in these campaigns. It triggered my curiosity for how these photographs would appear differently when they are in color. I scraped images of U.S. presidential election campaigns from 1952-1980 at Getty Images collection and ran the colorization script.


While some images worked better than the other, the effect that colors contribute to the portrayal of election campaigns was stark. I made a chart to see if there were any patterns or trends.

I think it would be also interesting to arrange these charts based on other variables such as candidates or parties. It would have been also better if I had a larger collection of images of election campaigns, which I could have used a training set to get better results.

blue-Event

I’ve been working with footage shot in the Panoptic Studio at CMU, a markerless motion capture system developed by CMU CS and Robotics PhD students, . I’m interested in volumetric capture of the human body, without rigging a model to a skeleton in traditional motion capture, but in capturing in 3D the actual photographic situation – in my case, the human form. I am collaborating with Pittsburgh dance and music duo, Slowdanger, comprised of Anna Thompson and Taylor Knight. I’m interested in capturing actual video of real people, volumetrically, and creating situations to experience and interact with them.

The research question of how to work with and display this data is a challenge from multiple perspectives. First, a capture system must exist to be able to generate the data. The Panoptic Studio uses 480 cameras and 10 Kinects to capture video and depth data in 360 degrees. Secondly, the material is extremely expensive to process with regards to a computer’s RAM, CPU and GPU, and graphics cards. I worked for multiple weeks to convert resulting point clouds – i.e. a series of (x,y,z and r,g,b) points that create a 3-dimensional form, as meshes, with textures, and convert them to obj sequences to manipulate in a 3D program such as Maya or Unity. This had very minimal success – as I was able to get a few meshes to load in and animate in Unity, but without textures. I then decided to work with the point clouds themselves, to see what could be done with these. The resulting tests load in the ply files, in this case 900 of them (or 900 frames), and display them (draw to the screen) one after the other, creating an animation. I experimented with skipping points to create a less dense point cloud, and in displaying nearly every point to see how close I could get to photographic representation.

The resulting artifacts are proof-of-concept, rather than an artwork in and of themselves. I was not originally thinking of this, but the footage has been likened to early film tests of Edison, Muybridge, and Cocteau. It’s interesting to me to think of such a new technology generating material which feels very old – but at the same time, it is oddly appropriate, as we are basically at a similar point in creating visual content with this medium as they were with the early film tests in the late 1800’s, early 1900’s. It is such a challenge to simply process and display this content, that we are experimenting with the form in similar ways.

https://www.youtube.com/watch?v=-CM9W6pYSEo

In a further iteration of this material, I would like to get this content into an Oculus to emphasize its volumetric qualities, giving the viewer the ability to move around the forms in 360 degrees.

Here are the tests:

Creating volumetric films, “4D holograms”, is catching investor and industry attention for taking virtual, augmented, and mixed reality into a new domain beyond CGI – and there is a race to see who will do it best/first/most convincingly. Companies such as 8i and 4D Views are two such companies. I do feel that there are a lot of assumptions and exaggerated claims being made currently around this technology. It’s interesting to look at the types of content that come out of very nascent technology – and draw parallels between the early filmmaking / photography community and this industry / research. Who is making what, who is capturing who, and why? For whom?

The Panoptic Studio at CMU, however, does not come from filmmaking / VFX motivation, but rather a machine learning skeleton detection research question to interpret social interactions through body language. Thus, the question of reconstruction of these captures has not been heavily researched.

fatik- event


Depthkit + Moshpit

I really enjoy going to concerts and I realized that the audience have a big role in the experience of the show. I wanted to explore the different kinds of crowds in different music events. My vision was a crowd with a lot of people but somehow capturing the density and movement.Thanks to DepthKit, I was able to do this. I want to eventually go to more concerts of different genres and compare the movement of the masses.

I was inspired by one of radiohead’s music videos that was all filmed with a Lidar. I’ve also been super interested in photogrammetry and 3D scanning. I was thinking of this project as a moving photogrammetry if that makes any sense.


Testing the DepthKit

Before looking for the right event to film, I wanted to do a test run with DepthKit. I took all of my gear to a party and filmed people dancing. It was a good way to run into problems before the real shoot.


Finding a Gig/ Getting permission

Like I said before, the crowd can really vary by the event. I wanted a lot of movement so I decided to search for punk shows to film a mosh pit. I called all of the theaters and they told me that I had to contact the bands directly. I found one event and seemed like the perfect fit. I messaged them on Facebook and they were super chill.

When I got to the venue, the band members were extremely kind. They helped me set up, got me water, and even gave me ear plugs because it was so loud. One of the band members even introduced me to his wife whom I’d stuck with the entire night.


Final

To put all of my footage together I made a music video. I just really wanted to make a music video. Along with the MV, I also made a video using just the moshing scenes and overlaying a non-punk song. I wanted to decontextualize the footage. Because I was only able to capture one type of music event, I thought it’d be interesting to overlay a song that would have a different crowd.

https://vimeo.com/213366188


Gifs and other neat things 


kyin & weija – event

Foot Classifier

Our event is stepping. We were inspired by the many tools that were shown during lecture, including the SenselMorph, openframeworks eye and face trackers, etc. We liked the idea of classifying feet, a part of our body that is often forgotten about yet is unique to every individual. Furthermore, we wanted to capture the event of stepping, to see how individuals “step” and distribute pressure through his or her feet. As a result, we decided to make a foot classifier by training a convolutional neural network.

Process

Openframeworks and ofxSenselMorph2

First, we used Aman’s openframeworks addon ofxSenselMorph2 to get the SenselMorph working, and to display some footprints. Next, we adapted the example project from the addon so that the script takes a picture of the window for every “step” on the Sensel.

Gathering Data 

In order to train our neural network we want to get a lot of data. We collected around 200-250 train images for each individual our neural net would train on, and got 4 volunteers (including ourselves).

Training our Neural Net

We used Pytorch, a machine learning library based on python. It took us a while to finally be able to download + run the sample code, but through some help from Aman we managed to get it to train on some of our own data sets. We ran a small piece of code through the sensel that can capture each foot print through a simple gesture. This allowed us to gather our data much faster. We used our friend’s GPU-enabled desktop to train the neural net, which greatly reduced our overall time dealing with developing the model.

Putting Everything Together

To put everything together, we combined our python script that given an image will detect whose foot it is with our openframeworks app. We created 2 modes on the app, a train and run mode, where train mode is for collecting data, and run mode is to classify someone’s foot in real time given a saved train model. On Run mode, the app will display its prediction after every “step”. On train mode, the app will save a train image after every “step”.

Running Our Classifier

Overall, we were really happy with our results. Although, the app did not predict every footprint with 100% accuracy, about 85-90% of the time it was correct between 4 people, and this is with 200-250 train data for each person, which is pretty darn good.

caro-event

Inspiration

I was very inspired by the Cassandra C. Jones work that Golan showed in class, where she manually aligned different photos of sunsets to create one continuous sunset. I thought the concept of creating one event through hundreds of different people’s momentary experiences was very interesting, and I wanted to explore it in my project.

https://vimeo.com/84883569


I was also inspired by the pixillation works we saw in class, particularly the One Frame of Fame music video, for the same reason.


Pregnant Women

Lots of pregnant women post the exact same selfie on Instagram. It’s this one:

I thought it would be fun to align these women from most to least pregnant. So I downloaded about 100 photos from Instagram, and I got to work manually aligning them in Photoshop.

Attempt #1

Most to Least Pregnant (my first gif, aligned manually)


I then turned this into a music visualizer (which you can still play with a draft of at https://caro.io/pregtunes):

Changing the Media Object

I did make the music visualizer, and it worked, but there were a few problems with it.

  1. I was choosing the woman’s size by the volume of the song, and volume doesn’t really map very intuitively onto sound
  2. It looked choppy enough without the random frames jumping around, and with this visualization method it looked even more incongruous.
  3. Conceptually, I don’t really know why I was doing this. It was straying from my original idea of turning all of these women’s experiences into one.

So, I scrapped the music visualizer, and went for another project.

Three Points Define a Circle

My new idea was collecting data from my images, and creating visualizations with the ladies I collected. If I could get three points on the stomach, I could define a circle that corresponds to the curvature of the pregnant lady’s belly. So, I built a tool to log this data for each of my pregnant ladies.


Using this data, I created a few visualizations.


Creating the Visualizations

I used python imaging library and various matrix transformations to align the images. Using principles that I learned in computational photography and computer graphics, I constructed transformations to achieve various effects.

(napkin math)

0. More and Less Pregnant

My manually aligned gif that I started with is honestly still my favorite one, and it’s the idea that sparked this whole project. Still, the computer generated ones are interesting, and it was fun to model women and babies as mathematical shapes.


1. Same Belly Button

  1. select a point to be the “new belly button” location
  2. get transformation values by subtracting the woman’s belly button coordinates from the new belly button coordinates
  3. construct a transformation matrix for each lady based on the transformation values

I originally tried it on the full color images with backgrounds, but came to the conclusion that it was too visually busy, so I reverted to the background-less images I made.

2. Spinning around the belly button

  1. Move the belly button to the new, approved belly button place
  2. For each lady, increment the angle of rotation a little bit
  3. Translate the lady’s belly button to (0, 0)
  4. Rotate the lady by theta
  5. Translate the lady’s belly button back to the correct belly button location

3. All Woman-Circles are the Same Size

  1. Translate the woman’s belly button to the new centralized belly button location
  2. Scale the image by the ratio of a standardized radius to the ratio of the woman-circle
  3. Translate the image again by a factor that eliminates the movement about the centralized location due to scaling

Reflection

I wound up taking a pretty experimental route with this, and got some interesting results. If I had more time, I would love to gather even more photos for this, and do it with a thousand photos rather than a hundred. The problem with that is that this only really wound up working for the images where I took out the background. I think it’d probably look a lot better if I had hundreds of images, and there was no variation in the clothes, i.e. if their stomachs were all bare.

Challenges I encountered:

  1. Switching my project after a while
  2. Matrices are hard
  3. Jitteriness in the resulting gifs

I did get some interesting media results out of this project, and tagging women’s stomachs with bubbles was fun.


Event Progress

I have been tryiing to make progress with controlling the focus motor on the Canon cameras using the Canon SDK, and have not had any luck.  As an alternative, I have found this method that seems like a good way to be able to control the focus computationally:

caro-eventProgress

My last blog post has a detailed process writeup:

caro-eventProposal


Since then, I haven’t done much, but I was really far ahead for the last checkpoint so I guess it evens out? I still need to do icons for the website, and I actually want to play around more with the images of pregnant ladies to make more weird visualizations.

cdslls – EventProgress

I achieved to make a frame specially optimized for the schlieren mirror, in order to hold it up with a clamp and keep it nice and snug. The frontal pieces of plywood were used instead of wood to maximize the amount of light refraction. The biggest difficulty in achieving this first step was building the frame, without bringing the mirror into the wood shop (to avoid it getting dusty and damaged). It was a nice surprise to see that it fit perfectly inside its designed space (with a millimeter accuracy).

Process sketch:

Then I proceeded to setting up the schlieren mirror at a focal distance of about 2 meters. The image below shows my point light source (a flashlight covered with metallic tape) and its refraction at a distance of about 5mm from the original source. Today I will proceed with the razorblade placement and first trials.

hizlik-EventProgress

Over the past week I’ve built a mount on my RC car to hold two GoPro (or in this case, GoPro knock-offs). As I’m normally a digital artist, it was a fun and interesting experience re-learning how to use power tools like the drill press, band saw and other tools to rig up a mount to my rc car without actually modifying the car too much. The only permanent change applied to my car was cutting the front bumper to be shorter (it used to cover the lens).

After the mount, I started learning how to create stereoscopic 3D video for youtube, which was simpler than I thought. All I had to do was align the two video files time-wise, and then squeeze them into one frame so they were side-by-side (height = 100%, width = 50%). The 3D works really well, despite the lenses being wide-angle and the cameras being farther apart than human eyes. The only true problem is when an object is very close, it becomes dizzying to try to focus on. But the wide distance between lenses helps really emphasize the 3D depth for farther-away objects, which is good for wide-angle footage (as objects look farther than they are).

Here are some test videos- best viewable on a Google Cardboard or similar VR platform:

https://www.youtube.com/watch?v=GlGtOXn6Gcs

https://www.youtube.com/watch?v=6AHTyUfjFA0

https://www.youtube.com/watch?v=iNgsHt4coFA

Here are some ideas for me to film later:

ngdon-eventprocess

My event project is going to be a software that takes in lots of different photographs (from different sources) of a certain event as input, then uses computer vision to find the similarity and differences between the images in order to sort them, and finally produce a video/animation of the event by playing the sorted images in sequence.

For example if I input a lot of images that consist of running horses from google images, one way the software can process them is to first align by the positions of horses in them, and then sort by similarity of the pose of the horse. It can thus produce a video of a running horse consisting of frames from different images.

Similarity, I can input images of dancing people, flying birds, ball games, fights, etc.

I’m using general object detection to find the binding boxes of all objects in images. Then, depending on which works better, I can either do pixel-wise comparison or contour comparison to produce a similarity score for any two arbitrary images.

Here’s where I am in the process:

  • I wrote a program to download images from ImageNet, where tons of images are categorized by subject.
  • I found a neural network object detection tool called darknet. I tweaked its source code so it can print out the bounding boxes of all objects in an image into Terminal. Then I wrote a python program to batch process my source images using this tool, and parse the output.
  • I used openCV in python to do some simple manipulations on the source images so the comparison process will probably be more accurate.

What I’m trying to figure out:

Although I have information about the bounding boxes, most objects have irregular shapes that do not resemble a box. So finding out exactly which pixels are actually part of the object and which ones are part of the (potentially busy) background is a problem. I’m going to read darknet’s source code to find out if this information is already in there. If not, I will have to write something myself.

kyin&weija – EventProcess

Our Idea

We want to use the Sensel touch sensor to train footsteps in order to detect a person’s unique footprint. Our event is “being stepped on”, or walking.

ofxSenselMorph2

We are using image recognition/processing to train our neural net. In order to do that, we first need to get images footprints from the Sensel. We used Amon’s ofxSenselMorph2 to display the information the Sensel is receiving, and adapted the script to take a screenshot of the window on a specific key press.

Kristin’s foot:

Jason’s foot:

Neural Nets

We did some research regarding convolutional neural networks, which we plan to use in our feet classifier. We’ve done some research on which ones to use, and we’re currently looking TensorFlow as our main candidate. (If anybody has any better / easier cnn to use, we are completely open to suggestions).

blue-EventProcess

I’m in the midst of a deep, dark hole about meshing point clouds using Meshlab, and automating all the processes through scripting. I am attempting to create a workflow that starts in Meshlab, uses a filter script and Meshlab Server to batch process the point clouds (.ply) into usable .obj’s, and then bring these obj’s into Unity, and animate using a package called Mega Cache, which takes in .obj sequences.

I’ve just discovered some material that seems to suggest that Unity can deal with point clouds using plugins, and I will pursue this next.

I’m meeting with the Panoptic Studio team tomorrow evening to talk through their data output and the workflow I’ve been investigating.

My highest priority right now is to achieve functional playback in animation form with meshes that maintain a relatively high level of fidelity to the original mesh. I’d like to display the point clouds as an animation, too, but have not figured this out yet. The content is exciting, but challenging to work with.