a — portrait

Portrait — Ghost Eater


I captured the ghost of Ngdon. Here it is being called upon, during Open Studio 2016.

How

I trained a pix2pix convolutional neural network (a variant of a CGAN) to map facetracker debug images to Ngdon’s face. The training data was extracted from two interviews conducted with Ngdon, about his memories of his life. I build a short openFrameworks application to take the input video, process it into frames, applies and draws the face tracker. For each frame the application produces 32 copies, with varying scales and offsets. This data augmentation massively increases the quality and diversity of the final face-mapping.

For instance, here are 6 variations of one of the input frames:

These replicated frames are then fed into phillipi/pix2pix. The neural network learns to map the right half of each of the frames to the left half. I trained the network for ~6-10 hours, on a GTX 980.
At run-time, I have a small openframeworks application that takes webcam input from a PS3 Eye, processes with the dlib facetracker, sends the debug image over ZMQ to a server running the neural network, which then echoes back its image of Ngdon’s face. With a GTX 980, and on CMU wifi, it runs at ~12fps.

Only minimally explored in the above video, the mapping works really well with opening/closing your mouth and eyes and varying head orientations.

The source code is available here: aman-tiwari/ghost-eater.

Here is a gif for when Vimeo breaks:

Bernie-portrait

This video shows a Photogrammetry rig that I created using a Universal Robots Robot arm and a Cannon camera.  My program is one Openframeworks program that I use to send strings of URScript commands to the robot arm and also simultaneously take pictures using the Cannon SDK.

My inspiration for this project was to use the precision of the robot arm to my advantage.  The arm is so precise that photogrammetry could be done easily, quickly, and repeatably for any object.  This takeout box was created from 100 images.

With this application, you can enter the number of images you want it to take, and the height of the object, and it will scan any object of reasonable size.  It covers about 65 degrees of the object, as is.  After entering the proper measurements and number of photographs to be taken, I start the app, and the robot moves to a position, waits for any vibrations from movement to stop, then sends a command to the camera to take a picture.  I then wait an appropriate amount of time for the camera to focus and take a picture, then move to the next location.  It takes pictures radially around the object for optimal results.  Ideally, with future iterations of this, I will be able to go all the way around the object in a sphere to get the most accurate model.

After taking all the photographs, I used Agisoft Photoscan to overlap the images and create the 3D model shown in the video.

The model turned out as well as I had hoped, and will definitely continue with this project to be able to make a full 3D models of objects and people.

DMGordon-portrait

My portrait is a collection of VR environments which describe different aspects of caro. From our discussions, I plucked three ideas she shared and created virtual environments from them. I did this using Maya and Mudbox for modeling and animation, which were then imported into Unity, which provided the underlying framework for interaction. The three ideas eventually developed into their own scenes, which are connected together by a hub world containing portals that transport the subject to and from each scene.

The most difficult portion of this project was definitely the scene based upon caro’s drive to achieve and compete. I thought to represent this drive using procedurally generated staircases, where steps were constantly being added to the top while the bottom steps would fall away, forcing someone on the stairway to climb at a certain pace or fall. Making the staircase assemble itself in a smooth, yet random path involved both calculating the position of new steps in relation to the ones before them, and having them materialize some distance away and fly to their assigned position to give the effect of being assembled out of the ether. I also had a lot of trouble writing a shader that would make the steps fade to and from transparency in an efficient manner. These challenges all provided good learning experiences which will help me in future projects.

The final product is semi-successful in my opinion. I succeeded in creating an immersive VR experience which interfaced with the Vive. I am happiest with being able to create my own song for the piece, as sound and music are integral to immersion. However, much of the piece (the hub world in particular) have nothing to do with caro, resulting in what seems to be only a half-portrait. If I were to redo this project, I would involve caro much more in content creation, rather than building an infrastructure which is then embellished with details about her.

Portrait from David Gordon on Vimeo.

ngdon-portrait

Trashscape: A portrait of A from Lingdong Huang on Vimeo.

Trashscape: A virtual environment where the user can pick up and listen to A’s trash.

Mac Version Download A Leap Controller is required to play. Mouse and 3D mouse versions are in development

Plan

I thought it was an interesting idea to know my subject and explore his mind by documenting his trash.

I planned to collect all the things my subject throws away over a period of time, along with voice recordings of the subject telling some thoughts he had in mind the moment he wanted to throw away that piece of trash.

I would then do a photogrammetric scan of all the trash, and place them in a virtual 3D world where the user can wander around, pick them up and listen to the corresponding voice recording.

Process

Trash Collection

My subject handed me a plastic bag full of all sorts of trash.

Recording My Subject

To make it as realistic as possible, we recorded the subject’s voices using an ear-shaped mic from above, so when the user listen to the trash, it sounds as if the voices are coming from the trash.

We numbered each piece of trash, from 1 to 34, and put a label on each of them. This number corresponded to the number my subject would say at the beginning of each recording, so it was impossible to confuse.

I found my subject’s speech exceed my expectation. When I was planning the project, I was thinking of the recording to be something banal such as “This is a half eaten apple. I’m throwing it away because it tastes awful.” but in fact A has something quirky and insightful to say about every piece of his trash.

Here are some sample recordings:

“Newspaper”


“Spoon Unused”


“Museum Ticket”


3D Scanning

I used photogrammetry software Agisoft PhotoScan Pro to virtualize the trash.

The software is really bad at smooth surfaces, which it cannot understand, and symmetrical objects, which it tries to warp so that the opposite sides overlap. But eventually I got 21 out of 34 trash models done. The other 13 were tiny balls of ash and hair and chips of paper that were evidently too hard for PhotoScan Pro.

The finished models really had a trash-like quality to them, which might be a problem if I was scanning any other object, but instead became a bonus since I’m scanning actual trash.

Visualization

I used Unity and Leap Motion to create the virtual world.

I imported all the trash models and voices and paired them in Unity. I programmed a virtual hand so that the user can “pick up” trash by making the gesture over the Leap controller.

A question I spent a lot of time figuring out is the environment the trash were going to situate. Using the default Unity blue sky scene certainly feels unthoughtful, yet building a customized realistic scene distracts from the trash itself. I also tried to create a void with nothing but the trash, but I felt that the idea of an explorable environment is weakened by doing so.

Finally I decided to float the trash in a black liquid under a black sky. I believe this really solved the problem, and even helped bring out the inner beauty of those trash.

Things to Improve

I’m generally happy with the result. However, there are things I need to improve.

Golan pointed out that the controls are problematic. I often face this kind of problem. Since I’m testing the software hundred of times while developing it, I inevitably train myself to really master the control. However when a new user tries to use it, they usually find it way too difficult.

I’m working on the 6DoF mouse now to make a better controlling experience.

Another problem is the hand model. Currently it’s just a plain white hand from the default Leap Motion Assets. Golan and Claire gave me a lot of ideas, such as the trash picker’s glove, tweezers, A’s hand, etc.

They also mentioned things the users can do with the trash they find, such as collecting them in a bag, sorting them, etc, which I might also implement.

I’m also thinking about improving the workflow. Currently it’s really slow, and I find myself spending hours photographing each piece of trash and struggling with crappy software to make 3d models out of them. I need to automate the whole process, so anyone can just bring in their trash and get their trashscape compiled in no time.

iciaiot-portrait

I’m very excited by interactive, 3d, time-based projects with a hand-made quality to them. I’ve been exploring ways to represent reality with hand-drawn renderings, clay, and fabric, in conjunction with rotoscoping, photogrammetry, and especially videogrammetry. The portrait I made with bierro was an openFrameworks executable where the viewer could manipulate the angle of bierro’s head just as you could manipulate the angle of a sphere in maya or unity. All the frames were hand drawn from a video I took of bierro spinning in a chair.

Going forward with this project, I would love to capture more angles so that my subject could be turned and rotated in a variety of angles (rather than just one axis). I would also like to create more interactive portraits where the viewer can manipulate the position of the subjects arms/legs, etc. In order to do this efficiently, I plan on researching some style transfer algorithm so each frame will not have to be hand-drawn but will still appear that way.

Workflow:

I started with a video of bierro.

I wrote a simple script to extract frames at a regular interval. Here are the frames I extracted:

I then used tracing paper and “rotoscoped” my subject:

Here is the final result:

supercgeek-Portrait

For my portrait I used a live-image slit-scanner controlled via a custom OF App and the Griffen PowerMate to capture images of fourth. This blog post describes my project in three steps:

  • What Happened: My Process
  • What Resulted: The Portraits
  • What (could be) Next: Areas for Future Research

Process

Near the beginning of my exploration into machine-based portrait capture, I read Golan’s overview of Slit-Scanning and started thinking a lot about how differently artists had approached the simple rudiment of assembling a series of captured slits. For my project, I didn’t want to create a new one of these approaches for my portrait subject, fourth, as much as create a machine that would allow an artist to create their own algorithm physically. To enable the creation of this portrait machine, I worked with a jog-wheel Human-Interface Device called the Griffen PowerMate (controlled via ofxPowerMate), which would paint slits to the right of the starting location when turned clockwise, and to the left when turned counter-clockwise.

In effect, this allows an artist to craft custom-slit-scan works with a high degree of personal expression and control. In the below video, you can see me painting in fourth’s portrait using the custom OF app I created for this project.

Video of OF App Working

Capture Setup

More Software Iterations

Portraits

Other Portraits (Still Developing)

Future Directions

Though my capture system works, I believe there’s significant room for future improvement. Going forward, I’ve been thinking about a number of areas where I could iterate this project:

  • Extend the functionality beyond just placing a captured slit, to include the ability of choosing where the slit is captured from (currently, it is always captured from width/2).
  • Experiment with more continuous blurring between captured states instead of just leaving the blank bars (which adds an glitch aesthetic to the scans).
  • Work on improving the capture & paint playheads to better communicate what the software is doing.
  • Someone in my review pod mentioned the IO Brush, I think it would be interesting to look into this more.
  • Investigate the notion of transcompiling the OF application to iOS and shifting from the wheel as creative input to some version of touch interface.
  • Slit-scanning often has a ‘glitchy quality’, in part due to the low resolution that it is normally captured at. I may explore a way to hook up a high resolution DSLR-quality camera to work towards a more professional look.

hizlik-Portrait

Update: As of 2020, an updated documentation for this project is now on my website at hiz.al/photodata.

After meeting Quan and getting to know each other, we discovered we wanted to make a portrait of each other based on our preferences as photographers. We wanted to compare styles, subjects, etc. We came up with a bunch of ideas, and settled on using metadata to create data-driven visualzations of our preferences. We also orignally wanted to use Google’s Vision app to interpret what the subject of the photos was, but that turned out to be too slow/complicated. Instead we focused on core aspects of our photographic styles. For example we wanted to know how we compared based solely on aperture and focal length preferences, as Quan has special lenses and I prefer using a single 50mm prime lens. We also wanted to see what kinds of ambient light we photographed in, and how that compared to what we thought of ourselves. I’m surprised, because I usually think I’m an indoor photographer, but a lot of my photos turned out to be daylight-level ambience.

Quan has about 90k images and I have about 25k images. The process for Quan was a bit longer than me since he stores his images as RAW files, but for it to be easier on us we decided to convert his images to small JPEGs with metadata intact, and read it into the python script below. As for my images, the count is because I clear unneeded images and generally can reduce a photoshoot of about 700-900 photos down to 50 photos to be kept. All my photos are already in JPEG so I didn’t need to convert anything (a process that took over a week for Quan). After conversions, the python script grabbed the necessary metadata (time, focal length, shutter speed, aperture, etc) and computed the data for the four visualizations below. For ambience, we made a rating-based system comprised of a combination of aperture, shutter speed and ISO to create a number that represented the overall ambient light that the location must have had (instead of the actual brightness of the photo).

After the data is created, it is saved to js files and read into various HTML pages and loaded into Chart.js charts to create the visualizations below. Quan, since he didn’t write as much code, also made a second project visible on his page. For the ambience ones, each dot represents an image, and each image has a certain amount of transparency. The brighter the white, the more the images during that day, in that lighting.

Ambience (Hizal)

Ambience (Soonho)

Focal

Aperture

(the following code was adapted for the various analysis above)
Python Script: Analyze metadata from 120k images for ambience


from collections import OrderedDict 
from os.path import exists, join
from datetime import datetime
from os import makedirs, walk
import logging, traceback
import exifread
import json

debug = False
default_folder = "imgs"
extentions = ('.jpg','.jpeg','.png','.tif','.tiff','.gif')
files = []
metadata = {}
days = {}
data = []

def load(folder = None):
  global files
  if not folder:
    folder = default_folder

  for r, dir, f in walk(folder):
    for file in f:
      if join(r,file).lower().endswith(extentions):
        files.append(join(r, file))

  perc = 0
  count = 0
  for file in files:
    if debug:
      print file

    image = None
    while not image:
      try:
        image = open(file, 'rb')
      except:
        print "ERROR: File not found: " + file
        raw_input("Press enter to continue when reconnected ");
    
    tags = exifread.process_file(image, details=False)  
    try:
      # timestamp
      ts = datetime.strptime(str(tags['EXIF DateTimeOriginal']), '%Y:%m:%d %H:%M:%S')

      # aperture
      fstop = str(tags['EXIF FNumber']).split('/')
      if len(fstop) > 1:
        f = float(fstop[0])/float(fstop[1])
      else:
        f = float(fstop[0])

      # shutter speed
      speed = str(tags['EXIF ExposureTime']).split('/')
      if len(speed) > 1:
        ss = float(speed[0])/float(speed[1])
      else:
        ss = float(speed[0])
      
      # iso
      iso = int(str(tags['EXIF ISOSpeedRatings']))

      # focal length
      mm = str(tags['EXIF FocalLength']).split('/')
      if len(mm) > 1:
        fl = float(mm[0])/float(mm[1])
      else:
        fl = float(mm[0])

      if debug:
        print "\tTimestamp: " + str(ts)
        print "\tAperture: f" + str(f)
        print "\tShutter: " + str(tags['EXIF ExposureTime']) + " (" + str(ss) + ")"
        print "\tISO: " + str(iso)
        print "\tFocal length: " + str(fl) + "mm"

      metadata[file] = {'f':f, 'ss':ss, 'iso':iso, 'fl':fl, 'ts':ts}

    except Exception as e:
      if debug:
        print file
        logging.error(traceback.format_exc())
      pass

    # print progress
    if count == 0:
      print " 0% ",
    count += 1
    new_perc = int(round(((count * 1.0) / len(files)) * 100))
    if new_perc > perc and new_perc%10==0:
      print "\n" + str(new_perc) + "% ",
    elif new_perc > perc and new_perc%1==0:
      print ".",
    perc = new_perc

  print ""
  print str(len(files)) + " files found.\n"

def write():
  filename = "data.js"
  if debug:
    filename = "debug.txt"

  print "Writing " + filename + "... ",
  with open(filename, 'w') as f:
    f.write("window.chartdata = [\n")
    for day in data:
      f.write("[")
      for i in xrange(len(day)):
        f.write(str(day[i]))
        if i != len(day)-1:
          f.write(',')
        else:
          f.write('],\n')
    f.write("];")
    f.close()

  print "\t\tdone."

def map(value, srcMin, srcMax, tgtMin, tgtMax):
  return tgtMin + (tgtMax - tgtMin) * ((float(value) - srcMin) / (srcMax - srcMin))

def constrain(value, min, max):
  if value < min: return min if value > max:
    return max
  return value

def getRating(meta):
  iso = constrain(map(meta['iso'], 100, 6400, 0, 100), 0, 100)
  f = constrain(map(meta['f'], 22, 1.4, 0, 100), 0, 100)
  ss = constrain(map(meta['ss'], float(1.0/8000), 1, 0, 100), 0, 100)

  if debug:
    print "\tISO: " + str(meta['iso']) + "/" + str(iso)
    print "\tF: " + str(meta['f']) + "/" + str(f)
    print "\tSS: " + str(meta['ss']) + "/" + str(ss)

  return int(iso + f + ss)

def analyze(index = None):
  global metadata, data, days

  count = 0
  perc = 0
  for img in metadata:
    meta = metadata[img]
    rating = getRating(meta)
    if debug:
      print ""
      print img
      print rating
    if rating >= 250:
      print img

    if str(meta['ts'].date()) in days:
      days[str(meta['ts'].date())].append(rating)
    else:
      days[str(meta['ts'].date())] = [rating]

    # print progress
    count += 1
    new_perc = int(round(((count * 1.0) / len(metadata)) * 100))
    if new_perc > perc and new_perc%10==0:
      print str(new_perc) + "% "
    perc = new_perc

  # save as ordered days
  ordered = OrderedDict(sorted(days.items(), key=lambda t: t[0]))
  for day in ordered:
    data.append(ordered[day])

  if debug:
    print days
    print ordered
    print data

  print str(len(metadata)) + " files processed."

def test():
  pass

while True:
  print "0: Exit (without saving)"
  print "1: Auto"
  print "2: Load"
  print "3: Analyze"
  print "4: Save data"
  choice = (int)(raw_input("> "))

  if choice == 0:
    break

  if choice == 1:
    load()
    analyze()
    write()
    
  elif choice == 2:
    folder = raw_input("Folder section: ")
    load(folder)
  elif choice == 3:
    analyze()
  elif choice == 4:
    write()
  elif choice == 626:
    test()
  else:
    print ""

  print ""

Bierro-portrait

For this project, I wanted to create an intimate portrait of Iciaiot through the “voice” of her moves, her breath, her quirks and so on. For that purpose, I put four contact mikes on different parts of her body during a 2-hour dinner and recorded the output of the mikes along with a close-up video that I then edited.

This project started with a first chat at Starbucks with Iciaiot. We noticed that we were both fidgeting, probably out of nervousness and excitement triggered when you meet someone new. While she was playing with her ring, I did the same with my pen. The idea then emerged in my mind to create a portrait based on this fidgeting movement.

My initial thought was to have someone play with a fake ring, which would modify a virtual environment representative of Iciaiot’s world. However, this situation was too contrived and based on Golan’s recommendation, I moved on to something more straightforward to capture Iciaiot’s quirks: contact mikes.

First idea: Glove with ring / photocell sensor
Second idea: Contact Mikes

Figuring out the best way to use the mikes required some testing. I tried different locations on Iciaiot’s body and different situations while recording. Having her eating or drinking turned out to be most interesting as it required movements of the jaw or the esophagus which made distinct waves for the mikes. In the end, four locations were compelling: the skull behind the ear for voice and chewing, the throat for swallowing, the chest for breath and moves, the hand for picking up objects.

Testing the mikes
Testing the Mikes

As Iciaiot knew me better after a while, she would no longer fidget with her rings next to me. I then decided to record her in a casual place outside during dinner. We went to the Porch in Pittsburgh and I recorded the moment with a camera and 4 contact mikes positioned at the locations mentioned above.

Contact mikes can generate a lot of noise, and the setup took a bit of time to find the right sound level. I also needed to tape the mikes a few times during dinner as the foam became less sticky. I was also surprised that some mikes (especially the one on the hand and the one on the ear) actually recorded voices very well. I would have preferred to get rid of it as the camera already had voice as an input but I had to deal with it in my audio files.

I think the output is somehow original, as the different positions of the mikes allow to get different perspectives over Iciaoit at the same time. Another situation than a restaurant might be more suitable though. I think recording the reaction of people when they discover the “sound” of their body would be very interesting. Here, Iciaiot was aware of my plan and had tested it with me before, so the “surprise” effect was not available anymore, but her reaction (along with mine) the first time we tried was very expressive. Recording such moments could be very compelling.

gloeilamp – Portrait


Stereo video, in Slitscanning and Time/Space Remapped views


Slitscanning as a visual effect has always fascinated me. Taking a standard video, slitscanning processes allow us to view motion and stillness across time in a completely new way. Moving objects lose their true shape, and instead take on a shape dictated by their movement in time. There is an immense history of this effect being taken advantage of by artists to create both still and moving works, but for my own explorations, I wanted to see the possibilities of slitscanning in stereo.

As an additional experiment, I processed the video not through a slitscanning effect, but through a time/space remapping effect. What happens when a video, taken as a volume, is viewed not along the XY plane (the normal viewing method), but along the plane represented by X and Time? This is a curious effect, but could it hold up in stereo video?

Stereo Slitscanning

Using the Sony Bloggie 3D camera, I captured a variety of shots. For Cdslls, I chose to isolate her in front of a black background, for simplicity’s sake. I first ran the video through code in Processing, which would create a traditional slitscanning effect. In order for the slitscanned video to hold up as a viewable stereo image, the slit needed to be along the X axis, so the same pixel slices were being taken from each side of the stereo video.  I output this slitscanned video into AfterEffects, where I composited it with a regular stereo video. *1

Time Remapping 

With a process for regular slitscanning in stereo achieved, I began to wonder about the possibilities for stereo video processed in other ways. Video, taken as a volume, is traditionally viewed along the X/Y plane where TIME acts as the Z dimension; every frame of the video is a step back in the Z dimension. But do we have to view from the X/Y plane all the time? How does a video appear when viewed along a different plane in this volume? Here I explore a sterographic video volume as viewed from the TOP, that is, along the X/TIME plane. *2

Code 

processing code for both the slitscanning and time remapping processes, using a sample video from archive.org (Prelinger Archives)

SlitscanVideoFINAL

spatioVideoFINAL


Display

For display, I chose to present the video in the Google Cardboard VR viewer. Using an app called Mobile VR Station, the two halves of the images are distorted in accordance with the Google Cardboard lenses, and fused into a single 3D image. The videos are also viewable on a normal computer screen, but this requires the viewer to cross their eyes and fuse the two halves themselves, which can be unpleasant and disorienting.

Thoughts

  1. I chose to do this kind of post production on the first video for a couple reasons- The output of the slitscanning, while pleasing in terms of movement, did not really create a 3D volume to my eyes in the way that the non-slitscanned video did. The two halves of the image would fuse, but it appeared almost as if the moving body was a 2D object moving inside the 3D space that the still elements of the video created. Through compositing the two videos together, the slitscanning would create a nice layer of movement deep back in 3D space, while the non-slitscanned portion would act as an understandable 3D volume in the foreground. I also refrained from applying the slitscanning effect to the tight portrait shot of Cdslls due to my hesitation with distorting her features. While slitscanning does create nice movements, it at times has an unfortunate “funhouse mirror” effect on faces, at times looking quite monstrous. This didn’t at all fit my impression of Cdslls, so I left her likeness unaltered on this layer.
  2. The way that my time remapping code operates currently, there are jumpcuts occuring every 450 frames- that is the height of the video. This is due to the way that I am remapping the time to the Y dimension- each frame of the video displays a single slice of pixels in the input video, so the top output row of pixels is the beginning of the clip and the bottom output row of pixels is the end of the clip. Once the “bottom” of the video volume is reached, it moves to the top of the next section of the video, thus creating the cut.

Moving Forward

One of the richest discoveries of these experiments has been seeing how moving and still elements of the input videos react differently to the slitscanning and time remapping processes. The “remapped time experiment 1” video shows this particularly well- still elements in the background were rendered as vertical lines, deep back in 3D space. This allowed a pleasing separation between these still elements, and the motion of the figure, which formed a distinguishable 3D form in the foreground. I would thus like to continue to film in larger environments, especially outdoors, which contain interest in both the foreground and the background.

I would also like to further refine the display method for these videos. Moving forward, I’ll embed the stereo metadata into the video file so that anyone with Google Cardboard or similar device will be able to view the videos straight out of YouTube.

sayers-Portrait

I decided for my portrait to create a maze out of my subject’s fingerprint.  I took her fingerprint by a normal ink pad and paper.  I then scanned it at a fairly high DPS.  I took that and slowly in Rhino traced with vector every single line and mark. After making all of these closed curves and giving an outside edge, I extruded these curves as a group to create a maze like design.  I had wanted the floor to be curved on the bottom so it would look like you were in the groove of the fingerprint, however this was much more difficult than I had thought.  Traditional lofting and filleting were behaving strangely on this many objects.  After spending a long time on this, I decided that I could get a more wavy effect in other ways, so I decided to use a vert shader that twisted the view of the camera, instead of changing the mesh.  I made the floor white while the ceiling black, so that it would be like if you were stuck inside of the actual ink print.

I tried multiple different techniques before this, including doing some using the ink scans as height maps to put into the terrain editor and doing various simple image processing sketches in processing.  I considered doing photogrammetry, but I wanted to explore methods of capturing that I hadn’t tried yet.

I was primarily inspired by the idea of hedge mazes and the lines of sand dunes.  I wanted to pose the question of could a fingerprint be a solvable maze? What would be the goal? To get to the outside or the inside?

Although this project is not what I had planned, I think it may get interesting results.  I am not very good at judging success immediately after making something.  I need time to process it.

I wanted to explore a very personalized thing (a fingerprint) is actually very abstract and how doesn’t truly tell a lot about who the person is. It is a portrait, but it tells you almost nothing. It is completely unique to my subject, just as her fingerprint is, although this could be recreated for anyone (similar to the normal process of fingerprinting).

Mac Download

cdslls-portrait

For my portrait assignment I decided to make a digital reproduction of gloeilamp’s interaction with bioluminescent plankton. To achieve this, I decided to use a technique called slit scanning in order to recreate the flow of water with a supplement of water projections and blue glow sticks to recreate the chemiluminescence.

I particularly enjoy slit-scanning as a method because it very literally plays with the way one sees and perceives time. The reason I decided to depict this specific event instead of one that might have been more personally relevant to my subject is due to my own interests. Most of my work involves time, space or narration in one way or another and thought it would be interesting to depict gloeilamp through my eyes instead of her own.

Process:

  1. Once I decided what part of her story I wanted to narrate, I immediately turned to Processing and slit scanning + time displacement. I created many variations in my sketches in order to find the visual effect I wanted.
  2. I then filmed gloeilamp in the photo studio. Hoping to add to the authenticity of the experience and the final visual effect, I projected wave sequences onto her body and asked her to interact with blue glow sticks. My intention was for her to stay as natural as possible. The video starts with her getting ready to enter the water. She jumps out of the frame and land back in the (slit-scanned) water. All shots were concentrated on her hands and feet, which was meant to reference the highly sensitive part of our somatosensory cortex (and the parts of her body that would have been affected most by the experience/affect the chemiluminescence of the plankton due to touch).
  3. Finally, I put each video into my chosen processing.js sketches and rendered the final video in premiere pro.

I am mostly satisfied with my project as I got pretty close to my initial idea. I really would have liked to know my subject better before making a portrait of her (it would have added some complexity to the concept) however I do feel like I got to know her through the entire process. I am also disappointed that the shots didn’t turn out as high quality as I would’ve wanted to. The camera I used probably wasn’t the best for low light settings and I should have checked on my computer screen before leaving the studio. I was stuck in an odd place between wanting high quality footage and it not being the most practical option for processing rendering.

(For sketches, see PortraitPlan).


mikob – portrait

For this assignment, I wanted to experiment with the process of getting to know someone. Some of the questions I had in the beginning include:

  • How much would I be able to know about somebody through others’ description of this person?
  • What can I make out of others’ descriptions of someone else?
  • How much do we know about ourselves?
  • How can I portray “perspective”?

I received a curated list of her people including her family members, friends, and one ex-boyfriend. Within a week I talked with 7 of them in person or on the phone.

After interviewing her people, I realized that I got to know my subject so well that I felt like I knew her as much as those who’ve known her for years. At this point, I recognized that the greatest takeaway was not the data that I collected from the interviews, but my own portrayal of her, which I gradually developed throughout this experience. I created a private edition of the interviews to give it to my subject as a gift, and also my own description (portrait) of her that was also given to her privately.

The process itself became a novel and experimental capture technique for a portrait. I created a concept video to introduce this method and a guide for people to use for conducting their own “inter-portrait” of someone.

References

He Said She Said (1970)


Dove Real Beauty Sketches

Result

I think this project would have been very interesting and perhaps even stronger if I didn’t know my subject at all. This way my perception of the subject would solely rely on the interviews and might have produced a different result.

This project would also become more powerful if it is created as a series. I would love to have more subjects who are willing participate and get to learn about them.


fatik – portrait

Final Video: portrait

I was inspired and interested in the concept of actually getting to know my partner for this project. I didn’t have any set ideas or plans in the beginning so I kept my project open ended. One thing I knew for sure was that I wanted to create something time-based, so I was inspired by Koyaanisqatsi and Jean-Luc Godard’s Kuleshov. My idea was to somehow document and portray our growing relationship.

Part 1: Getting to know my partner

I started off by stalking her and trying to capture her natural essence and mannerisms. By doing this, I though that I’d be able to find one character or habit that I would concentrate on, but that was very difficult for me. It’s really difficult trying to grasp someone’s quiddity.

This is one of my many attempts in trying to capture my partner without her knowing. We also hung out a good amount apart from me just following her. We talked in studio, did homework together, and tried to get to know each other.

Part 2: Playing with the 360 Camera

I played around with the 360 camera a lot before deciding to use it.

Part 3: Documenting our Meet-ups

I’ve been thinking to hang out at her house because I wanted to see what it was like. My thought was that it would be great to capture my partner at her own house and the 360 camera would be able to capture the environment. This dinner was definitely the push to our friendship. I was able to hang the 360 camera from the ceiling so that it could really capture the entire space. I also set up a dslr to capture different angles, but didn’t end up using any of those footages.

Part 4: Attempting OpenFrameworks

When I was playing with the 360 cameras, I liked that a sense of depth was very present. I originally was thinking of making a time-based piece but faking the sense of depth through really good editing. Thanks to OpenFrameworks and the Timeline add-ons there was no need for faking! It was great getting a taste of OF, and I definitely want to continue to do more with it.


Weija and Kyin – portrait

Inspirations:

Several of Kyle Mcdonald’s work presented in class really intrigued us, and we wanted to further explore some technical fields that Kyle’s work touched. As we were interviewing each other, we both noticed that our youtube channels were remarkably unique, and it was in a way indescribable to each other in regards to our viewing pleasures. We thought it would be cool to document one’s youtube viewing history over a period of time, and overlay them in a chronological order such that each image could represent a distinct block of time.

Development:

The progression of our project was rather difficult. While we knew what kind of portrait capture method we wanted to explore, we still struggled with how to present it. Our first tangible goal was to figure out how to scrape reliable data off of youtube. This was rather tricky, since a lot of sites (including Google), go through certain measures to prevent their websites from being automated. For this, we decided to use phantomjs and casperjs, Javascript headless browser libraries. When we came up with the idea of stitching these overlayed photos together, we knew OpenCV was the best library to use for the job. With this, we developed a python flask api server to operate the system level management of the files and we made a meteor frontend ui server to facilitate the user inputs. Once we hooked all of the pieces up, our last issue was time: We noticed it took a very long time to do some of these operations, as they require scraping through thousands of pixels. For this, we managed to incorporate some multi-threaded action in some of the scripts to expedite the portrait generation process.

Results:

Finally, to put everything together, we used Meteor.js to create the Youtube Portrait webapp where anyone can generate their own Yotube portrait. Here are some screenshots of using the webapp and generating a portrait.

Here is an example of the final product!

We wanted to compare our portraits with portraits of other people. So we asked some of our friends to generate their portraits as well. Below is a picture of a comparison between some portraits, where every strip is a Youtube Portrait of a different person.


Thoughts on Piece / Relevance to Subject:

Overall, we were really excited to have this actually working (and displaying real video history data). However, if we had more time for the project, we definitely would have tried to figure out how to place timestamps to the images. (Just scraping the images was already a huge feat, so we decided to take what we have and go with it.) Still, regardless of that, we feel like when we play tested our machine with some of our friends their reactions were all similar: initial embarrassment of having their youtube viewing history viewable, and then acceptance that they did in fact watch all of them. We liked the variety of thumbnails we collected, and we think it is in fact an accurate representation of the user. Some interesting things we noticed where moods of Youtube videos we watch, from colors, faces, texts, etc.


fourth-portrait

Uncanny from Smokey on Vimeo.


About

Uncanny celebrates the faces we make in between expressions, the faces that – when captured in a photograph, “just feel wrong”.

Steps were taken to ensure an unnerving and uncanny result without simply distorting, coloring, or any other such “easy” approaches that work between the expression and the interpretation.

This “portrait machine” is designed to emphasize the uncanniness that arises from the expressions the subject makes, not to inject uncanniness into a portrait.


Process

The following steps were taken to emphasize the uncanny expressions:

  • The video was captured at about 700 frames per second, at 720p. A regular video allows a video to ignore the uncanny expressions unconsciously, as we do all the time. Images are too easily “written off” in my opinion as just a “weird face”. The video tells hints a story of the intended expression.
  • The video is vertical, not widescreen, making it more difficult for an audience to simply ‘rest’ their eyes on one element.
  • The subject was not permitted to relax during the shoot, not sit in a chair with a back. Uncomfortable, confusing, and off-putting questions were asked, as well as the use of deliberately off-putting use of uncomfortable silences, volume changes, and other anti-social behavior during the shoot. The subject never “loosened up” in front of the camera.
  • Multiple images on the screen are juxtaposed. They are not blended and bordered, signaling the viewer to switch attention between the various sections. The viewer attempts to assemble a single expression from these parts, and the parts – either temporally, geometrically, or with the expression – are not aligned.

The following steps were taken while working with the challenging tools.

  • Only one continuous (no flicker) light was available, so a clever lighting setup had to be employed with a reflector, and black backdrop.
  • Significant color grading was employed to normalize the camera’s unfiltered color cast.
  • Video intake, tagging, organizing, and editing was not experimental, but the most time consuming part of the process. Among the normal time consuming tasks, frequent breaks were necessary during editing to get a ‘fresh look’ at the footage, as one quickly gets used to the uncanny effect that the video aims to achieve.
  • Full screen preview of the image was necessary to check focus and composition, which constricted the shooting environment by cable length, desk placement, and so on.
  • Image tracking and digital image stabilization was utilized to keep the face elements consistent despite head movement.

Success and Failures

This project was successful in achieving one of my secret goals: using the high speed camera for a project that uses a high speed footage and 1) doesn’t sacrifice production value and 2) doesn’t look like high speed footage – the aesthetic often found with a single close hard light, quick shadow falloff, discoloration, and – of course – boring.

The original goal, to capture the moments as a laugh slides through a natural smile into a false, fake smile, was achieved in the capture process (link coming soon), but the video result is 1) extremely boring, 2) too similar to Warhol’s screen tests for my taste and 3) did not hold up as a triptych in my opinion. Uninspired, I took a step back, considered the goals – the uncanny expressions being my true capture goal – and continued forward with the project under this refreshed lens.

The biggest failure was something I discovered while editing – I should have shot close ups, and combined different visual angles. The form of the project evolved while editing, and I was unable to re-shoot in order to better capture what I wished to achieve.

The other biggest failure was the inability, for a variety of reasons, to just play with the high speed camera. I knew from experience with the camera that to achieve a quality result I had to have a plan and execute on it. Different camera settings, lighting setups, angles, and so forth were completely impractical to achieve. I would love to spend more time with the camera, as I believe it can achieve beautiful results when used well – but it’s slow (ha) and awkward to deal with.

caro-portrait

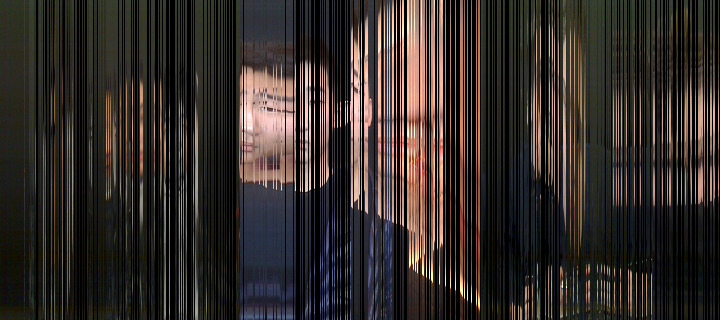
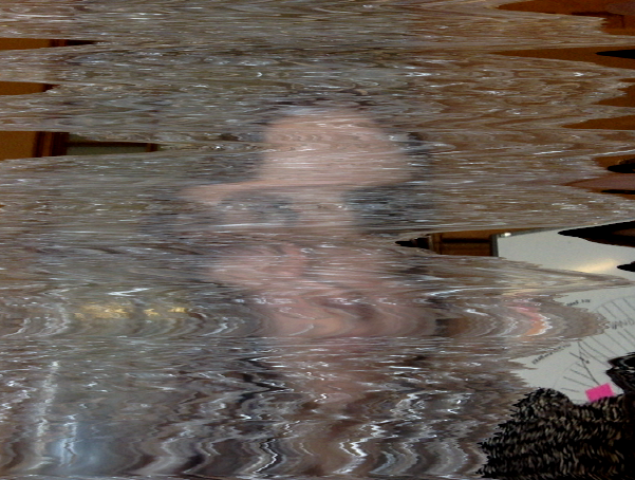
Portrait made by Neural Networks

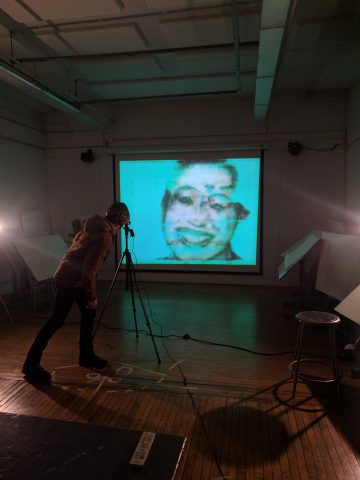
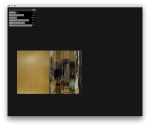
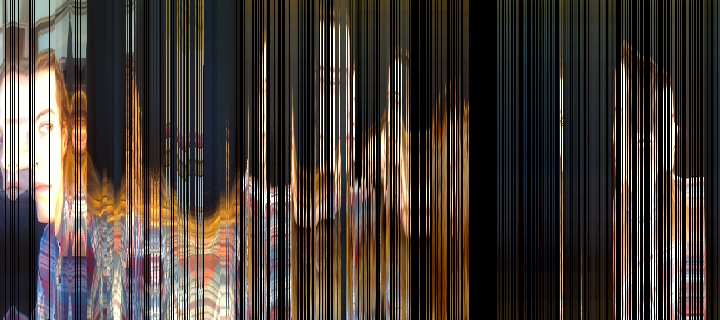
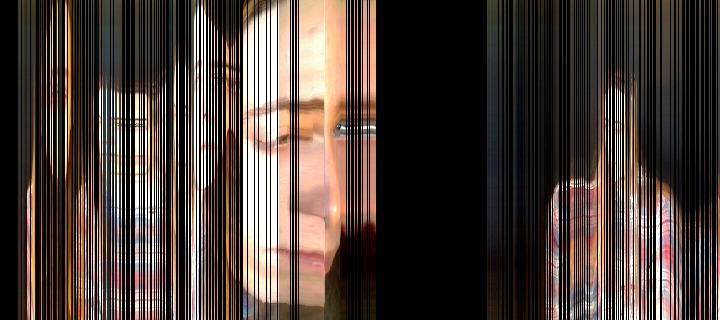
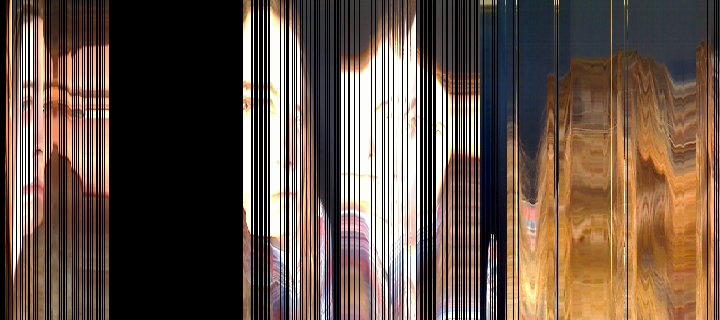
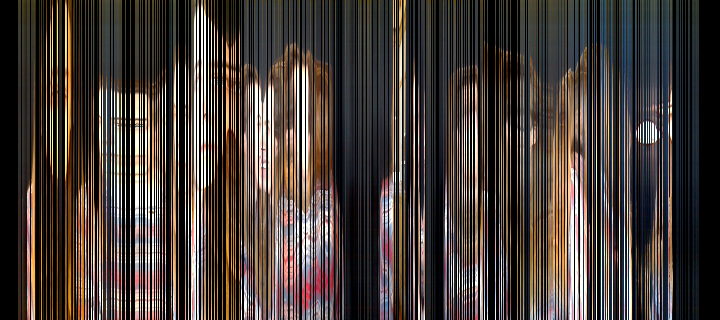
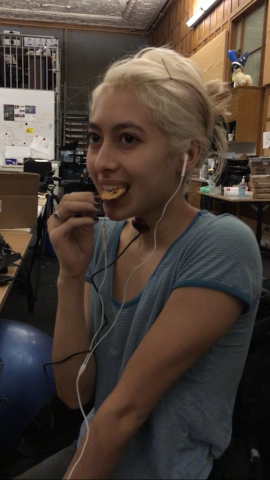
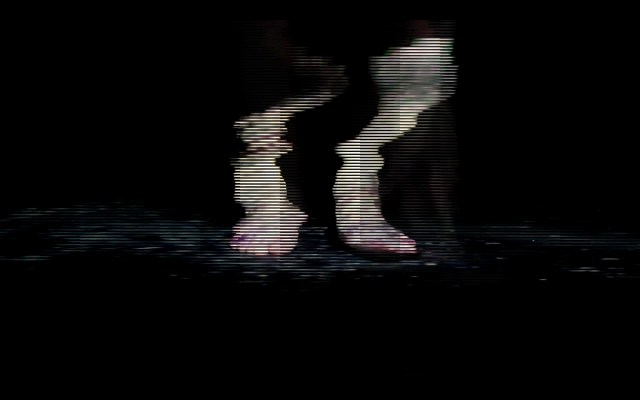
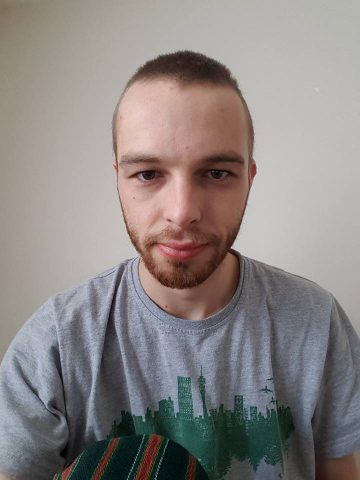
This portrait was made by neural networks. DMGordon, the subject, discusses his artwork as a machine attempts to recreate him in his own artistic style.

Artistic Process

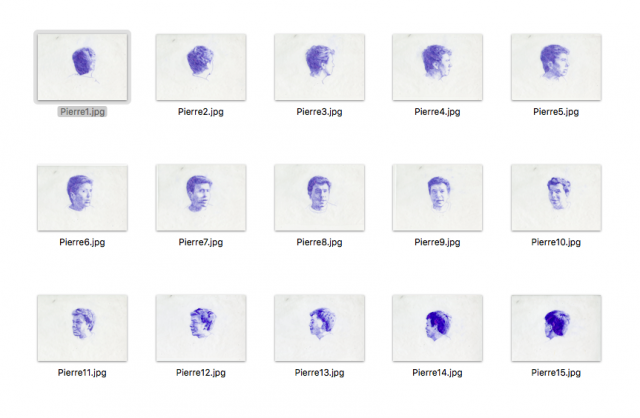
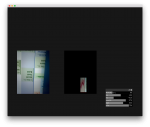
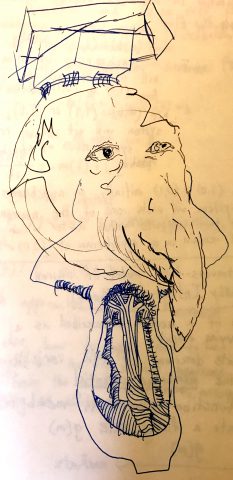
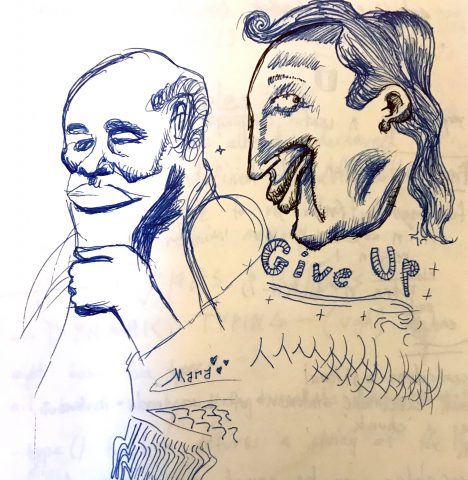
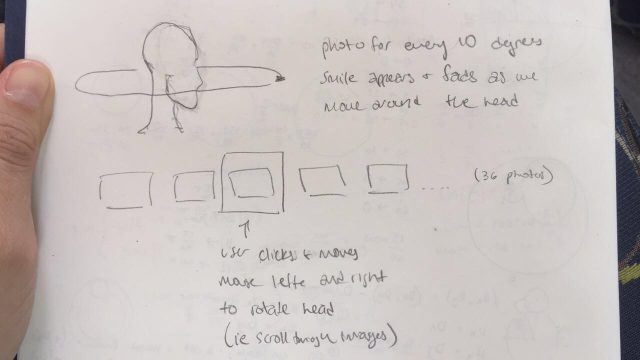
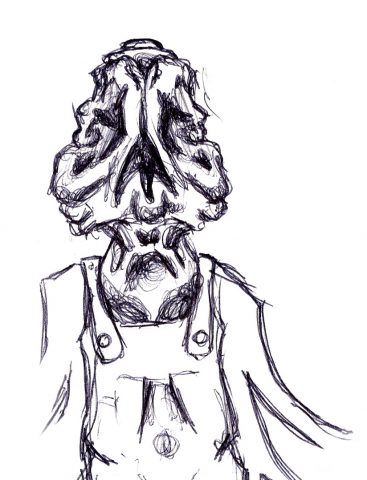
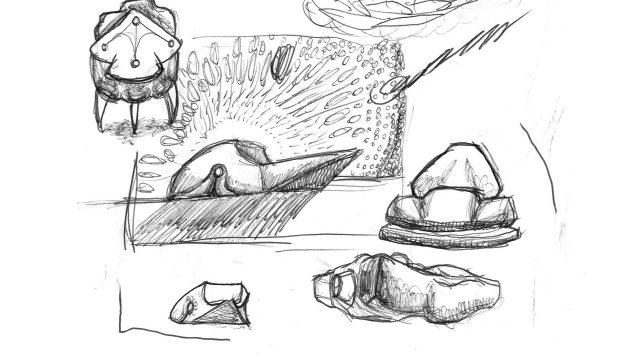
DMGordon and I talked a lot before I settled on the idea for this project. I was inspired to create this portrait after we looked through his sketchbooks, which were full of interesting drawings and characters. He has a style of sketching that I felt captured his quiddity in an interesting way. I wanted to see what DMGordon would look like if he were rendered in the style of one of the characters he creates. Additionally, by constructing the video in clips showing the style of one sketch at a time, I wanted to emulate the experience of flipping through one of his sketchbooks. Here are the three sketches I used:

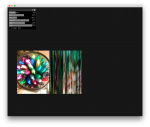
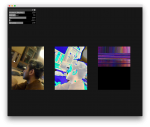
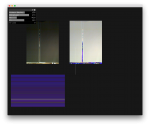
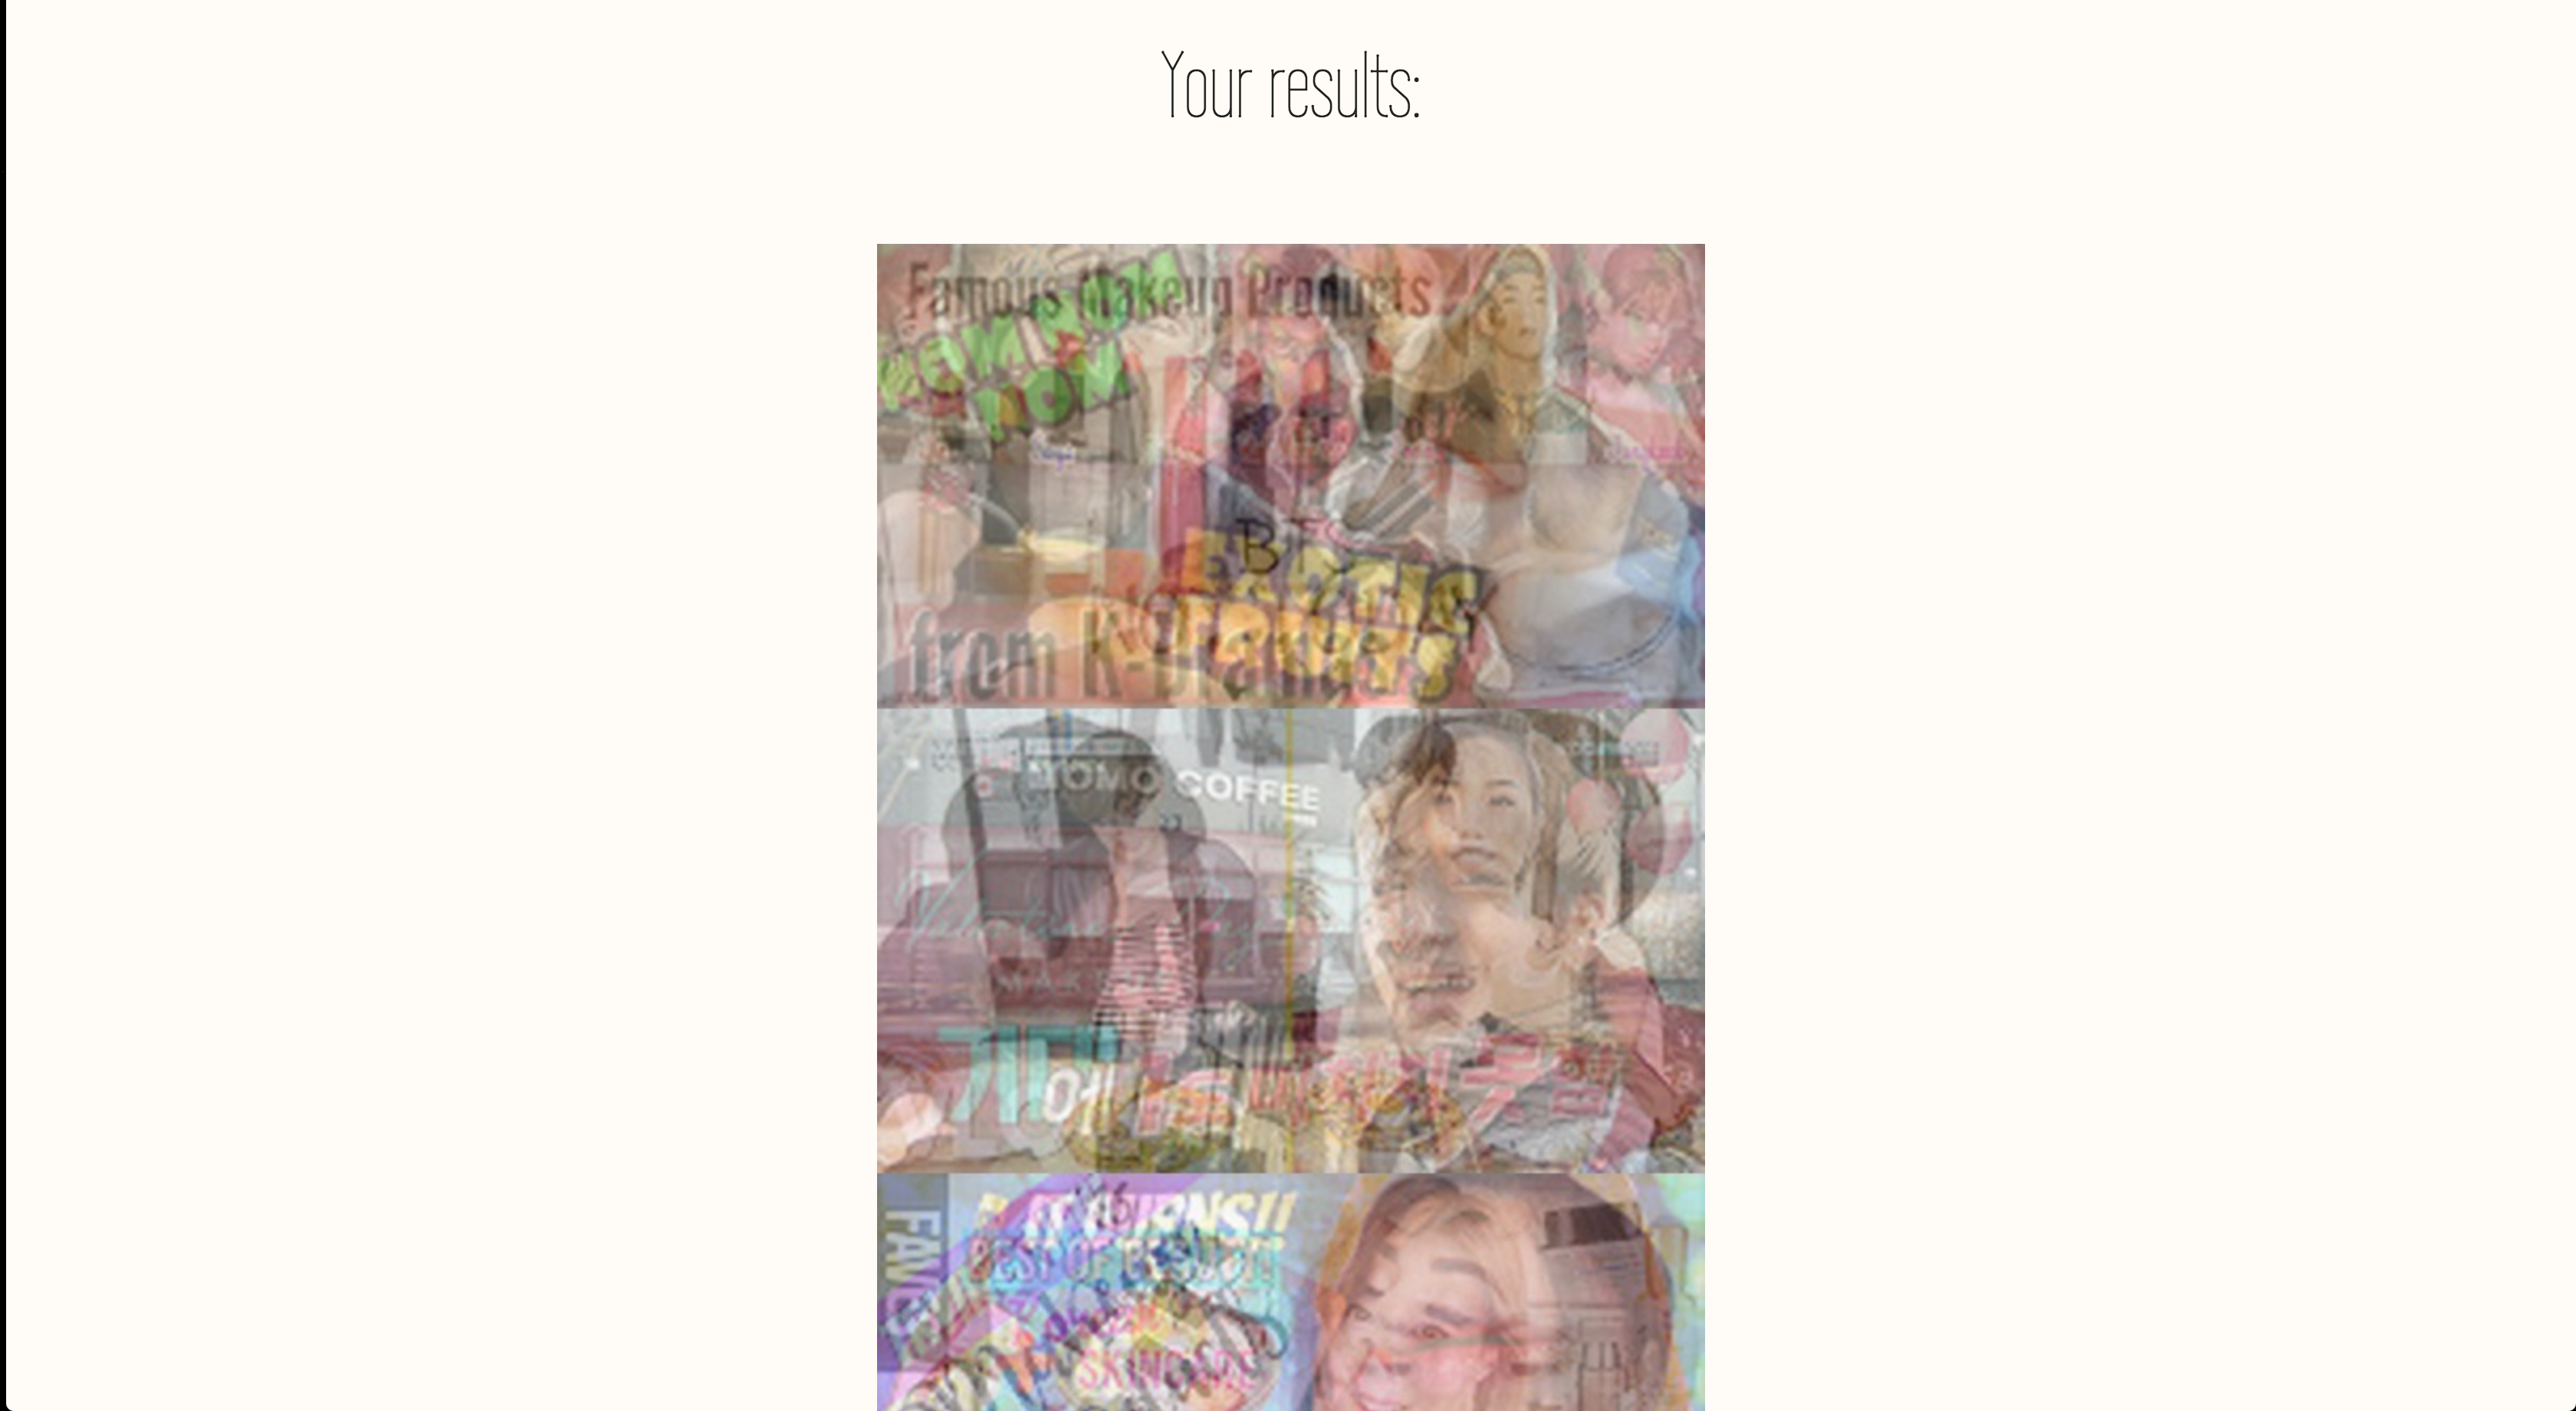
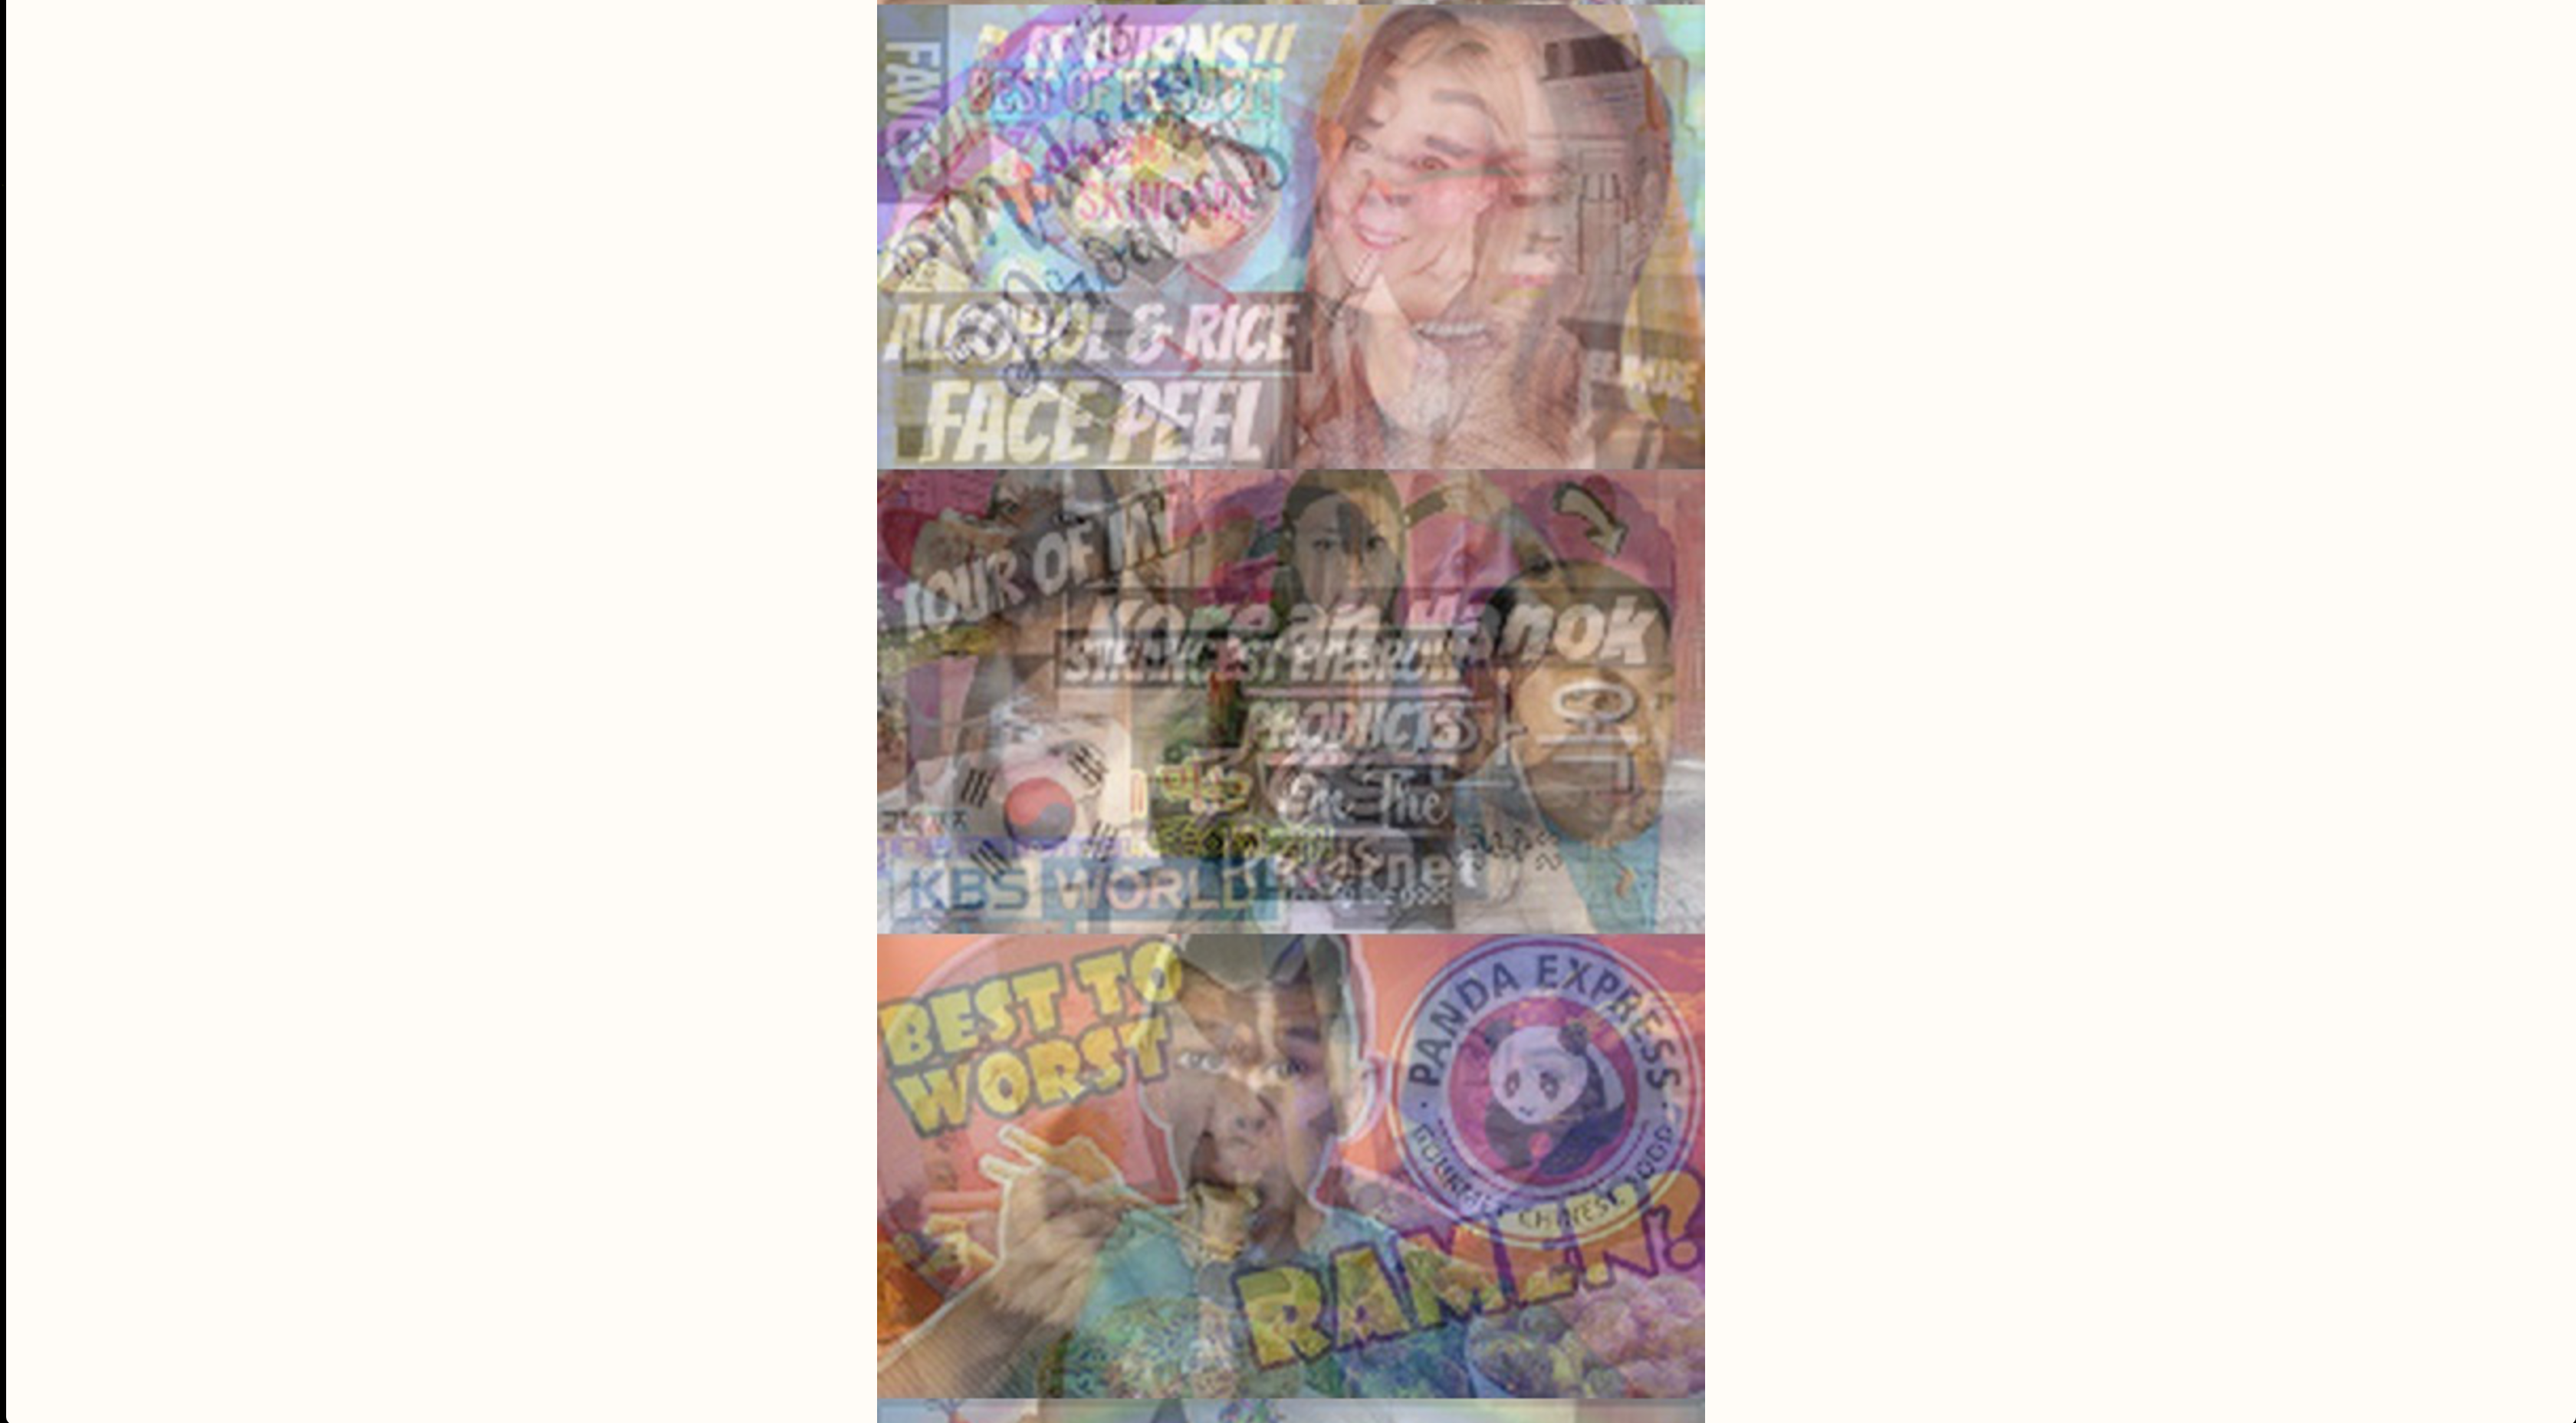
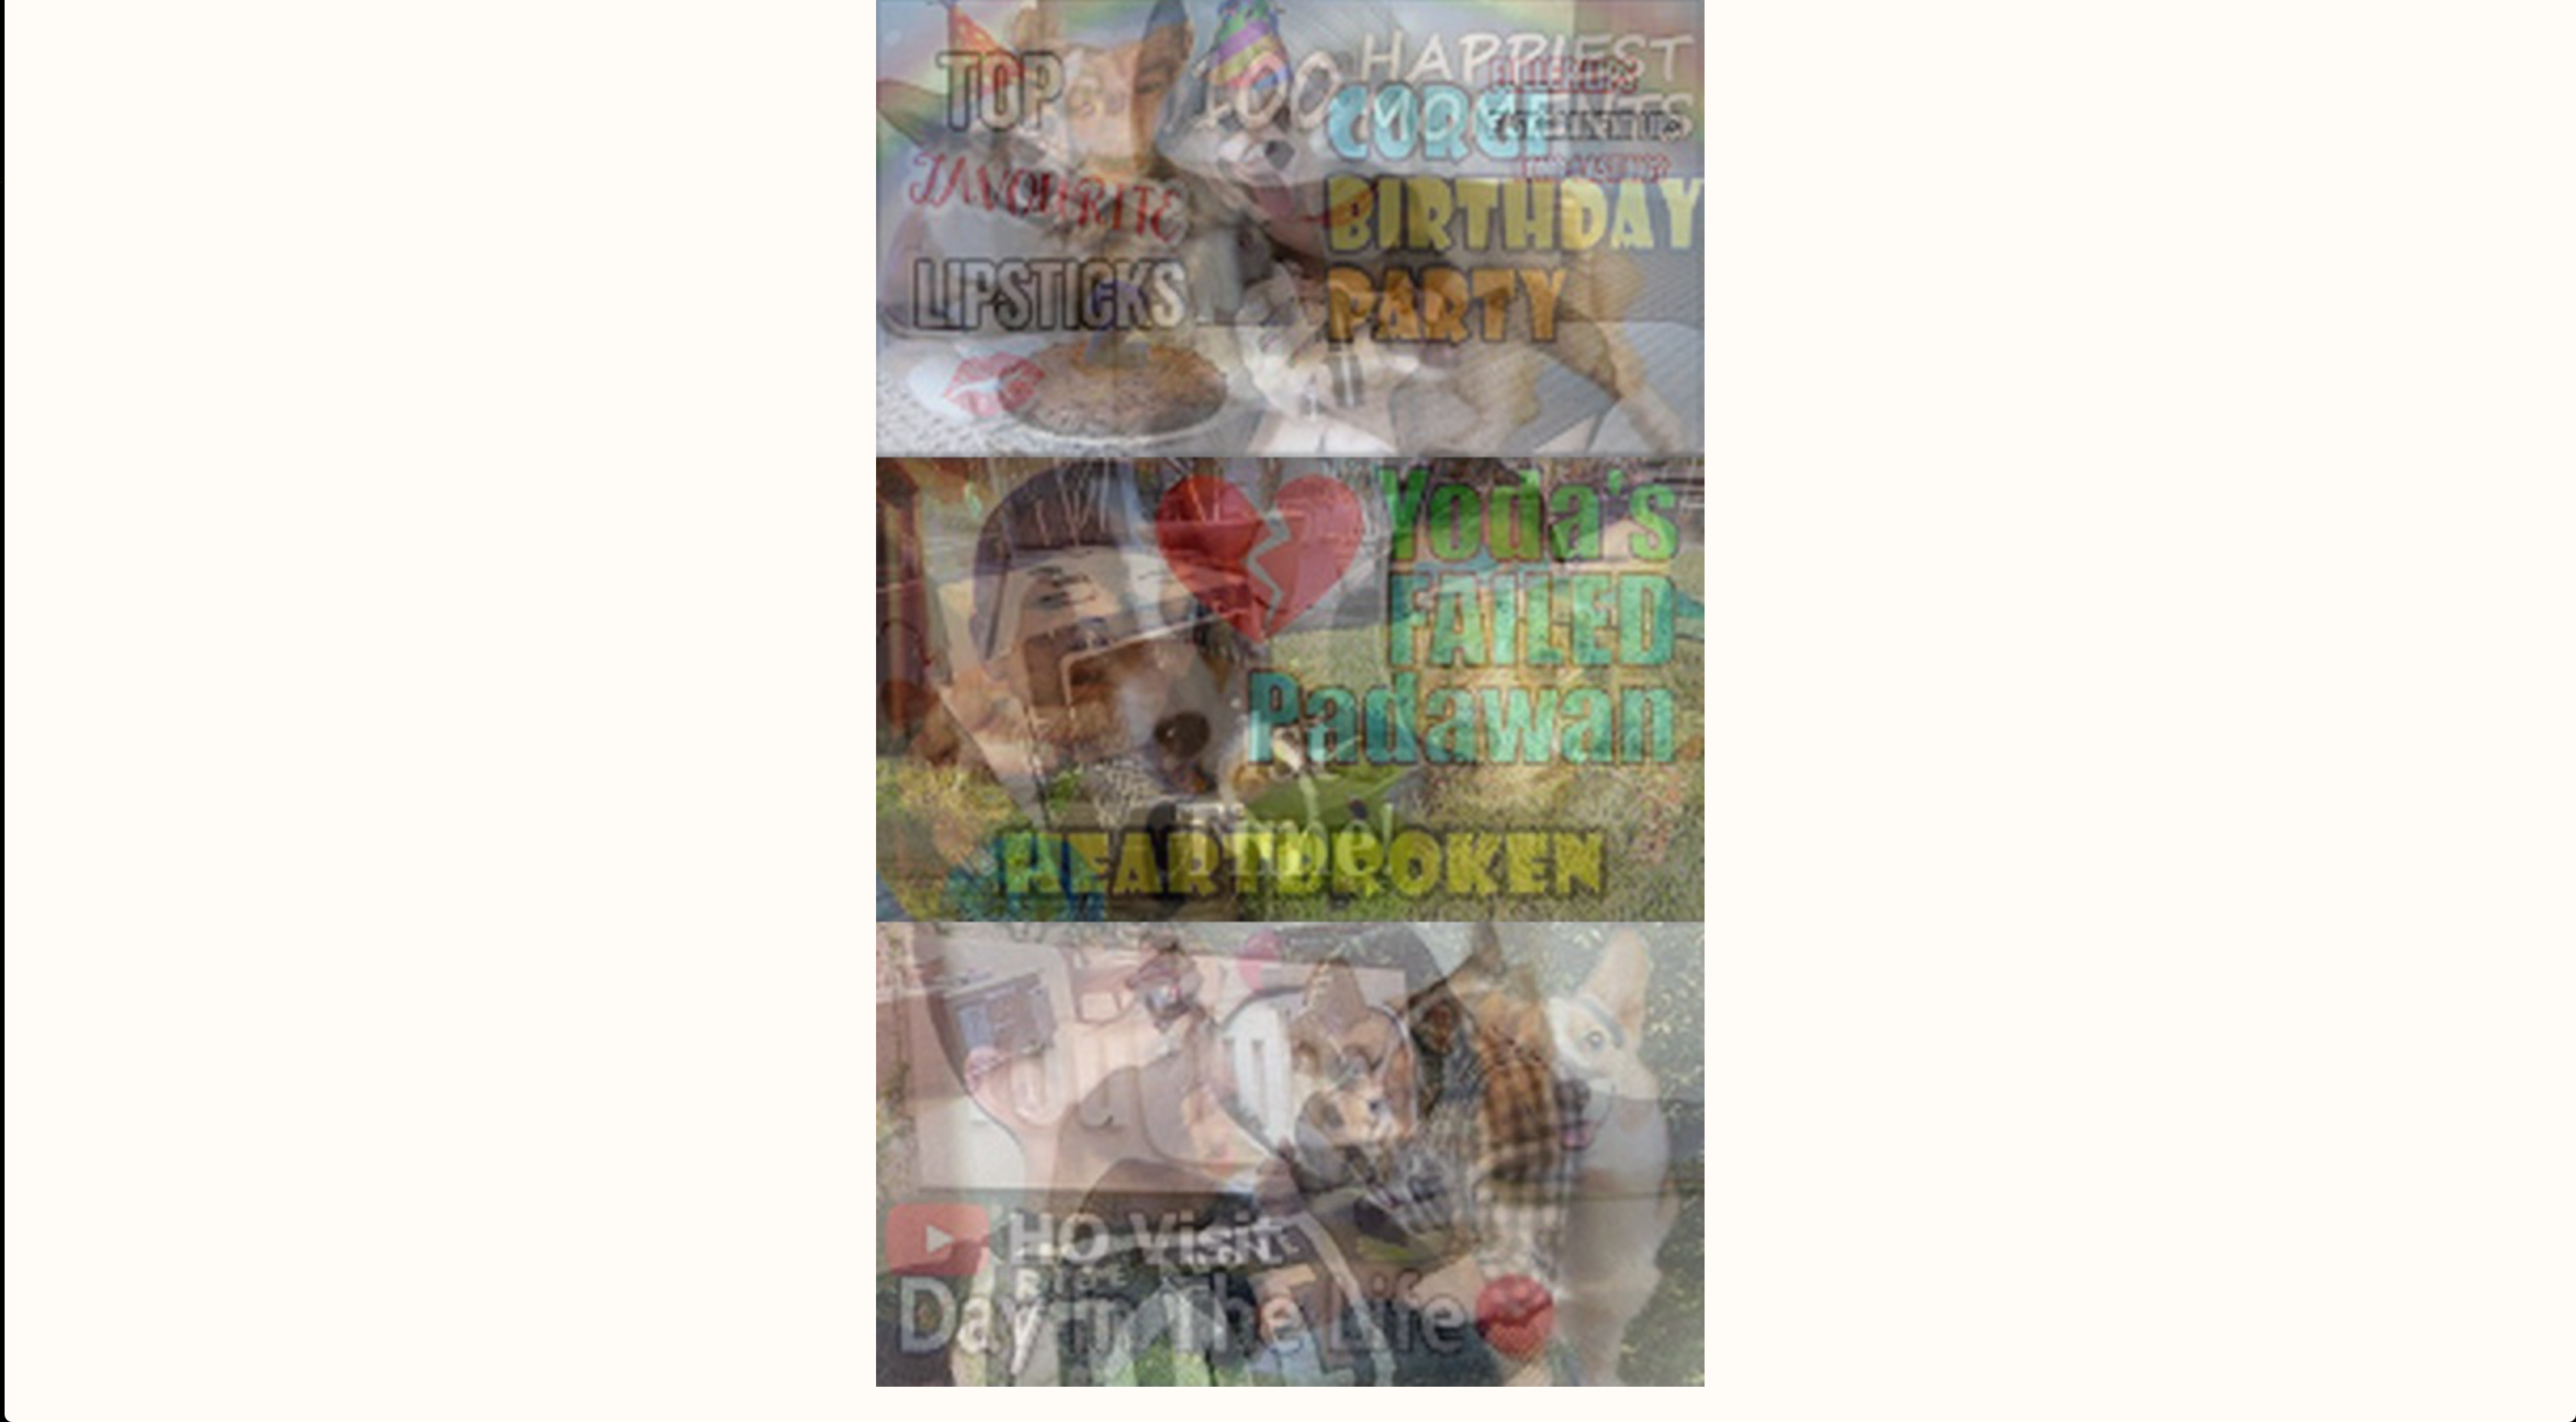
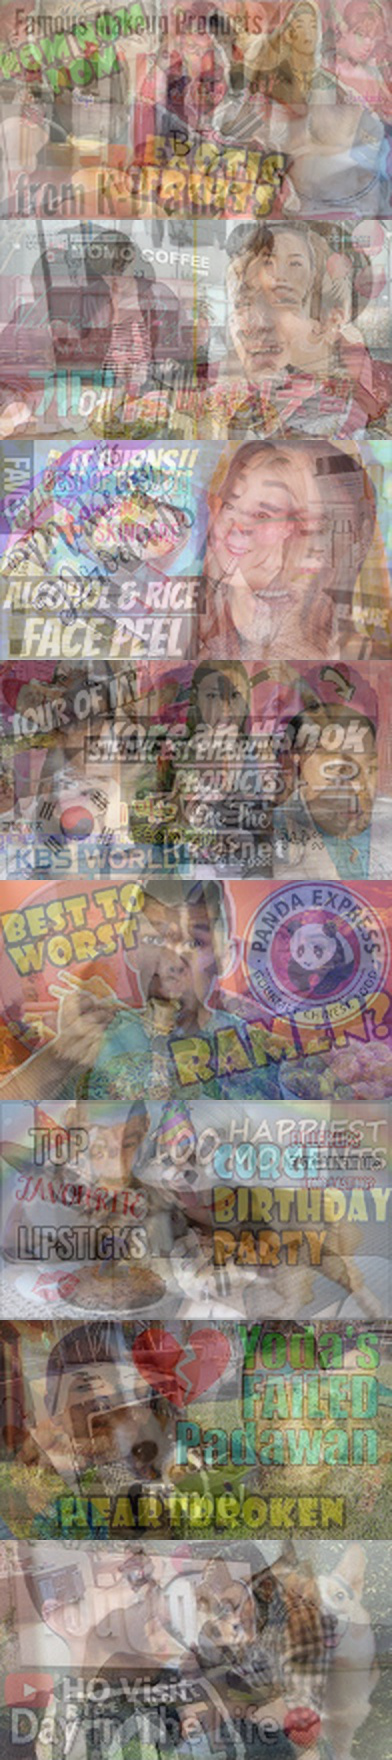
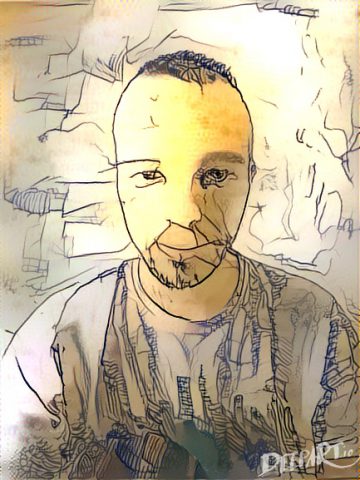
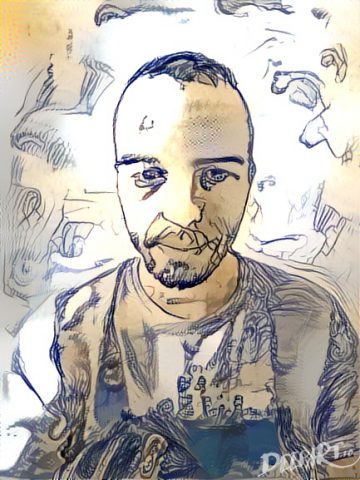
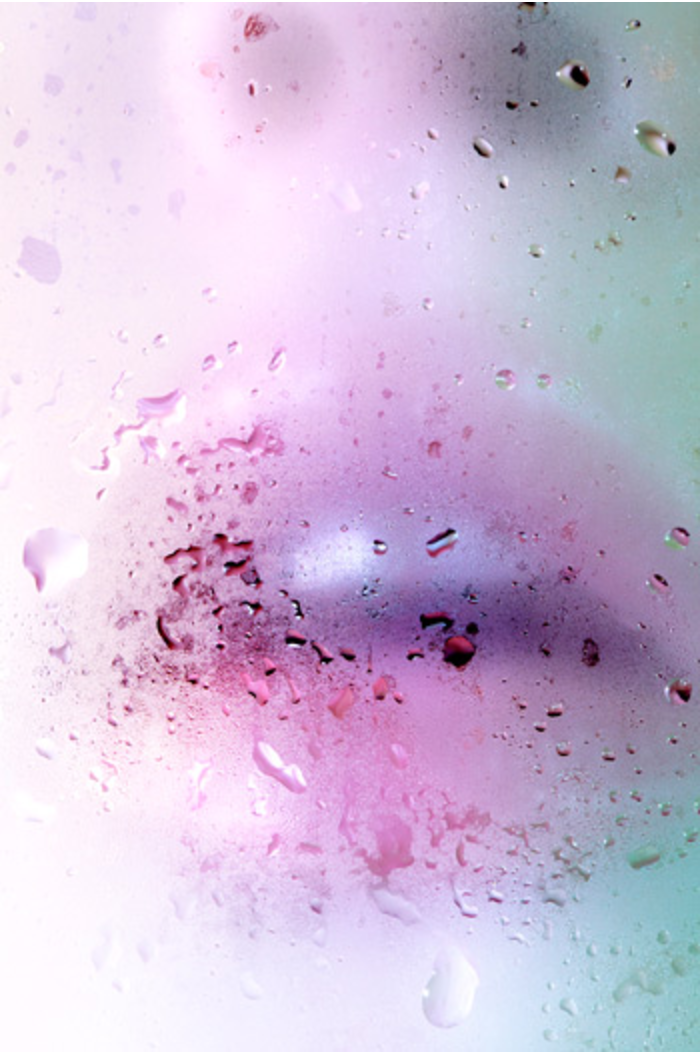
Before I settled on these three sketches, I scanned in dozens of his sketches and experimented on the results that each of them gave when passed through a neural network. I tested out the styles using http://deepart.io, a website that allows you to style transfer individual images. I made the following gif out of the results:

From making this gif I realized that varying between dozens of sketches and colors is visually very unpleasant, and it’s hard to see consistency from image to image. I like the randomness of it, but not so much randomness that it’s hard to look at. I ultimately settled at only using black and white images, and, for the most part, staying consistent with which sketch I used from frame to frame. In terms of the video content, I decided to have DMGordon discuss each sketch as he was rendered in the style of that sketch.

Inspirations

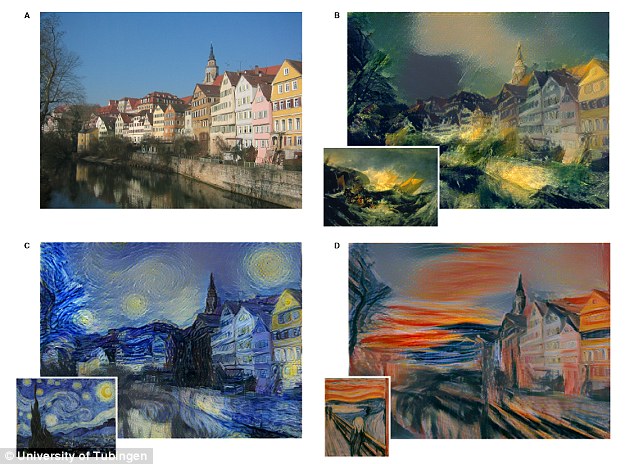
I was inspired a lot by traditional rotoscoping, such as the Take On Me music video and the movie Waking Life. I wanted to see if it was possible to create a similarly interesting effect programmatically.
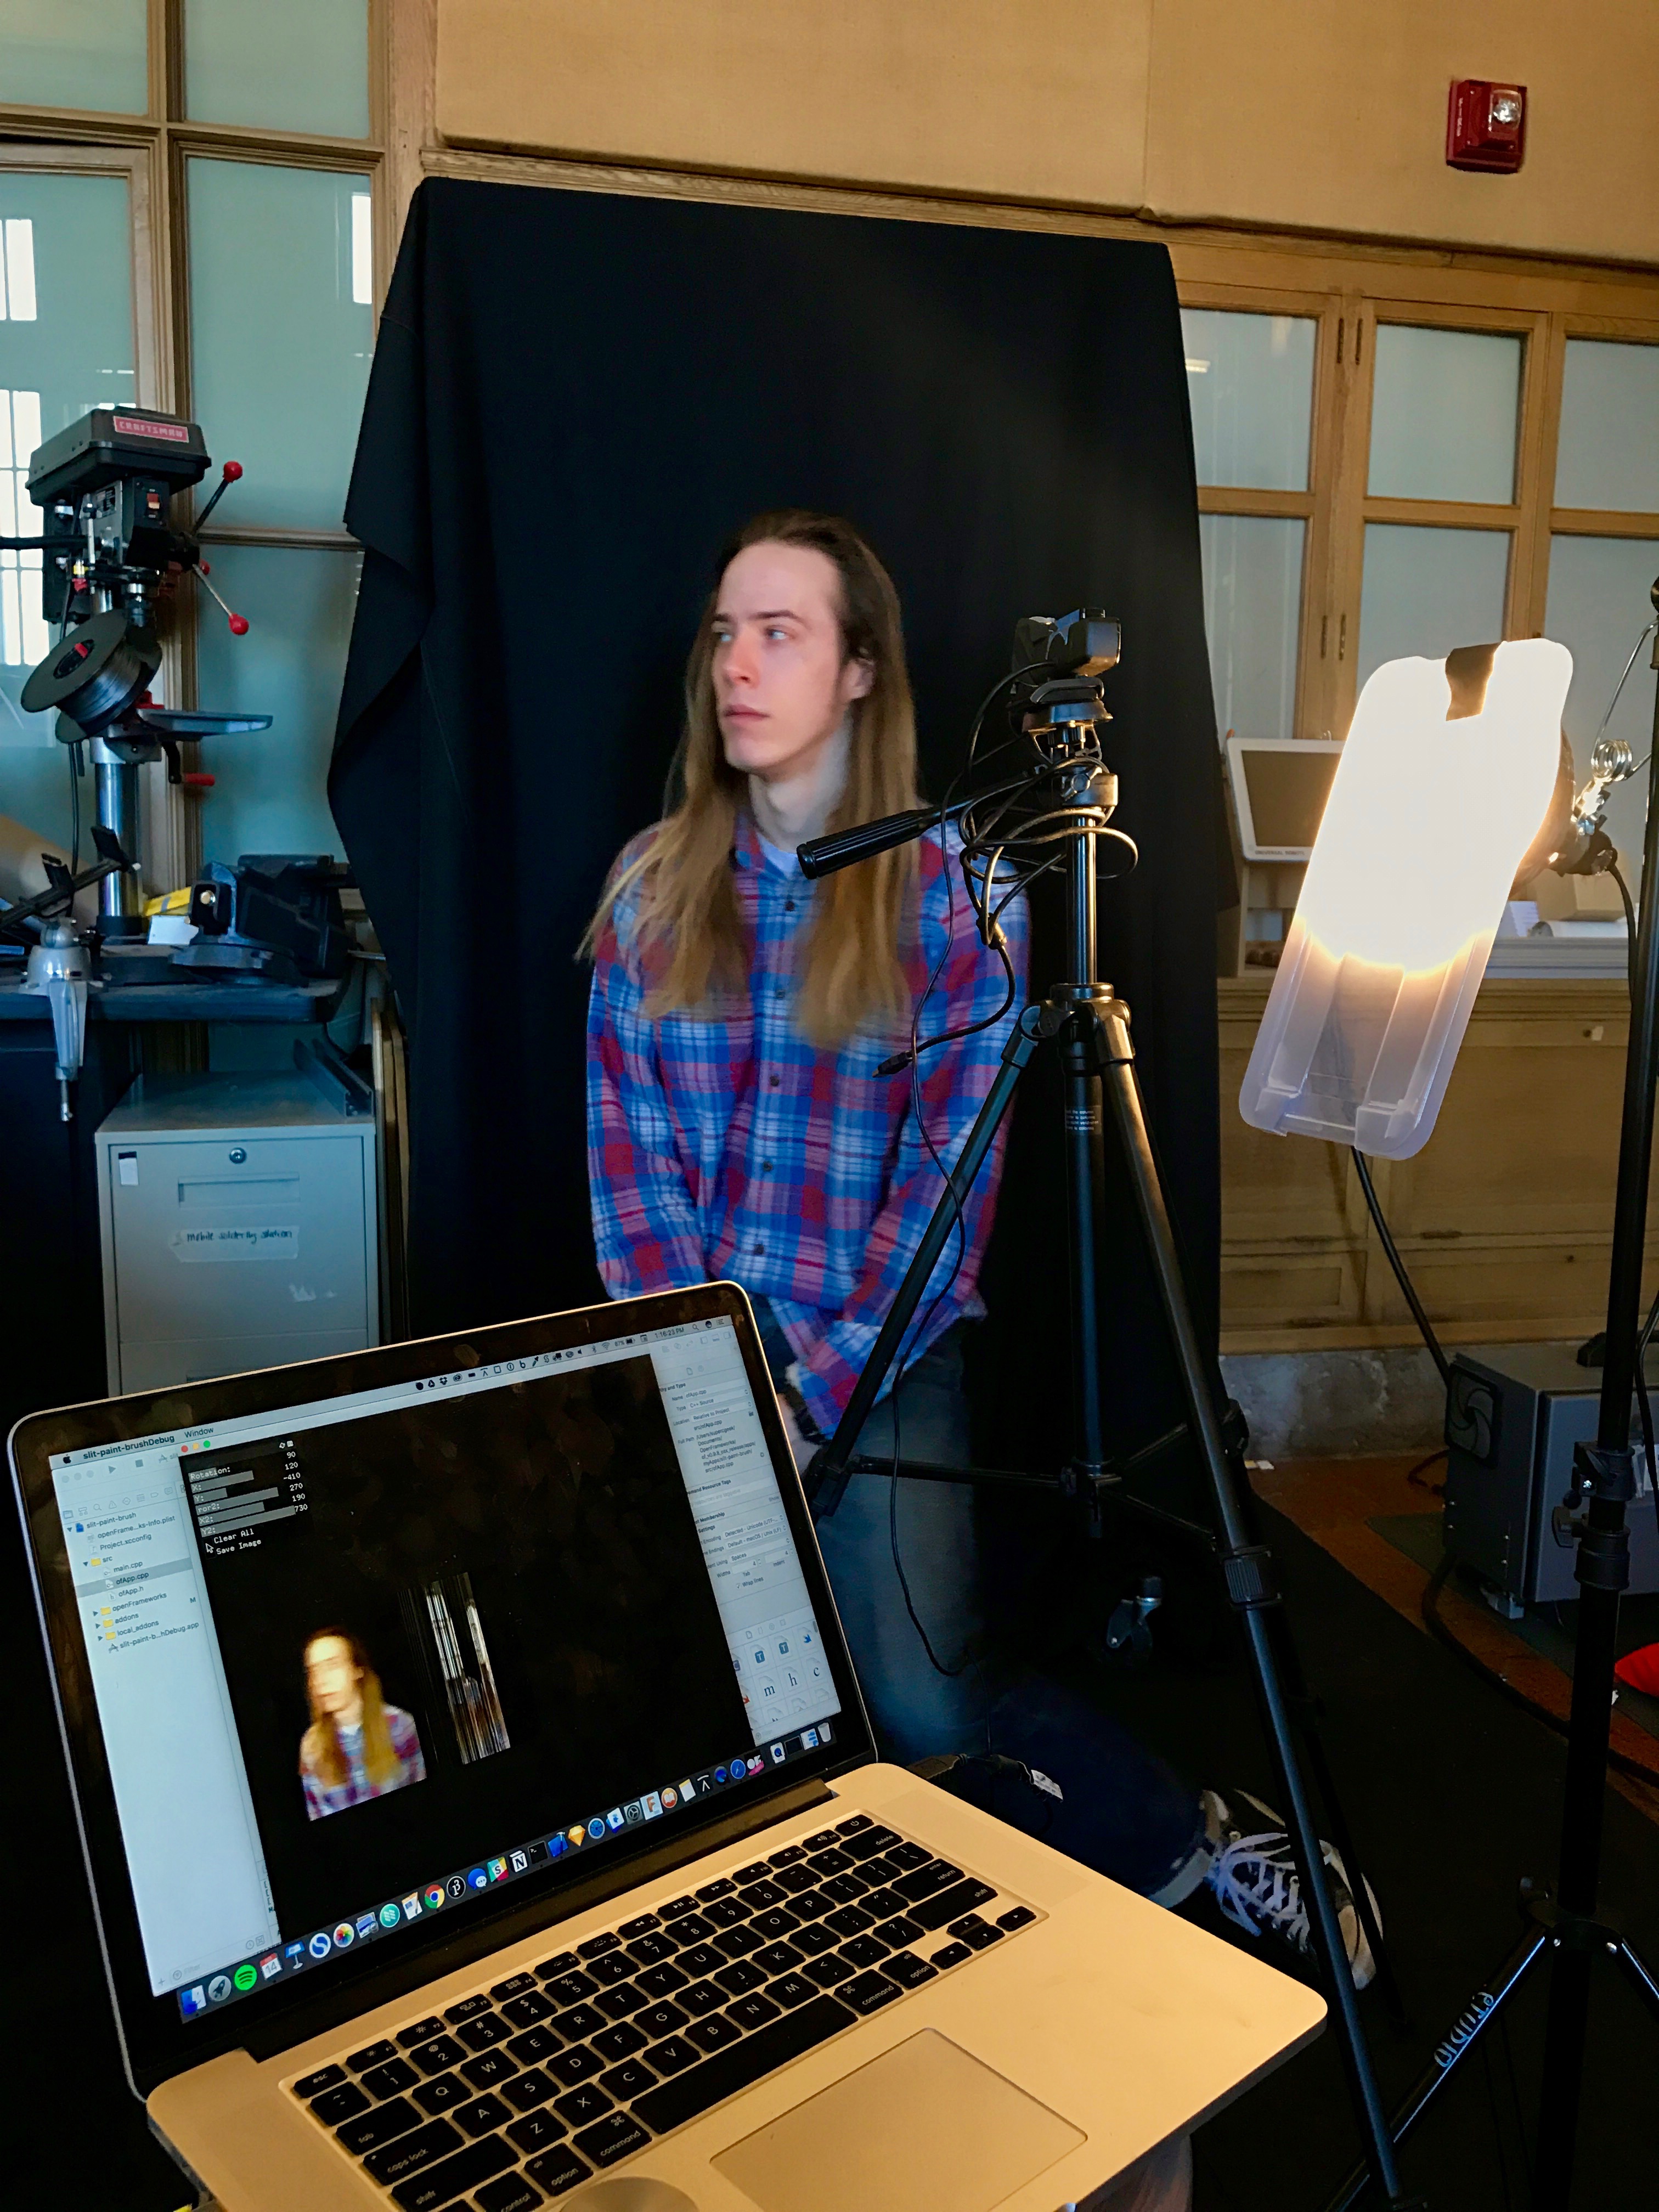
 

Technical Process

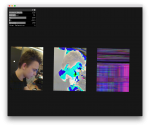
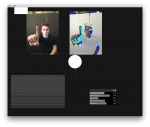
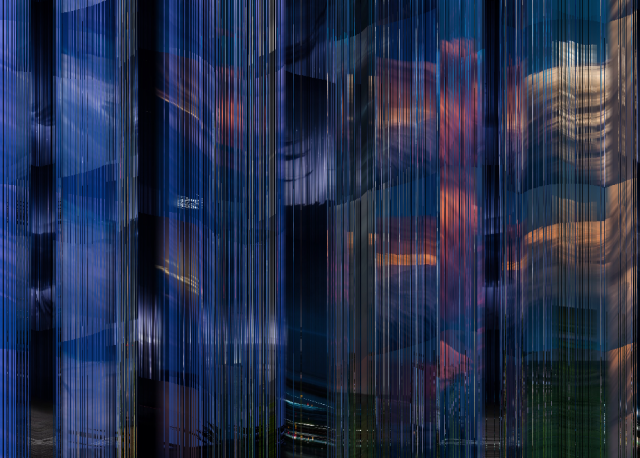
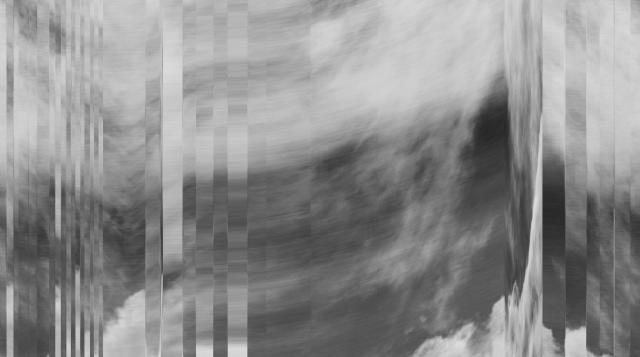
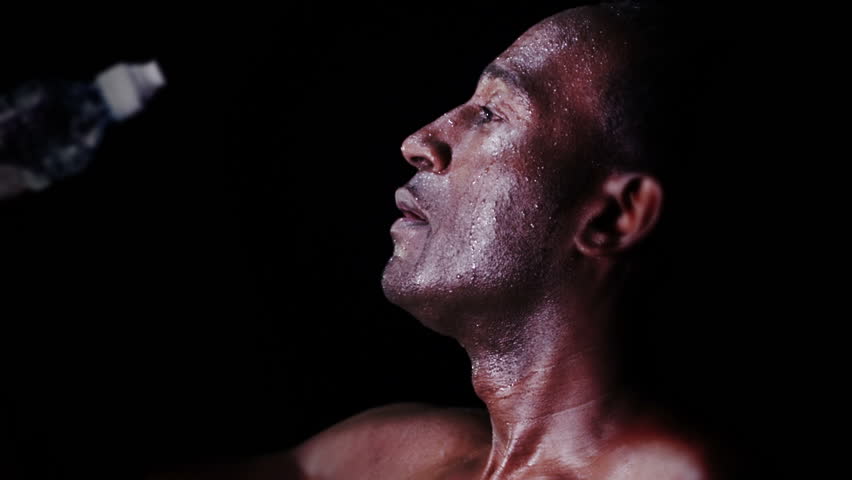
To create this project, three of DMGordon’s sketches were scanned and passed through a neural net. For each sketch, the neural net developed a style model. Then, the model was transferred one by one onto each frame of video, rendering the frame in the style of the original sketch.

There were two technical pipelines I used, one to generate the style transfer models, and one to apply the style transfer models to a large amount of media.

Tech Part 1: Style Model Transfer

Originally, I attempted to do all of the style transfer locally on my own computer. I downloaded an implementation of the style transfer algorithm on GitHub (there are many), and tried running it on my own laptop. Unfortunately, running one frame through this neural network on my own laptop took about 90 minutes, which wasn’t feasible.

Fortunately, I found an incredible service called Algorithmia that can apply the style transfer in only 10 seconds per image. I would highly recommend this service for any sort of intensive algorithm needs anyone may have. Algorithmia has their own image hosting, and an API to transfer image back and forth from their hosting and run it through their algorithms. I contacted Algorithmia about my project, and they gave me a bunch of free credit – turns out both of the founders went to CMU!

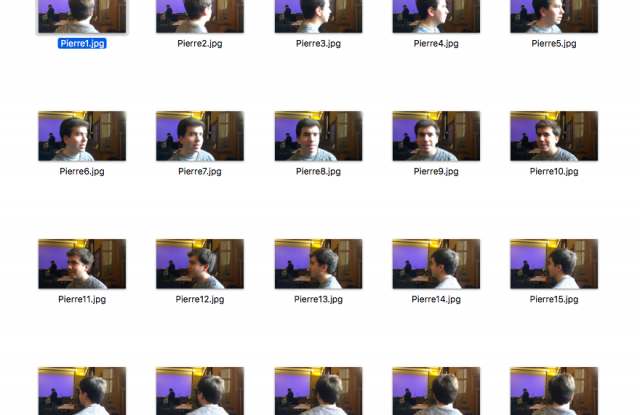
After I had filmed all the video for my project, I went through all the clips and found the ones I liked. Essentially, I edited together my video in normal footage before I processed the effects. Then, for each clip, I developed the following process.

  1. I used ffmpeg to split the clip into 30fps images.
  2. Using a python script that I wrote to generate bash script, I uploaded the images to Algorithmia. I ran into an interesting problem doing this, where originally, the script would get stuck after 5 or so images. I fixed this problem by running all the commands as background processes. However, since I was uploading thousands of frames, I wound up accidentally fork bombing my computer once or twice and learned all about fixing that.
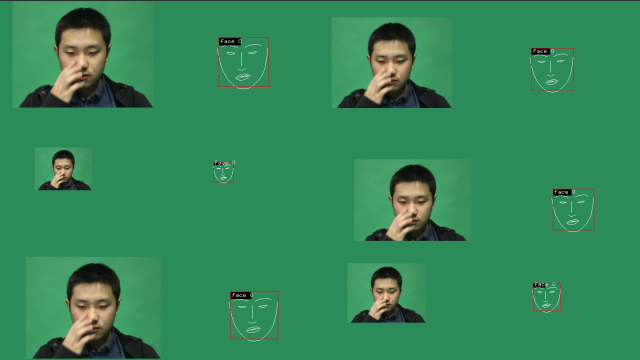
  3. Using another python script I wrote, I passed the images through Algorithmia’s style transfer algorithm (using the models that I generate using AWS – more on that later) in batches of 20. If you do more than 20 images at a time, the requests time out. This script was actually really interesting to write, because I didn’t always want only one style applied to a video. Often, I wanted to randomize which model was applied to a given frame between 2 or 3 options. Additionally, since I trained so many models, I was able to save benchmarks for each style model. Basically, this means that for every sketch I had a “really good model” and a “less good model” and a “weird looking model”, so I was able to randomize the model between these options without actually randomizing the style. It made things look just a bit more visually interesting.
  4. Using another python script I wrote to generate bash scripts, I downloaded all of the frames from Algorithmia.
  5. Using ffmpeg, I stitched the frames back together, split off the original audio from the video, and re-combined the audio with the new video.


Tech Part 2: Style Model Generation

I needed to actually generate models to apply to the frames of video. Again, there was no way this process was going to work on my personal computer. Fortunately, Algorithmia has a solution using Amazon Web Services to run a style model training script. After spending several hours on the phone with Amazon trying to convince them to let me use one of their beefy GPU-enabled EC2 instances, I triumphed!

I also managed to get $150 of educational AWS credit, so cost wasn’t a problem. This instance costs about $1 an hour to run, and it takes around 24 hours to train one style model, so it would normally cost about $25 per model. I can only imagine how long it would take without a GPU.

Here’s how I generated the style models:

  1. Select the sketchbook image I want to use
  2. Launch an Amazon EC2 p2.xlarge instance using the Algorithmia AMI
  3. Install the Algorithmia script. This loads the necessary machine learning software and environments that are dependencies to the model training code.
  4. Start the model training on the style image (using tmux so that I don’t have to leave my computer open for 24 hours)
  5. Upload the trained model to Algorithmia


Reflection

I feel I’ve created a “portrait machine” with this project, and I think the output is nice but it could be a lot better. For example, in critique, my group pointed out that the video for the interview could be more interesting, and the audio could be cleaner.

There’s definitely room for further experimentation with this project, especially since I’ve worked out all the technology now and still have Algorithmia and AWS credits left.

I’m planning on doing a series, and next trying the same technique on someone whose art uses color, and possibly a digital artist as well.

a — portrait plan

I am going to create a generative model trained using video of Ngdon’s facial emotional response to provoking questions. The model will consist of a WGAN conditioned on text to generate video that embodies and hallucinates my subject’s expressions in response to audience-input questions.

caro-NeuralNetPortraitPlan

My subject keeps really interesting sketchbooks.

These days, neural networks can “draw” real life portraits in the style of another photo. An example is here. 


I want to draw a video of my subject in the style of his own sketchbooks, each frame being rendered in the style of a randomly chosen sketchbook page. I’ll write a script to process the video of himself through the lens of his own art. In a sense it would be a self portrait.

Here’s an example of one frame

Robot Photogrammetry Rig

My plan for this semester is to explore the capabilities of the precision and movement of the robot arm with relation to motion capture.

I plan to use the robot arm to be able to place an object within a certain area near the robot arm and by attaching a DSLR camera to the end of the arm, be able to create a 3D model of the object.  I will be using the Cannon SDK to remotely control the camera, and the Universal Robots arm that we have in class.

Ideally, I will be controlling the arm using a URscript that is pushed to the robot by an OF app. I am hoping that URscript has the capabilities to return a flag after it has been moved so my OF app knows when to take a picture.

In terms of making a portrait of my partner, two things stood out to me while talking to him:

  1. Wigs
  2. He is very “quotable”

I’m thinking of possibly making 3D models of his wigs, and giving each one a different voice, since wigs are something people usually use to change their identity.


Geep-Portraitplan

I’m still fiddling around with some ideas but as of now I’m certain I’m going to utilize mascara or makeup in my final portrait. One of the answered questions focused around their heavy use of mascara. There’s an old hollywood glam that I want to mix with technology.

Overall I want the piece to be a gif incorporate shimmers, glam, glitz, etc. I don’t want this portrait to focus too heavily on my subject as I want the viewer to pull their own conclusions. I want it to be more ambiguous.

I’m looking towards a lot of fashion resources and in particular contemporary culture behind youtube makeup gurus. Possibly using photogrammetry to incorporate these concepts and create a small, moving 3D space.

Some images from my mood board:

PortraitPlan-sayers

My general plan is to allow people to walk around / fly around their fingerprints.  I find looking at people very closely (as in observing their pulse on their skin type close) can really create a more intimate experience between people. Generally people only observe one another at this scale if they are extremely emotionally close, so learning about a person like this will be a really interesting experience.  By making this into a landscape however, I put distance between myself and the subject.  I possibly will make it into a dessert with the ridges being sand dunes (shaders?).

I possibly can get a fingerprint on glass and go back to the SEM or use photogrammetry.  Also I may simply need to just squish a finger onto a scanner, as I just really need a heightmap that I can then use in the terrain editor to at least get the base effect that I want.

Gloeilamp-PortraitPlan

For the portrait project I am working with cdsls. We were both completely mesmerized by the scanning electron microscope- Watching that image appear on the screen was some kind of magic- an object I thought I understood revealed itself in a completely unexpected way.

Here, I hope to leverage the novelty of slitscanning techniques to also reveal a known object in a satisfying and surprising way. The images below show my experiments so far with interactive slitscanning methods in Processing.

Moving forward, I want to capture cdsls with the Sony sterographic “bloggie” camera, process the video through slitscanning techniques, potentially moving through these videos with the interactive methods I have developed so far. The addition of stereo capture to this process will also allow for display through methods like Google Cardboard, which could further deepen the experience.

iciaiot-PortraitPlan

I’ve wanted to bring hand drawn qualities to virtual reality and 3d for some time and I’m greatly inspired by Michelle Ma’s work where she used drawings of a subject to create a 3d model. What I hope to do with this project is photograph my subject’s bust (head and shoulders) from every 10 degrees and then rotoscope those images. I’ll then put them in an OF application so that the viewer can use their mouse to slide through them. I want to make the interactions similar to how you would rotate a 3d model in Unity or Maya so it feels like the bust is 3d and interact-able, but still hand drawn. In order to make the bust more dynamic, I will have my subject smile as I am photographing around his head and then when the viewer “rotates” the head (just moving through images) the bust will smile.

Tangent idea: I could make it rotate in more than one direction (ie rotate in x and y) if I took the photos from around the face area.

Blue-PortraitPlan

I’m interested in using the high speed and possibly thermal camera to capture Faith in a way that focuses on her physicality when put through a process of exertion, physical & mental. I’m interested in creating a situation where I’m able to visualize this exertion in the form of sweat, breath, tears, or saliva. I’m very interested in capturing her breathing in detail – and to this end, I am planning to have her run, to work up a sweat, and then to film her as she is breathing when she stops running. I would like to situate this portrait outdoors, with the environment around her, and work WITH the cold weather to help visualize this physical process. I’m drawing influence from the artists Marilyn Minter, Collier Schorr, Rineke Dijkystra, Bruce Nauman, and also advertising imagery of atheletes.

hizlik-PortraitPlan

For this project I am working with Quan. After getting to know each other and brainstorming many ideas that were either general or specific to each other’s interests and attributes, we settled on the idea of creating a portrait of us through our portraits of the world- meaning, we are both photographers and we want to use the metadata and other information available in our photography to paint a picture of how we photograph the world, what our interests/habits are when it comes to photography, etc.

We are still coming up with variations and implementations of our settled subject, but one that we are sure to do is crating an “illumination portrait,” a visualization of the lighting conditions we generally shoot in based on a value obtained from the aggregate of shutter speed, aperture and ISO (grabbed from the EXIF data of all available .jpg images). An example of my portrait, below, is from the 20k+ images on my computer. Quan, who’s photo count is much higher he never deletes any photos) is currently converting all RAW images to jpg for analysis, hopefully to be done within the next few days.

Another idea involves running our images through Google vision to get an idea of the subject matter, however this gets very tricky on multiple levels. Some problems we’ve run into for this idea are:

  • Google vision spits out too many variations of subjects, and often don’t align with “photography categories”
  • Google vision will cost a lot of resources (time, money) to run all of our images through
  • Sometimes it is wrong. Or weird.