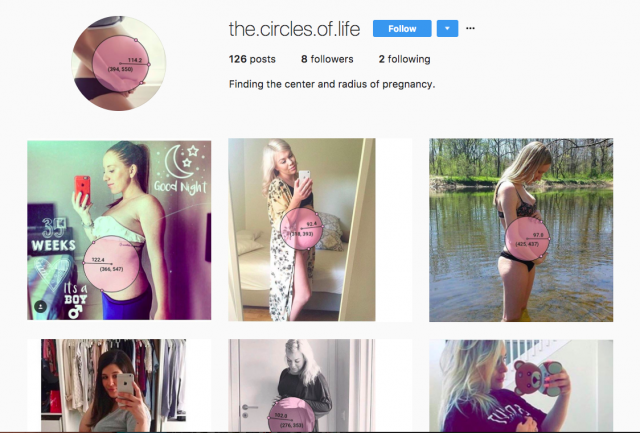
@the.circles.of.life
Finding the center and radius of Instagrammed pregnancies.
The Project
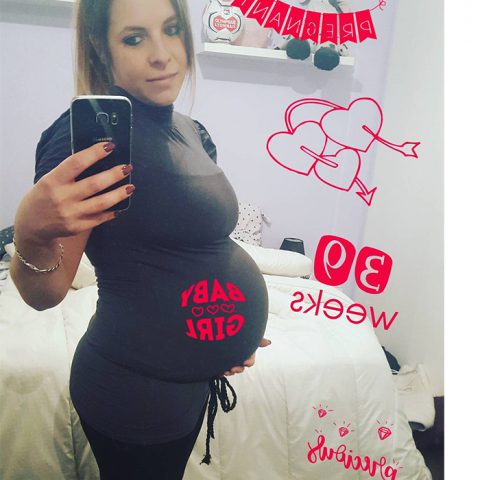
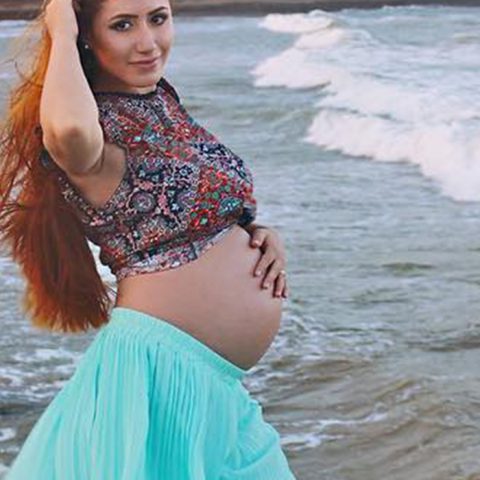
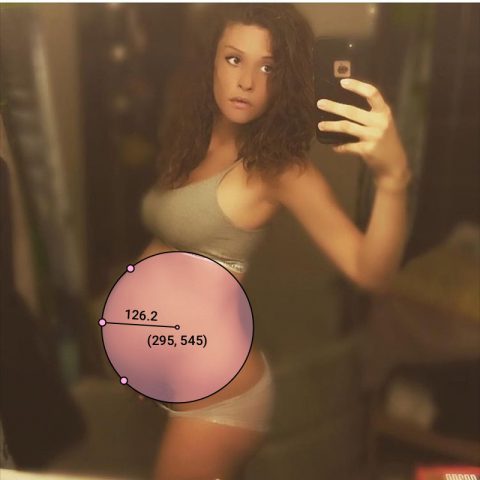
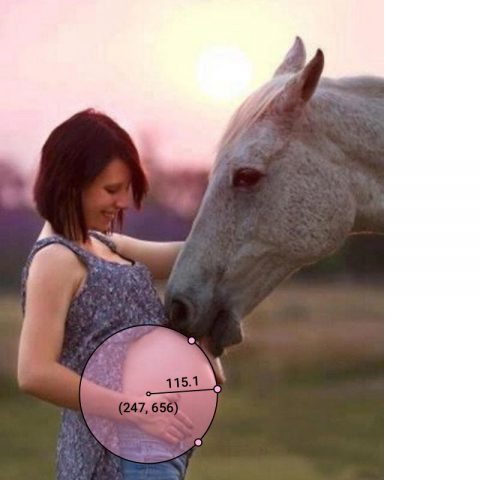
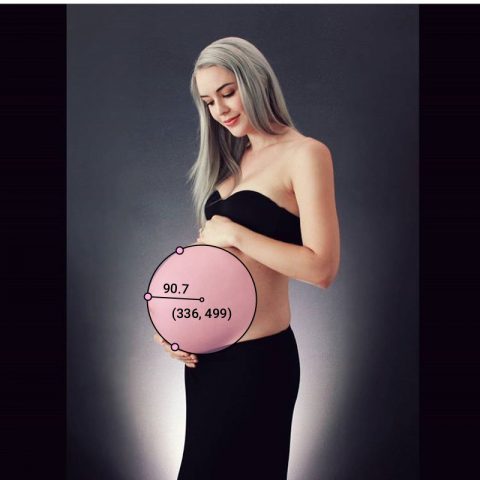
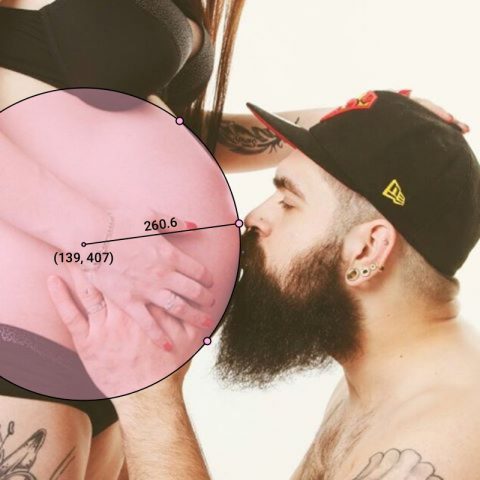
My project is an investigation into the geometry of pregnant women on Instagram. I downloaded over six hundred images of pregnant women, and using a tool I built with Processing, annotated each photo to find the center and radius of the belly. After collecting all of these photos, I have been periodically re-uploading them to Instagram under the name @the.circles.of.life and reporting the data.
Through this project, I’ve created an absurd a way to objectively evaluate women that’s completely useless and has no basis in traditional beauty standards. This turns social media into an even stranger evaluative process than it already is.
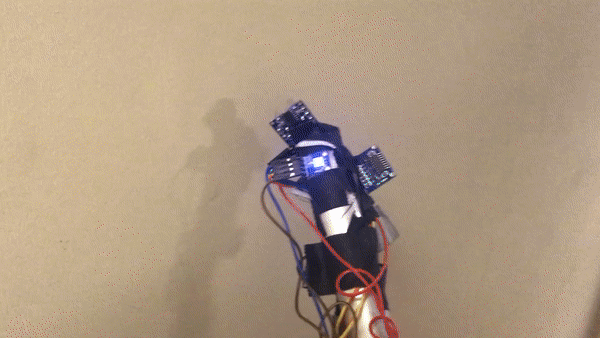
There’s also a certain amount of ridiculousness in the fact that someone would spend so much time doing this. To poke at this, I’ve included several screen capture videos on Instagram of me annotating the pregnant women, so that people will know I’m doing this all by hand. I want there to be a hint of the weirdo behind the project, without actually revealing anything about who I am or why this is happening.
Context
The most similar projects I can think of are other works that make you question “who on earth would spend the time doing this?” My favorite comparison is to anonymous Internet people who use video games as platforms for strange art projects, such as this person who built a 210 day long roller coaster in Roller Coaster Tycoon, or this person who beat Sim City with an incredibly intensely planned out metropolis. It’s funny, and it clearly took an impressive amount of effort, but you have to wonder who’s behind it. They also leverage popular culture through video games in a similar way that I’m doing with Instagram.
I have been evaluating my work based on how well the humor lands. The project has been getting in-person reactions that are similar to what I was hoping for, which is a lot of fun. I’ve shown people and had them be shocked and bemused as they scrolled through dozens and dozens of Instagrammed photos of geometric pregnant women, which was exactly my goal. I hope to continue posting these photos until I have only 50 or so left, and then try and throw the project into the world and see how/if people react.
Media Object
My media object is the ongoing Instagram account. I’ve also compiled all of my pregnant lady images into this Dropbox folder for safe keeping.

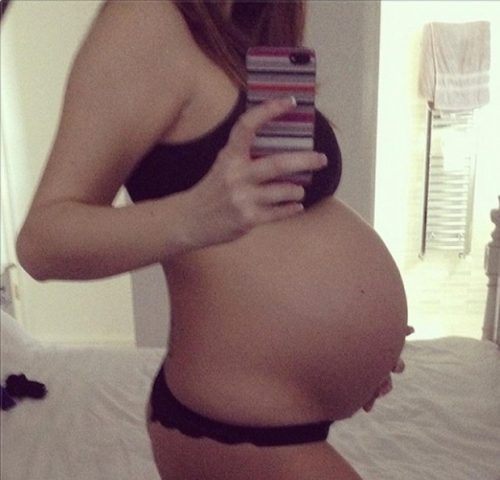
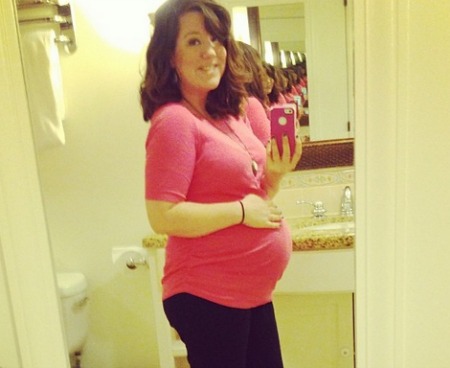
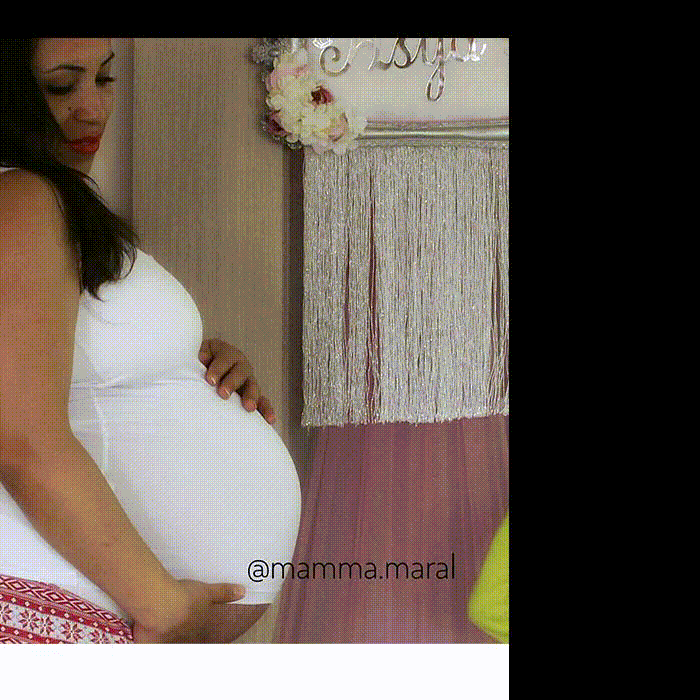
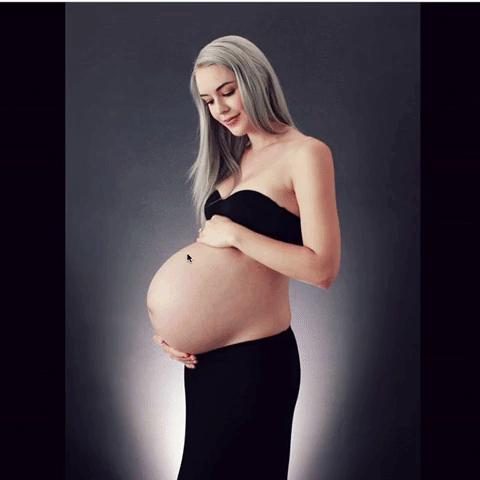
Example photos
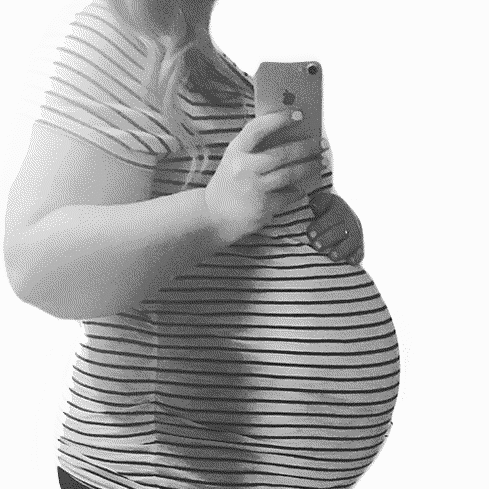
Example GIFs
I also created a print sorting about 200 of the images from least to most pregnant from left to right.

Process
Creating this work was an incredibly explorative process. I tried a lot of things that worked, I tried a lot of things that didn’t work, I regularly got a lot of feedback from a lot of people, and I regularly revised and improved my ideas.
I started where I left off with my last project, with some new insights. My final project really originated during a conversation with Golan, where he pointed out a really amusing GIF from my previous iteration of the pregnant women project.
The idea of a person hand-fitting a geometric shape to a woman’s pregnant stomach is very amusing. We brainstormed for a while about the best format to explore this potential project, and settled on Instagram as a medium. What if there was an account that analyzed pregnant women from Instagram, and re-posted the analysis back online?
I quickly registered @the.circles.of.life, and started coding. Unfortunately I had accidentally deleted the tool I made for the first draft of the project, so I had to rewrite the data logging tool.
Finding the Images
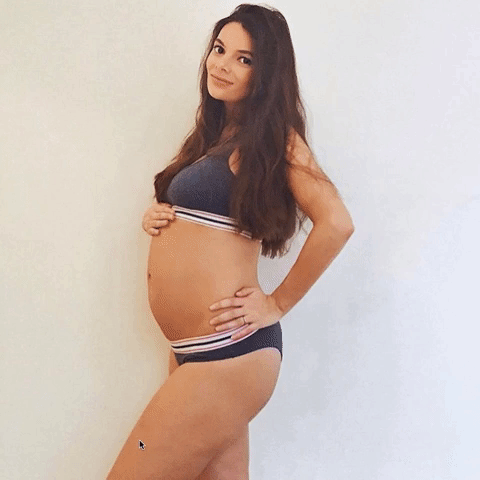
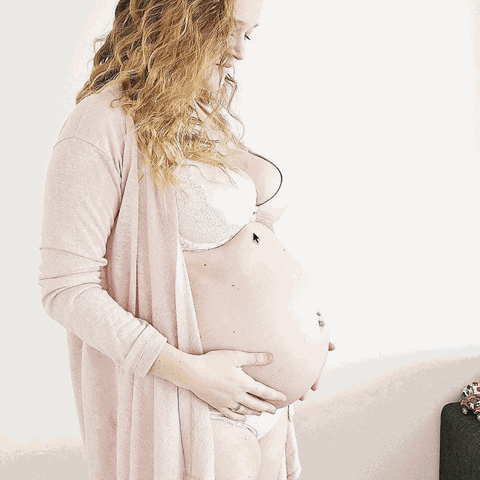
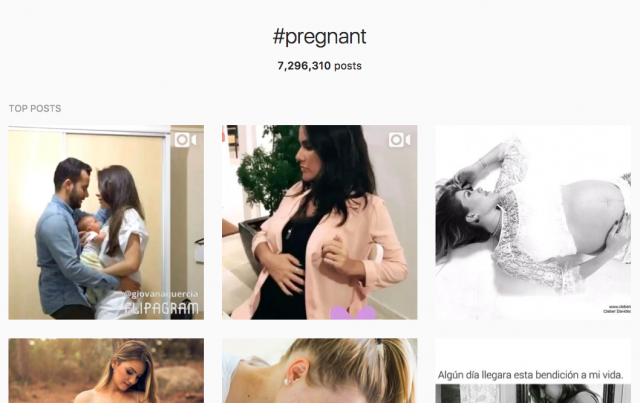
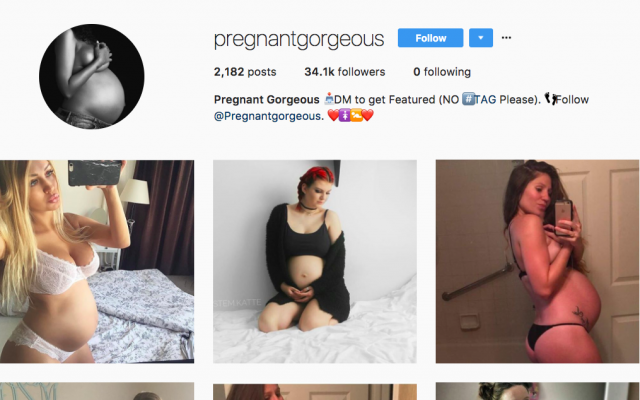
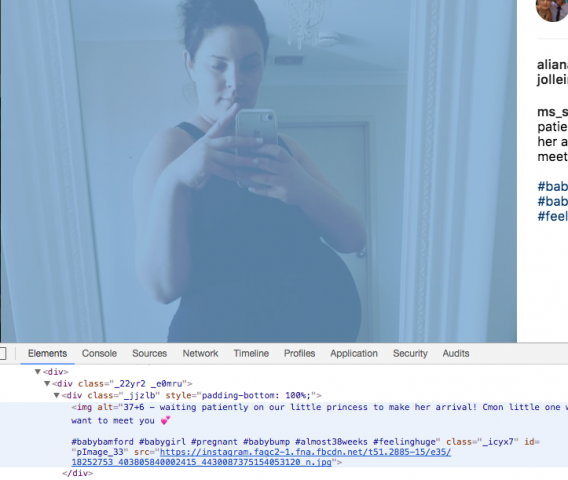
“Where did you get 600 images of pregnant women?” is a question I get a lot. I’ve developed several methods. The first method is searching hashtags such as #pregnancy, #pregnantbelly, and #babybump. The second method is that after I search these things, I can occasionally find themed accounts that are a great resource for photos of pregnant women.
Since you can’t click-and-drag download images from Instagram, I had to find a workaround. If you go to “inspect element” on an Instagram image, you can find a buried link to the image source and download it. So I did that, 600 times.
Working with the images
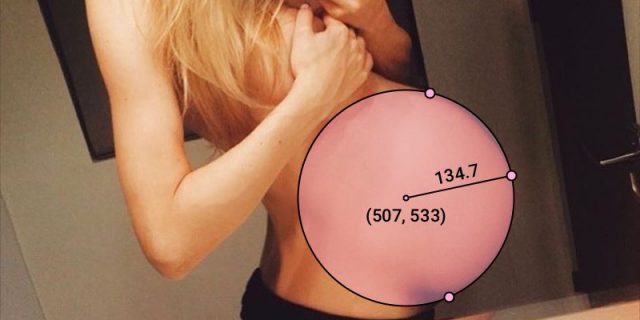
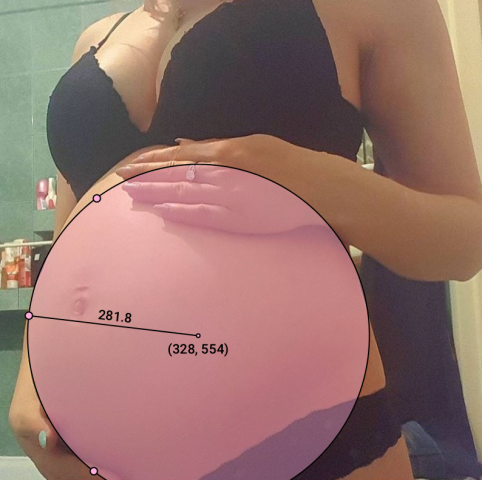
I went through several drafts of the design of the circles. I had several versions, all with different colors and varying degrees of fonts. After conferring with people in the STUDIO and getting a lot of valuable feedback, I settled on light pink semi-opaque circles, with the circle data adjusting visibly on the circle as it’s being dragged. I began creating videos like this, and posting them on Instagram to test.
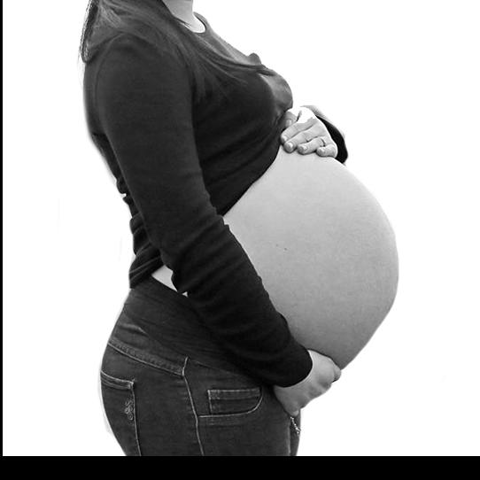
However, I realized quickly that scrolling through dozens of videos on Instagram is pretty uneventful. The videos don’t autoplay, and the thumbnail of the video isn’t very interesting looking. If I wanted to hold people’s attention, I realized that I needed to start posting images. This also made the data collection a lot easier: where previously I had to take a screen recording of the women and split it up by which woman was in the video, I could now simply tell my processing app to save photos of women once they were finished. I began to create photos like this, but still it wasn’t quite right.
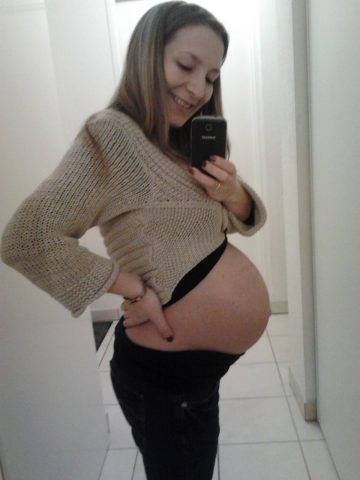
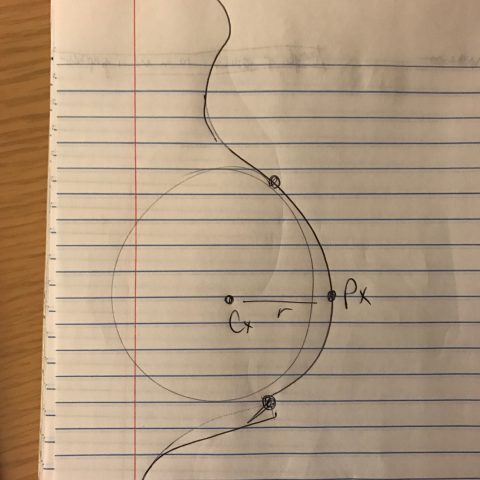
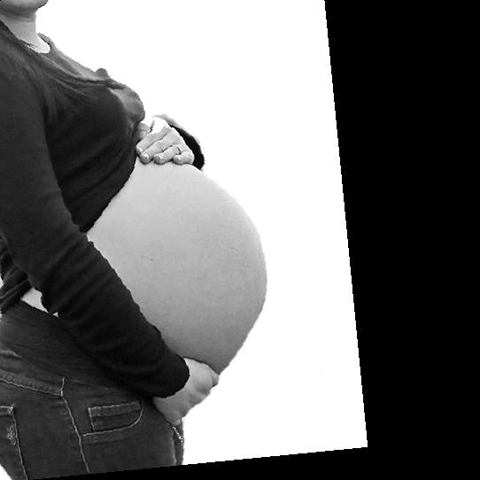
Do you see the problem? The top dot isn’t on the woman’s body. In a few of my photos, I wasn’t using exclusively the woman’s body to determine the circle, which is a very important element of the project. Throughout this time, I got better and better at marking up the images.
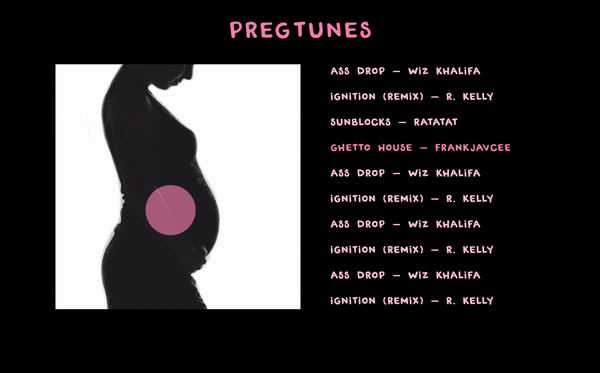
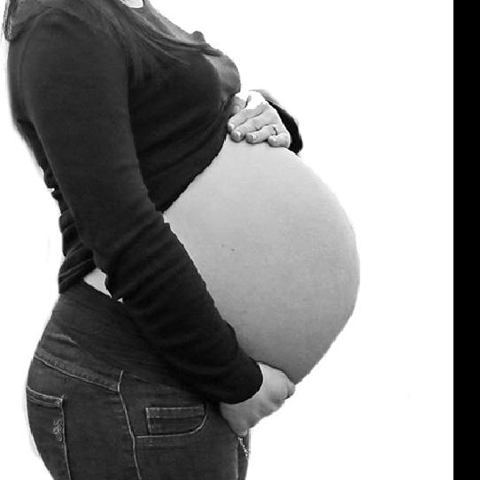
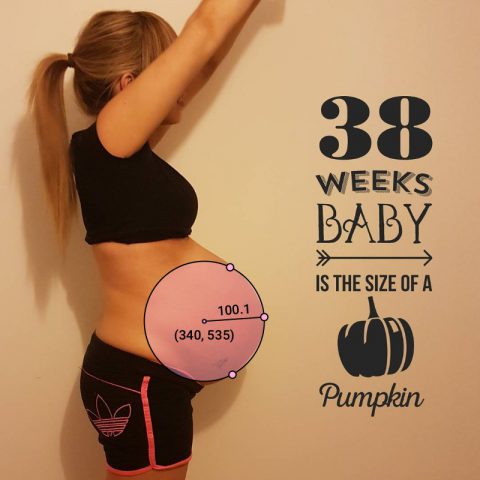
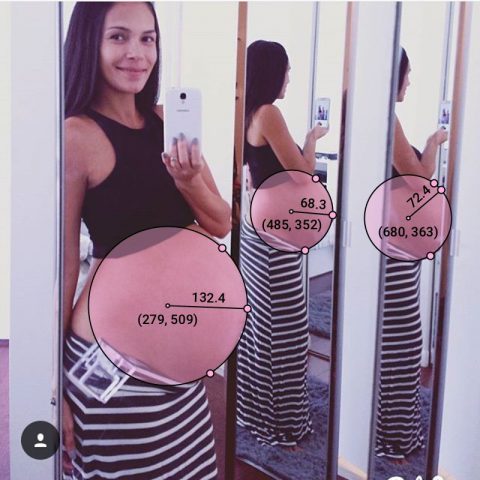
I settled on creating images like this.
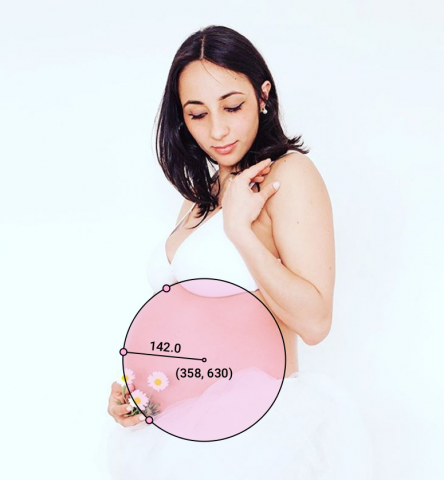
The dots are all on the belly, the center and radius are very visible, and the circle is semi-opaque so that you can see the woman’s body through it, but the text is still visible on top of patterned clothing.
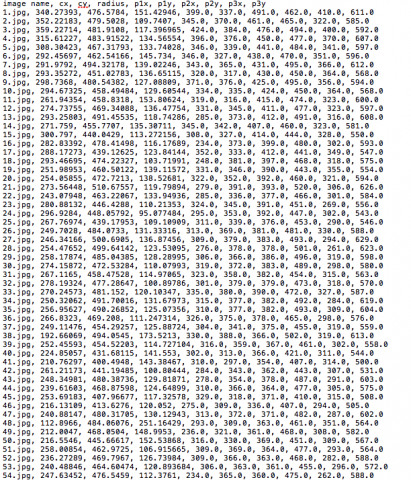
Now, I had hundreds of images and a processing sketch that would save these photos and log the data for me. At this point, it takes me about an hour to mark up every photo: not bad.
Posting the photos
There was also some debate about how to post the photos. Instagram is really difficult to post on, because they actively try to discourage bots, and will ban you if they think your account is doing something suspicious. I looked into it a lot, and decided that to be safe, I could only post about 10 photos an hour. I originally wanted to compensate for this by creating a temporary twitter account, but decided that Instagram was the correct medium. I have to post them all by hand, as there’s no Instagram API. I’ve been posting them a few at a time for several days now, and should have most of them up within the next few days.
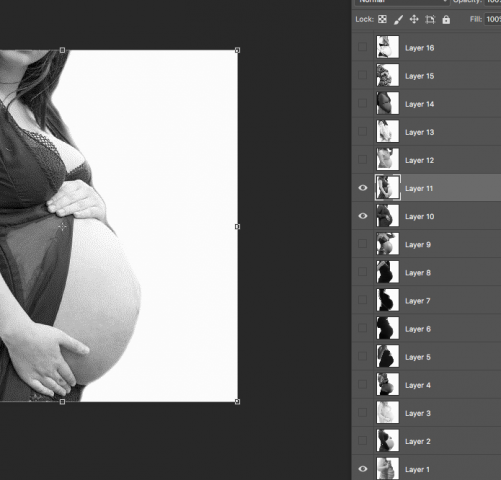
Creating the print
Creating the print was simple once I had all of the belly data. I just sorted all the women from largest to smallest radius, and created another processing tool where I could tag the images for whether the full belly was in the circle or not, because I didn’t want any cut off circles in the print. I went through several drafts of the print, and ultimately decided on the pink and grey.
Special thank you to Golan Levin, Claire Hentschker, Cameron Burgess, Ben Snell, Avi Romanoff, Anna Henson, Luca Damasco, the ladies of Instagram, and all the other people who helped me out and gave me opinions. Additional shout-out to my eight loyal Instagram followers (Smokey, Chloe, Adella, Golan, Me, Anne, Anna, and some random person), who are still following me even though I post over 30 pregnant ladies a day.