
Experimental Capture – Spring 2017
CMU School of Art, Spring 2017 • Prof. Golan Levin

So far I was able to confirm on the event I will be attending.
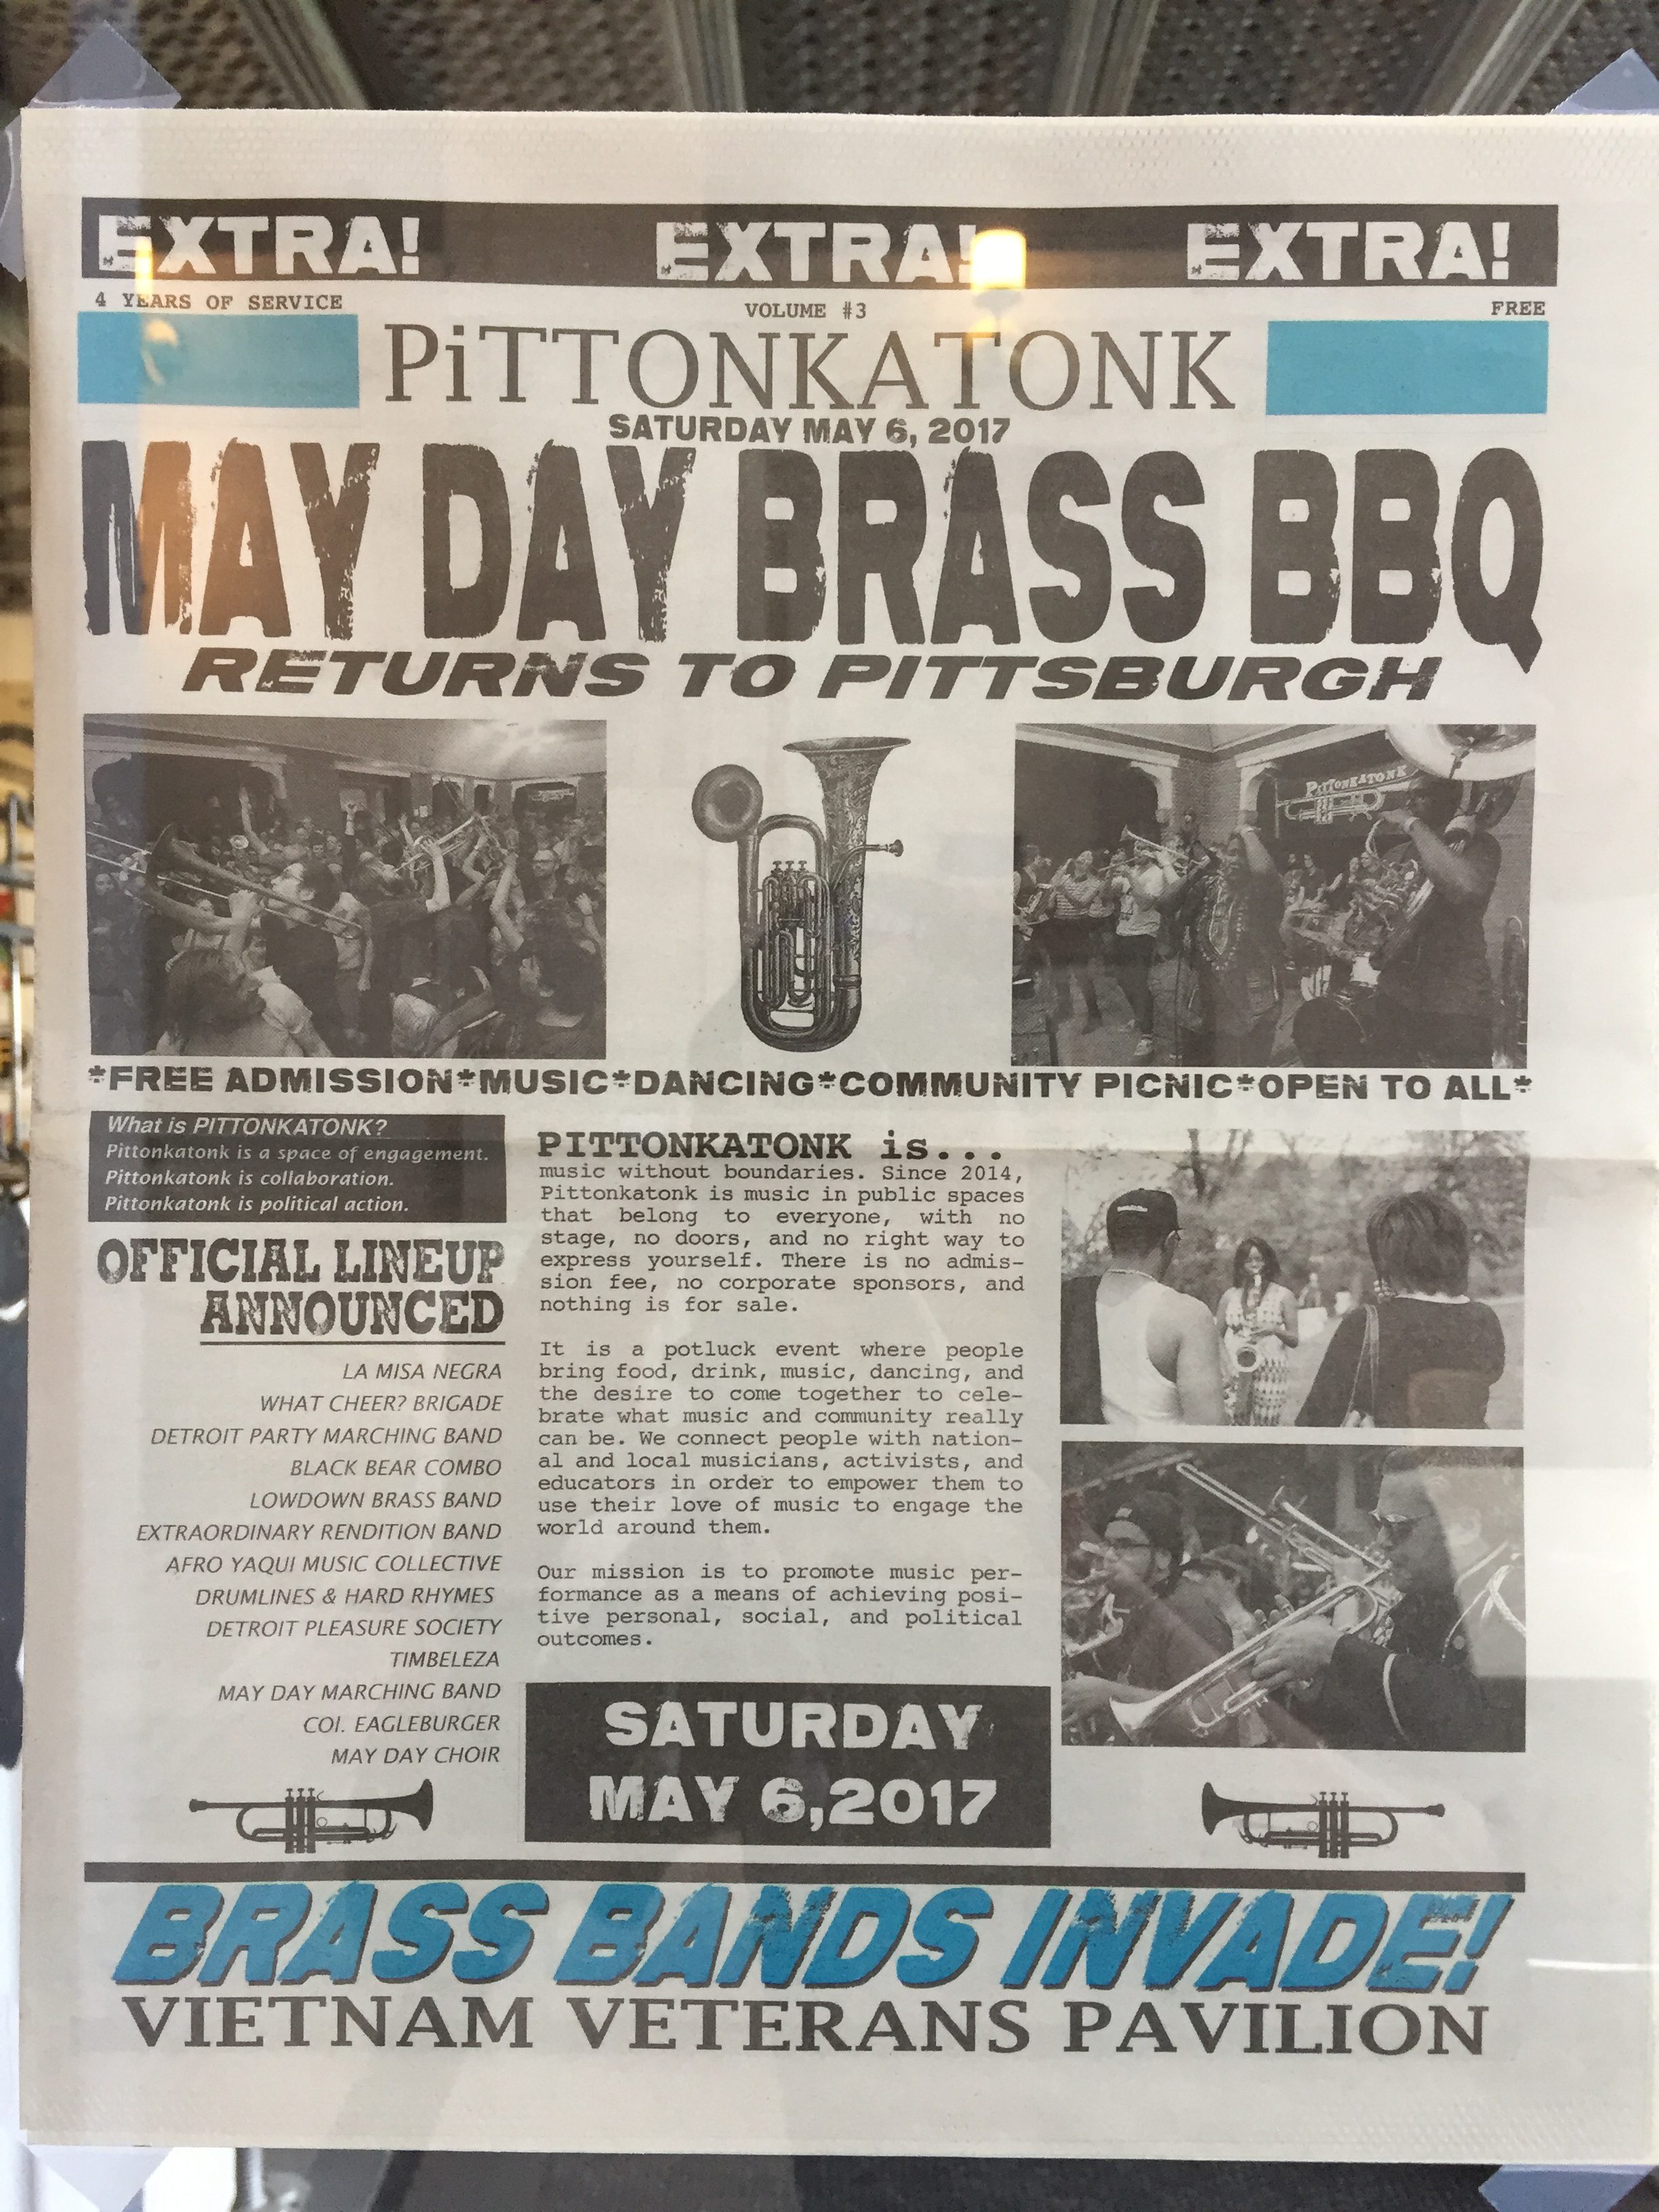
Pittonkatonk is a free, outdoor, family friendly community celebration of brass music that features both local and touring musicians. Held at the Schenley Park Vietnam Veterans Pavilion, Pittonkatonk blurs the lines between music festival and family reunion. There’s no formal stage, no ticket prices, and no vending. Instead, bands play in the crowd with little to no amplification. The community creates a potluck table of food donations for refreshment, and folks of all ages can be seen dancing together.
http://pittonkatonk.org/about/
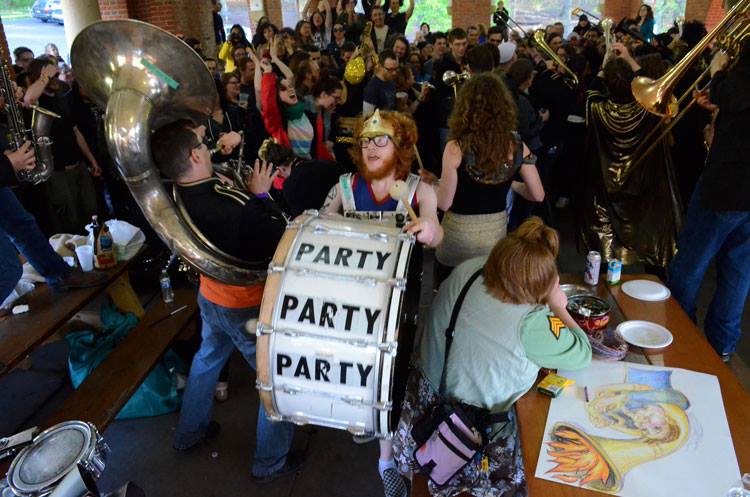
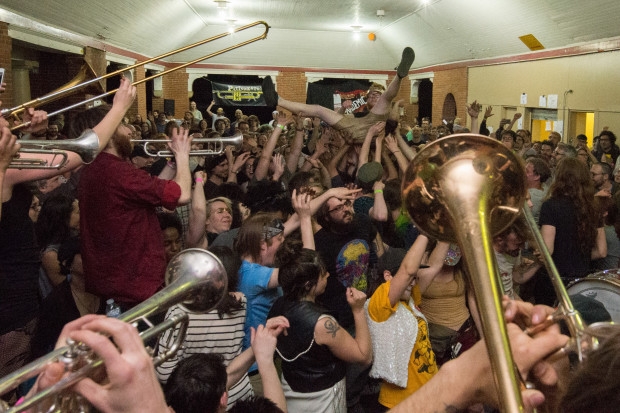
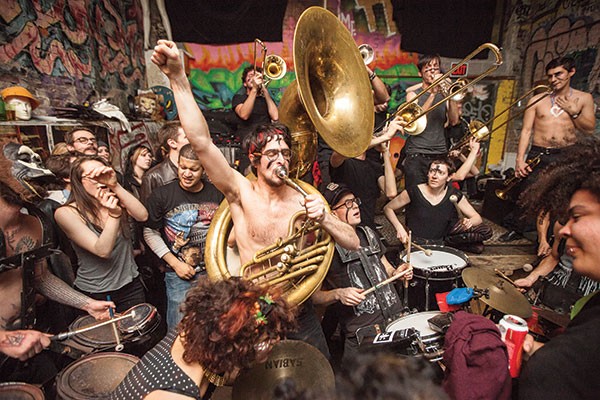
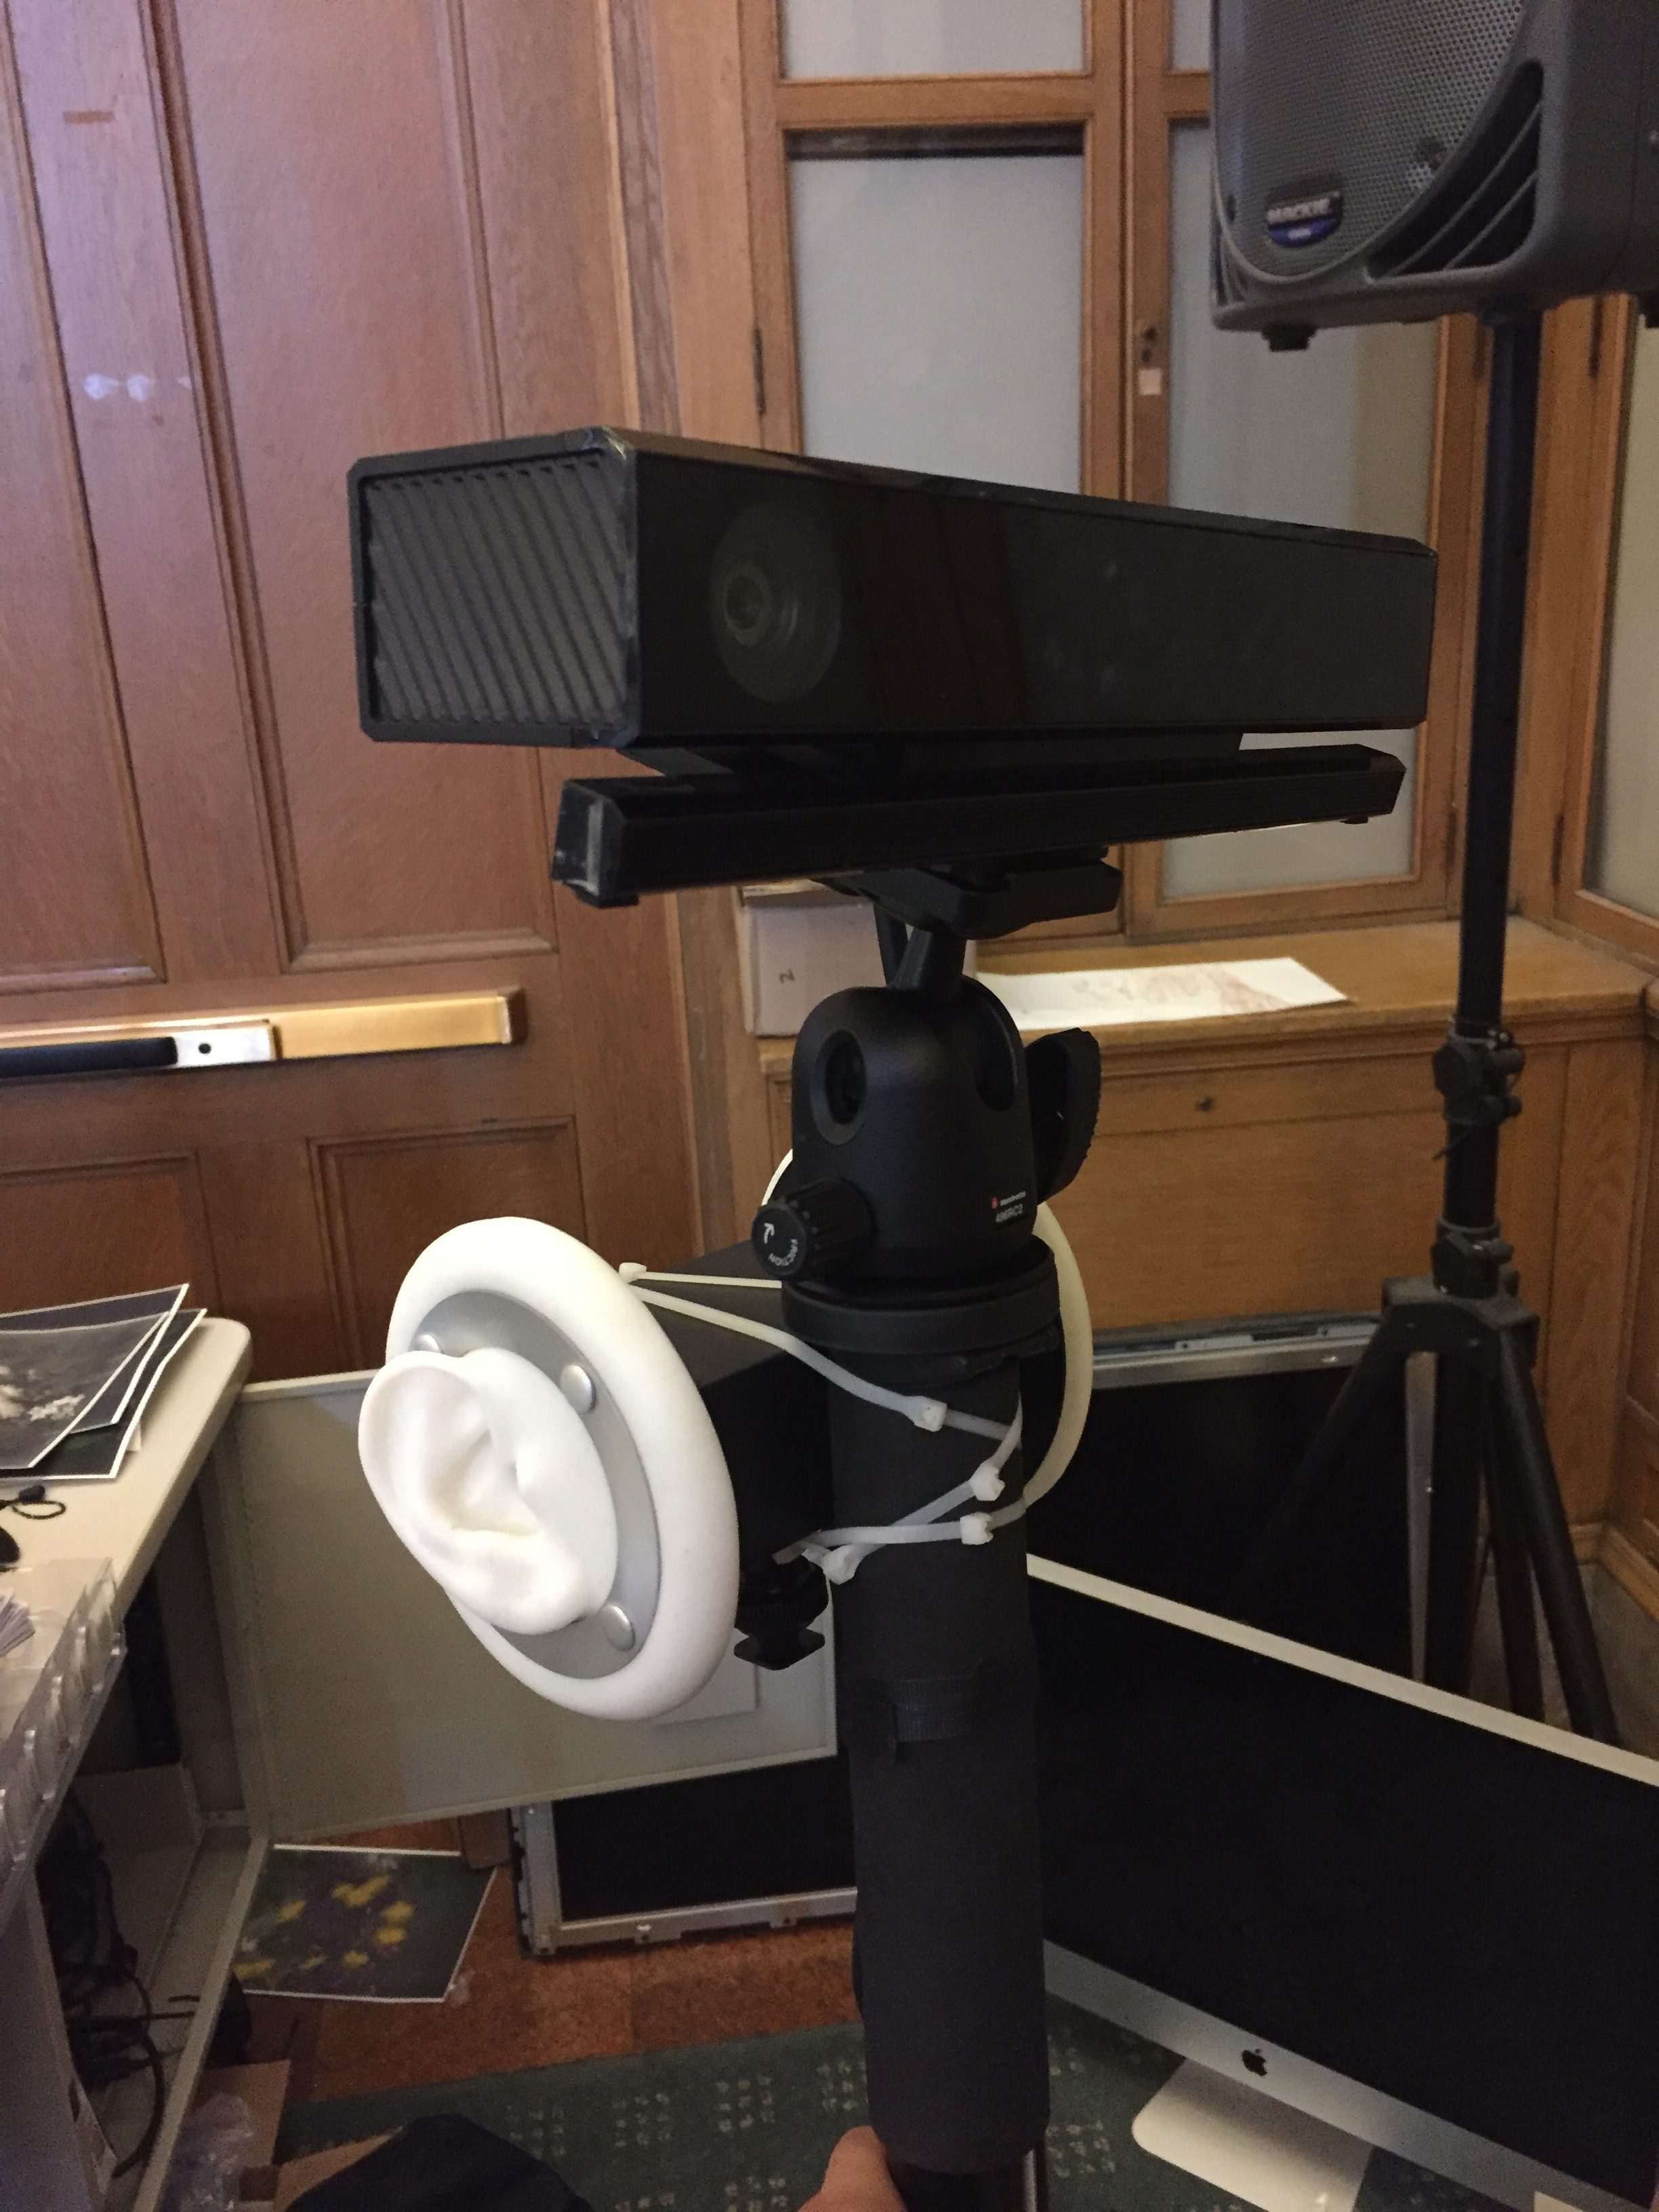
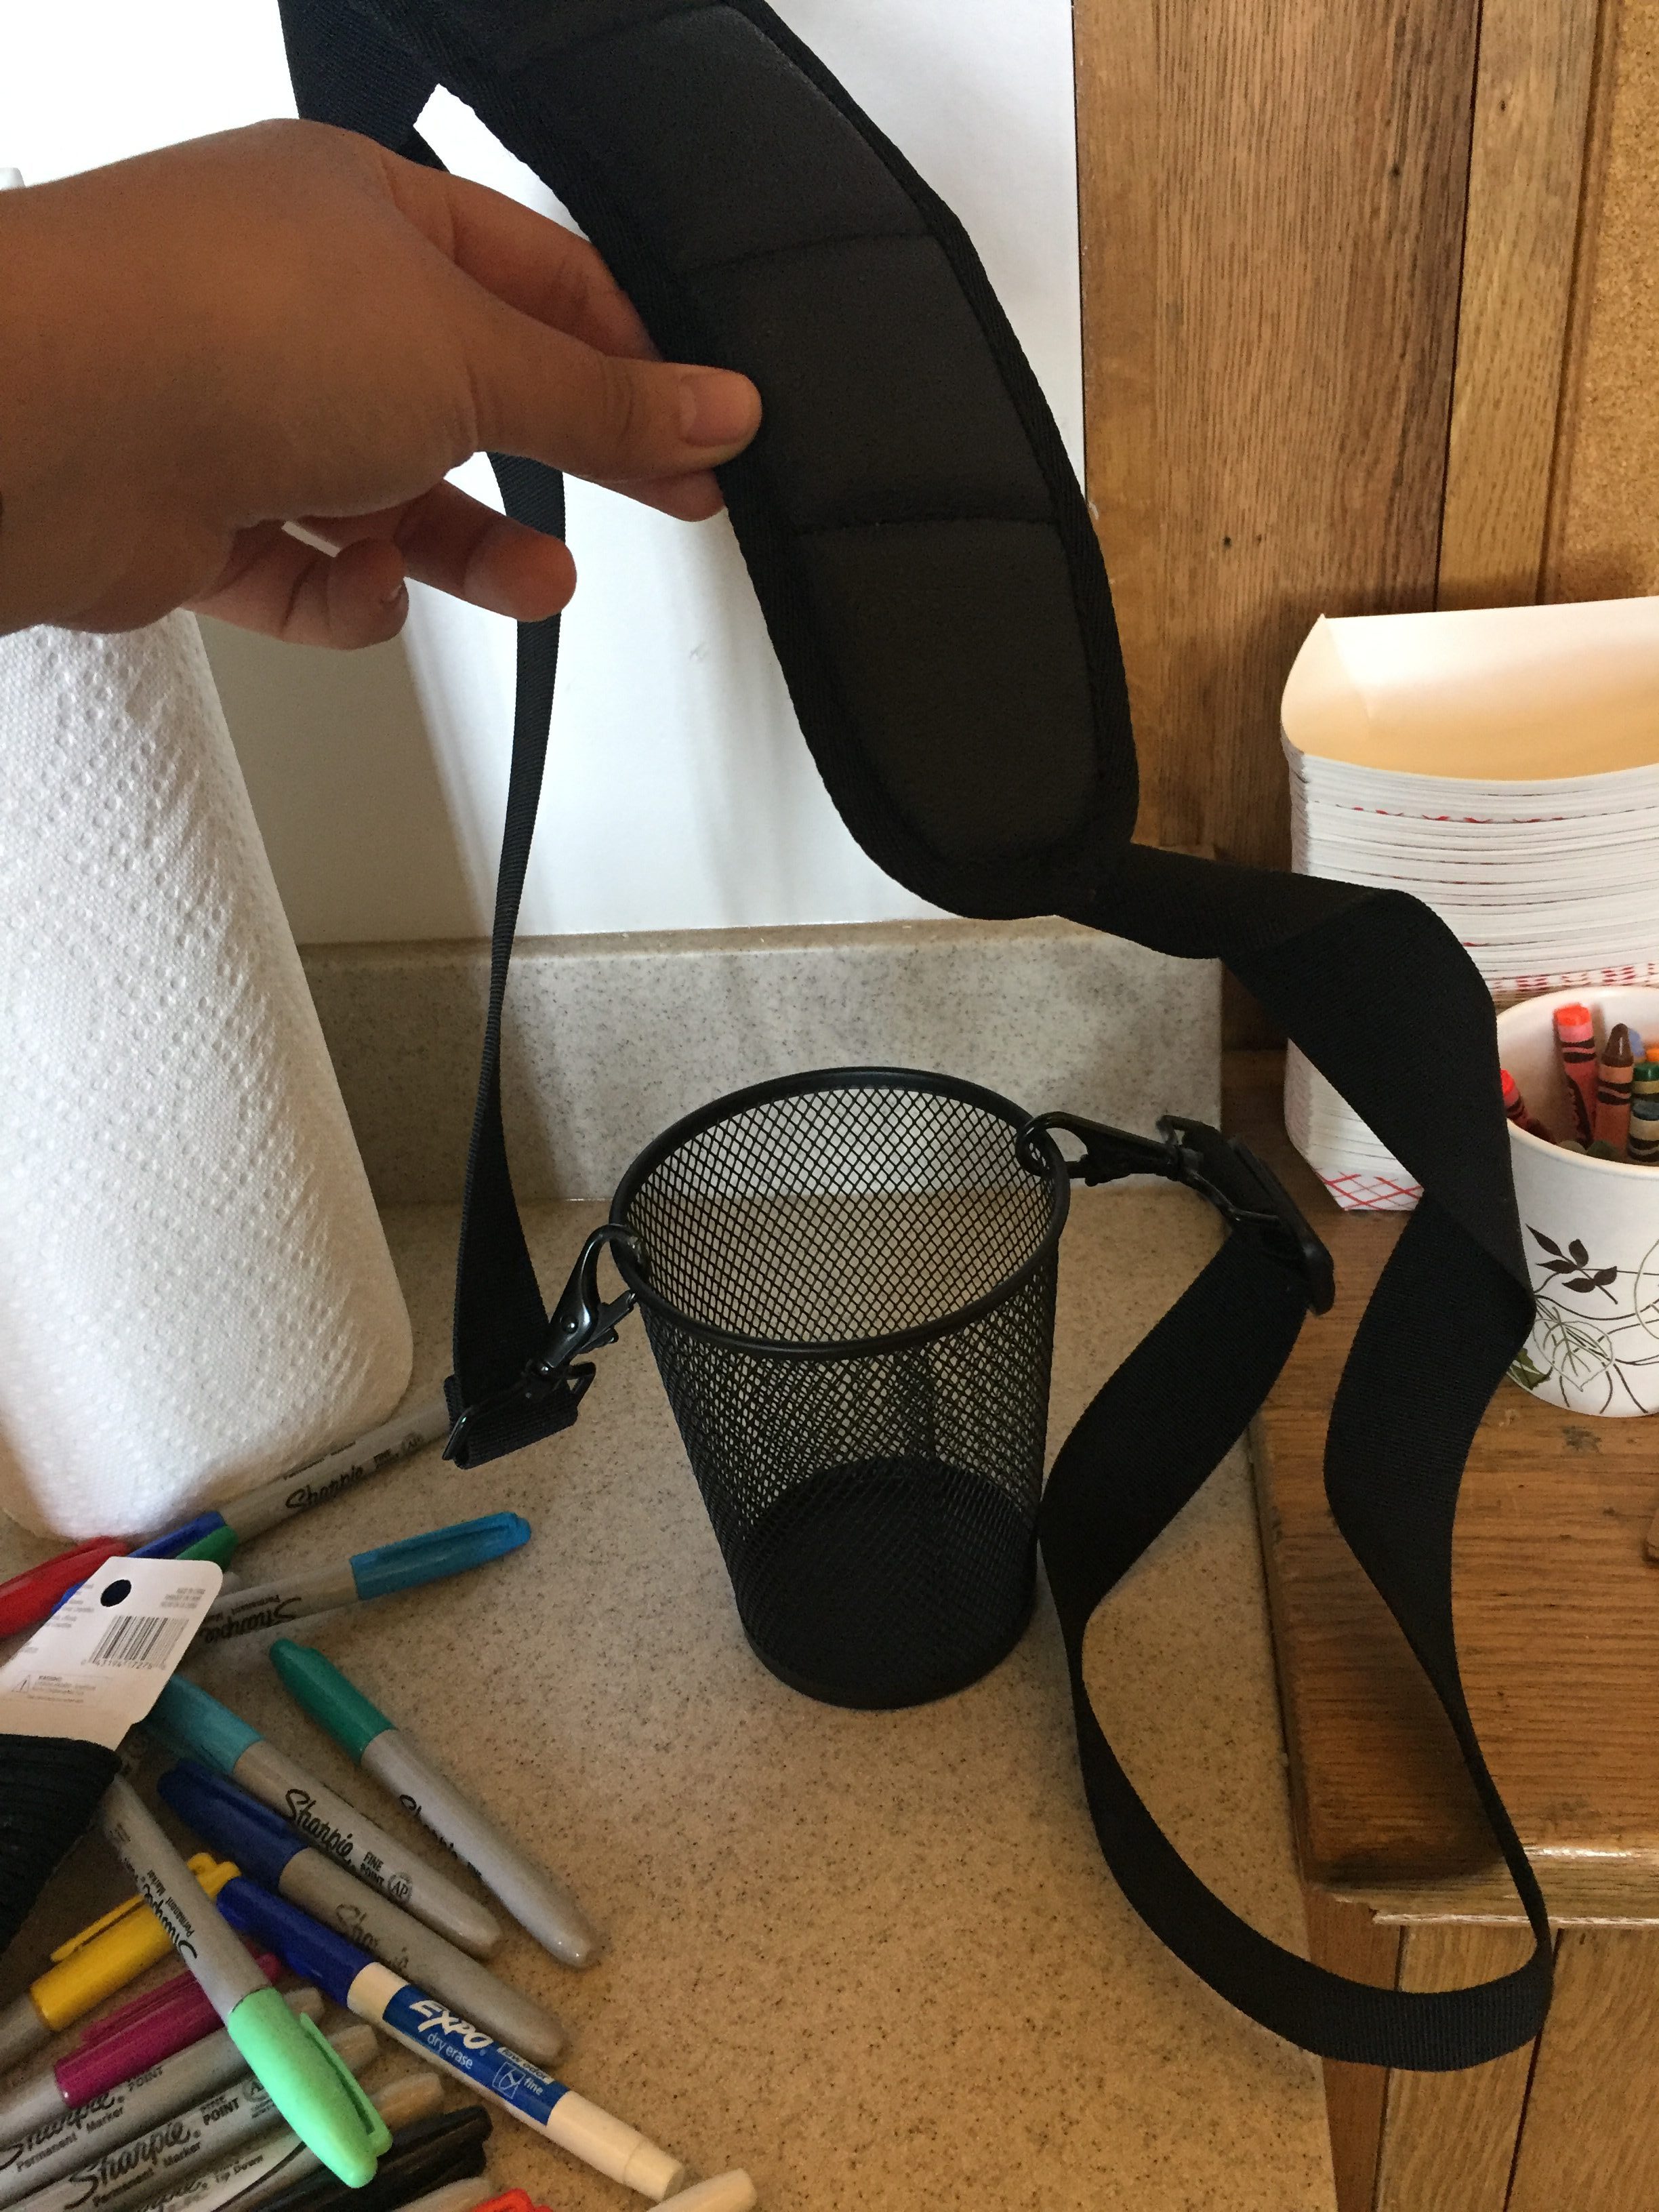
Yesterday Golan and Tom helped me make a probe for this specific event. The result is a magical wizard stick with a lot of stuff on it.
It’s a monopod with the depthkit and a binaural microphone attached to it.
Until I get all of the footage I need to figure out how to carry everything to the event and how I’m going to organize all of my footage. Because I’m also dealing with audio, I need to figure out a flow to match the footage and the sound for post production. I am planning on testing a lot of this stuff out this weekend.
The biggest difference between this venue and my last is that it’s outdoors. I’m excited to see how green looks on the depthKit.
For my final I am going to try to create a series of short video and sound loops. I would also like to figure out a way to edit and upload these short videos onto Instagram more easily. Zach Lieberman does it with his Instagram posts and posted a process on medium of how to do it.
For our final project, Quan and I have been experimenting with putting the black magic camera on the robot arm. We have been experimenting with stereo shots using two black magic cameras. We came to the conclusion that it is not possible to do stereo if the arm is moving away from and closer to the subject without changing the angle between the cameras. These are shots we got using the black magic camera and the motion of the robot arm to capture events from many different perspectives.
I improved my code to run 200x faster. So originally processing a dataset takes more then a day, now it takes twenty minutes or so.
I experimented with different datasets.
Really confusing basketball games:


348 portraits sorted by facial expression

I working on sorting the same dataset by beauty standards. Since there have been a lot of researches on golden ratio and perfect face proportions, I can sort the portraits from the prettiest to the ugliest.
Re-sorting shuffled video frames
Left: original Right: re-sorted

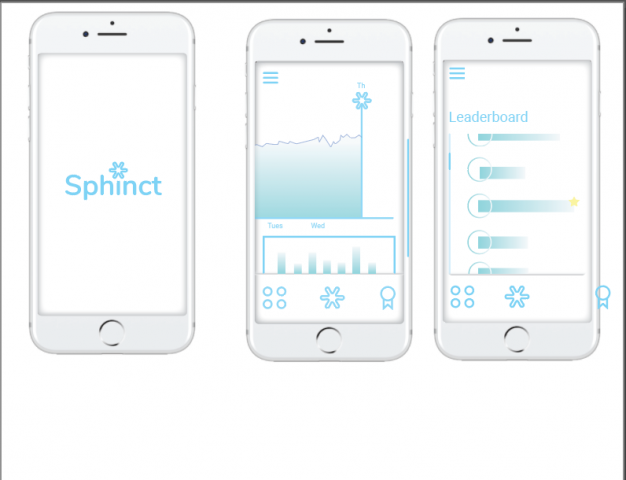
Golan and I have been reaching out to companies that have survey panels so I can collect answers ranging from 10,000 – 100,000. It has been a struggle to get in touch with them, but we just received a reply yesterday so fingers crossed! If not, the other alternative is to use mechanical turk. If you use twitter, please feel free to reply to this tweet.
Where were you when you had your first kiss? For a study. Please reply!
— Question of Taste (@bobebibu) 2017년 4월 25일

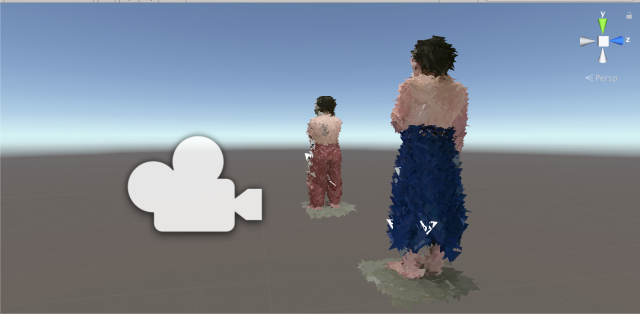
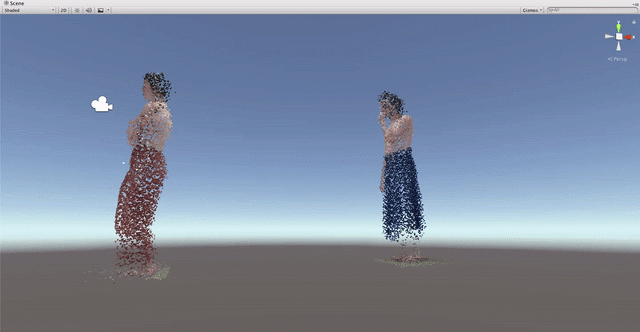
I’m continuing to work with the material I shot a while ago in the Panoptic Studio – determined for some obsessive reason to try to get the difficult file format that is a PLY to become usable geometry in a 3D editing program (Unity or Maya) and to play (i.e. display and swap out) thousands of frames to create a volumetric animation that can be exported for and viewed in a VR/AR device. Last time, I got the PLY’s to animate in Open Frameworks. While this was exciting, my subsequent goal has been to get this material into a program like Unity or Maya so I can treat these animations – PLY sequences – as another 3D asset and create an environment around these dancers (the subject of my panoptic capture). In Open Frameworks, while I could get the ply’s to display and animate, I could not add other 3D assets such as 3D scans of trees that I created and have edited in Maya.
The question of how to capture, display, and animate point clouds, and generate usable meshes from this data, is a very current challenge in computer graphics. Much of the information I’m finding about this is being published concurrently with my explorations. I’m also discovering a large gap between the research communities and production communities when it comes to this material. One of the most fascinating parts of this project, for me, is exploring this disconnect and inserting myself in the middle of this communication stream, attempting to bring these communities (or at least the work of these communities) together. Can I dive into the (non-arts / creative coding) research while coming up with something actually usable and communicable to the arts / creative coding communities? This is a goal I’ll pursue for my thesis.
I’ve done some smaller experiments with the PLY’s and 3D scans, and I got Vuforia to work to test Augmented Reality:
Here’s an unaltered PLY in Meshlab: 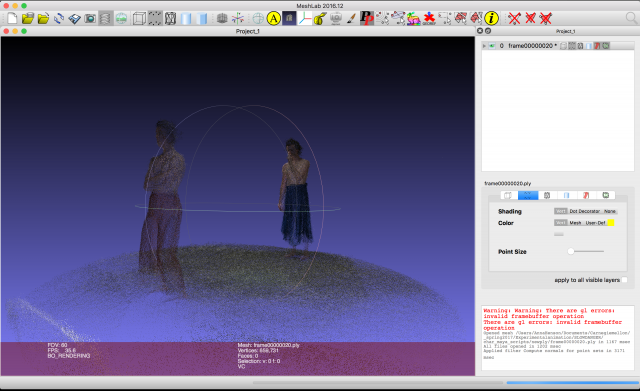
I also got this tutorial to work, to display a PLY in Unity. I hope to continue working on this, and write a script to load and display multiple (ideally thousands, lol) PLY’s to create an animation – and export this for Oculus for the final project. By generating the ply’s as triangles, this creates usable geometry that Unity understands, therefore I can treat these game objects as expected, and will hopefully be able to create a VR project in a fairly streamlined way.

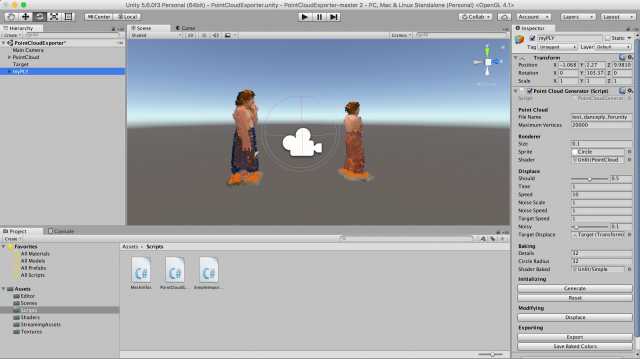
Here’s a screenshot of the Unity editor, with the parameters for editing the PLY in the Inspector:
High Speed Portraits: evan from Smokey on Vimeo.
High Speed Portraits: lexi from Smokey on Vimeo.
High speed collage portraits to be presented next to final printed portrait.
We created a handprint and footprint recognition system, by applying machine learning techniques to data from a Sensel Morph pressure interface.
We (Kyin and weija, sophomores at CMU) were really inspired by the potential of what the SenselMorph, a pressure sensor module, could do. With the SenselMorph we will be able to identify not only the physical shapes and surfaces of the objects that touch the sensor, but also the distribution of pressure. With this idea in mind, we wanted to investigate how “identifiable” certain aspects of our body can be from others. The project was in part an exploration of machine learning, as well as what kind of new use cases we could project onto it.
In order to train a robust neural net, we needed several hundreds of photos. However, since the event we are recording is fairly short, repeating the event over and over wasn’t too hard. To further expedite this process, we made it so that our script can automatically save images when it detects that the event has “ended”. Across four people, we gathered about 400 sample images, and after removing poor samples, we ended with about 300. In hindsight, we probably should have trained it on much more data samples, but for the purposes of the assignment, 300 was more than sufficient.
With Pytorch, we were able to implement a convolutional neural network in Python and build a model using the 1200 train images that were collected. Here is more theoretical and technical information on Convolutional Neural Networks.
Special thanks to our lovely volunteers! (Photos shared with permission)
(From left to right: Jason, Kristin, Rohan, Changning)
In addition to the hand and footprints, we wanted to create an interactive exhibit for the final presentation. Since we can’t have our four trained people stand around a stand for hours, we decided to retrain our neural net on inanimate objects for viewers to try to classify themselves.
Here are the outputs from some preliminary testing. When training a neural net, there is a concept called “epochs”, which is essentially how long we want to train the data for. If we overtrain the data, we suffer from something called over fitting, which is basically when the model is too hard coded on just recognizing the training data, and will fail to recognize any other external picture that isn’t identical to any of its training data. Therefore, to get the best results, we had to play around with how long we want to train the data. Overall, the results were around 85% – 90% accuracy, which is over our expectations.
We’ve noticed our accuracy actually drops when ran on the inanimate objects. Even though the pressure classes of the objects are vastly different, intuitively, we figured that since they are so apparently different, the neural network should be able to be much more accurate than the hand and foot prints, which look much relatively closer to each other than the objects:


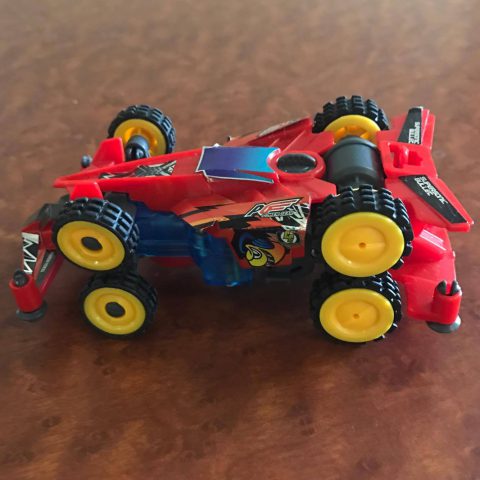
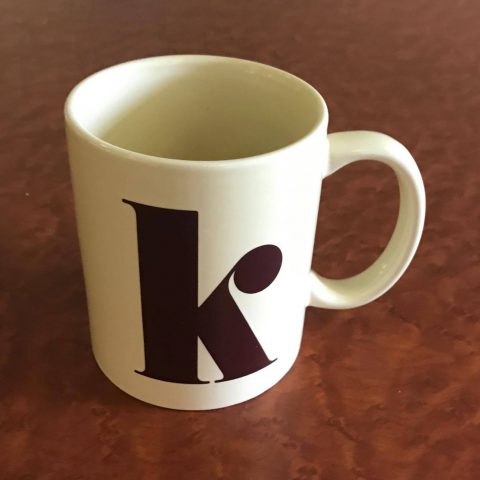
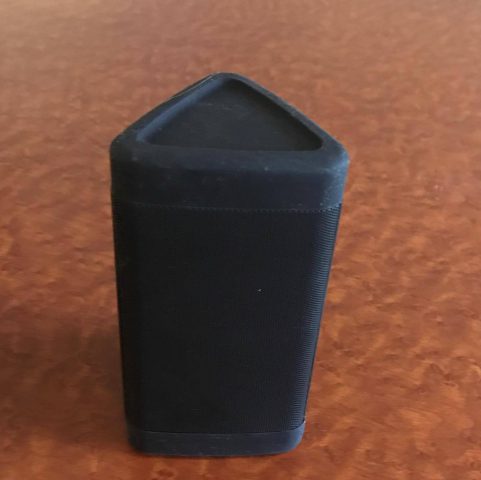
(From left to right: Speaker, Mug, Car)
As we can see, the differences between the bases of the three objects are very different, and to the human eye, it seems as if they should easily be differentiated with respect to each other. On the contrary, beacuse of the lack of distinct features (edges, color gradients, corners, etc). the nerual net can only identify objective visual data of the images, and since these images lack significant features, it actually can’t tell the difference between the images as well as other images such as hand and foot prints.
Once we were able to classify hands/feet, we were able to confirm our hypothesis that every hand is unique and are identifiable just like fingerprint. As we worked on this project, we’ve realized that thsi could have many more applications than just classifying hand and feet. Some other use cases include: butt classification for sit-down establishments like restaurants and barber shops, front door mat classifiers to identify visitors, and so on. We are optimistic from how accurate our foot and hand classifications ended up, and we definitely plan on thinking of more use cases for it.