fourth-final

High Speed Portraiture
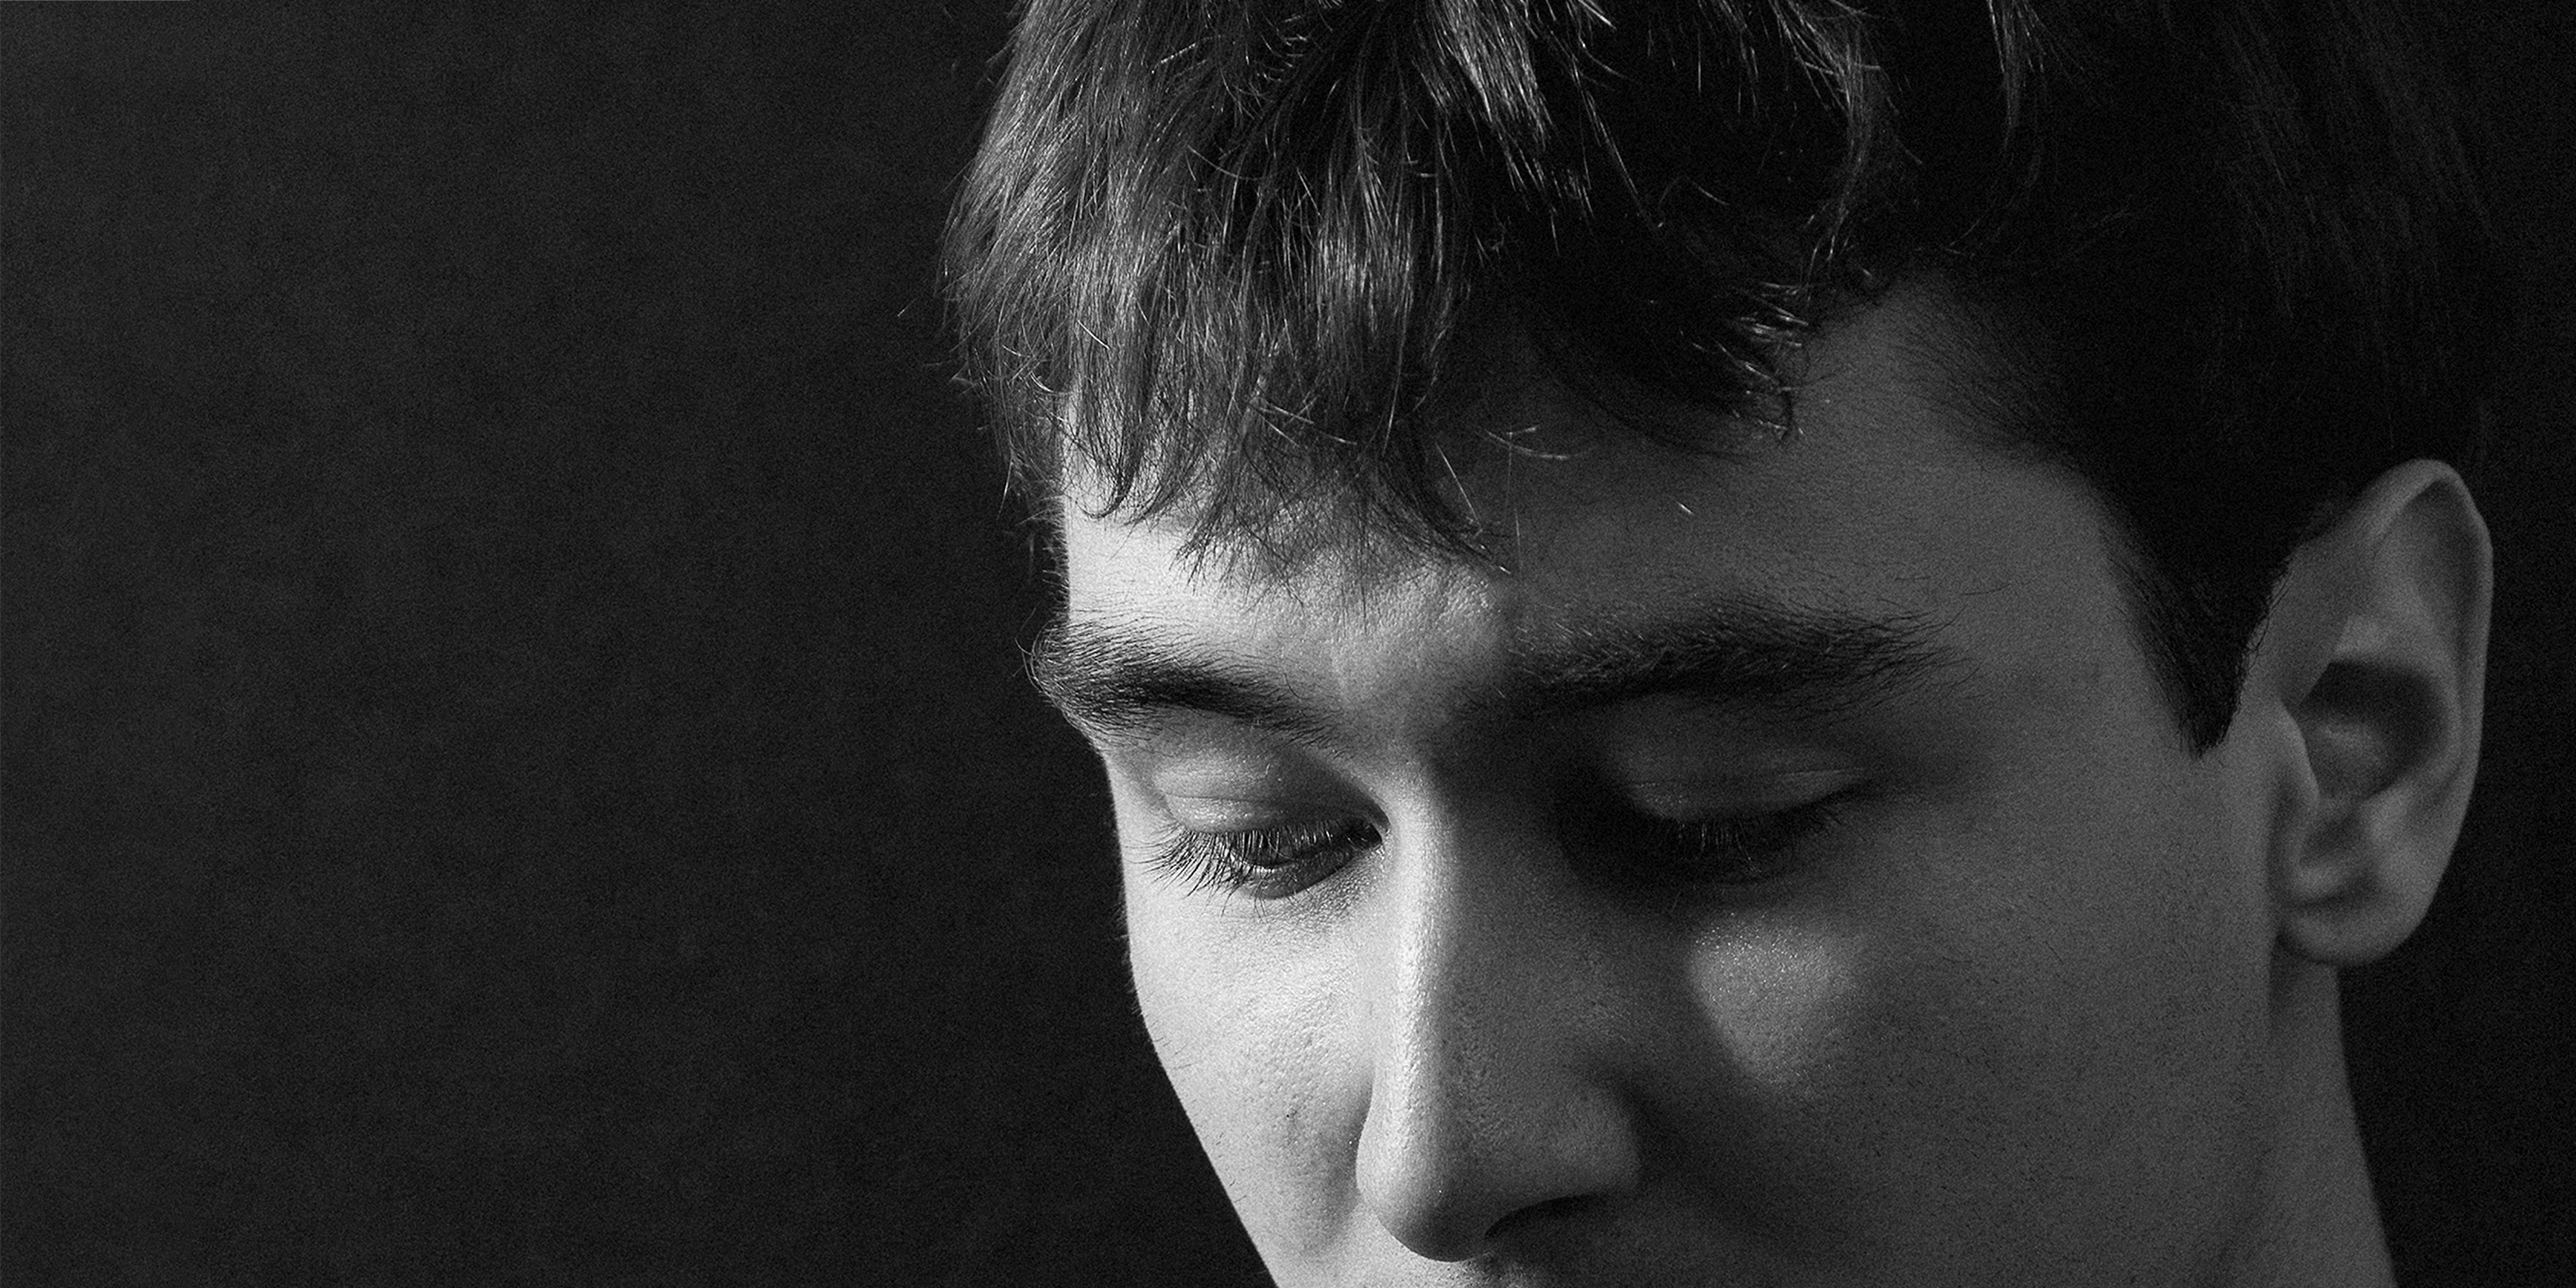
High speed footage and audio recordings provide not just a montage portrait, but insight into the photographers perspective while capturing a traditional portrait.


The work is composed of two portraits. The first, a traditional printed portrait, as captured by me in a completely non-experimental way. The second portrait is a view of the subject as I, the photographer, see them. Their movements, mannerisms, how they talk about themselves, how their face moves and slides between expressions, and the other elements that I am paying attention to when choosing how and in what instant to capture my portrait. This was captured in high speed to draw attention to details, micro-expressions, fidgets, and face movements that otherwise would go hidden or diminished.

This project is interesting because it gives a behind-the-scenes look at the process without actually being a behind the scenes look. The high speed portrait stands alone as a portrait, related yet distinct from the printed portrait.


I am not the first photographer to experiment with high speed cameras or working to deny the characteristics of high speed cameras to make them appear like other works, in aesthetic. Sam Taylor-Wood’s Hysteria, is one example, Bill Viola’s The Passions another. I was also inspired by radio work, such the podcast Beautiful/Anonymous hosted by Chris Gethard, and the style of first person characterization utilized in episodes of The Truth and The Heart, a form I have utilized in my own radio work before.

These portraits do not hinge on the high speed camera, and I did not use the high speed technique to reveal or re-contextualize someone, but instead to just draw focus and attention – this is also how I chose to edit the clips, quickly and impatiently; denying the high speed footage of the time it takes for one to discover ultra slow motion details.


This project succeeded in my primary technical goal, which was to use the (all things considered) cheap high speed camera in such a way as to achieve results that looked good and didn’t have a ‘high speed’ aesthetic. This included a great deal of color grading with a variety of techniques. The footage was shot high key and low key, and was often both over and under-exposed, which posed interesting color and post-production challenges. I utilized de-flicker techniques as well.

The main technical failure was being unable to tackle the noise artifacts remnant on the footage. This is possible and not even experimental, I just didn’t have the time or tools available. Using this camera going forward, noise reduction is essential.

The other failure was that I did not complete enough portraits. At least 3 things are needed for these to conceptually fall into a set. As just two – one high-key and one low-key, they play in opposition to each other when observed; making or failing to make statements I have no intention of making. Various methods were considered to tackle this, such as numbering the portraits arbitrarily or using a wrapping aesthetic of ‘test footage’ with bars/tones and so on to imply the existence of other films. These were ultimately decided against.


High Speed Portraits: evan from Smokey on Vimeo.

High Speed Portraits: lexi from Smokey on Vimeo.


Making Of

First was the audio recording. Here’s a video explaining what I did to get the audio how I wanted it.

Then the process of capturing the footage. First I set up and took test shots of my regular camera until I got the lighting how I wanted it, and to loosen the subject up. The high speed camera was set to a 50% buffer, and I triggered both cameras at the same time when aiming for an actual portrait capture. Each video takes a few minutes to save out of the buffer when capturing, so the process is slow. Keeping my stereo system on and a conversation running helps keep the subject from getting bored. I also made sure they were not moving too much by having them remember and return to a home position – this way I didn’t lose focus (hopefully).

Editing was the last and most time consuming aspect. Nothing magical and no tricks. Color grading was done with the lumetri tools in premiere, and starting working with my white balance and color balance so it’s not so incredibly red. Then I played with cooler lookup tables’s as a starting point, as they tend to add cyan as opposed to just desaturating reds. This keeps my image natural while balancing out the color. Evan’s was always intended to be black and white, which helped deal with color grading, and I used the red channel to adjust his skin tones separate from his jacket and background (which I darkened).

There was some after-effects work, rotoscoping or painting out reflective elements that were distracting, such as the chair Evan was sitting in. Again, time-consuming work that isn’t too difficult.

This project is a whole lot of simple things that came together in a complicated way. By focusing and giving myself the time to do everything (except that dang noise reduction) right, I was able to achieve a technically polished project in the class environment where I don’t usually have time for these details.
fourth-Final-Proposal

For my final project, I would mainly like to collaborate with somebody else on a new project. My best work in previous semesters has come out of collaboration and this class is a great chance to do something remarkable that I couldn’t do alone.

That said, I would like to revisit the high-speed camera portraits. Instead of exploring in-between expressions, I would like to explore time-remapping and ‘busy’ scenes.

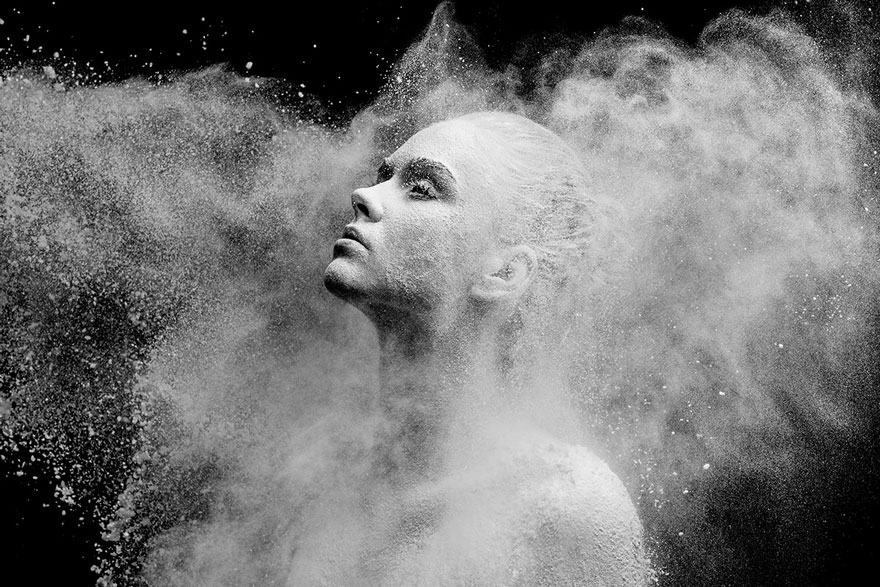
I love the idea of a high speed portraits captured as portraits (not as “slow mo shots”), but in high speed, and would like to explore this further and take advantage of the tool more. Things like moving the high speed camera to create depth and parallax in a portrait with a lot ‘else’ going on – think throwing colored flour and so forth – in an aesthetic that is lit well and visually stunning as hell; I know these tools can bring something new and exciting to portraiture but I’ve yet to really get to it.

Imagine this but slowly moving. Still, basically, a still frame; just a spark of life and character and expression; more cinemagraph than videography.

fourth-Event

Monday Afternoon from Smokey on Vimeo.

My event process captures a boring non-time; me waiting, hanging with my cat. This ‘downtime’ is something I do every day, yet when I think about or communicate about my day, it is literally the gaps around which my actual ‘events’ take place. This idea wasn’t interesting to me until I realized that this sort of time is basically all my cat does. He chill’s all day long. I captured a few of these downtime moments, emphasis on my cat, I temporally overlapped the moments, and let them loop. In this way drawing focus to small details that otherwise go unnoticed, just like how these moments go unnoticed during our days.

I was further inspired by Cinemagraphs and Afrianne Lupien’s ‘Crazy Cat Portraits’, which do a great job of being a polished and crafted magical photos without loosing a documentation feel.

The system for capturing this was nothing special. Lots of 360 videos without moving a camera, but with moving my cat and myself. Then an After Effects composition to mask out sections, and repeating layers to create the loops for the last step. Some color grading for clarity, not style. Time consuming, but nothing tricky.


Process

This project took a lot of twists and turns, here is a updated review of my progress and how I got here. I wanted to push the boundaries of what I have been doing in 360 video. My main objective was to create something that seemed a little bit magical, while capturing an routine-like event, as looping is amenable to exaggerating and re-conceptualizing routines.

I knew if I could loop 360 with camera movement, I could achieve a solid effect.

My first experiments involved things that moved in some radial way. I could combine rotating objects, with -perhaps- opposing or in-sync camera movement to create visually stunning (and magical) environments.

This ended in disappointment, for while they are interesting in an equirectangular view, the scene itself is just what it is. I was unable to build a rig to rotate the camera that I was pleased with, which I feel was the missing ingredient to this method.

I briefly experimented with larger radial camera movements, which were fascinating to watch in an equirectangular view, as the distortion morphs around.

Fascinating, but a proper inquiry into capturing interesting morphing equirectangular scenes is not what I set out to do, and in 360 they are just vomit inducing videos. Stabilizing could give myself some level of ‘freedom’ after the fact to make sure the loop points were perfectly lined up, and help prevent vomit; as well as more ‘perfectly’ (smoothly) morphing shapes. The first technique I tried was manually locking a point into the center of view. 10 seconds with this technique took over 2.5 hours of grinding effort in AutoPano video. The results were not worthwhile, motion blur and perspective distortion was too big of a factor on top of even an ideal single-point stabilization.

The second method was to transform the video into a cubemap, track points on each face, and stabilize (via warp) the average tracking between faces to create smooth transitions, and convert back to equirectangular. I used Mettle’s after effects plugins to perform this technique, which crashed my computer every time it tried to solve for the camera. While the technique is still conceptually solid, the camera movements, motion blur, and shake amount were seemingly too large for the method to handle.

When I finally settled on the method that would be my final project, I did a test shoot one evening. I filmed my room with just my cat in it for over 2 hours. 8.96gb of footage, and my cat almost didn’t move at all.

Sunday Night, Static Cat from Smokey on Vimeo.

In order to get around processing all 9gb of footage, I did the entire composite on the ‘double-bouble’ source footage. Since Samsung Gear 360’s software only wants to stitch SOOC video, I had to export both ‘bubbles’ and stitch with autopano video (which explains the watermarks).

If nothing else, this taught me to film as little extra footage as possible for the sake of processing time later.

For the final project, I thus settled on: Static Camera, myself in the video (to interact with the cat), daytime/window light, and a flat documentary aesthetic. Results above.

fourth-eventProcess

I am still working on looping, and will experiment tomorrow with rotoscoping and looping around a 360 video.

After talking with other students I was inspired to work on a project combining strobes and continuous light. I would also like to play with focus blue and this effect, but I need more hands to do that.

Flash/Continuous mixing is not a new technique. Combining continuous and flash is a necessary tool for photographers who shoot with flash out doors. The flash output is not affected by the shutter speed, so a photographer can change the shutter speed to get independent control of the balance between flash light and continuous light, in-camera. It’s a very powerful (and difficult) tool for photographers to master.

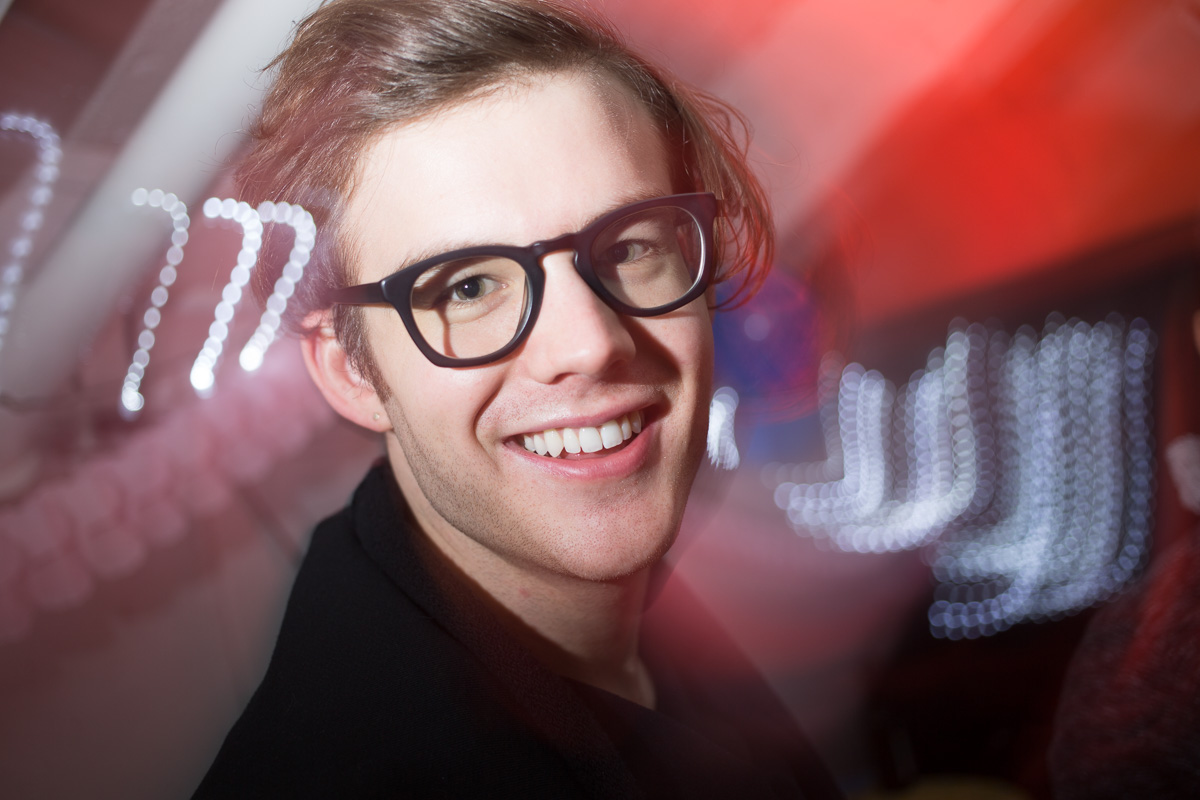
This is something I have done before for creative ends, as seen above, where I shook my camera while I fired my flash.

I set up a quick studio, a black backdrop, a continuous LED light (right), and a flash (top left, above lamp) with a grid on it (to control spill). The standing lamp (bright spot, left) was not used during the exposure.


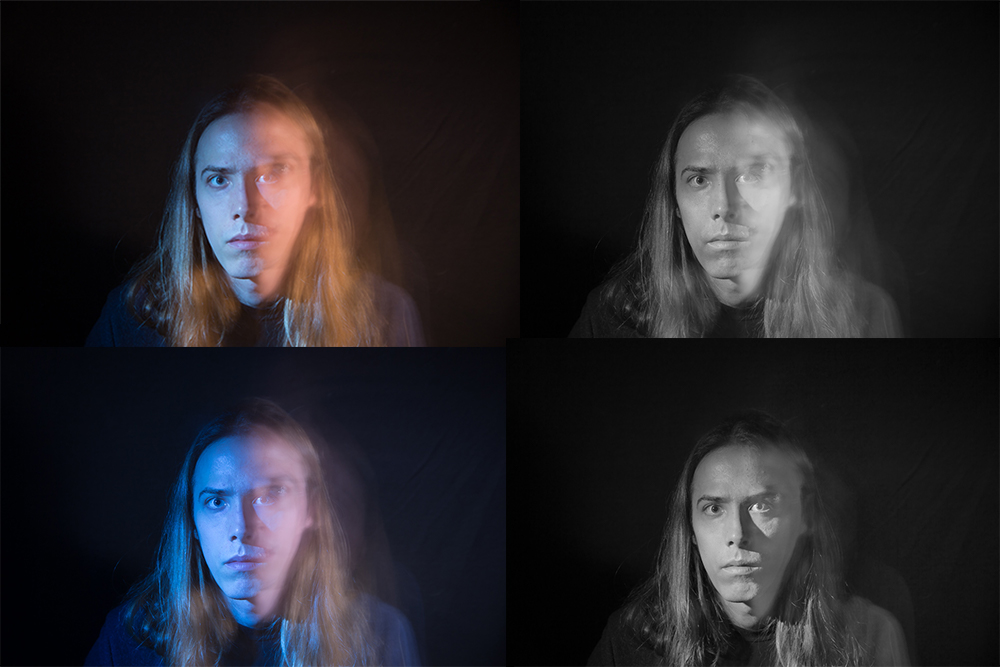
There is one clever thing I did. I put a warm filter over my continuous light and a cooling gel filter over my flash. By shooting RAW and adjusting the white balance, I had control over both of these lights independently. I could push them further blue and further orange. Doing this, I mixed to black and white. In the black and white mix, I can adjust thee white balance and the brightness of my blue channel and my orange channels.

This way, I could fine tune the balance after-the-fact, and edit my image with much more precision and control over the perceived lighting and shadows than if I had used masks, or dodging/burning.

These are all from the same source image. The left images are adjustments of white balance, and the right images include white balance and black/white mix adjustments to get different looks. Notice the shadows on the image-right side of my face in the BW photos above.

Moving around during the exposure got your standard “multi-exposure” “two-face” look, which is pretty cliche.  Heisler nailed it, I see no reason to just make a bad imitation.

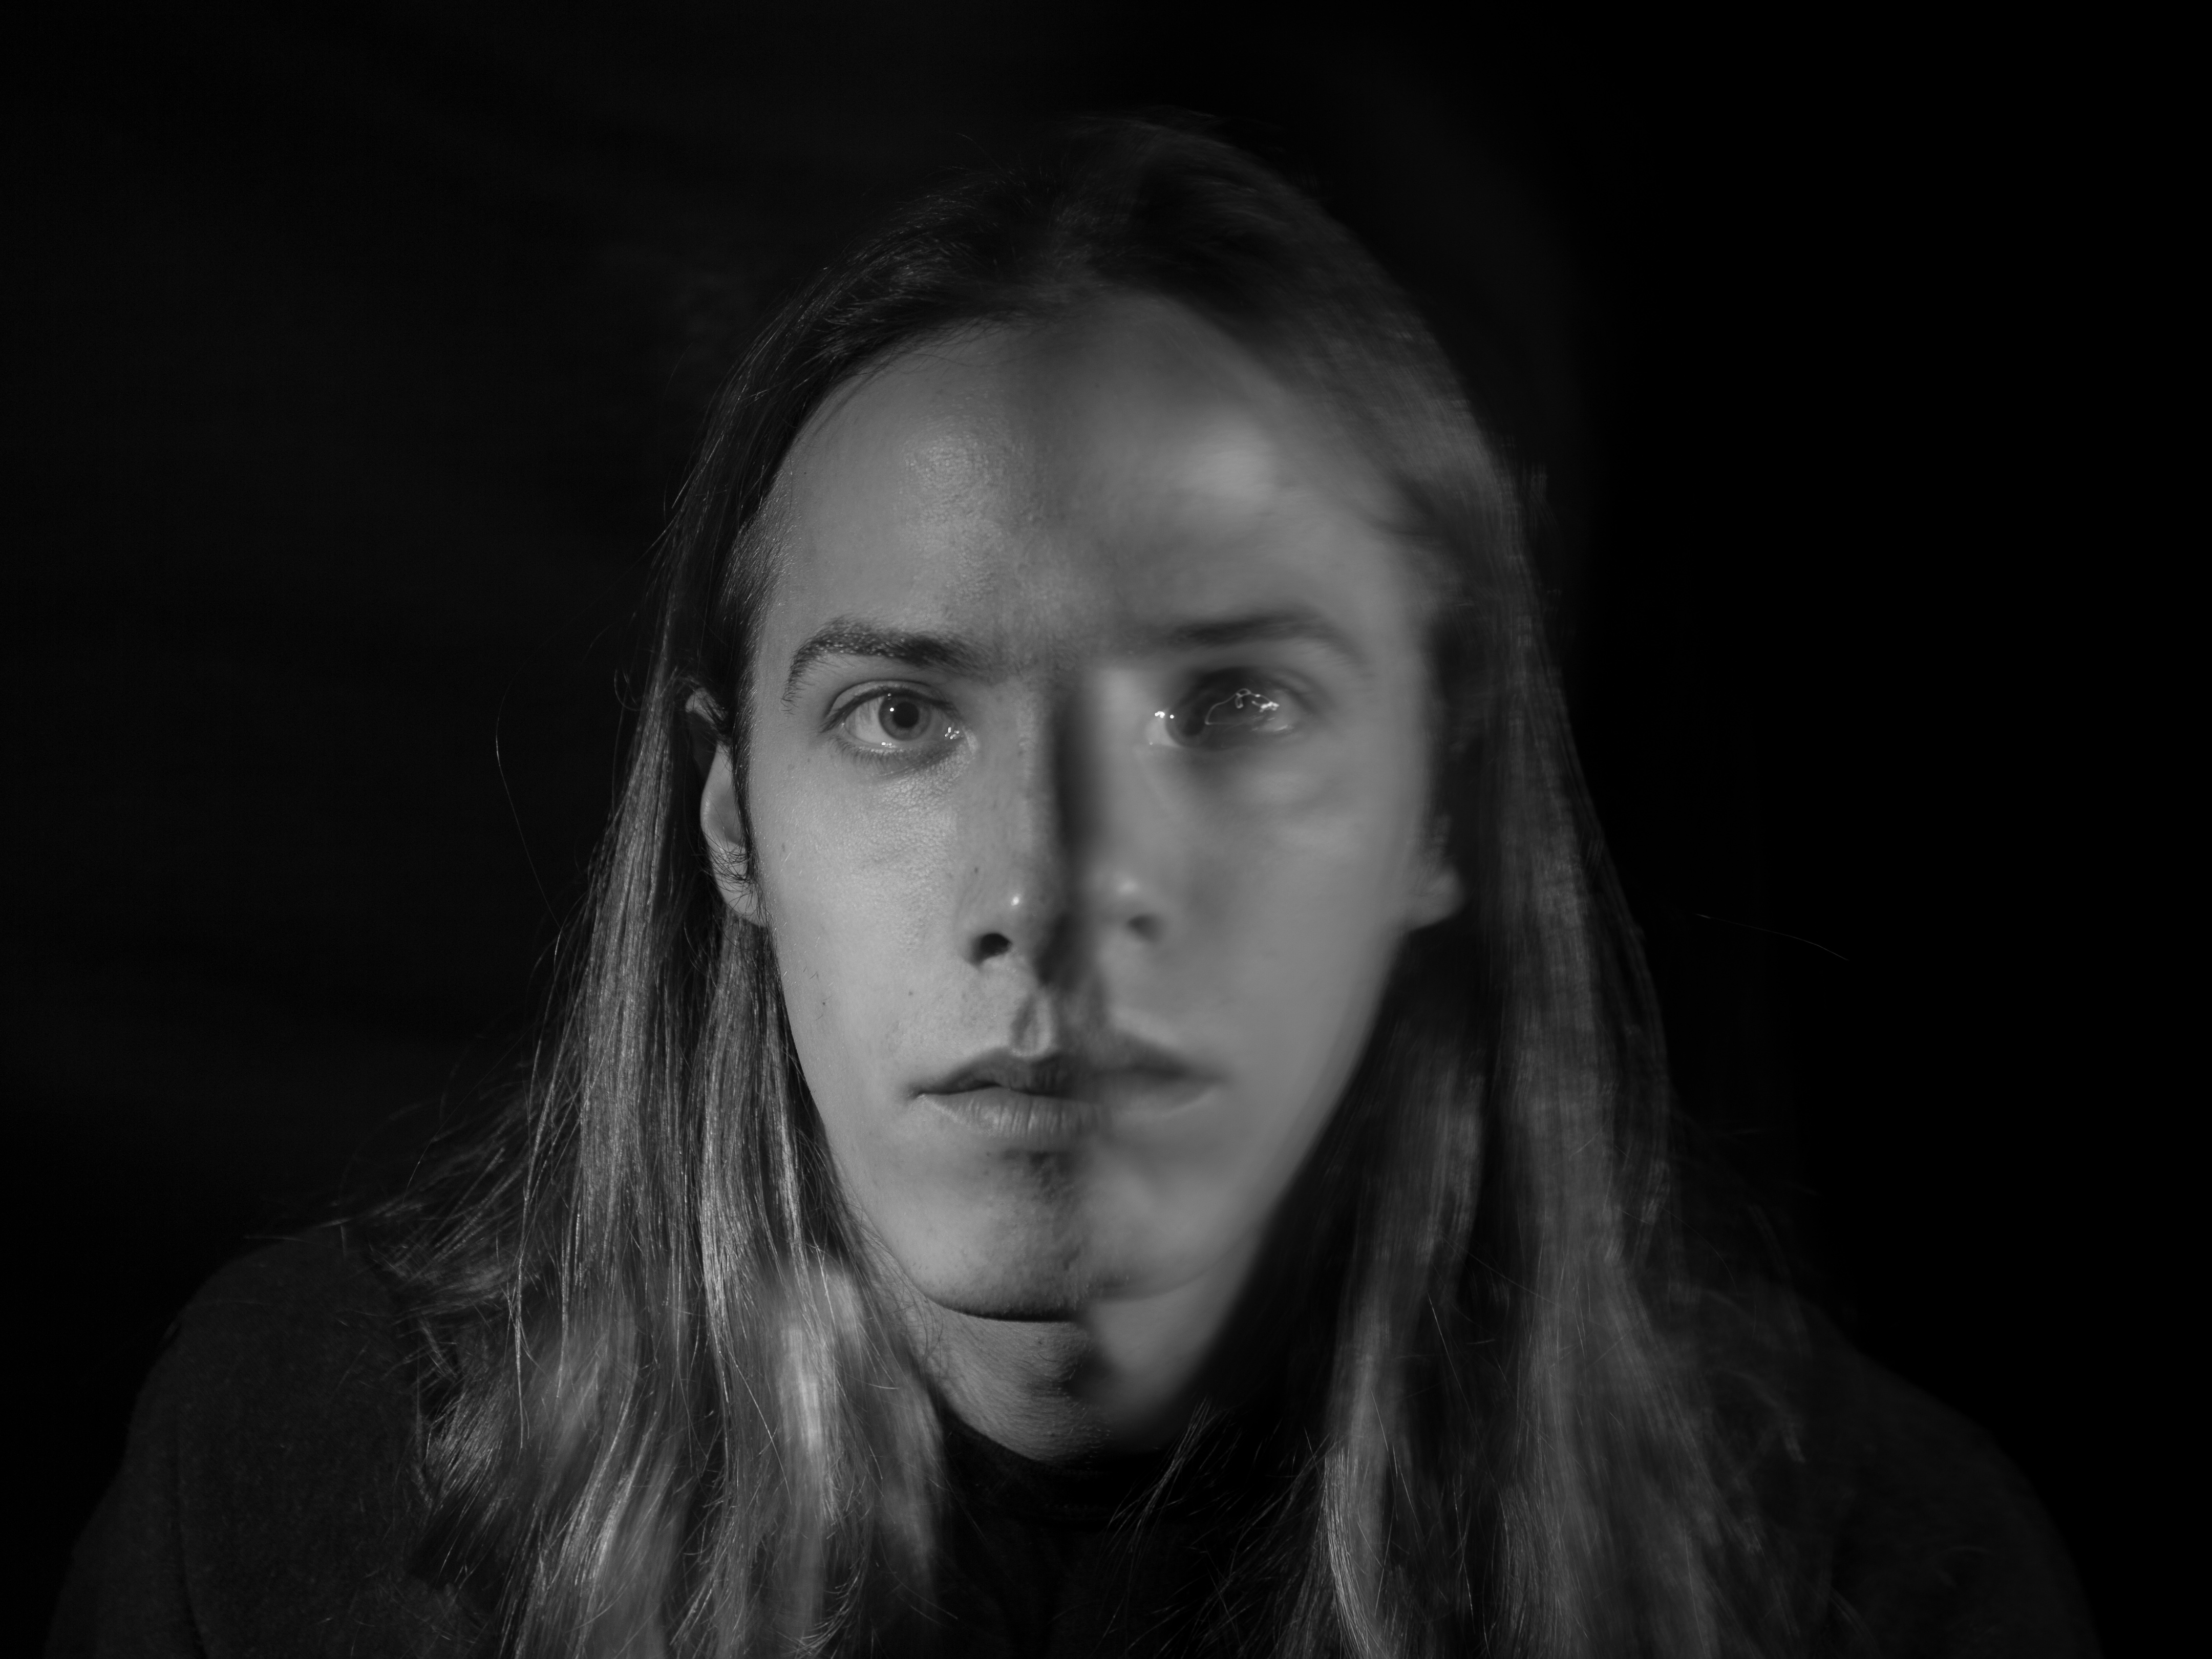
Attempting to stay still, however, proved more interesting. Uncanny, you might say.


Next, the actual direction I may take my final event project. For this image, I removed the color filters from both lights. The color version still looks like junk, so I mixed black/white here (okay, some split toning, to bring back my blue/orange palette in spirit), but I would may shoot color or go for a more documentarian (read: ‘non-artsy’ ‘point-and-shoot’, ‘just captured a slice of life’) feel for a final project.

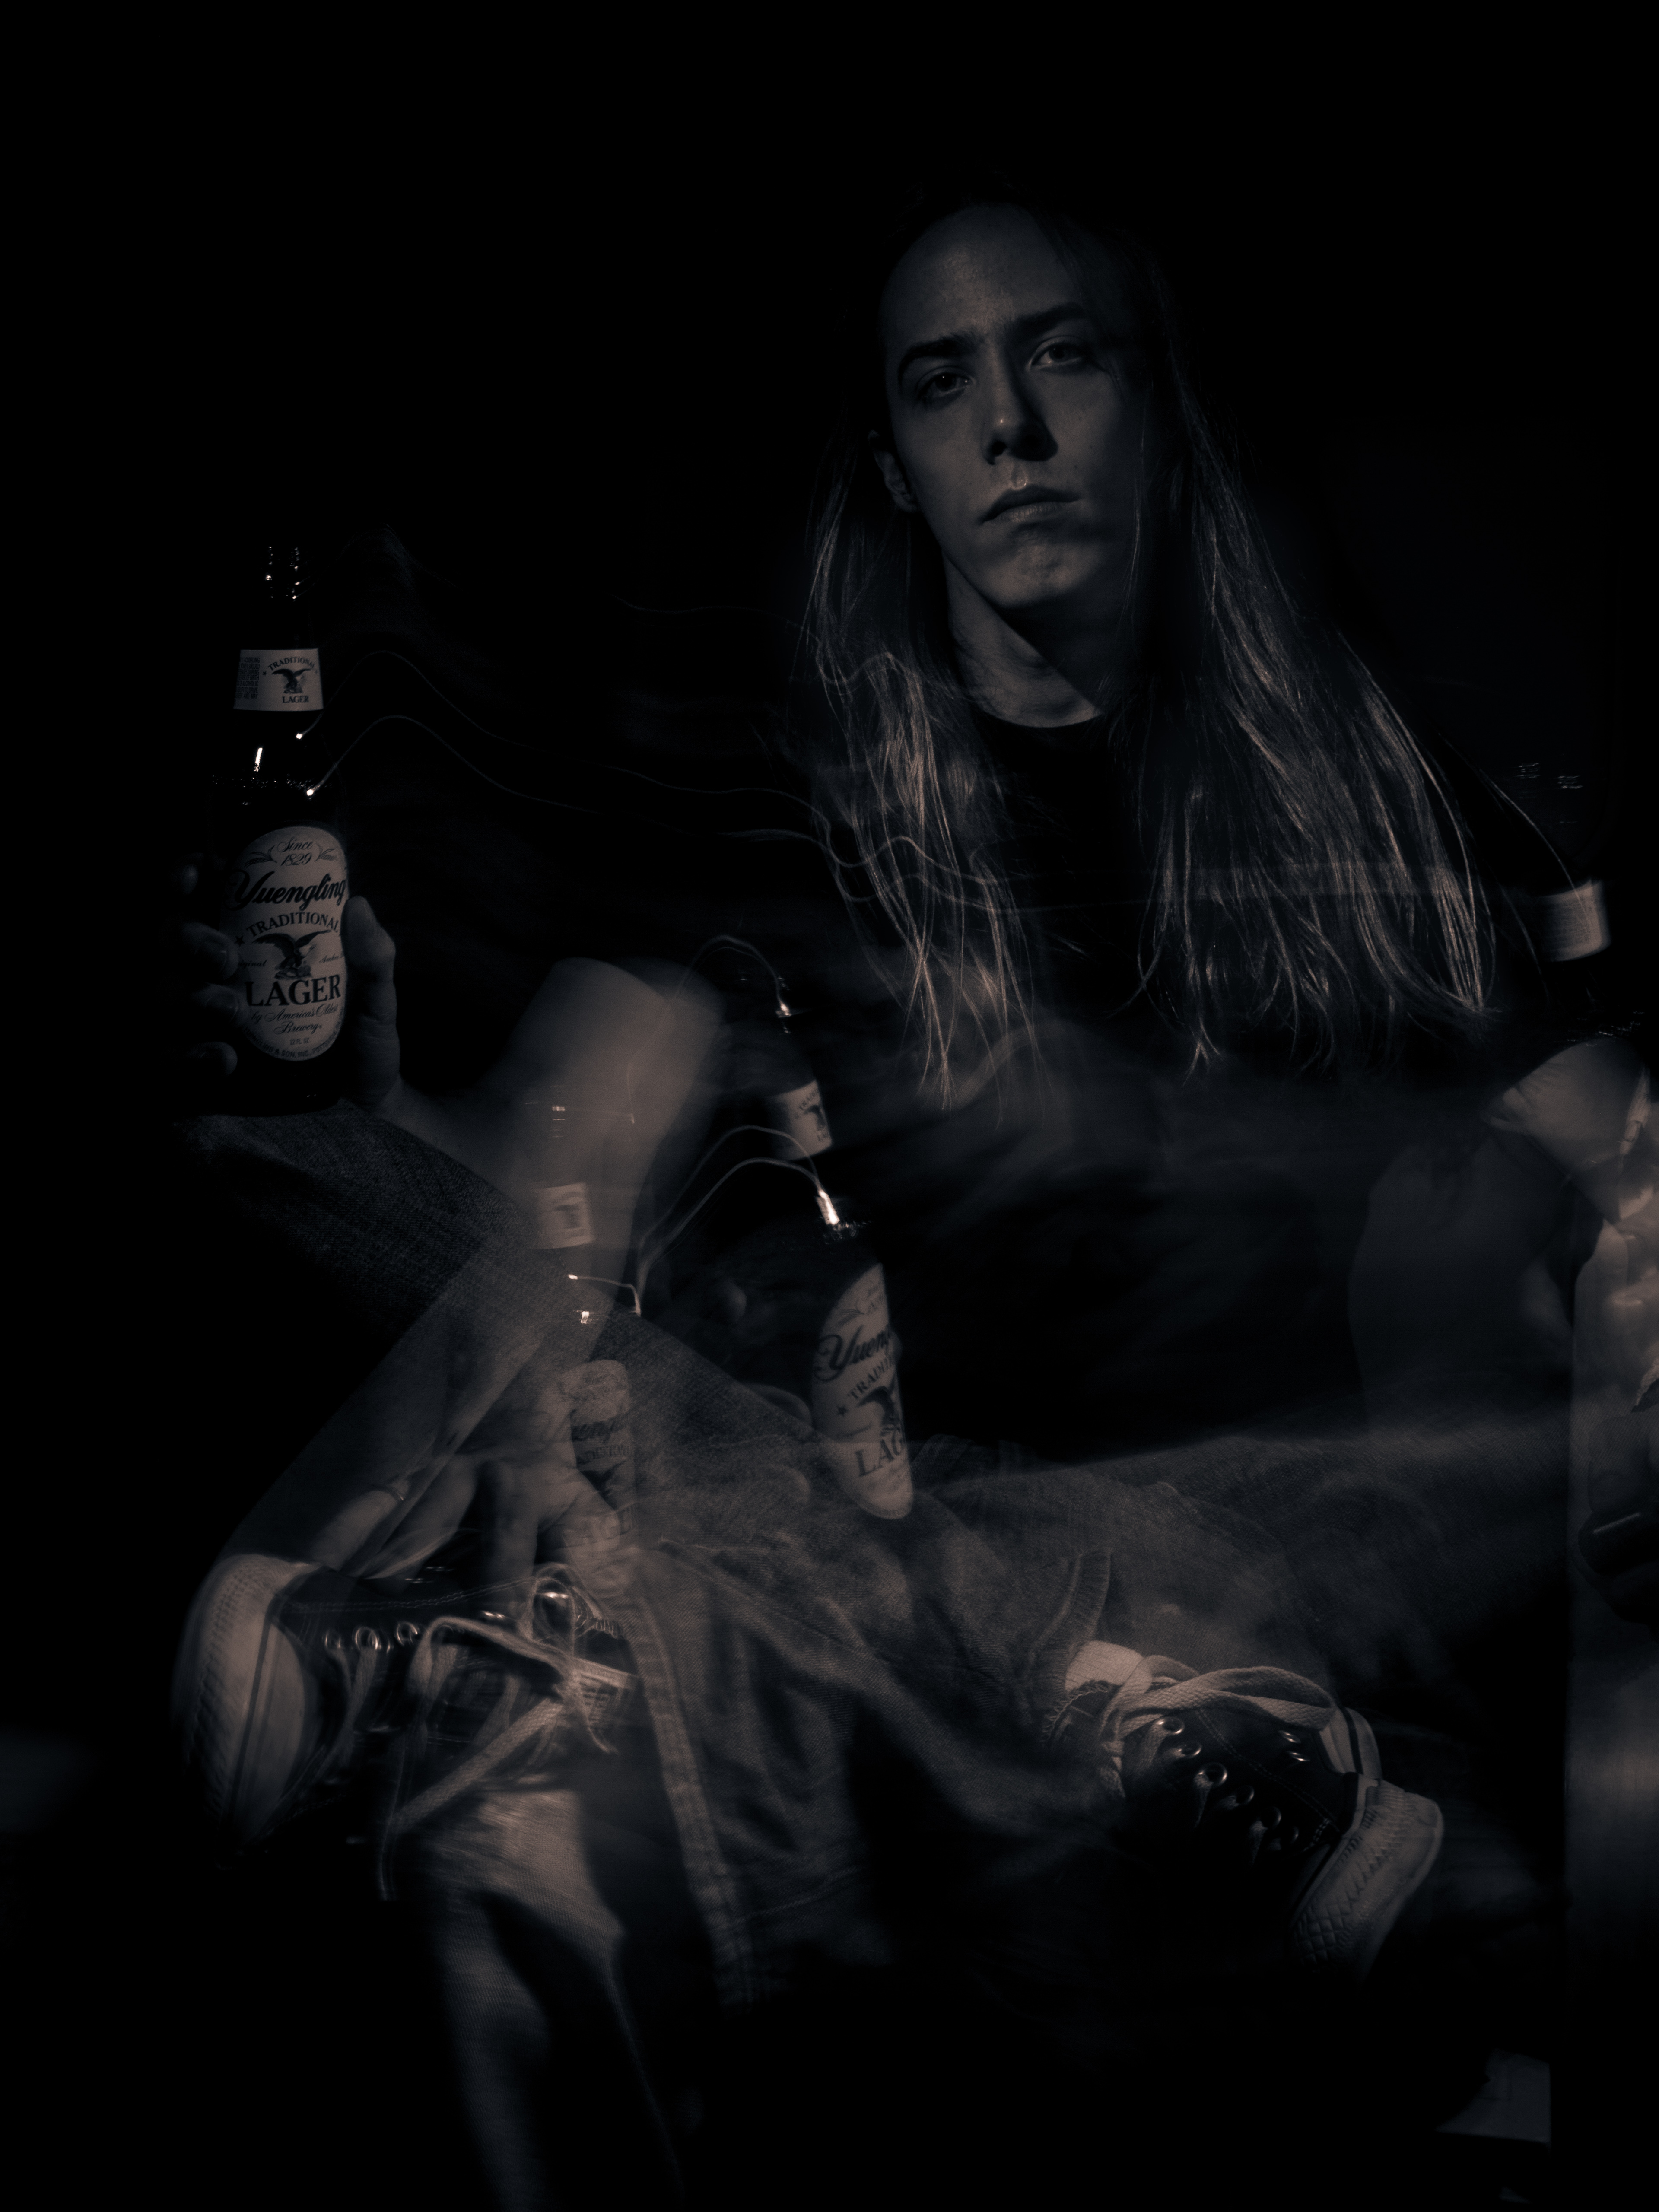
I light different parts of a scene with continuous and strobe light. This gives the continue blur a sense of movement – I capture an event; but allows my to highlight a part (a face) of this event with clarity; all in-camera. In this case the event is drinking a beer. The continuous light doesn’t light my face almost at all, so the beer is gone when I raise it up. You see me fidgeting, crossing/uncrossing my legs, moving the beer, and so on. Note: this image is intentionally underexposed (I dropped it down in post).

Again, this image was created in-camera, colors/tones/acne edited in post for fun/habit.

If I did pursue this technique for my final project, I would get a model so I could focus on the photography side of things. I’d like to capture individuals performing different actions, using motion to a greater extreme than it could be done without a flash.

fourth-eventProposal

I would like to explore looping. I am fascinated with perfectly looping gifs (remembering loop findr) and how we look at these loops (and canon’s) differently as events than ones that either do not loop perfectly or are not looping.

I would like to use video editing magic to create impossibly looping gif’s of my morning routine.

Any routine element is conceptually amenable to be shown as a loop, isolating the event from the world around it and showing it in it’s repetitive, unchanging nature.

Experimentally, I want the gif’s to create a reaction of “waitwhat?” or “how did that happen?”, the magical impossibility of the video drawing attention to, yet juxtaposed by, the repetition and banality of the event.


Examples:

fourth-place

A compressed version of the final image. Click to open.

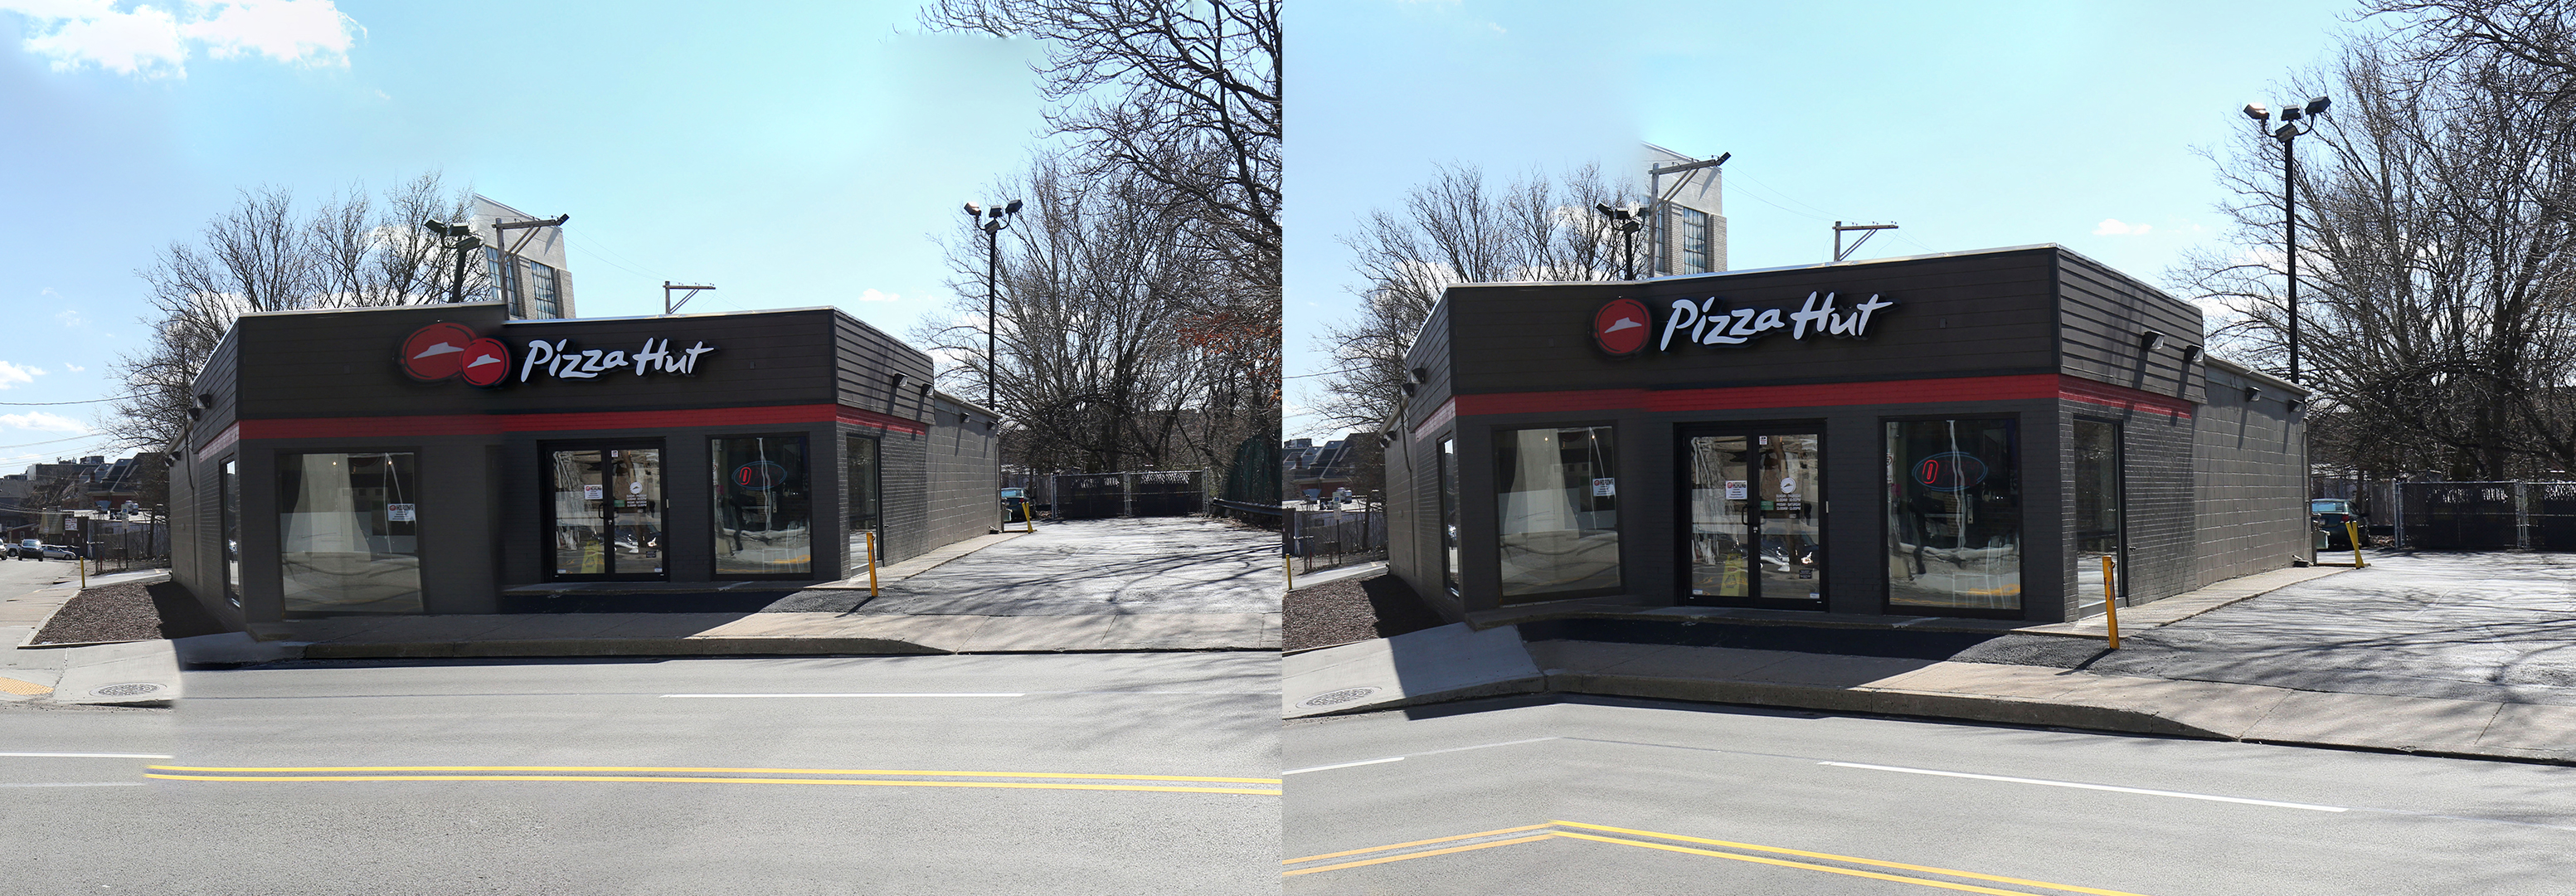
The goal of my project was to capture the entire length of Baum Blvd. and present it in a single image. The image is about 41 feet long by 4 inches printed. It’s dimensions are 150454×1200 pixel’s. The aspect ratio is about 125.

Baum Blvd exists between, through, and across many different neighborhoods in Pittsburgh. Some sections function metaphorically as a living timeline of the history of the city while other sections truly represent the living and always evolving city as it changes. Portions are always under construction and from one end to the other, a mere 1.6 miles, you will find a little bit of everything.

Pittsburgh is often talked about via neighborhoods. “Shadyside”, “Easy Liberty”, Bloomfield”, “Oakland” and so on all have their own charms, their own ideas, their own subcultures, their own image – in conversation at least as much as in reality. They are at best, geographic regions and at worst, damaging stereotypes. I posit these labels can do harm. Underneath the labels, the images, of the neighborhood is a city both simpler in it’s humanity and more complex in it’s construction. By presenting Baum Blvd. captured in a single image, I hope to challenge the language that so often dictates how we conceptualize this city.


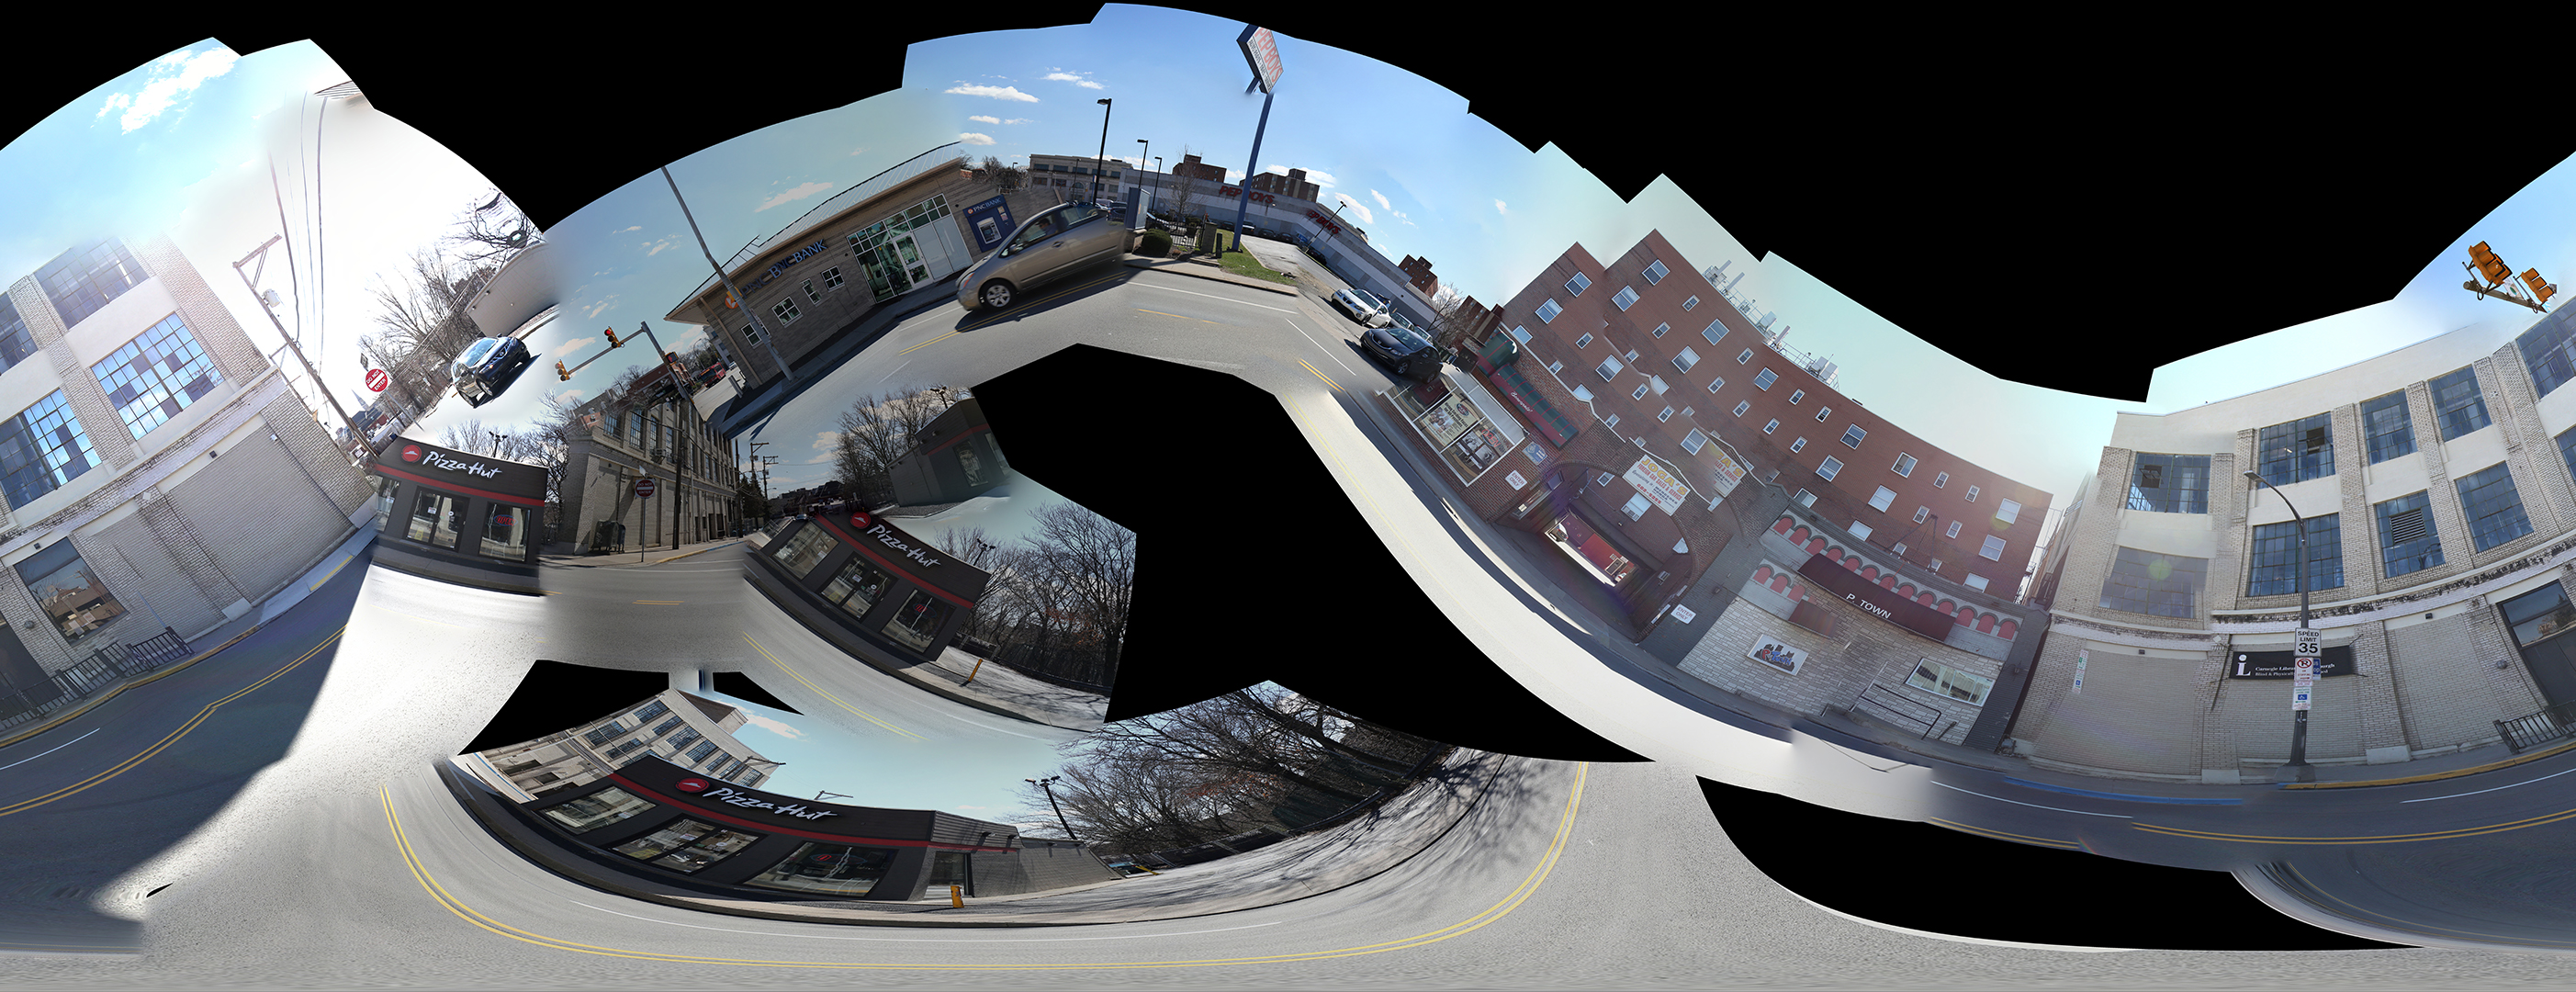
I took over 800 images, about one every 10 feet or so, down the 1.6 miles of Baum Blvd. I used Kolor Autopano Pro to take chunks of the images, usually between 3 and 26 at a time, and stitch them together. I then assembled these in Photoshop. I focused on editing to achieve a smaller number of apparent stitches, as opposed to editing the “worst” stitches to be less noticeable. Where the stitches function well, you will not notice. Where the stitches fail, it’s very apparent.

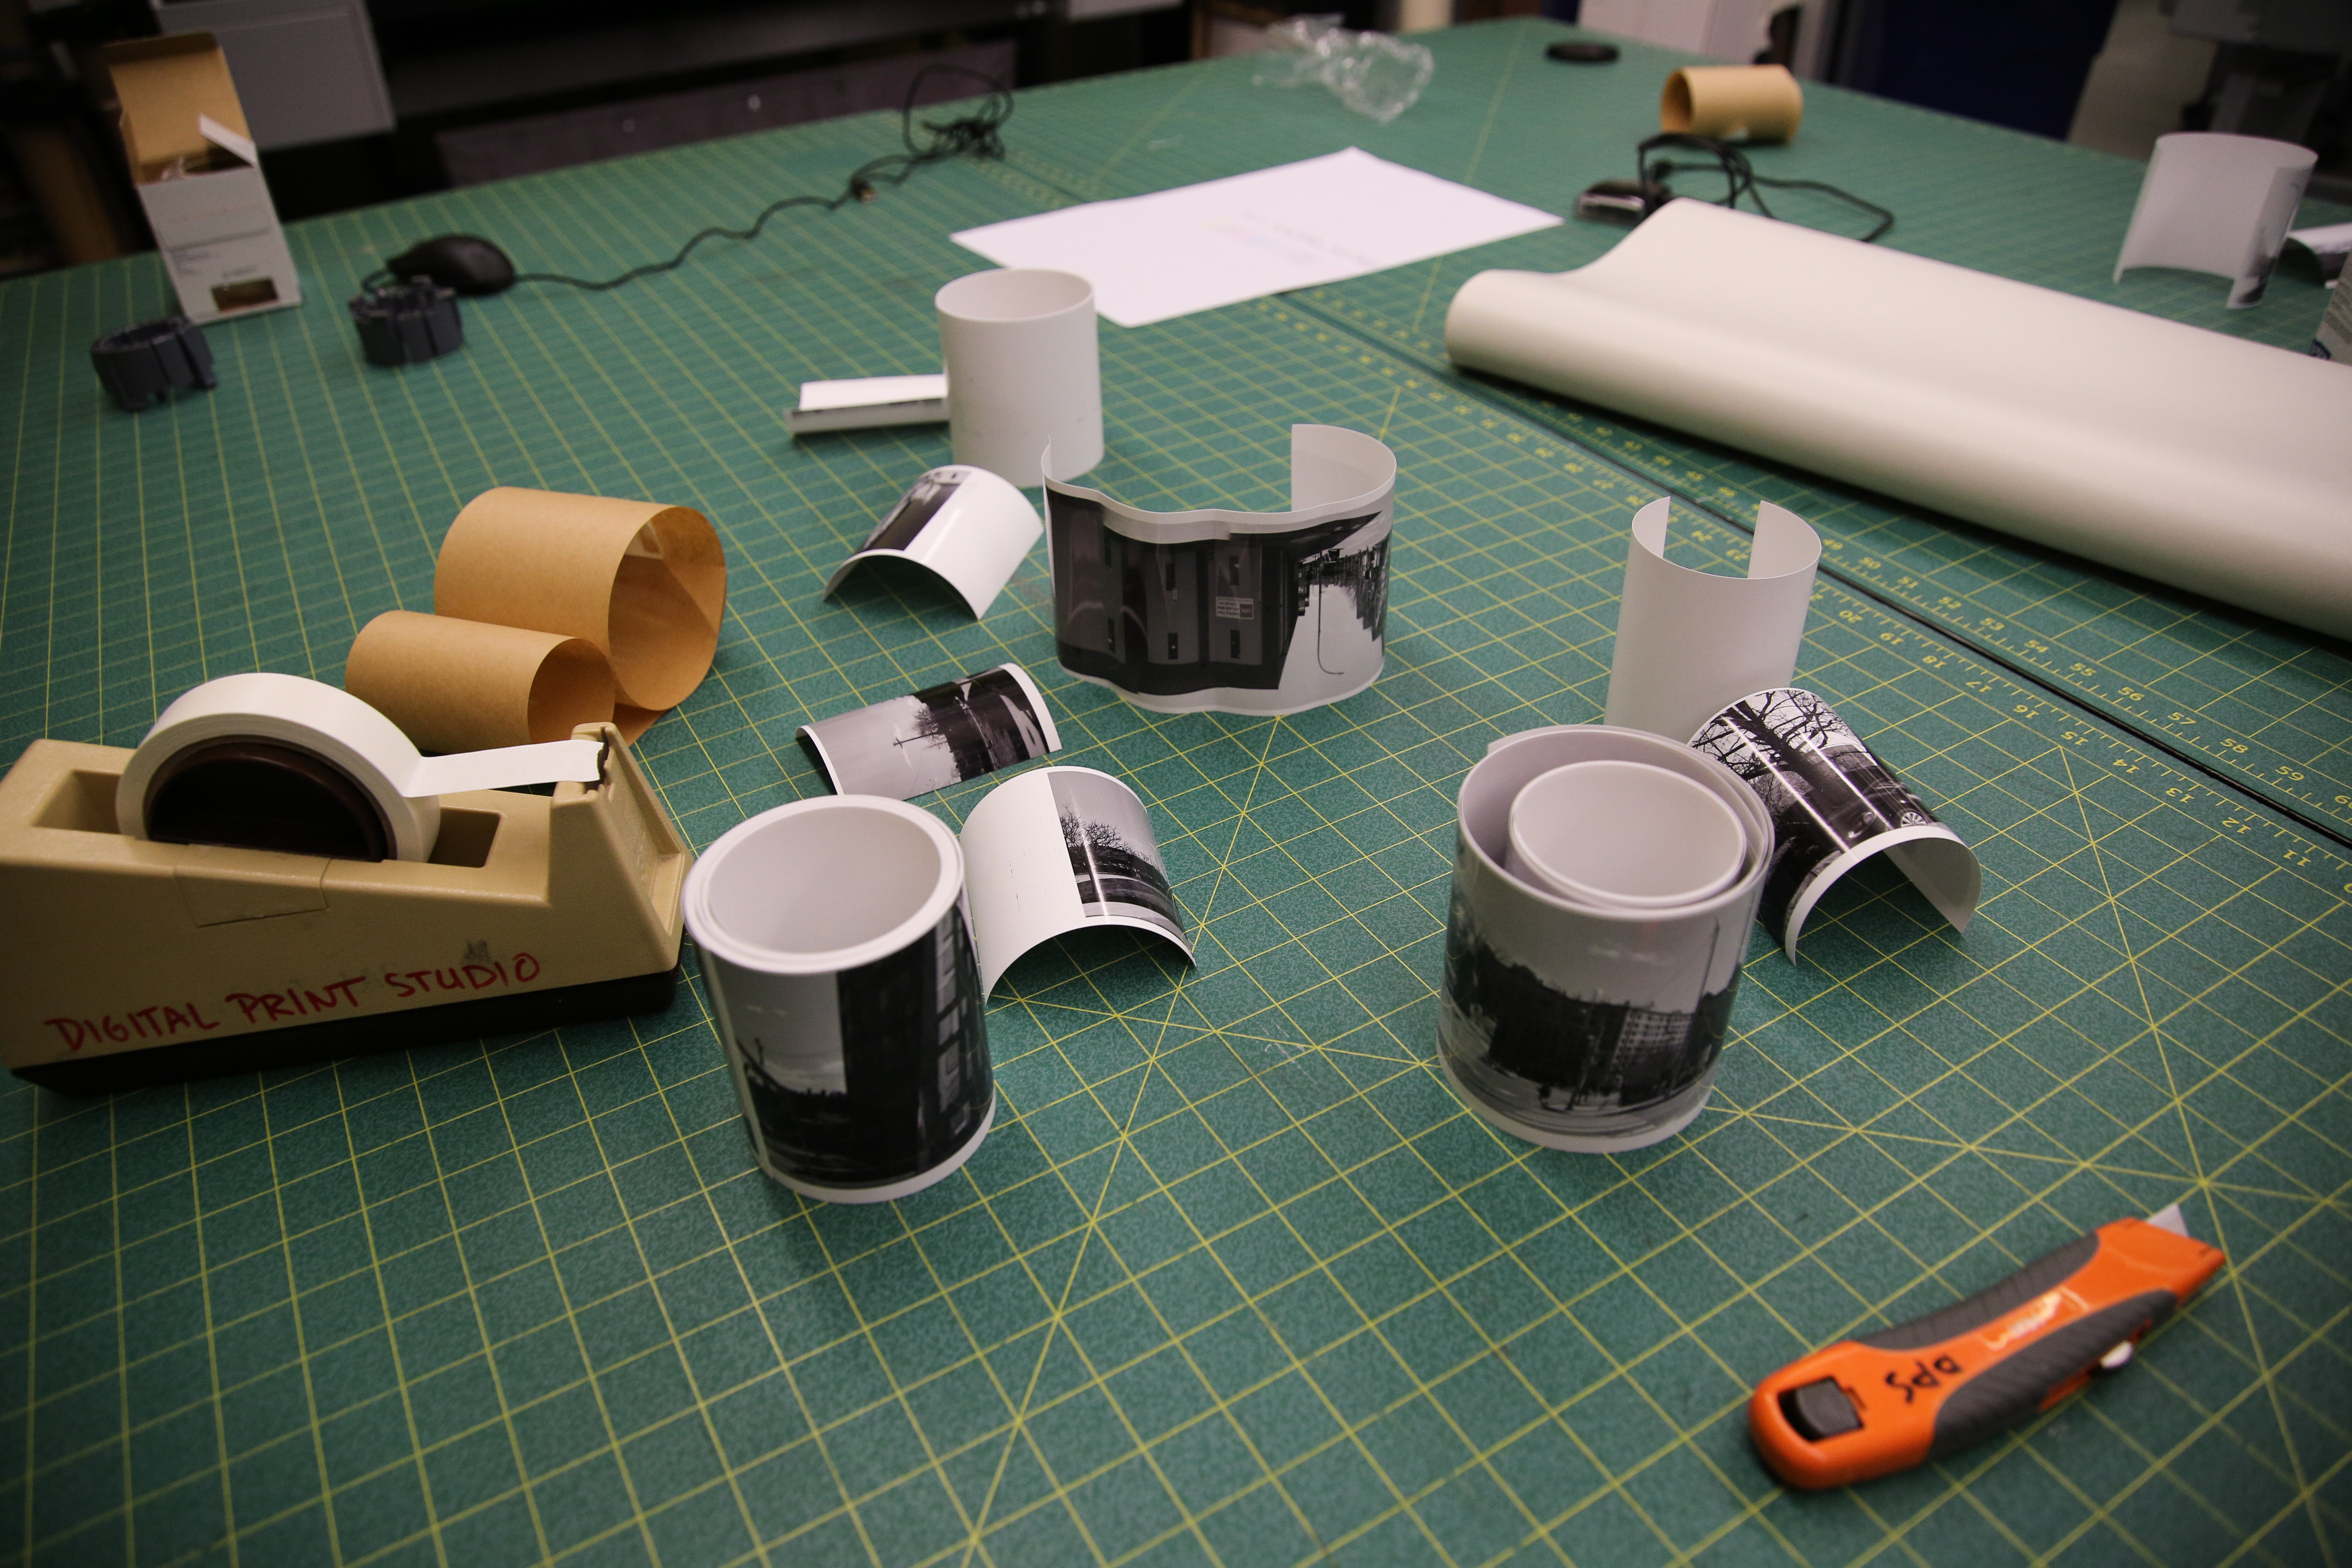
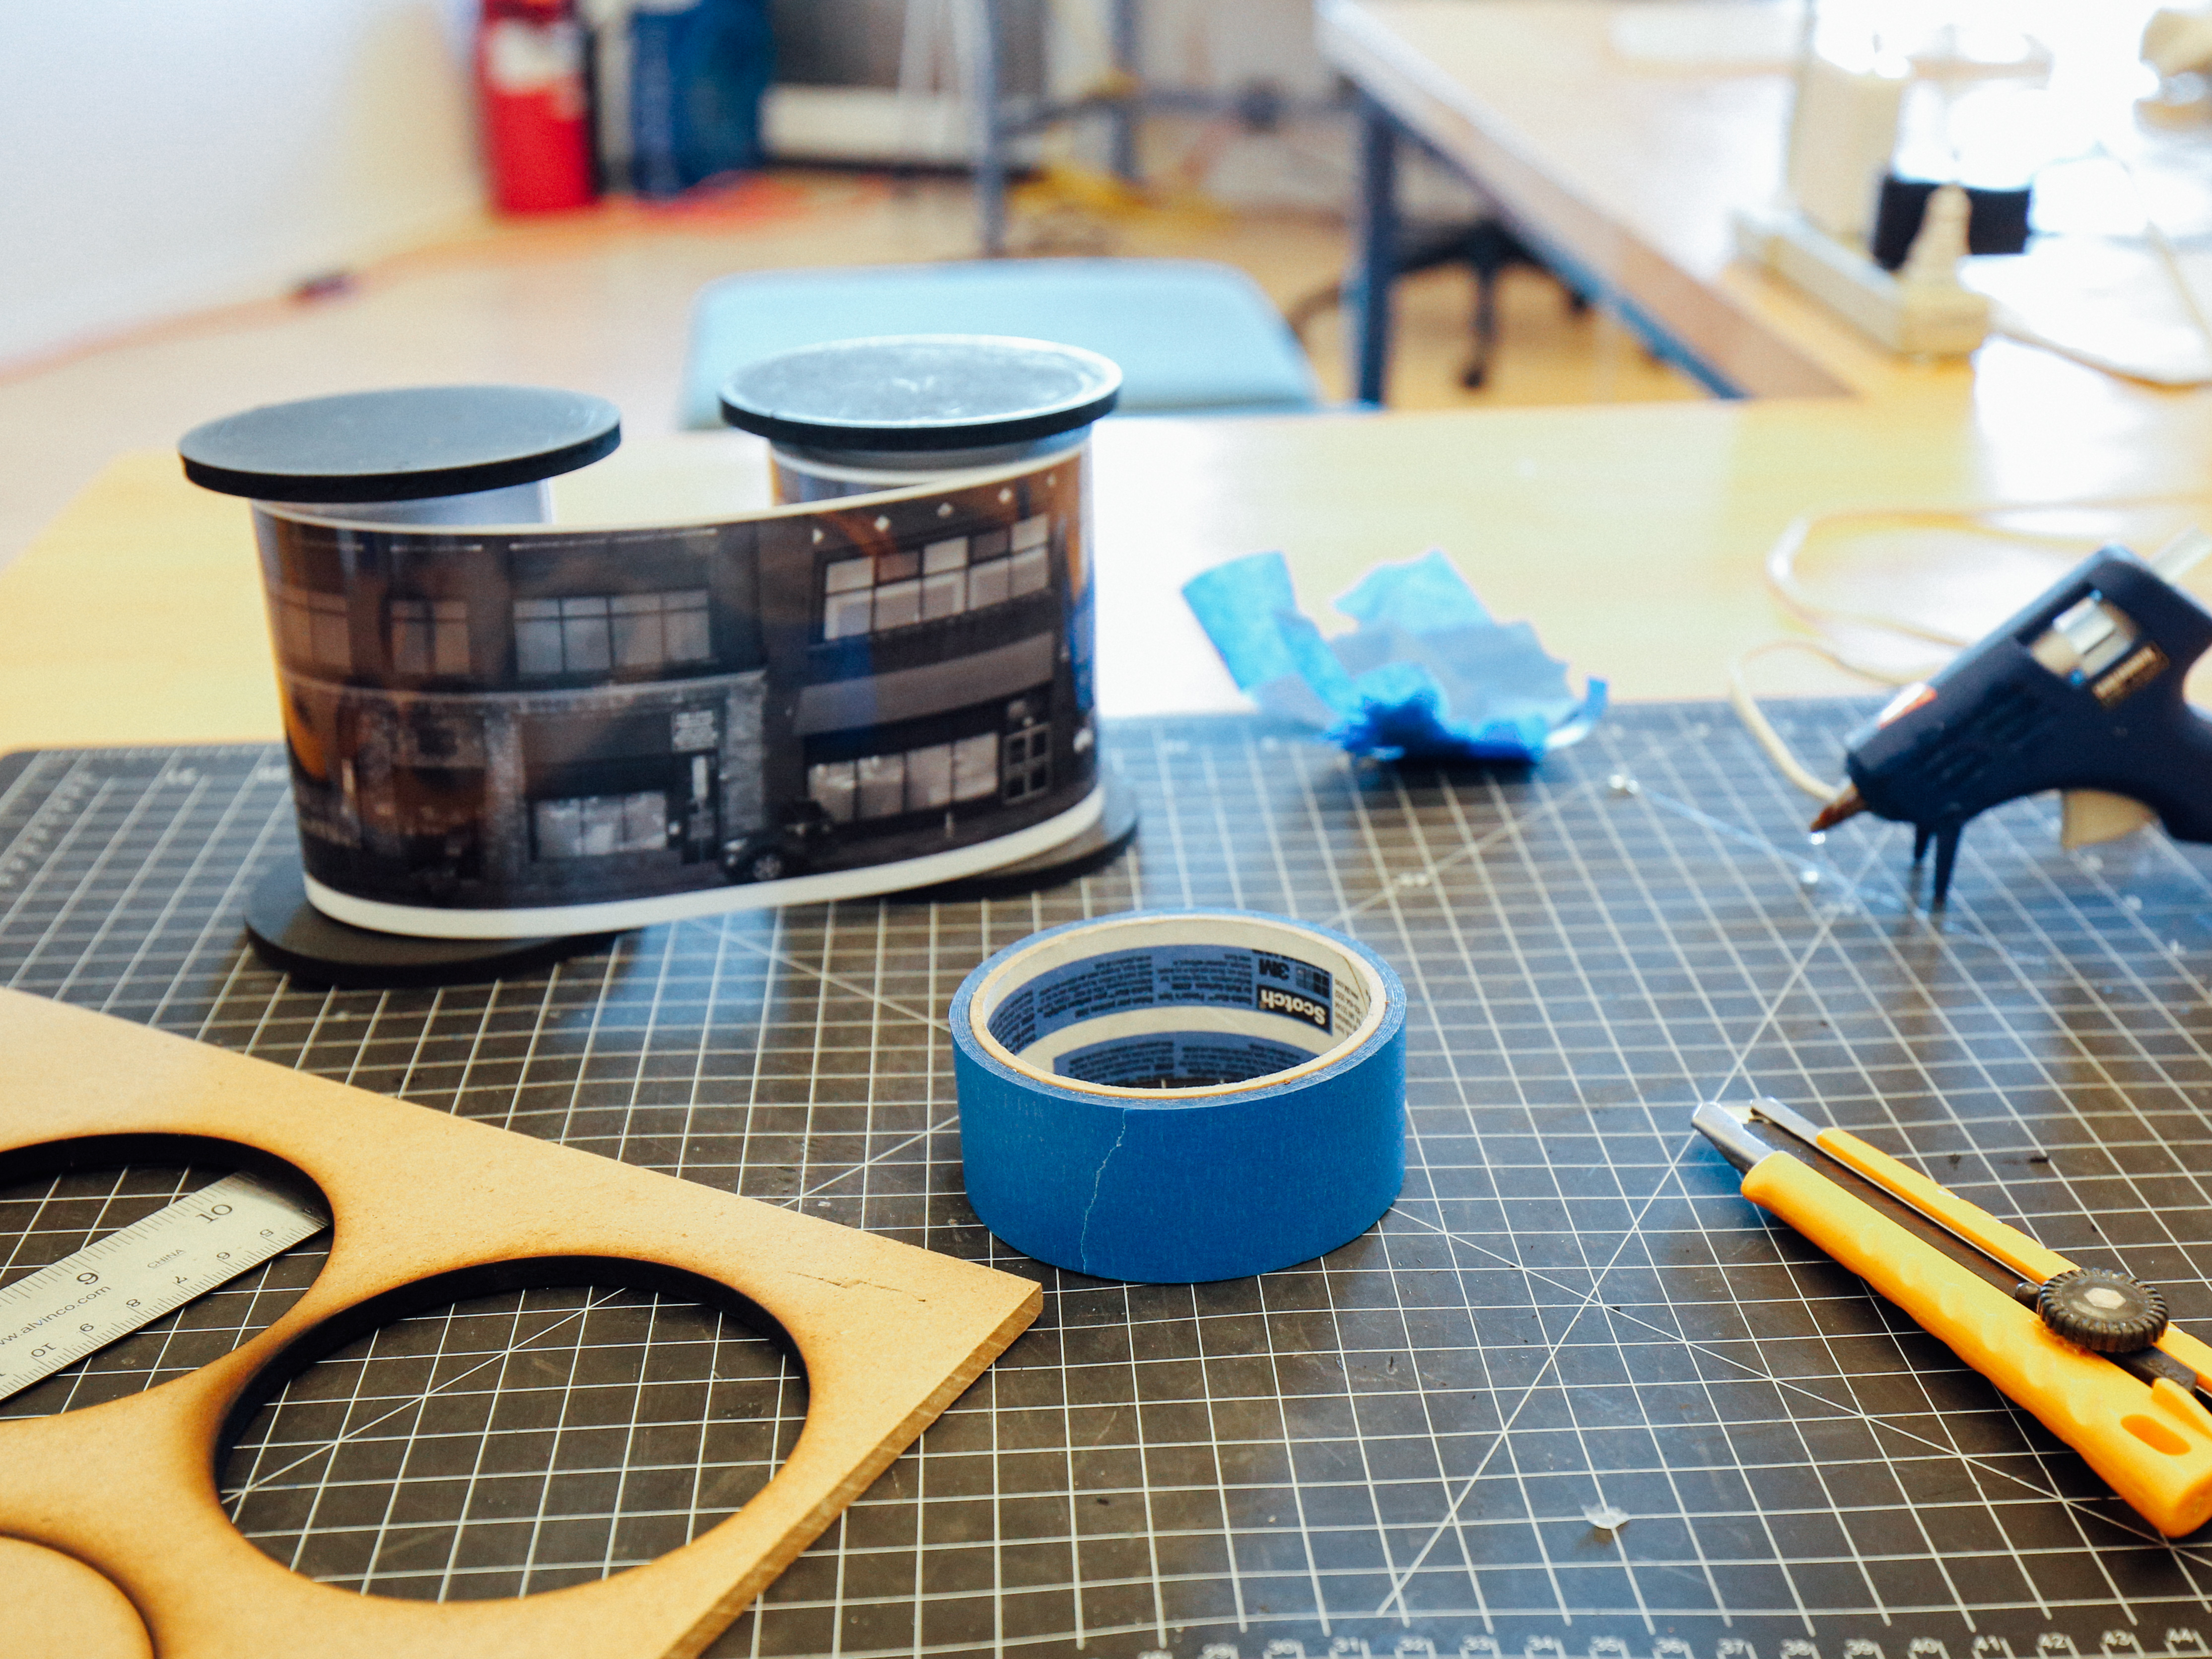
I laser cut a simple scroll for ease of storage and viewing. I wanted no accidental religious connotations (this is not a document to be revered) so I did not craft handles and tried to make the scrolls as simple, unobtrusive, and unnoticeable as possible.


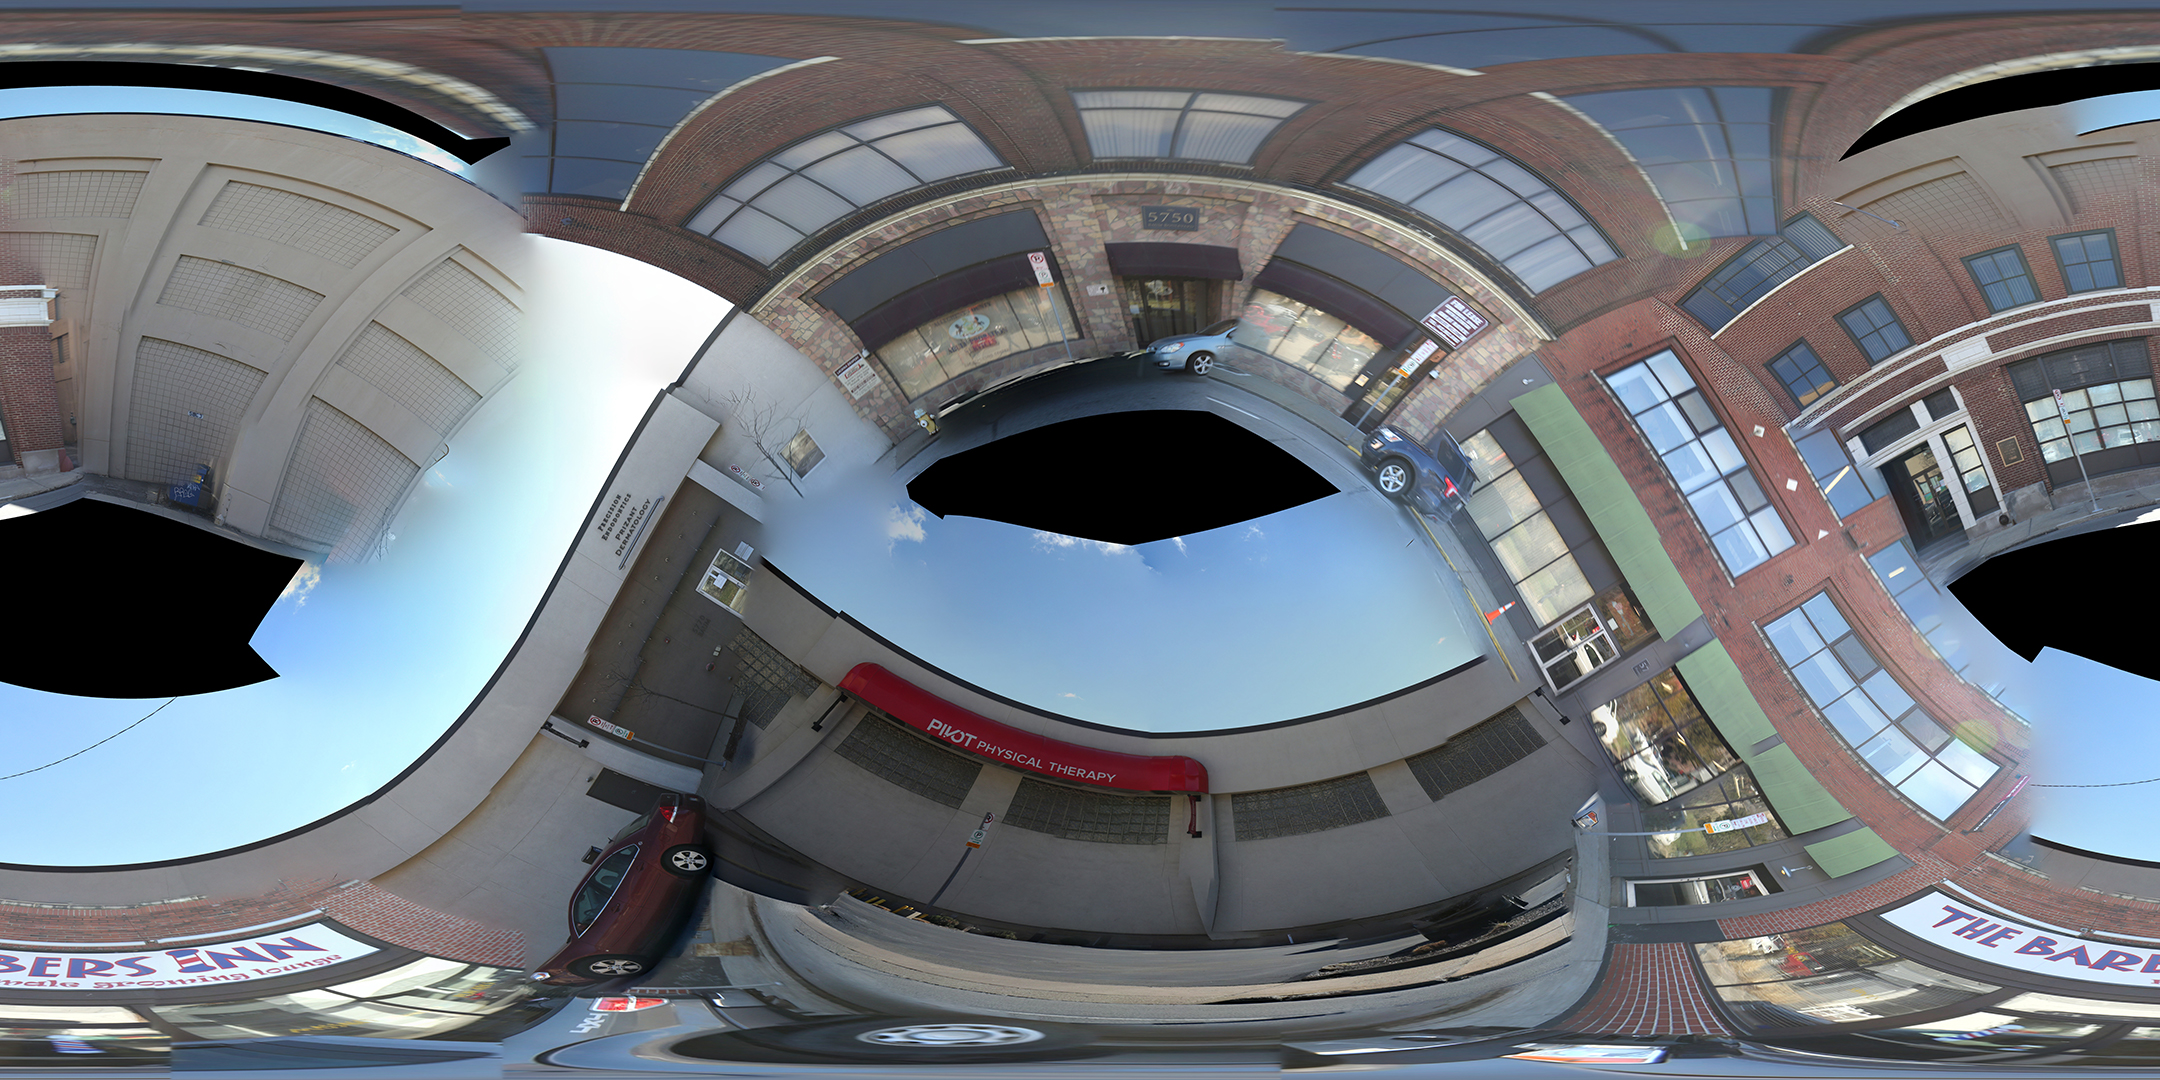
For the curious, below are some of the failed stitches.


Below is a side-by-side comparison of the software’s automatic attempt, left, and a manual intervention, right.

Refinement to the stitches involved selecting different sub-images to stitch, deleting “bad control points (trying to keep those that lied on building facade’s at the cost of the quality of the road), and manually rearranging images. Smoothing of building edges and such can be done in Photoshop as well. It’s important to note that these are impossible images, and there is no “correct” version.


fourth-PlaceProposal

When I think of the places I go during a day, one doesn’t quite qualify as a place: “commute”. In my head it’s a single place, but it might better be categorized as the place between places.

For my project, I would like to create a single photo of my commute. This image would have to be very long, achieved through stitching software. I would use a GPS-connected intervalometer, to automatically take images while I travel x feet. and a rig to keep the camera at a consistent height  and direction while I travel; probably attached to a bicycle or simply a monopod strapped to my backpack. If the rig is successful, I would like to create a few of these images.

Long panoramas have been achieved before and are nothing particularly special. I want to make my panorama… longer than that. A single image as long as possible. The aspect ratio should be absurd.

I hope through a refined rig I can capture something unique and impressive, creating a single high quality stitched image that captures a scene for over a mile.

For delivery, I would like to print the image a few inches high, however many feet long, on a single strip of roll paper I would purchase.


The second idea I am playing with is going on a hike and using satellite-stitching techniques, and a microscope, to create an ultra-high resolution image of the boots after the hike; see what sorts of stories are hidden in the parts of places that get stuck to our shoes.

fourth-portrait

Uncanny from Smokey on Vimeo.


About

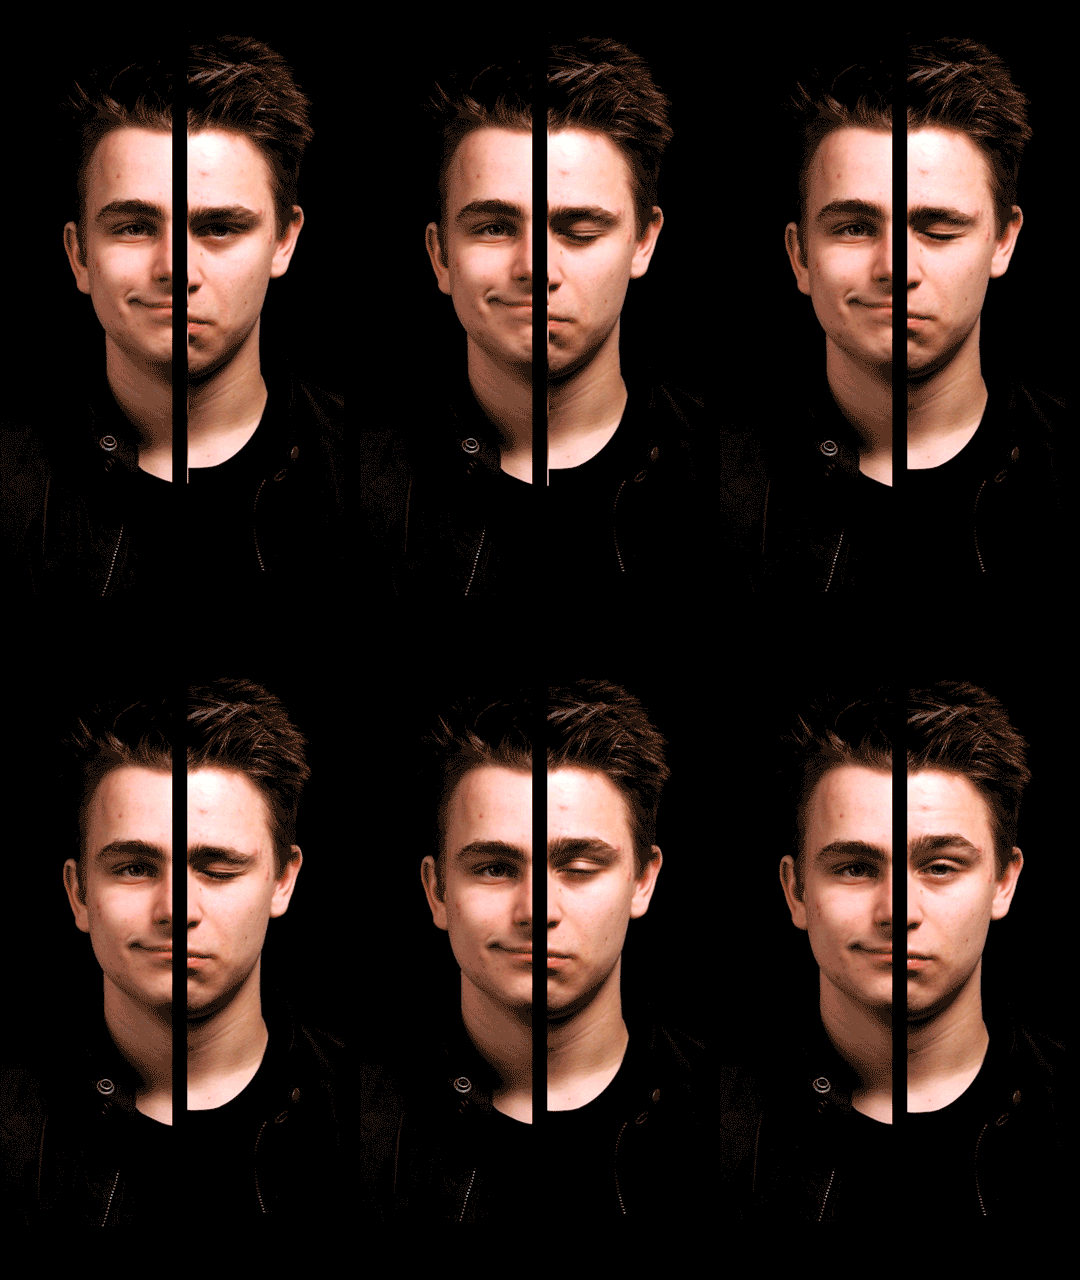
Uncanny celebrates the faces we make in between expressions, the faces that – when captured in a photograph, “just feel wrong”.

Steps were taken to ensure an unnerving and uncanny result without simply distorting, coloring, or any other such “easy” approaches that work between the expression and the interpretation.

This “portrait machine” is designed to emphasize the uncanniness that arises from the expressions the subject makes, not to inject uncanniness into a portrait.


Process

The following steps were taken to emphasize the uncanny expressions:

  • The video was captured at about 700 frames per second, at 720p. A regular video allows a video to ignore the uncanny expressions unconsciously, as we do all the time. Images are too easily “written off” in my opinion as just a “weird face”. The video tells hints a story of the intended expression.
  • The video is vertical, not widescreen, making it more difficult for an audience to simply ‘rest’ their eyes on one element.
  • The subject was not permitted to relax during the shoot, not sit in a chair with a back. Uncomfortable, confusing, and off-putting questions were asked, as well as the use of deliberately off-putting use of uncomfortable silences, volume changes, and other anti-social behavior during the shoot. The subject never “loosened up” in front of the camera.
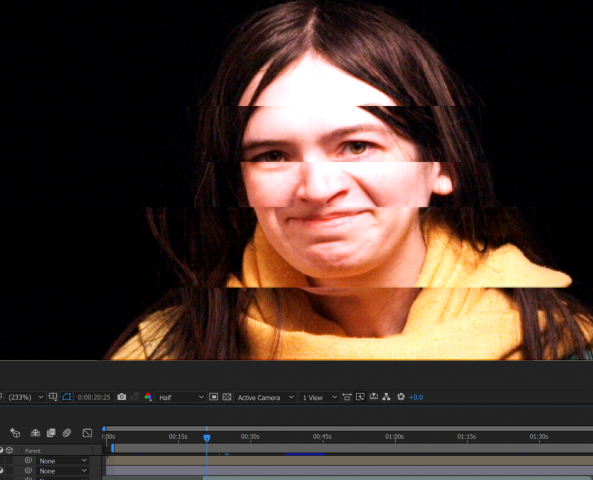
  • Multiple images on the screen are juxtaposed. They are not blended and bordered, signaling the viewer to switch attention between the various sections. The viewer attempts to assemble a single expression from these parts, and the parts – either temporally, geometrically, or with the expression – are not aligned.

The following steps were taken while working with the challenging tools.

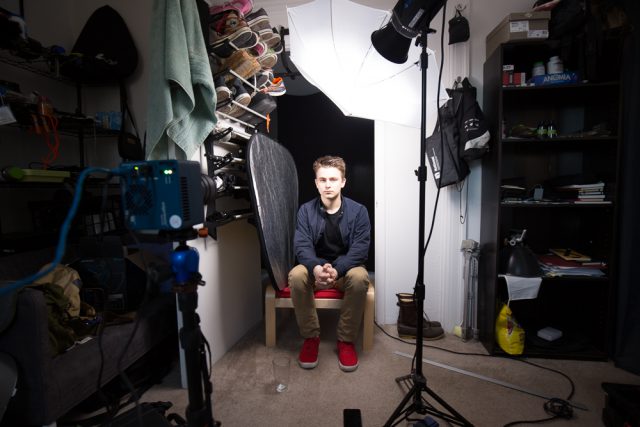
  • Only one continuous (no flicker) light was available, so a clever lighting setup had to be employed with a reflector, and black backdrop.
  • Significant color grading was employed to normalize the camera’s unfiltered color cast.
  • Video intake, tagging, organizing, and editing was not experimental, but the most time consuming part of the process. Among the normal time consuming tasks, frequent breaks were necessary during editing to get a ‘fresh look’ at the footage, as one quickly gets used to the uncanny effect that the video aims to achieve.
  • Full screen preview of the image was necessary to check focus and composition, which constricted the shooting environment by cable length, desk placement, and so on.
  • Image tracking and digital image stabilization was utilized to keep the face elements consistent despite head movement.

Success and Failures

This project was successful in achieving one of my secret goals: using the high speed camera for a project that uses a high speed footage and 1) doesn’t sacrifice production value and 2) doesn’t look like high speed footage – the aesthetic often found with a single close hard light, quick shadow falloff, discoloration, and – of course – boring.

The original goal, to capture the moments as a laugh slides through a natural smile into a false, fake smile, was achieved in the capture process (link coming soon), but the video result is 1) extremely boring, 2) too similar to Warhol’s screen tests for my taste and 3) did not hold up as a triptych in my opinion. Uninspired, I took a step back, considered the goals – the uncanny expressions being my true capture goal – and continued forward with the project under this refreshed lens.

The biggest failure was something I discovered while editing – I should have shot close ups, and combined different visual angles. The form of the project evolved while editing, and I was unable to re-shoot in order to better capture what I wished to achieve.

The other biggest failure was the inability, for a variety of reasons, to just play with the high speed camera. I knew from experience with the camera that to achieve a quality result I had to have a plan and execute on it. Different camera settings, lighting setups, angles, and so forth were completely impractical to achieve. I would love to spend more time with the camera, as I believe it can achieve beautiful results when used well – but it’s slow (ha) and awkward to deal with.

fourth-PortraitPlan

My portrait project is a collage drawing attention to the expressions we make in between expressions. The strange, fake, unnatural, and uncanny expressions that exist when we are not making a single expression, but mixing between them. Photographs capture these all the time (think of unnatural smiles) but in real life we tend to filter them out.

By capturing a portrait with a high speed camera at 700 frames per second, I don’t merely snapshot these strange expressions, but bring full attention to them. More than just slowing down the face, I collage various expressions on top of each other in order to 1) make the high speed video less boring by providing the eye more points of interest and 2) create more mis-matched expressions to amplify and draw attention to the phenomenon.

I did test shoots on Friday and Saturday. Friday I made myself familiar with the camera, light, and workflow. On Saturday I shot what could be a version of my project, shown below.

This was so I could have a clear head about how I would handle masking various layers, and make sure I had a competent strategy for managing my files and organizing my after effects composition. When using up my partners time, I wanted to make sure everything would go without a hitch.

Plus ,the friend above knows after effects better than I, and provided guidance. Shout out to her for the help. It’s nice to be able to basically complete the project once and let oneself mess up/chase down rabbit holes, and see what pit-falls exist.

On Sunday I met with my subject and we completed principle filming. It was a long, slow, and uncomfortable process; which is just fine for capturing uncomfortable and unnatural facial expressions.

In the image above you can see we are filming in a doorway, limited by the length of the Ethernet cable to my workstation. Hitting focus was the second largest challenge, and plenty of the intake was out of focus. With so much time needed for the camera to process and save the high speed footage the subject inevitably relaxes and moves between each and every shot. I couldn’t monitor the feed closely, preferring to be closer to the subject and use the trigger at the camera.

Now I have to filter, organize, compose, edit, and color-grade the video; which will take me some time. If my initial tests taught me anything, it’s that the after effects work is going to be slow going.

fourth-SEM

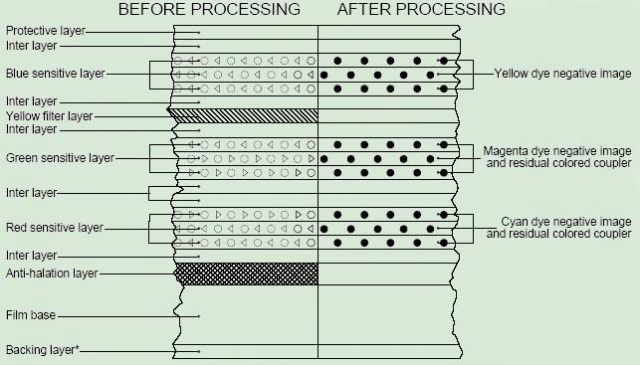
Color film is made in layers of emulsions and filters. One way to think about it is three layers of black and white film that are in layers, and each layer is sensitive to different color channels. Usually, 3  layers: yellow, magenta, and cyan on the film base, but some films have as much as 12 – and the Ferraria revival project is making a color film with 16 layers.

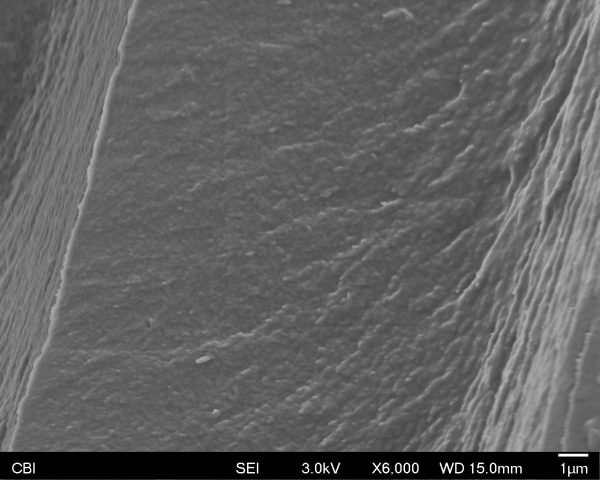
I was never quite satisfied with diagrams like the above. Film isn’t that thick! What’s really going on? To photograph the actual silver halide sensitive-to-light grains, one would need to strip the protective layers off the top with chemical baths. I couldn’t do this, but examined film anyway to see what I would end up with.

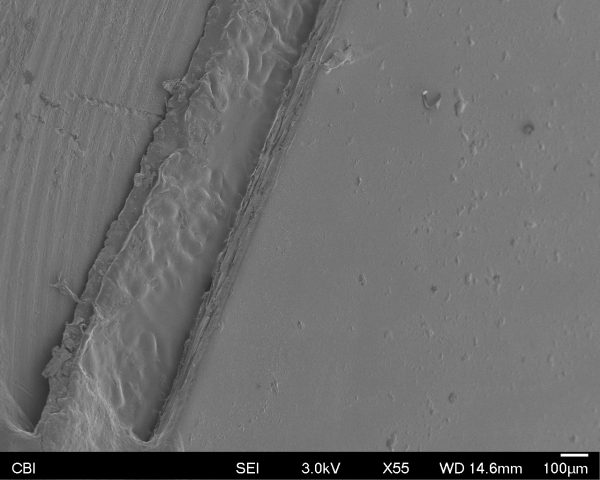
SEM of color film

On the left, you can see the metal slug. To the right of that, you can see a bit of the copper tape, and the solver contact in the bottom left corner. The sheet that takes up more than half of the frame, on the right, is the film. Little bits of what is most likely dust on top of the smooth layer. The edge is where the action is however.

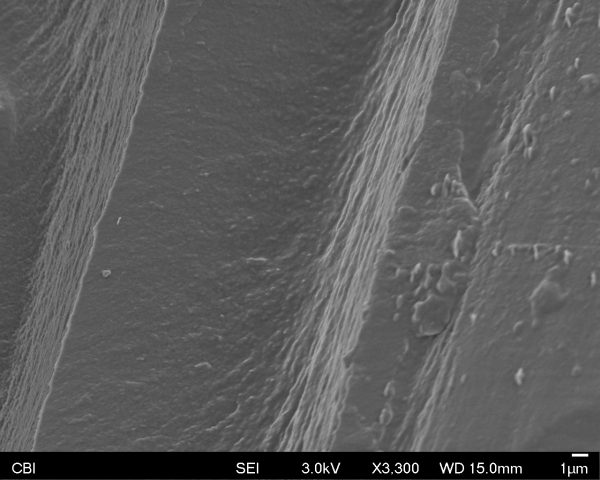
A close up of the edge shows us distinct “shelves”, the different layers of the film, certainly!

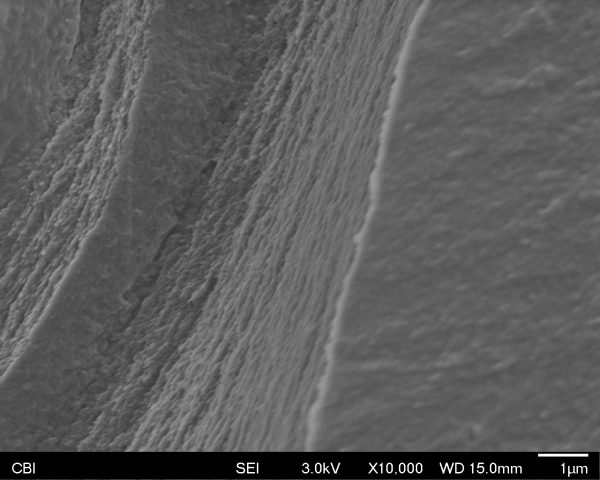
Each of these layers has an interesting amount of texture to them. Perhaps from the crystalline inner structure. Below shows an even closer look.

Ultimately the inner dynamics of film are no more revealed to me than they were before, but seeing it for myself – in real life – is far more reassuring and gratifying than through diagrams  or drawings.

An Introduction to Fourth

Hello. Call me Fourth or The Fourth.

I’m a photographer who owns over 70 film cameras, and is writing a masters thesis on the craft of 360 video storytelling. Check out my photo blog if you want to. I’m teaching an IDEATE micro course on photography this semester, you can sign up for it. I used to intern in a recording studio and have produced a wide variety of audio, from music recordings to live show sound reinforcement to podcasts. I also do a not insignificant amount of game development. If you’re curious, my undergraduate degree was a combination of creative writing, theater performance, and film studies with minors in mathematics and philosophy.

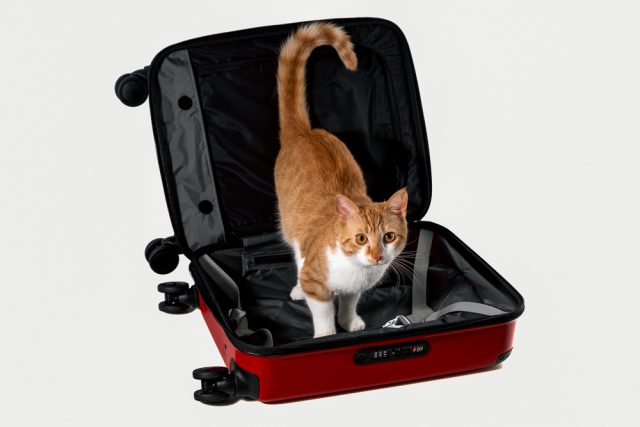
I have a cat, his name is Agent 86 and he is very cute. Here is a photo I took of him in a suitcase.