Bernie-Final

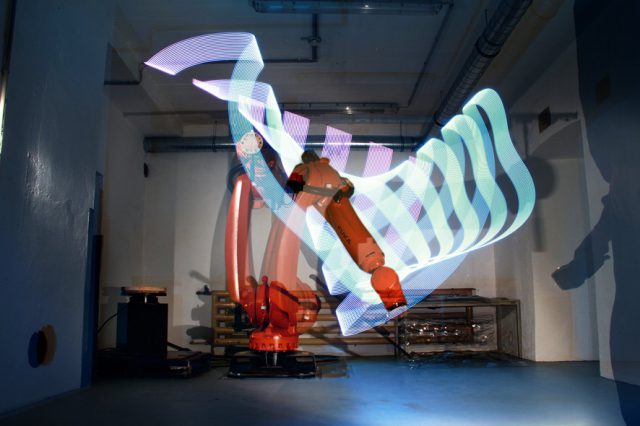
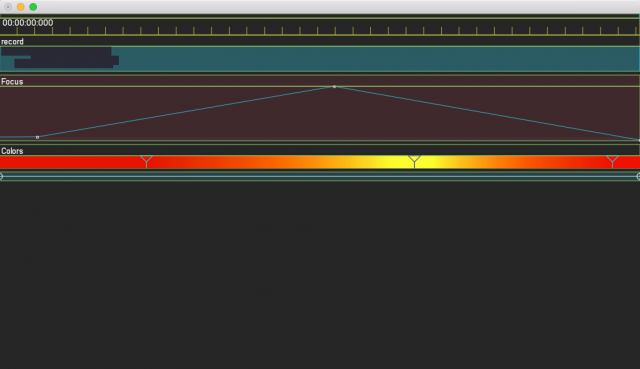
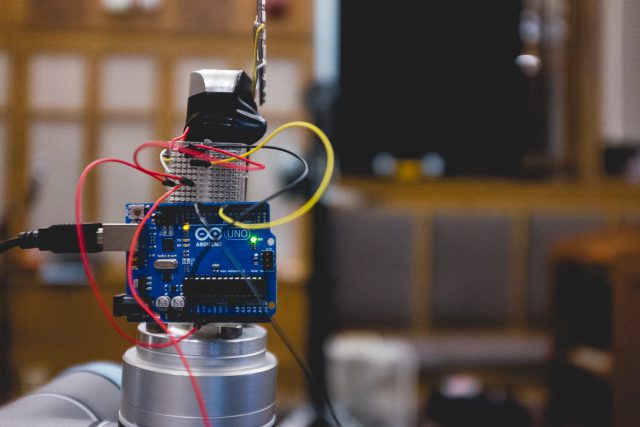
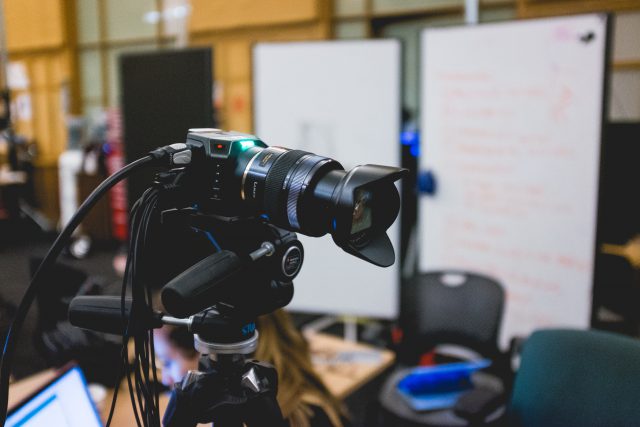
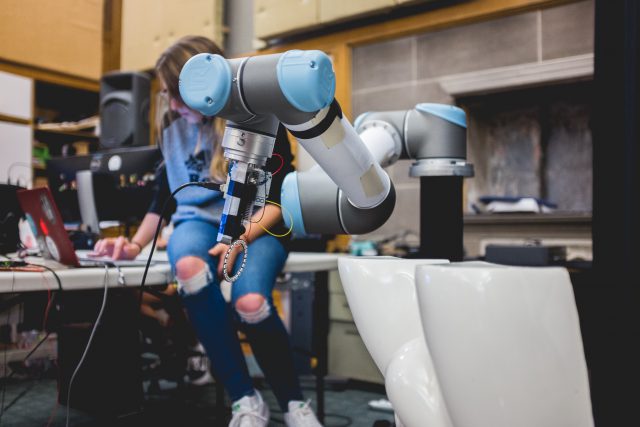
As a final experiment to working with robots and cameras, Quan and I decided to do a few experiments with putting the Black Magic camera on the robot this time.  Many have done robotic cinematography, by simply using a robotic arm to maneuver the camera in specific ways.  Our technical endeavor was to create interesting cinematic effects using the motion of the robot arm around objects while simultaneously controlling the focus and the zoom.  I wrote a OpenFrameworks app using the ofxTimeline addon to computationally control the focus and zoom of the black magic camera with an arduino.

Hitchcock Dolly Zoom

Our inspiration for creating cinematic effects entirely computationally using the robot arm came from watching Hitchcock dolly zoom effect videos. If all he had was a dolly and manual zoom, we were interested to find out what we could do with a robotic arm and computationally controlled zoom and focus.

Our first attempt was to create stereo video using two BM cameras.  After filming quite a few scenes using computationally controlled focus and two cameras, we realized that shooting stereo video is not as simple as putting two cameras eye-distance apart.  We noticed very quickly after creating the first stereo video and putting it on a google cardboard that whenever the cameras moved away from an object, the focal point needed to be further, and the cameras should have turned away from each other.  Inversely, when an object got closer, the cameras needed to shorten the focal point and angle inwards towards each other.

Stereo Video Experiments

After our in-class progress critique, our main feedback was that the capture technique is great, and that we already had a great way of capturing video – one camera, one robot arm, computationally controlled zoom and focus – but we needed to derive meaning from the objects we were shooting.  Our project needed a story.  We had considered doing portraits before, but the class reinforcing that portraits would be the most interesting way to use this tool made the decision for us.  We moved to portraiture.

The Andy Warhol screen tests were our inspiration for this next part of the project:


We liked the idea of putting people in front of the robot arm while we explored their face using this unusual method.  We had our subjects stare at one spot and took the same three minute path around each of their faces.  For three minutes they had to sit still while this giant arm with a camera explored their faces very intimately.  The results were pretty mesmerizing.

Face Exploration

We also wanted to do a similar exploration of people’s bodies.  We created a path with the robot that would explore all of a person’s body for 4.5 minutes.  It would focus in and out of certain parts of people’s bodies as it explored.  During this examination we had our five subjects narrate the video, talking about how they felt about those parts of their bodies or how they felt about the robot getting so intimate with them.  We got a lot if interesting narrations about people’s scars, insecurities, or just basic observations about their own bodies.  It ended up being a very intimate and almost somber experience to have a robot look at them so closely.


Final-Progress-Bernie

For our final project, Quan and I have been experimenting with putting the black magic camera on the robot arm.  We have been experimenting with stereo shots using two black magic cameras.  We came to the conclusion that it is not possible to do stereo if the arm is moving away from and closer to the subject without changing the angle between the cameras.  These are shots we got using the black magic camera and the motion of the robot arm to capture events from many different perspectives.

Bernie-FinalProposal

Quan and I would like to keep playing with the robot arm and black magic camera.  It’s interesting to make tools for people integrating focus and zoom and the robot arm.  I think it would be cool to try to use touchOSC to have people create scores sort of like the ones we created with focus blur, but integrating more parts.

Maybe one designed specifically for the Dolly Zoom effect.

Bernie-Event

As we all know, I’ve been playing with cameras and a robot all semester. My inspiration for using a robot to do paintings with light came from Chris Noel who created this KUKA light painting robot for Ars Electronica.

Since painting and animations has already been done, my partner Quan and I decided to still use the robot to light paint, but light paint using computational focus blur.  Quan is the designer, and I am the programmer, so we had very distinct roles in this project.  This truly was an experiment since neither of us knew what to expect.  All we had seen was these pictures of fireworks being focus blurred by hand:


In my original endeavor to computationally control focus was to use the Canon SDK, which I have used before to take pictures, but controlling the focus turned out to be much more complicated.  Then we decided to try a simpler solution of 3D printing one gear to put around the focus ring of a DSLR, and one to put on the end of a servo and control the focus ring with a servo.  This was a solid solution, but a cleaner one ended up being to use the Black Magic Micro Cinema Camera.  This is a very hackable camera that allowed me to computationally control the focus blur with a PWM signal.

Then I created an app using ofxTimeline to control the focus of the BMMCC and the colors of an LED that was attached to the end of the robot arm.  The robot arm would then move in predetermined shapes as we computationally controlled the focus.  Focus blur is usually done manually and on events that cannot be controlled, like fireworks.  This was an entirely controlled situation that we could play with every aspect of, because we controlled every variable.  Quan then used Echo in Aftereffects to average the frames and create these “long exposure” images.

The first tests we did were with random focusing, and they looked interesting, but they also looked computer generated.  In the second shoot, we aimed to integrate the streaks with real objects.

Test Shot:

App:

Final Setup:

Final Gifs:

Outline of a reflective object:

Reflected by a Mirror

Through a Glass Bowl

Through a Large Plastic Container


Event Progress

I have been tryiing to make progress with controlling the focus motor on the Canon cameras using the Canon SDK, and have not had any luck.  As an alternative, I have found this method that seems like a good way to be able to control the focus computationally:

Bernie-EventProposal

In further exploration of the Canon SDK, I think it would be fun to play with focus blur.  The repeatability of the arm and the Canon Camera being controlled by an app, would be a great way to conduct experiments in focus blur.  Since focus blur on moving light is extremely hard to capture in fireworks (a very quick event,)  I would be able to experiment with focus blur on LED lights indoors.  I would perform this experiment on a few different shapes with various focal blurs and see what happens!

UR5: Painting the Aurora Borealis

Equipment:

-UR5 Robot Arm

-Canon Camera

-Arduino

-Neopixel Ring – 24 LEDS

Objective:

The most astounding thing about the robot arm is how accurate it is.  It can move in specific paths down to the millimeter.  I thought it would be interesting to utilize this to “capture” something by accurately recreating it.  Without using a pen and paper to, I decided light painting would be an interesting way to recreate something using the robot arm.  I chose the northern lights because as seemingly random as they are, every image has a trajectory.  I thought it would be interesting to accurately recreate something as random as the northern lights.

Workflow:

  1. I used Openframeworks to do analysis on the various frames of the Aurora.
  2. I took the baseline that I extracted and used that as the path of the robot.
  3. Lit the Neopixel according to the gradient of the aurora (height of the Neopixel ring being proportional to the height of the aurora)
  4. Colored the Neopixel ring in an aurora gradient.
  5. Took long exposure photograph of the Neopixel ring, moving along the baseline.

Original Gif:


Aurora Filtered:


Aurora baseline and upper bound detected:

Light Painting Gif:


Bernie-PlaceProposal

For my Place project, my difficulty is that the robot arm can’t really go anywhere besides the studio.  So I have to somehow bring a place to the arm.

I think it would be interesting to generatively have the arm light paint different “versions” of the northern lights.  I could start by attaching a line of about 8 RGB LEDs to the end of the arm that I change colors and fade in and out as I paint the northern lights.

My plan to start is to make an OF app that I can draw a squiggle on, and the arm will take a diagonal trajectory along the squiggle fading the top lights and twisting randomly to create generative light paintings of the northern lights.

Bernie-portrait

This video shows a Photogrammetry rig that I created using a Universal Robots Robot arm and a Cannon camera.  My program is one Openframeworks program that I use to send strings of URScript commands to the robot arm and also simultaneously take pictures using the Cannon SDK.

My inspiration for this project was to use the precision of the robot arm to my advantage.  The arm is so precise that photogrammetry could be done easily, quickly, and repeatably for any object.  This takeout box was created from 100 images.

With this application, you can enter the number of images you want it to take, and the height of the object, and it will scan any object of reasonable size.  It covers about 65 degrees of the object, as is.  After entering the proper measurements and number of photographs to be taken, I start the app, and the robot moves to a position, waits for any vibrations from movement to stop, then sends a command to the camera to take a picture.  I then wait an appropriate amount of time for the camera to focus and take a picture, then move to the next location.  It takes pictures radially around the object for optimal results.  Ideally, with future iterations of this, I will be able to go all the way around the object in a sphere to get the most accurate model.

After taking all the photographs, I used Agisoft Photoscan to overlap the images and create the 3D model shown in the video.

The model turned out as well as I had hoped, and will definitely continue with this project to be able to make a full 3D models of objects and people.

Robot Photogrammetry Rig

My plan for this semester is to explore the capabilities of the precision and movement of the robot arm with relation to motion capture.

I plan to use the robot arm to be able to place an object within a certain area near the robot arm and by attaching a DSLR camera to the end of the arm, be able to create a 3D model of the object.  I will be using the Cannon SDK to remotely control the camera, and the Universal Robots arm that we have in class.

Ideally, I will be controlling the arm using a URscript that is pushed to the robot by an OF app. I am hoping that URscript has the capabilities to return a flag after it has been moved so my OF app knows when to take a picture.

In terms of making a portrait of my partner, two things stood out to me while talking to him:

  1. Wigs
  2. He is very “quotable”

I’m thinking of possibly making 3D models of his wigs, and giving each one a different voice, since wigs are something people usually use to change their identity.


SEM Cork Images

Before having read the excerpt from Robert Hooke’s Micrographia, I thought a cork would be an interesting object to look at on a microscopic level due to it’s unique consistency.  A cork definitely has some give when you squeeze it, and you can tell that it must be a relatively porous material.  The images are in order from furthest away to closest up.

My favorite two observations from these images are first: examining the walls between the cells inside the cork.  I thought it was really interesting that there seems to be some sort of material keeping the cells adhered to each other.  Second,  I enjoyed the last image in the series that shows one of the cell walls.  I asked Donna what it was, and she said that it was probably the walls cracking from dehydration.


mental toolkit

“Engineering” is a pretty big word.  It’s a word I’ve given up trying to pin down a definition for.  These sorts of new media arts classes are where I’ve chosen to apply my “engineering” knowledge.  This semester I’m interested in taking advantage of learning to use as many of the different capturing techniques we are about to learn in order to come out of the class with a new mental toolkit – if you will.