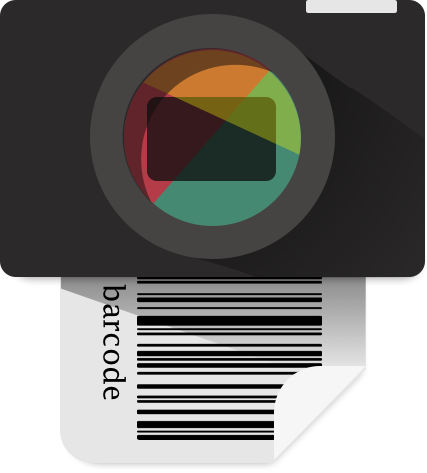
Conversion of image from and to barcode.
photoBarcoder from Lingdong Huang on Vimeo.
Inspiration
When Golan showed us his barcode scanner, I felt that there should be more barcodes in the world. So I thought about the idea of taking photos right in barcode format, printing out and pasting the barcodes everywhere so anyone with a scanner can view that picture. My project will not be a documentation of any particular place, but rather an interesting device people can use to observe places.
A rough calculation told me that it would take more than 50 barcodes to contain an average image. However I’m just so curious about the idea so I tried it out nevertheless.
Compression Algorithm
One barcode only holds a tiny bit of information while an image contains huge amount of information. Compression of images so that it can be contained within reasonable amount of barcodes is the key problem.
I used/developed a series of compression algorithms based on the idea that compression of data is elimination of redundancy. I try to pick out the repetitions, place them together, and describe them in a concise manner.
1. Image Compression
At first, I turned the images into greyscale, so there’s only one channel to compress instead of three.
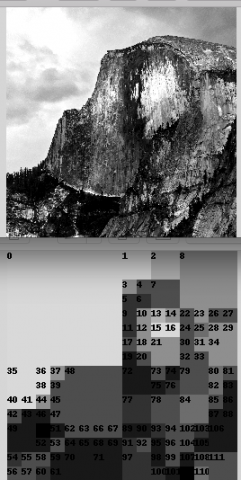
I thought about the problem from three perspectives. First, I can group pixels that are adjacent to each other and have similar values into a “patch”.
I did this recursively:
- The program first divides the whole image into four patches.
- For each patch, if the standard deviation of pixel values in it is below a certain threshold, we’re done with that patch.
- If not, further divide that patch into four patches, and repeat the same procedure with each of them.
- If the standard deviation of all patches are below threshold, or that we’ve reached the pixel size unit, we’re done.
I then thought about a more efficient manner of describing image data then recording pixel/patch colors. For example, if the image is that of a green cat on a banana, and the computer already knows what that looks like, we just write down “green cat on a banana” instead of describing each pixel in that green cat picture.
So the idea is that I can teach the computer about predefined “patterns”, and for it to reconstruct the image, I can simply tell it which “pattern” to use.
I categorized eight possible patterns that divides a patch into an upper half and lower half, each defined by a function.
Then the program tries to apply each function to all the pixels in the patch. The function that makes the difference of average values in the two halves the greatest is the “best” function. The corresponding pattern ID is then recorded.

When rendering, gradient is used to fake smooth transition between the two halves in a pattern.
Last I thought about the compression of actual pixel values. Normally if say we have 3 bits, then we can express 2^3=8 different pixel values, if we have 8 we can express 256 of them, etc. I found that adjacent pixels usually have relatively similar pixel values, so if I record the relative value compared to the region it’s in instead of recording the absolute value, I can save even more space.
 ->
->
^ My algorithm(above) is smaller and preserves much more information than simply pixelating the image (below).
2. Image Format
I recorded the image data directly in bits, for in this way I have the best control over them to make sure no space is wasted.
The image data consists of an array of patches, and each patch is represented by the following groups of bits
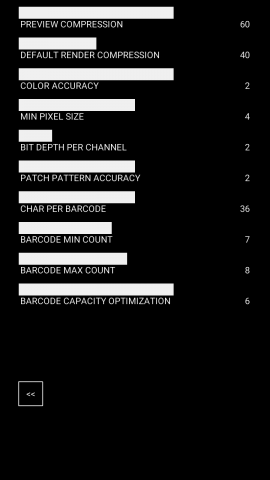
00|00|00|000
1 |2 |3 |4
Group 1 denotes how many “quarters” we’ve taken during the phase of dividing the image to get this patch. This is the only positional information we need because with it we will be able reverse the recursion to infer exact size and location of the patch.
Group 2 denotes the value of upper half of the patch, while group 3 denotes that of the lower half relative to the upper half.
Group 4 is the pattern ID 1-8 that matches the patch. If more aggressive compression is necessary, we can reduce the variety of patterns into 4 or 2.
3. More Compression
The procedures above compressed the image a lot, but it’s still not good enough to be contained in just a few barcodes. Golan urged me to find more algorithms to compress even more.
Since the compressed image has almost reached the threshold of unrecognizably, I decided to do lossless compression directly on the bit data instead.
After doing research, I figured the best idea is to try every possible kind of lossless compression on my data, and see which works. So I applied each algorithm listed by Wikipedia.
Most of them increased the size of my data instead. But one of them, arithmetic coding, was able to reduce it by around 10%.

Basically what arithmetic coding does is that it divide a string of bits into groups, and substitute groups that are used most often with a shorter code and groups that are less used with a longer code.
I then use base 64 encoding to convert bits into alpha-numeric characters to be used in barcodes. Interestingly I didn’t know the real name of this method at first, and defined my own rules and character set for my program. Later Golan mentioned base64, and I realized that it’s what I’ve already been using, so I changed my character set into the standard one.
After the encoding, every 6 bits will be turned into an ASCII character, so the elephant image above becomes a brief nonsensical code:
5l8vky2c0LqKxCK6mu3jRrq6/KP1FN76+n8YhFch44cp6VP57n7XGHP2/IUMOQprFmYtl9Lf7Sfz/Arb2fz2YDfyo5U1l5mYbtrZ7OVMm/btqxZ57Jh0lRdUcfshxPRzMPJHjg
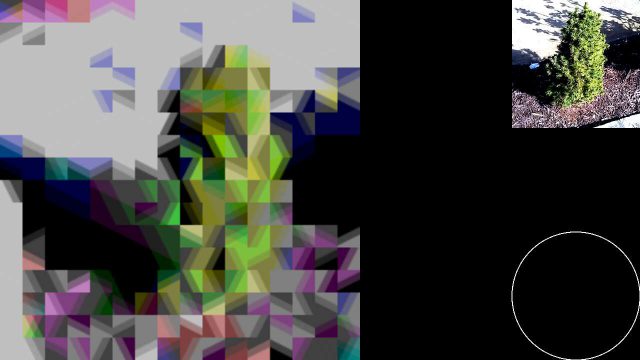
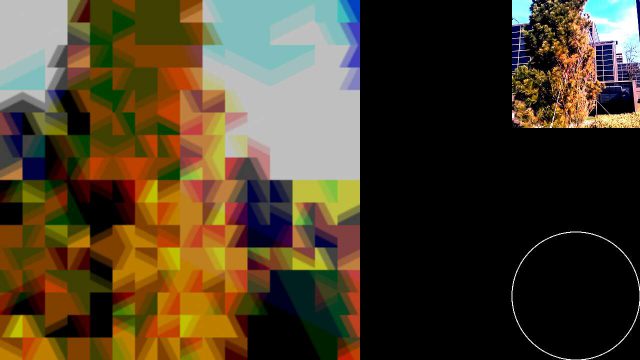
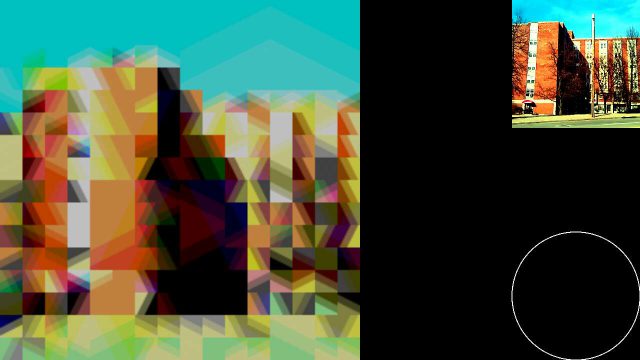
4. More Colors


Having done greyscale, I thought I can do three channels just for fun. I compressed each channel differently, and combined them to get a colored image. The result is exciting, because each channel is quartered and pattern matched differently, the overlaying created huge variety of (more accurate) shapes and colors, thus increasing actual recognizability.
After doing some more optimizations, I was able to compress a three-channel image into around the same size as the greyscale image. So I decided to use the 3 channel version in my final product.
5. Pre-processing images for better output
Since the number of different colors is limited in images produced with this method, increasing the contrast/saturation of the original image before compression improves the result. For example, if we have a grayish image with pixels whose colors are not too different from each other, the algorithm would treat them as a large gray patch.
So I wrote something to manipulate the histogram of each channel, cutting off excess at both ends, to make sure the whole spectrum is utilized. This is what makes my output images look so colorful.
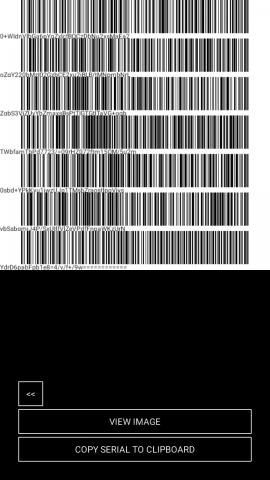
6. Conversion to barcode
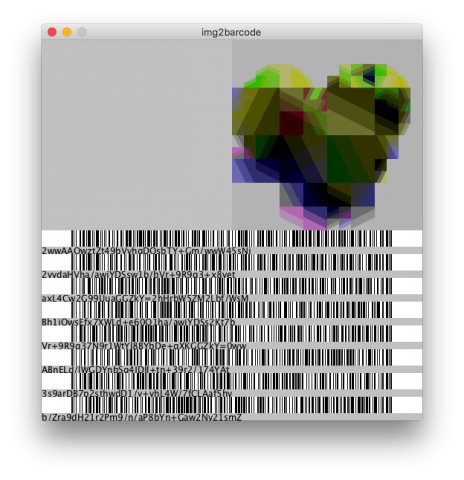
photoBarcoder
I decided that I’m going to present the product by making it into a mobile camera app, with which people can take pictures and convert them right into barcode. Then anyone can scan the barcode and reconstruct the picture in any device installed with my decompression algorithm.
I programmed everything above in Python, but I then realized that I need to translate it into some other language for it to compile for mobile platform. I found some Processing libraries that allows interfacing with the android system and sensors, so I decided to translate all my code into Processing.
After doing so I discovered that the above mentioned libraries are useless and can only do simple things. So I was forced to learn Java used in Android Studio to talk to the phone directly.
I took my phone and wandered around campus to test my app. Then I did a lot of tweaking, crashing, debugging, making GUI stuff, etc.
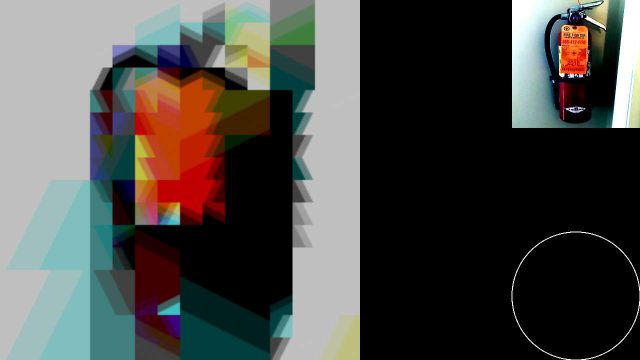
Below are some screenshots of an early iteration of the app.
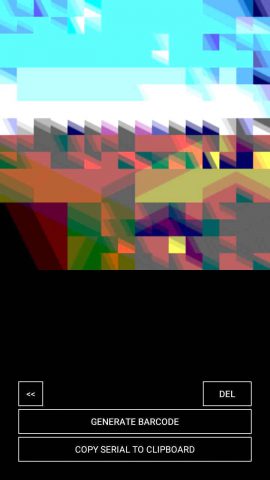
Final Screenshots
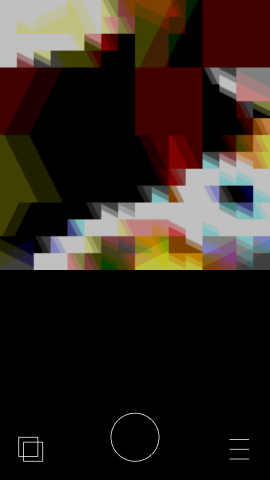
Left: taking a photo. Right: preview a photo.
Left: generate barcode. Right: settings.
Using non-photoBarcoder barcodes to produce glitch art
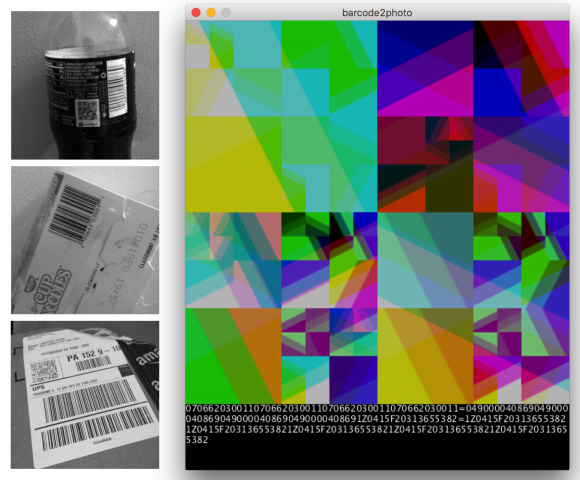
^ Barcodes from coke bottle as red channel, cup noodle as green channel and delivery box as blue channel.
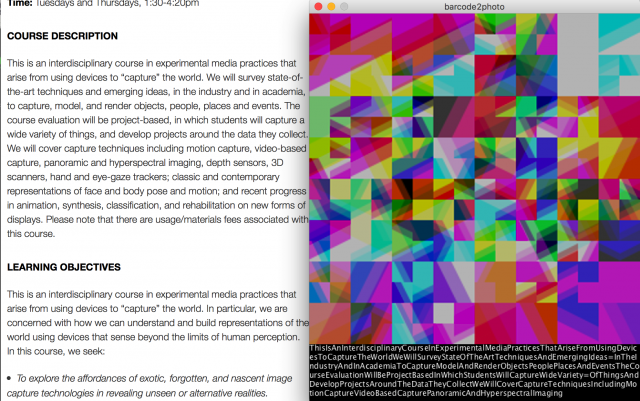
You can even directly type text into the program and produce images. Below is the course description used as if it’s content of barcodes.
Printing and Distributing Barcodes
I’m currently learning ESC/POS language to control a thermal printer so it can print out the barcodes to be pasted everywhere.
Comments from the Group Review.
Made a camera that takes photos in barcode format, and software which can reconstruct the photos from the barcodes.
Love the video
That was stunning!
Well done, video is entertaining and watchable, and demonstrates your project without any words.
This is amazing.
Absurd and delightful. +
Damn!!!!!!!!!
Great process.
Great video.
Great project.
Compression As Aesthetic Material.++++
Your work is always so well executed. QUALITY WORK
If you wanted smoother/more real you could get them if you use continuous patterns as well as sharp edged ones (e.g if you used gabor wavelets or something as the patterns.)
BUT the sharp edged style works really really well so idk if it would be Good or Not !
You are brilliant
So witty
“Extreme Compression”++
Do you have some creative control over the color palette?
Can we download this app? Could you put it on the app store? << PLEASE. + How many barcodes would it take to capture an reasonably high resolution image? Can you print and frame the barcodes and put them up in the context of images? Put a title on them. ^^ PLEASE.+ Your work is so consistently humorous while never losing in technical and conceptual quality -- I AM SO IMPRESSED